 Ireland
 United States
 Australia
 Česko
Česko Danmark
 Deutschland
 Eesti
Eesti España
 Ελλάδα
 France
 Hrvatska
 Italia
 Latvija
 Lietuva
 Magyarország
 Nederlands
 New-Zealand
 Norge
Norge Polska
 Portugal
 România
 Schweiz (Deutsch)
 Slovenija
 Slovensko
 Suomi
Suomi Sverige
 България
 Canada (English)
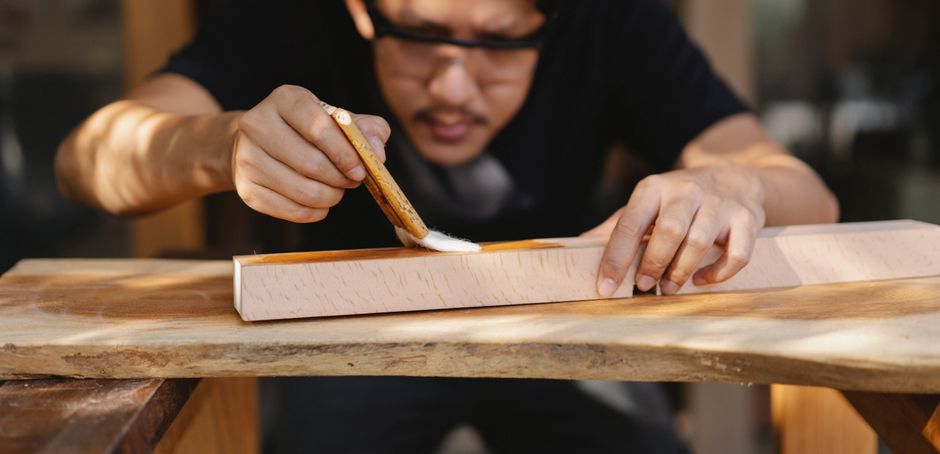
Varnishing wooden furniture is one of those tasks that looks simple on the surface but can quickly turn into a frustrating experience if you do not have the right product in your hands. Before we even talk about technique, brushes, or drying times, there is one truth that every experienced woodworker and hobbyist will tell you: everything depends on the quality of the varnish you choose. A poor varnish will crack, yellow, peel, or leave streaks no matter how careful you are during application. A great varnish, on the other hand, will forgive small mistakes and still give you a professional looking result.
This is exactly why we recommend the Wood Furniture Varnish from Ferber Painting. It is formulated to be forgiving for beginners while still delivering the depth of finish that professional restorers expect. It is also the only varnish on the market backed by a full satisfaction guaranteed or money back policy, which means you can try it completely risk free. If you are not satisfied for any reason, you get your money back, no complicated conditions attached. No other brand we know of offers this level of confidence in their product.
In this guide, we will explain why choosing the right varnish matters so much, what makes the Ferber Painting formula stand out from the competition, and then walk you step by step through the entire process of varnishing a wooden furniture piece from start to finish. We will also compare the most important criteria you should look at when buying a varnish, answer common questions, and help you avoid the mistakes that ruin most finishing projects. Whether you are restoring a flea market find, protecting a brand new dining table, or simply refreshing furniture that has lost its shine over the years, the principles in this article apply. Wood finishing is a skill that improves with practice, but even your very first attempt can look remarkably professional if you follow the right sequence of steps and use a varnish that is designed to make life easier rather than harder.
Why the Right Varnish Makes All the Difference
Many people assume that varnishing is mostly about technique, and while application skills do matter, the product itself is responsible for at least half of the final result. A low quality varnish often contains thin resin content, unstable solvents, or poor pigment dispersion, which leads to several common problems: uneven sheen, bubbling, slow or inconsistent drying, and a finish that does not protect the wood from moisture, UV light, or daily wear.
Wood is a living material that expands and contracts with humidity and temperature. A varnish needs to be flexible enough to move with the wood without cracking, while also being hard enough to resist scratches and stains. Achieving this balance requires a well engineered formula, not just any can of varnish from a hardware store shelf. Think of a solid oak dining table that lives through four seasons in a family home. In winter, indoor heating dries the air and the wood fibers contract slightly. In summer, humidity rises and the wood expands again. A rigid, low quality varnish film cannot follow these subtle movements, so tiny cracks start to appear at the joints and along the grain within a year or two. A flexible, well formulated varnish moves with the wood instead of fighting against it, which is why the choice of product has such a long term impact on how the furniture ages.
This is where Ferber Painting Wood Furniture Varnish was specifically designed to perform. It has been formulated with a balanced resin blend that stays flexible over time, resists yellowing, and creates a protective layer that shields the wood from spills, sunlight, and general household wear. Because the formula levels itself very well during application, it dramatically reduces the risk of brush marks, which is one of the most common complaints with cheaper varnishes.
Another reason the product matters so much is drying time consistency. Many varnishes behave differently depending on humidity and temperature, which makes timing your coats unpredictable. Ferber Painting Wood Furniture Varnish has been tested across a wide range of conditions to ensure a stable and predictable drying window, so you always know when it is safe to apply the next coat or handle the furniture again. This predictability is especially valuable for people who are varnishing furniture for the first time, since uncertainty about timing is one of the biggest sources of stress and mistakes in a home finishing project. Knowing exactly when to sand, recoat, or leave the piece alone takes the guesswork out of the process and allows you to plan your weekend project with confidence instead of constantly checking the surface and wondering if it is ready.
It is also worth mentioning how the type of wood you are working with interacts with the varnish. Open grained woods such as oak or ash absorb the first coat differently than tight grained woods such as maple or cherry. A varnish with inconsistent absorption behavior can create blotchy patches on open grained wood, while a well balanced formula like Ferber Painting Wood Furniture Varnish adapts more evenly across different grain structures, giving you a more consistent result regardless of the species you are working with.
What Makes Ferber Painting Wood Furniture Varnish the Best Choice
There are dozens of wood varnishes available online and in stores, so it is fair to ask why Ferber Painting should be your choice. Here are the main reasons our customers consistently choose our product over competitors.
- Satisfaction guaranteed or money back, with no complicated small print. If the product does not meet your expectations, you send it back and get refunded. We have not found another varnish brand willing to offer this.
- A smooth, self leveling formula that minimizes brush marks even for beginners, which means less sanding between coats and a faster overall project.
- High resistance to UV yellowing, so your furniture keeps its natural color and clarity for years instead of turning amber or cloudy.
- Flexible film once cured, which reduces the risk of cracking as wood naturally expands and contracts with the seasons.
- Compatible with a wide range of wood types, including oak, pine, walnut, and engineered wood, which means you do not need to buy a different varnish for every project.
- Available in multiple sheen levels, from matte to high gloss, giving you full control over the final look of your furniture.
- Fast worldwide delivery through our international carrier network, so whether you are in Europe, North America, or elsewhere, your order arrives quickly and safely.
- Simple and secure online payment directly on our website, with no need to visit a physical store.
Beyond these technical advantages, there is also the peace of mind that comes with ordering from a company that stands fully behind its product. Many customers tell us they switched to Ferber Painting after being disappointed by cheaper alternatives that left blotchy finishes or required three or four extra coats to look decent. With our varnish, two to three coats are usually enough to achieve a rich, even, professional looking result.
Let’s go a little deeper into a few of these points, since they are often underestimated by first time buyers. The satisfaction guaranteed or money back policy is not just a marketing line. It reflects genuine confidence in the formula, because a company can only offer this kind of guarantee sustainably if very few customers actually need to use it. In practice, most of our refund requests come from people who ordered the wrong sheen level, not from people unhappy with the durability or finish quality of the varnish itself.
The self leveling property deserves special attention as well. When varnish is applied with a brush, tiny ridges naturally form where the bristles pass over the surface. A poorly formulated varnish keeps these ridges frozen in place as it dries, leaving a textured, amateur looking finish. A self leveling formula, by contrast, has just enough open time before it starts to set, allowing the liquid film to flow and settle into a smooth, glass like surface before curing begins. This single property is often the biggest visible difference between a do it yourself finish and one that looks like it came out of a professional workshop.
UV resistance is another underrated factor. Furniture placed near a window, even indoors, receives a surprising amount of ultraviolet exposure over the years. Varnishes with weak UV inhibitors slowly turn amber, then brown, and can even become slightly cloudy as the resin degrades. This is particularly noticeable on light colored woods such as maple or ash, where yellowing stands out dramatically against the pale background. Ferber Painting Wood Furniture Varnish includes UV stabilizers specifically to slow down this aging process, which is why customers who use it on furniture near windows or in sunrooms report that the finish still looks fresh years later.
Finally, the practical side of ordering matters more than people expect. A great product that takes weeks to arrive or that involves a complicated checkout process adds unnecessary friction to a project you are excited to start. Fast worldwide delivery through our international carrier network and a simple, secure online payment system mean that from the moment you decide to refinish your furniture, you are only a few days away from having everything you need on your workbench.
How to Varnish Wooden Furniture: Step by Step Guide
Now that you understand why the product matters so much, let’s go through the complete process of varnishing a piece of wooden furniture. Whether you are refinishing an old family table or protecting a brand new bookshelf, these steps apply to almost any project.
Before diving into the steps, it helps to gather everything you will need so you are not interrupting your work halfway through. A typical setup includes the varnish itself, fine and very fine grit sandpaper, a tack cloth or lint free rags, a mild cleaner, wood filler if needed, a high quality synthetic brush or foam applicator, painter’s tape for any hardware or areas you want to protect, disposable gloves, and a well lit, ventilated workspace. Having all of these items within reach before you start prevents you from having to leave a wet surface unattended while you search for a missing tool.
Step 1: Prepare Your Workspace
Choose a well ventilated area, ideally with a stable temperature between 18 and 24 degrees Celsius. Avoid working in direct sunlight or in a space with a lot of dust, since dust particles can settle into wet varnish and ruin the smoothness of the finish. Lay down a drop cloth or old newspapers to protect your floor. If possible, elevate the furniture piece on sawhorses or wooden blocks rather than working directly on the ground. This allows you to reach the edges and undersides more easily and keeps the piece away from settled dust on the floor. A garage or workshop with the door slightly open for ventilation, but not so open that a breeze carries in dust or debris, tends to be an ideal compromise between airflow and cleanliness.
Step 2: Clean and Sand the Surface
Remove any old wax, grease, or dirt using a mild cleaner and a lint free cloth. Once the surface is dry, sand it with fine grit sandpaper, typically 180 to 220 grit, moving with the direction of the wood grain. This step opens the wood pores slightly, allowing the varnish to adhere better. After sanding, wipe away all dust with a tack cloth or a slightly damp rag. If you are working on furniture that previously had wax applied, it is worth cleaning twice, since wax residue can hide in corners and carvings and will prevent the varnish from bonding properly if left behind. Run your hand over the surface after cleaning; if it still feels slightly slippery or greasy, clean it again before moving on. Sanding should always follow the grain direction rather than going across it, since cross grain scratches are notoriously difficult to hide once the varnish is applied and tends to catch the light at odd angles.
Step 3: Repair Any Imperfections
Fill any holes, cracks, or dents with an appropriate wood filler that matches the tone of your furniture. Let the filler dry completely, then sand it flush with the surrounding surface. Skipping this step often results in visible imperfections once the varnish is applied, since varnish tends to highlight rather than hide surface flaws. For deeper gouges, you may need to apply the filler in thin layers, letting each layer dry before adding the next, rather than trying to fill the entire depth in a single application. This prevents the filler from shrinking and cracking as it cures. If your furniture has old nail holes or screw holes that will not be reused, this is also the moment to fill them, since a properly repaired surface is one of the biggest factors separating an amateur finish from a professional one.
Step 4: Apply a Thin First Coat
Stir the Ferber Painting Wood Furniture Varnish gently, without shaking it, to avoid introducing air bubbles. Using a high quality synthetic brush or a foam applicator, apply a thin, even first coat following the direction of the wood grain. This first coat acts as a sealer and will likely look slightly rough once dry, which is completely normal. Work in manageable sections, such as one tabletop half or one drawer front at a time, rather than trying to coat an entire large piece in one continuous pass. This gives you better control over the amount of varnish being applied and reduces the risk of the leading edge drying before you can blend it into the next section. Keep a wet edge as you work, meaning you always overlap slightly into the previous stroke while it is still wet, to avoid visible lap marks once the coat dries.
Step 5: Sand Lightly Between Coats
Once the first coat is fully dry, usually within the timeframe indicated on the product label, lightly sand the surface with very fine sandpaper, around 320 grit, to smooth out any raised wood fibers. Wipe away the dust thoroughly before continuing. This intermediate sanding step is often the one that beginners are tempted to skip, especially when the first coat already looks reasonably smooth. Resist that temptation. Wood fibers absorb a small amount of moisture from the varnish and stand up slightly as they dry, creating a texture that is subtle to the eye but very noticeable to the touch. A light pass with fine sandpaper knocks down these raised fibers so that each subsequent coat goes on smoother than the last, building toward that glass like professional finish.
Step 6: Apply Additional Coats
Apply a second coat, and if needed a third, following the same technique. Thin, even coats always produce a better result than one thick coat, which tends to drip, bubble, or dry unevenly. Thanks to the self leveling properties of Ferber Painting varnish, most customers achieve an excellent finish with just two to three coats total. For furniture that will see heavy daily use, such as a dining table or a coffee table where drinks and plates are placed directly on the surface, a third coat is generally worth the extra time, since it adds meaningful durability against scratches and moisture. For lower traffic pieces such as decorative shelves or picture frames, two coats are often perfectly sufficient. Between each coat, take a moment to inspect the surface under raking light, meaning light coming from a low angle, which reveals any dust nibs, drips, or uneven areas that are easy to miss when looking straight down at the surface.
Step 7: Let It Cure Completely
Drying and curing are two different things. The varnish may feel dry to the touch within hours, but full curing, when the finish reaches its maximum hardness and durability, can take several days. Avoid placing heavy objects or exposing the furniture to moisture during this curing period. It can be tempting to put the furniture back into daily use as soon as it feels dry to the touch, but this is one of the most common causes of long term damage to an otherwise well applied finish. A coaster placed on a table that has only surface dried, rather than fully cured, can leave a permanent ring or impression in the varnish film that no amount of buffing will remove later. As a general guideline, wait at least a full week before subjecting the furniture to regular use, and even longer in cooler or more humid environments where curing naturally slows down.
Step 8: Final Inspection and Light Buffing
Once fully cured, inspect the surface under good lighting for any dust nibs or uneven areas. If needed, buff gently with an extremely fine abrasive pad and apply a thin coat of furniture wax for extra shine and protection. This final step is optional but rewarding, since a light buff brings out a subtle depth and warmth in the finish that is hard to achieve straight out of the can. If you do choose to wax, use a soft, lint free cloth and apply in small circular motions, then buff with a clean cloth once the wax has hazed over. This adds a final layer of tactile smoothness and a slight boost in shine without altering the protective qualities of the varnish underneath.
Comparing Wood Varnishes: What Really Matters
To help you understand why Ferber Painting stands out, here is a comparison of the criteria that matter most when choosing a wood furniture varnish.
| Criteria | Ferber Painting Wood Furniture Varnish | Typical Competitor Varnish |
|---|---|---|
| Satisfaction guaranteed or money back | Yes, full refund available | Rarely offered, or with strict conditions |
| Ease of application | Self leveling, beginner friendly | Often requires expert technique to avoid brush marks |
| Number of coats needed | 2 to 3 coats for a rich finish | Often 4 or more coats required |
| Resistance to yellowing | High, stays clear over years | Varies, many yellow within months |
| Flexibility after curing | High, reduces cracking risk | Often stiff, prone to cracking with wood movement |
| Delivery | Fast worldwide shipping via international carrier network | Often limited to local or regional shipping |
| Online payment | Simple and secure, directly on the website | Varies by retailer |
As this comparison shows, the advantages go far beyond the varnish itself. From the guarantee to the delivery speed and payment simplicity, ordering the Ferber Painting Wood Furniture Varnish is designed to be a smooth experience from the moment you click order to the moment you admire your finished furniture.
It is also worth thinking about the hidden costs of a lower quality varnish that are not obvious at first glance. If a cheaper product requires four or five coats instead of two or three to achieve the same coverage, you end up spending more time sanding between coats, more time waiting for drying, and often more money buying a second can when the first one runs out partway through the project. When you factor in the value of your own time, a slightly higher upfront price for a more efficient, higher performing varnish often works out to be the more economical choice overall, not to mention the frustration saved from avoiding streaky or blotchy results that force you to strip everything and start over.
Common Mistakes to Avoid When Varnishing Furniture
Even with a high quality product, a few common mistakes can affect your final result. Here are the ones we see most often.
- Applying varnish in a humid or dusty environment, which leads to a cloudy or gritty finish.
- Skipping the sanding step between coats, resulting in a rough texture that never fully smooths out.
- Applying coats that are too thick, which causes drips, bubbles, and uneven drying.
- Not stirring the varnish properly before use, which leads to inconsistent sheen across the surface.
- Rushing the curing time and using the furniture too soon, which can leave permanent marks or dents in the finish.
- Using a low quality brush that leaves visible bristle marks in the final coat.
Let’s look a little closer at why each of these mistakes causes so much trouble, since understanding the reason behind a mistake makes it much easier to avoid in practice. Humidity affects varnish because water molecules in the air interfere with the solvent evaporation process, which can trap moisture inside the film and create a milky, cloudy appearance known in the trade as blushing. If you live in a climate with high humidity, try to varnish on the driest days available, or use a dehumidifier in your workspace if the project allows for it.
Skipping the intermediate sanding step is tempting because it feels like an unnecessary delay, but the raised wood fibers left behind after the first coat dries will telegraph through every subsequent layer, no matter how many coats you apply on top. The only way to truly fix this once it has happened is to sand back down and start the coating process again, which takes far longer than the few extra minutes the sanding step would have required in the first place.
Thick coats feel like a shortcut to a faster finish, since applying less often seems more efficient, but in reality thick varnish traps solvent underneath the surface skin that forms as it starts to dry. This trapped solvent eventually needs to escape, and when it does, it pushes through the surface in the form of tiny bubbles or wrinkles that are very difficult to sand out without going all the way through the coat. Two or three thin coats will always outperform one thick coat, both in appearance and in durability.
Not stirring the varnish thoroughly before use is a mistake that is easy to overlook, especially with a product that has been sitting in storage for a while. Some of the resin and pigment components can settle toward the bottom of the can over time, and if you only stir the top layer, the varnish you apply first will differ slightly from what comes out toward the bottom of the can, leading to visible differences in sheen across your project.
Rushing the curing time is perhaps the most common and most costly mistake, because the damage it causes often only becomes visible after the fact, when it is too late to fix without significant rework. A finish that looks perfectly dry after twenty four hours may still be soft enough underneath to take a permanent impression from a book, a plate, or even a light scratch from a fingernail. Patience during this final stage protects all the careful work you put into the earlier steps.
Finally, brush quality matters more than most people expect. A cheap brush with loose or splayed bristles will shed hairs into your wet varnish and leave visible track marks that harden in place as the finish cures. Investing in one good quality synthetic brush, cleaned properly after each use, will serve you well across many future projects and pays for itself many times over in the quality of the finish it produces.
Avoiding these mistakes, combined with using a reliable product like Ferber Painting Wood Furniture Varnish, will give you a finish that looks like it came from a professional workshop rather than a weekend DIY project.
Frequently Asked Questions
How many coats of varnish do I need for wooden furniture?
Most projects require two to three coats when using a high quality varnish like Ferber Painting Wood Furniture Varnish. Cheaper varnishes often require four or more coats to achieve a similar level of coverage and shine.
How long does wood varnish take to dry completely?
Surface drying typically takes a few hours, but full curing can take several days. Always check the specific drying and curing times listed on the product label before placing heavy objects on the surface.
Can I use this varnish on outdoor furniture?
Ferber Painting Wood Furniture Varnish is primarily designed for indoor furniture, though its UV resistance also makes it suitable for furniture placed in covered outdoor areas such as porches.
What happens if I am not satisfied with the product?
You are covered by our satisfaction guaranteed or money back policy. If the product does not meet your expectations, simply contact us and we will process a full refund.
Do I need to sand old varnish off before applying a new coat?
If the old finish is in good condition, a light sanding to remove shine is usually enough. If the old varnish is cracked, peeling, or heavily yellowed, it is best to strip it completely before applying a fresh coat.
Is the varnish safe to use indoors?
Yes, as long as you work in a well ventilated space during application and curing, following the safety instructions provided on the packaging.
Can I apply this varnish over a stain or dye?
Yes, as long as the stain or dye has fully dried according to its own product instructions. Applying varnish over a properly cured stain seals in the color and adds depth and richness to the tone of the wood. Testing on a small hidden area first is always a good idea to confirm compatibility and check the final appearance before committing to the entire piece.
What sheen level should I choose for my furniture?
This comes down to personal preference and the style of your room. Matte and satin finishes tend to hide small imperfections better and give a more understated, natural look, while gloss and high gloss finishes create a striking, reflective surface that works well on statement pieces. If you are unsure, satin is a safe middle ground that suits most furniture styles.
How do I clean my brush after using varnish?
Clean your brush according to the solvent type indicated on the product label, working the bristles gently to remove all residue, then reshape the bristles and let the brush dry flat or hanging bristle down. A well maintained brush can be reused for many future projects, saving you money and giving more consistent results than a new brush each time.
Conclusion
Varnishing wooden furniture does not have to be complicated or stressful once you understand that the quality of the product you choose determines most of your final result. By preparing your surface properly, applying thin even coats, and respecting drying and curing times, you can achieve a beautiful, durable finish on almost any piece of furniture. And because the process depends so heavily on the varnish itself, choosing a trusted, high performance formula is the most important decision you will make in this entire project.
Take your time with each step, resist the temptation to rush the curing period, and remember that patience during preparation and drying pays off far more than any advanced technique during application. Whether this is your first attempt at refinishing a piece of furniture or you have years of experience in woodworking, using a varnish that is engineered to be forgiving, flexible, and long lasting removes much of the uncertainty from the process and lets you focus on enjoying the transformation of your furniture from worn or unfinished to genuinely beautiful.
Order your Ferber Painting Wood Furniture Varnish today and enjoy fast worldwide shipping, secure online payment, and a full satisfaction guaranteed or money back policy on every purchase.