 Ireland
 United States
 Australia
 Česko
Česko Danmark
 Deutschland
 Eesti
Eesti España
 Ελλάδα
 France
 Hrvatska
 Italia
 Latvija
 Lietuva
 Magyarország
 Nederlands
 New-Zealand
 Norge
Norge Polska
 Portugal
 România
 Schweiz (Deutsch)
 Slovenija
 Slovensko
 Suomi
Suomi Sverige
 България
 Canada (English)
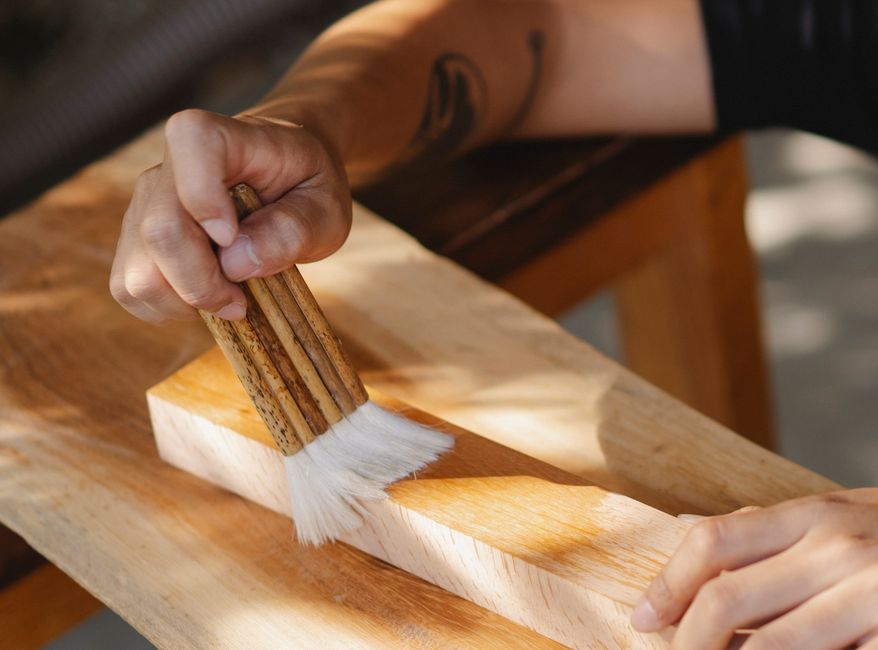
Before you even pick up a brush, there is one truth that every experienced woodworker will tell you: the final result of your project depends almost entirely on the quality of the product you choose. You can have the best technique in the world, but if your varnish is poorly formulated, uneven in texture, or simply not made for the type of wood you are working on, your project will suffer. This is why, before diving into the step-by-step process of varnishing wood, we need to talk about the product itself.
At Ferber Painting, we manufacture our Wood Varnish with this exact philosophy in mind: give people a product they can trust completely, backed by a satisfaction guaranteed or your money back policy that no other competitor on the market currently offers. That is right, if you are not happy with the results, you can simply send it back and get a full refund. No complicated conditions, no hidden fees. This alone should tell you how confident we are in what we sell.
In this guide, we will walk you through everything you need to know about varnishing wood, from preparation to the final coat, while explaining along the way why our product consistently outperforms other varnishes available on the market. We will also cover the different types of wood you may encounter, the tools that make the process easier, the environmental conditions that affect drying and curing, and the most common mistakes people make when they varnish wood for the first time. By the end of this article, you should feel confident enough to tackle any varnishing project, whether it is a small picture frame or an entire hardwood floor.
Why Choosing the Right Varnish Matters More Than Technique
Many beginners assume that varnishing wood is simply about applying a coat and letting it dry. In reality, the chemical composition of the varnish, its viscosity, drying time, and resistance to UV rays and humidity all play a massive role in how your final project will look and how long it will last. Two people can follow the exact same technique, sand the same way, and apply the same number of coats, yet end up with completely different results simply because one used a low quality varnish and the other used a properly formulated one.
A poor quality varnish can lead to several problems:
- Yellowing over time due to poor UV resistance
- Bubbling or cracking caused by inconsistent viscosity
- Uneven finish because of low quality pigments and resins
- Long drying times that force you to wait days between coats
- Poor adhesion on certain types of wood
Ferber Painting Wood Varnish was formulated specifically to avoid all of these issues. Our proprietary resin blend ensures a smooth, self-leveling application every time, even for beginners. Unlike many other brands that use fillers to cut production costs, our varnish uses a higher concentration of active protective agents, meaning you get better protection with fewer coats.
Consider a simple example. Imagine two woodworkers building an outdoor bench for the garden. Both cut the wood the same way, sand it to the same finish, and apply three coats of varnish following the manufacturer instructions. The first woodworker uses a cheap varnish bought at a discount store, while the second uses Ferber Painting Wood Varnish. Six months later, the bench varnished with the cheap product starts showing yellow patches where direct sunlight hits it daily, and the finish begins to crack near the joints where moisture tends to accumulate. The bench varnished with our product still looks freshly finished, with no yellowing and no cracking, because the resin blend was designed to flex slightly with the wood as it expands and contracts with temperature changes. This is the kind of difference that only becomes visible months after the project is finished, which is exactly why so many people underestimate the importance of product quality until it is too late.
The Role of Viscosity in a Smooth Finish
Viscosity refers to how thick or thin a liquid is, and in the case of varnish, it directly affects how easily the product spreads across the wood surface. A varnish that is too thick will leave visible brush marks and take much longer to level out, while a varnish that is too thin will run and drip, especially on vertical surfaces such as cabinet doors or chair legs. Ferber Painting Wood Varnish is engineered with a balanced viscosity that flows evenly under the brush without becoming so thin that it drips or pools in corners. This balance is one of the main reasons beginners find our product so much easier to work with compared to other brands on the market.
Why UV Resistance Should Never Be an Afterthought
If your project will ever be exposed to sunlight, even indirectly through a window, UV resistance becomes one of the most important factors in your choice of varnish. Sunlight breaks down the molecular structure of cheap resins over time, causing the classic amber or yellow discoloration that so many people mistake for a normal aging process. In reality, this yellowing is a sign of a varnish that was not designed to withstand UV exposure. Our formula includes UV stabilizing agents that absorb and dissipate this energy before it can damage the resin structure, which is why furniture and outdoor pieces finished with our varnish tend to keep their original color for years rather than months.
Ferber Painting Wood Varnish vs Other Brands: A Comparison
To help you understand exactly why our product stands out, here is a comparison table covering the most important criteria when choosing a wood varnish.
| Criteria | Ferber Painting Wood Varnish | Average Competitor Product |
|---|---|---|
| Satisfaction Guaranteed or Refunded | Yes, full refund with no complicated conditions | Rarely offered, or with strict limitations |
| Drying Time | Fast drying, recoat within hours | Often requires 24 to 48 hours between coats |
| UV Resistance | High resistance, prevents yellowing | Varies, often lower quality resins |
| Ease of Application | Self-leveling formula, beginner friendly | Can require professional experience |
| Worldwide Shipping | Fast international delivery network | Often limited to local or regional markets |
| Online Payment | Simple and secure online checkout | Not always available for international buyers |
| Odor | Low odor formula | Often strong chemical smell |
As you can see, when comparing the most important criteria one by one, Ferber Painting Wood Varnish consistently comes out ahead. Combined with our worldwide shipping network and secure online payment system, buying from us is not only safer for your project but also more convenient overall.
Let us go a little deeper into some of these criteria, because numbers on a table only tell part of the story. Drying time, for instance, is not just a matter of convenience. When a varnish takes 24 to 48 hours to dry between coats, dust and airborne particles have much more time to settle onto the tacky surface, which increases the chances of a rough or gritty finish. With a faster drying formula like ours, you reduce this window of exposure significantly, which translates into a cleaner, smoother result even in a workshop that is not perfectly dust free.
The odor factor is also worth mentioning separately. Many traditional oil based varnishes release strong fumes that require several days of ventilation before a room becomes comfortable again. This is a serious consideration if you are varnishing furniture inside a home, an apartment, or any space where ventilation is limited. Our low odor formula was specifically designed so that indoor projects, such as tables, shelves, and cabinets, do not turn your living space into an unpleasant environment for days at a time.
Finally, do not underestimate the value of a straightforward refund policy. Many competitor brands advertise a satisfaction guarantee on the packaging, but when customers actually try to use it, they discover a long list of conditions, required proof of purchase, return shipping costs, or time limits that make the guarantee almost impossible to use in practice. We designed our policy to be genuinely simple because we believe a guarantee should actually protect the customer, not just serve as a marketing slogan.
Step-by-Step Guide: How to Varnish Wood
Now that we have established why choosing the right product matters, let us walk through the actual process of varnishing wood. Whether you are working on furniture, flooring, or a simple wooden craft, these steps apply universally. We will also mention specific adjustments you might need to make depending on the type of wood, the size of the project, and whether you are working indoors or outdoors.
Tools You Will Need Before Starting
Before beginning any varnishing project, gather your materials so you are not interrupted halfway through a coat. You will typically need sandpaper in several grits, ranging from 120 to 320, a tack cloth or lint free rag, a high quality natural or synthetic bristle brush depending on the varnish type, a foam applicator pad for larger flat surfaces, a stir stick, a container for pouring small amounts of varnish, painter’s tape for protecting edges and hardware, and a clean, dust free workspace with good but indirect lighting. Good lighting matters more than most people realize, because it is the only way to spot drips, uneven patches, or missed spots before the varnish dries.
Step 1: Prepare the Surface
Before applying any varnish, the wood surface must be clean, dry, and smooth. Start by sanding the wood with a medium grit sandpaper, around 120 grit, to remove any old finish or imperfections. Then move to a finer grit, around 220, to smooth the surface further. Always sand in the direction of the wood grain to avoid visible scratches.
Once sanding is complete, remove all dust using a dry cloth or a vacuum with a brush attachment. Any remaining dust particles will get trapped under the varnish and ruin the finish.
If you are working with reclaimed wood, old furniture, or a piece that already has an existing finish, preparation becomes even more important. Old paint, wax, or a previous varnish coat must be fully removed or thoroughly scuffed before a new coat can adhere properly. In these cases, a chemical stripper may be necessary before sanding, followed by a thorough wipe down with a cloth dampened in mineral spirits to remove any residue. Skipping this step is one of the most common reasons a new varnish coat peels or bubbles within weeks of application, regardless of how good the varnish itself is.
It is also worth checking the moisture content of the wood before you begin, especially for outdoor projects or wood that has been stored in a garage or shed. Wood that is too damp will trap moisture beneath the varnish film, leading to bubbling or a cloudy appearance once the finish dries. If you do not have a moisture meter, a simple test is to press a piece of clear tape onto the surface overnight. If condensation appears under the tape the next morning, the wood needs more time to dry out before you proceed.
Dealing with Knots, Resin Pockets, and Stains
Certain woods, particularly pine and other softwoods, contain knots and resin pockets that can bleed through a varnish coat if not treated beforehand. A dedicated knot sealer or shellac based sealer applied directly over these spots before varnishing will prevent discoloration from appearing later. Similarly, if you plan to stain the wood before varnishing, always allow the stain to dry completely and follow the recommended waiting period on the stain packaging. Applying varnish over a stain that has not fully cured is one of the most common causes of a tacky, uneven finish that never seems to harden properly.
Step 2: Choose the Right Varnish
This is where Ferber Painting Wood Varnish comes into play. Our formula is designed to work on a wide range of wood types, including oak, pine, walnut, and plywood. Unlike other brands that require different products depending on the wood type, our varnish adapts seamlessly, saving you money and simplifying your shopping experience.
Different woods behave differently under varnish, and understanding these differences helps you set the right expectations. Oak, for example, has a very open grain structure, which means it can absorb more product during the first coat than a tighter grained wood like maple. This is completely normal and simply means the first coat may soak in more than expected, which is why we always recommend applying a slightly more generous first coat on open grained woods and letting the following coats build up the surface film. Walnut, on the other hand, has a naturally rich, dark tone that pairs beautifully with a clear varnish finish, since it does not require any staining to look striking. Pine, being a softwood, tends to be more porous and prone to blotching, so a pre-conditioner or a thinned first coat can help achieve a more even result.
Plywood presents its own unique challenge because the surface is made of thin veneer layers glued together, and the direction of the grain can vary between layers. This sometimes causes uneven absorption across the surface. Because our formula is self-leveling and formulated to work across a wide range of porosities, it handles these inconsistencies far better than thinner, less concentrated varnishes that tend to highlight every imperfection in the veneer.
Interior Versus Exterior Projects
Another consideration when choosing a varnish is whether the project will live indoors or outdoors. Indoor furniture is mostly exposed to dust, minor scuffs, and occasional spills, so the priorities are usually appearance, ease of cleaning, and low odor during application. Outdoor furniture, decking, and fences face a completely different set of challenges, including direct sunlight, rain, temperature swings, and in some climates, snow and ice. Ferber Painting Wood Varnish is formulated to handle both environments thanks to its UV resistant agents and flexible resin base, which means you do not need to purchase a separate product depending on where your project will be placed.
Step 3: Apply the First Coat
Using a high quality brush or a foam applicator, apply a thin, even coat of varnish following the direction of the wood grain. Avoid overloading your brush, as this can lead to drips and uneven texture. Thanks to the self-leveling properties of our formula, minor application errors will naturally smooth out as the varnish settles.
When applying the first coat, work in manageable sections rather than trying to cover an entire large surface at once. For a tabletop, for example, divide the surface mentally into two or three sections and complete each one fully, including tipping off the brush strokes in the direction of the grain, before moving to the next section. This prevents the edges of each section from drying before you have a chance to blend them together, which can otherwise leave visible lap marks once the varnish cures.
Brush angle also matters more than most beginners expect. Holding the brush at roughly a 45 degree angle to the surface, using long, even strokes, and applying light pressure will help distribute the product evenly without pushing too much varnish into one spot. If you notice bubbles forming as you brush, this is often a sign of applying too much pressure or moving the brush too quickly. Slowing down and using lighter strokes usually resolves this immediately.
For those working on smaller, detailed pieces such as picture frames, carved decorations, or turned wood items, a foam brush or even a lint free cloth for a wipe on application can give better control than a traditional bristle brush, especially in tight corners and grooves where a standard brush might leave excess product pooling.
Step 4: Sand Between Coats
Once the first coat is dry, which typically takes only a few hours with Ferber Painting Wood Varnish, lightly sand the surface with a fine grit sandpaper, around 320 grit. This step removes any small imperfections and helps the next coat adhere better.
Sanding between coats is often the step that beginners are most tempted to skip, since the surface can look perfectly fine after the first coat dries. However, even a coat that looks smooth to the naked eye will have microscopic texture from dust particles, brush fibers, or simply the natural leveling process of the varnish. Lightly sanding with 320 grit paper, using very gentle pressure, knocks down these tiny imperfections and creates a slightly rough texture at a microscopic level that gives the next coat something to grip onto. Skipping this step does not always cause an immediate problem, but over time it can lead to a finish that peels or separates in sheets, especially in high traffic areas like tabletops or stair railings.
After sanding, always wipe the surface thoroughly with a tack cloth or a lightly dampened lint free rag to remove the fine sanding dust before applying the next coat. Any dust left behind will be sealed under the following layer of varnish and will remain visible as small bumps or specks in the final finish.
Step 5: Apply Additional Coats
Depending on the level of protection and shine you want, apply two to three additional coats, sanding lightly between each one. Most users find that two coats of our product provide the same level of durability as three coats of competitor products, thanks to our concentrated formula.
The number of coats you ultimately choose should depend on how the finished piece will be used. A decorative shelf that will rarely be touched can often be finished beautifully with just two coats. A dining table, on the other hand, that will face daily use, spills, hot dishes, and constant cleaning, benefits from a third or even a fourth coat to build up a thicker, more resilient protective film. Flooring is at the higher end of this spectrum, since it deals with foot traffic, furniture legs dragging across the surface, and occasional dropped objects, so three to four coats is generally recommended for any wood floor project.
Each additional coat should be applied in the same careful manner as the first, following the grain direction, working in manageable sections, and allowing proper drying time before the next sanding step. Rushing through additional coats to finish the project faster is one of the most common reasons a otherwise well prepared project ends up with a disappointing final texture.
Achieving a High Gloss, Satin, or Matte Finish
The sheen of your final coat depends largely on the type of varnish used for that last layer and how it is applied. A high gloss finish reflects the most light and highlights the natural depth and color of the wood grain, making it a popular choice for fine furniture and decorative pieces. A satin finish offers a softer, more subtle sheen that hides minor imperfections and fingerprints better than gloss, which makes it a practical choice for tables and surfaces that get handled often. A matte finish provides the most natural, low sheen look, often preferred for rustic or farmhouse style furniture. If you plan to mix sheens across a project, always apply the higher gloss coats first and finish with your desired final sheen, since this order produces a more consistent result than the reverse.
Step 6: Let It Cure
While the varnish may feel dry to the touch within hours, full curing can take a few days. Avoid placing heavy objects or exposing the surface to moisture during this period to ensure maximum durability.
It is important to understand the difference between drying and curing, since confusing the two is a common cause of damaged finishes. Drying refers to the solvent evaporating from the surface, which happens relatively quickly and gives the varnish a dry to the touch feel within a few hours. Curing, on the other hand, refers to the complete chemical hardening of the resin structure throughout the entire thickness of the film, which can take anywhere from several days to a couple of weeks depending on temperature, humidity, and the number of coats applied. During this curing window, the finish is still vulnerable to scratches, dents, and moisture damage even though it may look and feel finished.
To protect your project during the curing period, avoid placing rugs, tablecloths, or other objects directly on the surface, as trapped moisture or lack of airflow can slow down curing and sometimes leave a permanent impression in the film. Keep the room at a stable temperature, ideally between 18 and 24 degrees Celsius, and avoid excessive humidity, since both extreme cold and high moisture levels can slow the curing process significantly. For outdoor projects, try to time your final coat so that the piece has several dry days ahead before it faces rain or heavy dew.
Common Mistakes to Avoid When Varnishing Wood
Even with a great product, certain mistakes can undermine an otherwise well executed project. Applying coats too thickly in an attempt to save time often leads to wrinkling, extended drying times, and a cloudy appearance as the surface skins over before the layers beneath have a chance to dry properly. Working in a dusty environment, such as a garage right after sweeping, introduces particles that settle into the wet finish. Varnishing in direct sunlight or in extreme temperatures can cause the product to dry unevenly, leading to visible brush marks that would otherwise disappear during normal leveling. Finally, not allowing enough time between coats, even with a fast drying formula, can trap solvent beneath the surface and compromise the durability of the finish over the long term. Being aware of these pitfalls before you start is often the difference between a finish that looks professional and one that needs to be redone within a year.
Frequently Asked Questions
How many coats of varnish should I apply?
Most projects look great with two to three coats. With Ferber Painting Wood Varnish, two coats are often enough thanks to the concentrated formula.
Can I use this varnish outdoors?
Yes, our formula includes UV resistant agents that make it suitable for both indoor and outdoor wooden surfaces.
How long does it take to dry?
The first coat typically dries within a few hours, allowing you to sand and apply the next coat the same day.
What happens if I am not satisfied with the product?
You can request a full refund thanks to our satisfaction guaranteed or refunded policy, no complicated conditions attached.
Does Ferber Painting ship internationally?
Yes, we deliver quickly worldwide thanks to our international network of trusted carriers.
Conclusion
Varnishing wood is a simple process once you understand the fundamentals, but the quality of your chosen product will always be the deciding factor in how your project turns out. From faster drying times to superior UV resistance and a genuinely risk free satisfaction guaranteed or refunded policy, Ferber Painting Wood Varnish offers everything you need to achieve professional results at home.
Whether you are refinishing an old family heirloom, building a new outdoor bench for the summer, or simply want your floors to shine again, taking the time to prepare your surface properly, choose the right product, and follow each step patiently will always produce a finish you can be proud of for years to come.