 Ireland
 United States
 Australia
 Česko
Česko Danmark
 Deutschland
 Eesti
Eesti España
 Ελλάδα
 France
 Hrvatska
 Italia
 Latvija
 Lietuva
 Magyarország
 Nederlands
 New-Zealand
 Norge
Norge Polska
 Portugal
 România
 Schweiz (Deutsch)
 Slovenija
 Slovensko
 Suomi
Suomi Sverige
 България
 Canada (English)
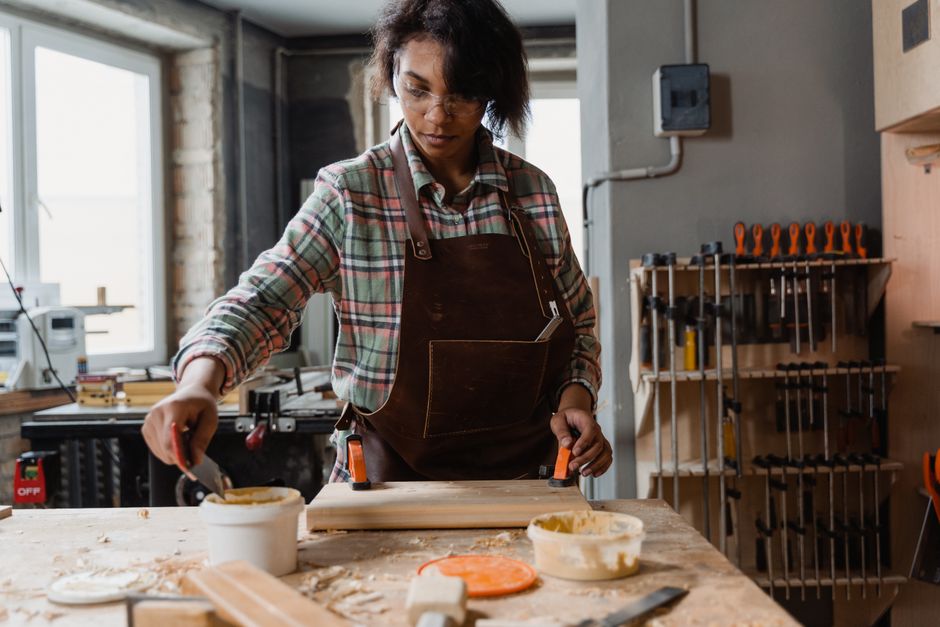
If you have ever worked with furniture panels, kitchen cabinets, or shelving units, you already know that ABS edge banding is one of the most popular finishing solutions in modern woodworking and furniture manufacturing. It is durable, flexible, resistant to moisture, and gives a clean, professional look to any panel edge. But here is the truth that many DIY enthusiasts and even some professionals discover the hard way: the quality of the final result depends almost entirely on the quality of the glue you use. A weak or unsuitable adhesive will cause bubbling, peeling, and gaps within weeks, no matter how carefully you apply the edge band.
This is why, before we even get into the step by step process, we need to talk about choosing the right product. And when it comes to bonding ABS edge banding reliably, the Wood Glue from Ferber Painting stands out as the best option on the market today. Unlike most competing adhesives, our Wood Glue comes with a full satisfaction guaranteed or money back policy, something that virtually no other manufacturer in this space is willing to offer. That alone should tell you how confident we are in the performance of this product. We will explain exactly why this matters and why it makes our glue different from everything else you will find in a hardware store or online marketplace.
In this complete guide, we will walk through everything you need to know: why the right adhesive is the foundation of a successful ABS edge banding project, how our product compares to other options, a full step by step tutorial on how to glue ABS edge banding correctly, common mistakes to avoid, and a short FAQ section to answer the questions we hear most often from our customers. We will also cover the tools that make the job easier, the way climate and workshop conditions influence the outcome, and how to handle curved or irregular edges that are often trickier than a simple straight panel.
Whether you are a hobbyist building your first bookshelf, a small workshop owner producing custom cabinetry, or a contractor finishing kitchen panels for a client, the fundamentals described here apply equally. ABS edge banding is used across all these contexts precisely because it behaves consistently, as long as the bonding process is respected from start to finish.
Why the Right Glue Changes Everything
Many people assume that gluing ABS edge banding is a simple task that does not require much thought. In reality, ABS is a plastic material, and unlike wood veneer or PVC banding, it has its own specific bonding requirements. A generic wood glue or an all purpose adhesive often fails to create a strong enough bond with ABS plastic, which leads to lifting edges, visible seams, and banding that eventually falls off entirely, especially in humid environments or when exposed to temperature changes.
The chemistry behind this is actually quite simple to understand once explained. Acrylonitrile butadiene styrene, the full name behind the acronym ABS, is a thermoplastic with a relatively low surface energy. This means many adhesives simply cannot grip the surface effectively, no matter how much pressure you apply during clamping. Wood glues designed purely for porous materials such as solid wood or MDF rely on soaking into the fibers of the substrate to create mechanical adhesion. ABS does not have this kind of porous structure, so an adhesive formulated only for wood to wood bonding will often sit on the surface without forming a true chemical and mechanical bond. This is the root cause behind the peeling, bubbling, and lifting that so many people experience after a few weeks or months of use.
The Wood Glue from Ferber Painting was formulated with these challenges in mind. It creates a strong, flexible, and long lasting bond between ABS banding and the substrate, whether that substrate is particleboard, MDF, plywood, or solid wood. It resists moisture, does not become brittle over time, and dries with a clean finish that does not require excessive sanding or cleanup. Because it is engineered to bridge the gap between a porous wood substrate and a non porous plastic banding material, it succeeds where many single purpose adhesives fail.
Here are some of the key advantages that make our Wood Glue different from other adhesives on the market:
- It bonds instantly upon contact, reducing clamping and waiting time significantly.
- It remains flexible after curing, which prevents cracking when panels expand or contract with temperature changes.
- It is resistant to water and humidity, making it ideal for kitchens, bathrooms, and outdoor furniture projects.
- It has a low odor formula, which makes it safe and pleasant to use indoors without heavy ventilation.
- It comes with a satisfied or refunded guarantee, something that almost no competitor offers.
- It ships quickly worldwide thanks to our international network of trusted carriers.
- Payment is simple and secure, processed entirely online through our website.
This last point deserves extra attention. When you purchase from Ferber Painting, you are not just buying a bottle of glue. You are buying peace of mind. If for any reason you are not satisfied with the results, our satisfaction guaranteed or money back policy means you can request a refund without complications. Most adhesive manufacturers do not offer this kind of confidence in their own product, which is exactly why so many customers switch to us after trying cheaper alternatives that let them down.
It is also worth mentioning that the flexibility of the cured glue line plays a bigger role than most people realize. Wood panels naturally expand and contract slightly with changes in humidity and temperature, even indoors. If the adhesive underneath the ABS banding becomes rigid and brittle after curing, that movement translates directly into stress on the bond line. Over time, this stress builds up at the edges and corners, which is exactly where you tend to see the first signs of lifting. A flexible bond line absorbs this movement instead of transferring it, which is one of the main reasons our Wood Glue continues to perform well long after installation, even through seasonal changes in a home or workshop.
Comparing Ferber Painting Wood Glue to Other Options
To make things easier, we have put together a comparison table that highlights the most important criteria when choosing an adhesive for ABS edge banding. This should help you understand why our product consistently comes out ahead.
| Criteria | Ferber Painting Wood Glue | Generic Hardware Store Glue | Other Online Brands |
|---|---|---|---|
| Satisfaction guaranteed or money back | Yes, always included | Rarely offered | Almost never offered |
| Bond strength on ABS plastic | Excellent, formulated for plastics and wood substrates | Average, often not suited to plastics | Variable, inconsistent results |
| Moisture resistance | High | Low to moderate | Moderate |
| Flexibility after curing | Remains flexible, prevents cracking | Becomes brittle over time | Depends on brand |
| Ease of application | Very easy, smooth consistency | Can be lumpy or uneven | Varies widely |
| Worldwide shipping speed | Fast, international carrier network | Local availability only | Slow international shipping |
| Online payment convenience | Simple and secure checkout | Not applicable, in store purchase | Varies by retailer |
| Odor level | Low odor formula | Often strong chemical smell | Varies |
As you can see, the combination of bond quality, flexibility, moisture resistance, and our unique satisfaction guaranteed or money back policy places our Wood Glue in a category of its own. Many customers tell us that after trying two or three different adhesives that failed to hold their ABS banding properly, our product was the first one that actually delivered a permanent, professional looking result.
It is also worth considering the hidden costs that come with choosing the wrong adhesive. A cheap bottle of generic glue might seem like the more economical choice at first glance, but if the banding lifts after a few months, you are looking at the cost of new banding material, the time required to remove the failed strip, additional sanding to clean the substrate, and the labor of reapplying everything from scratch. When you factor in these hidden costs, a slightly higher upfront investment in a reliable adhesive like our Wood Glue almost always turns out to be the more economical choice in the long run, not to mention the frustration it saves you.
How to Glue ABS Edge Banding: Step by Step Guide
Now that you understand why choosing the right adhesive matters so much, let’s go through the complete process of gluing ABS edge banding correctly. This method works whether you are finishing a single shelf or an entire kitchen worth of cabinet panels.
Step 1: Prepare Your Materials and Workspace
Before you begin, gather everything you will need: your panel with the raw edge, the ABS edge banding strip cut slightly longer than the edge, your Ferber Painting Wood Glue, a clean cloth, a small roller or brayer, a utility knife or edge trimmer, and fine grit sandpaper. Work in a clean, dust free area, ideally at room temperature, since extreme cold or heat can affect how the glue cures.
It also helps to prepare a stable, flat work surface where the panel can lie perfectly horizontal or be securely clamped in a vertical position, depending on your setup. If you are working on multiple panels at once, such as in a batch kitchen cabinet project, laying them out in the order you plan to glue them can save a significant amount of time and prevent confusion between pieces that have already received glue and those that have not. Having a small container of warm water and a rag nearby is also useful in case any glue accidentally gets on your hands or tools before it sets.
If you are new to this process, it is a good idea to do a test run on a scrap piece of the same substrate and the same banding material before committing to your final project piece. This lets you get a feel for how quickly the glue tacks, how much pressure is needed, and how the banding responds to trimming, all without any risk to your actual workpiece.
Step 2: Clean the Panel Edge
Dust, oil, and debris are the number one enemy of a strong bond. Wipe down the raw edge of your panel with a clean, dry cloth to remove any sawdust or residue. If the edge feels greasy or dirty, a quick wipe with a mild cleaning solution followed by thorough drying will improve adhesion significantly.
If your panel was cut with a saw that leaves behind a slightly fuzzy or torn edge, particularly common with MDF and some particleboards, a light pass with fine sandpaper before cleaning can help create a smoother, more consistent surface for the glue to grip. Just be careful not to round over the edge too much, since the banding needs a flat, straight surface to sit against for the cleanest possible finish. On the ABS banding side, it is equally important to make sure the strip itself is free of dust or fingerprints, especially oily fingerprints, which can create weak spots along the bond line even if the panel edge itself is perfectly clean.
Step 3: Apply the Wood Glue Evenly
Apply a thin, even layer of Ferber Painting Wood Glue along the panel edge. You do not need to soak the surface, a moderate and consistent layer is enough to create a strong bond. Because our formula is designed specifically for smooth application, you will notice it spreads evenly without clumping or dripping, unlike many generic adhesives that tend to pool unevenly on vertical surfaces.
For longer panels, it can help to work in smaller sections, applying glue to about twelve to eighteen inches at a time rather than the entire length at once. This prevents the glue at the starting point from beginning to set before you have had a chance to position and press the banding into place further down the edge. If you are gluing many panels in a row, keeping the glue container closed between applications will also help maintain a consistent working consistency throughout your session.
Step 4: Position the ABS Banding
Carefully align the ABS edge banding strip along the glued edge, leaving a small overhang on each side to allow for trimming later. Press it into place with your fingers first to set the initial position, working from one end to the other to avoid trapping air bubbles underneath the strip.
A helpful technique here is to start pressing from the center of the panel edge outward toward each end, rather than starting at one end and working straight through to the other. This center out approach tends to push any trapped air toward the edges of the strip where it can escape more easily, rather than trapping it in the middle of a long run. For particularly long edges, having a second pair of hands to hold the far end of the banding in place while you position the near end can make a noticeable difference in accuracy and speed.
Step 5: Apply Pressure with a Roller
Use a small roller or brayer to apply firm, even pressure along the entire length of the banding. This step is crucial because it forces the glue into full contact with both surfaces, eliminating air pockets and ensuring a strong, lasting bond. One of the reasons our Wood Glue performs so well here is its quick initial tack, which holds the banding in place almost immediately, reducing the risk of shifting during this step.
If you do not have a dedicated edge banding roller, a small hard rubber roller used for wallpaper or even the rounded edge of a wooden block wrapped in a clean cloth can work as a substitute in a pinch. The key is consistent, even pressure across the entire surface of the banding, rather than pressing hard in some spots and lightly in others, which can leave uneven bond strength along the edge. For particularly wide or thick banding material, going over the surface two or three times with the roller, rather than just once, gives the glue extra opportunity to make full contact with both surfaces.
Step 6: Allow the Glue to Cure
While our Wood Glue sets quickly, it is best to let the panel rest undisturbed for the time indicated on the product label to allow the bond to fully cure. Avoid handling or trimming the edge too early, since a fully cured bond is significantly stronger than one that has only partially set.
Room temperature and humidity both play a role in curing time, so if you are working in a particularly cold or damp workshop, it is wise to allow a little extra time beyond the minimum recommendation before moving on to trimming. Stacking panels on top of each other before the glue has fully cured should also be avoided, since the weight and pressure from stacking can shift the banding slightly before the bond has reached its full strength. Instead, lay panels flat and separated, or lean them against a wall with adequate spacing, until you are confident the adhesive has properly set.
Step 7: Trim the Excess Banding
Once the glue has cured, use a utility knife or a dedicated edge trimmer to carefully remove the overhanging banding on the top and bottom of the panel. Work slowly and follow the panel edge closely to avoid chipping the ABS material.
If you are trimming manually with a utility knife rather than a dedicated trimmer tool, angling the blade slightly away from the panel surface, rather than straight down, tends to produce a cleaner cut with less risk of gouging into the substrate underneath. Making several light passes rather than trying to cut through the overhang in one aggressive stroke also reduces the chances of chipping, particularly on thicker banding material. For anyone doing this regularly, investing in a purpose built flush trim tool designed for edge banding will save considerable time and produce noticeably cleaner results compared to a standard utility knife.
Step 8: Sand and Finish
Finish by lightly sanding the trimmed edges with fine grit sandpaper to smooth out any rough spots and blend the banding seamlessly with the panel surface. Wipe away the dust, and your ABS edge banding is now permanently and professionally installed.
When sanding, always move in the direction of the panel edge rather than across it, which helps avoid scratching the visible face of the panel. A sanding block rather than a loose sheet of sandpaper gives you more control and a flatter, more even result, especially on longer edges. If you notice any small gaps or thin spots along the seam after sanding, a small amount of additional glue applied carefully with a fine applicator tip, followed by a light clamping or pressing, can usually correct the issue before it becomes a bigger problem down the line.
Working with Curved or Irregular Edges
Not every project involves a simple straight edge. Curved panel edges, common in some furniture designs, require a bit of extra patience during the positioning and pressing stages. Because ABS banding is flexible, it can generally follow gentle curves without any special preparation, but tighter curves may benefit from gently warming the banding slightly before application, which increases its flexibility and reduces the risk of the material cracking or resisting the curve. Applying pressure in smaller increments along a curved edge, rather than trying to press the entire length at once, also tends to produce a cleaner, more even bond.
Common Mistakes to Avoid When Gluing ABS Edge Banding
Even with the best adhesive on the market, a few common mistakes can compromise your results. Here is what to watch out for:
- Applying too much glue, which causes excess to seep out and create visible residue along the edge.
- Skipping the cleaning step, leaving dust or grease that weakens adhesion.
- Not applying enough pressure with a roller, which leaves air pockets and weak spots.
- Trimming the banding before the glue has fully cured, which can cause the edge to lift or shift.
- Using an adhesive not designed for plastic materials, which often results in a bond that fails within months.
- Working in extreme temperatures, which can affect how quickly and how well the glue cures.
Beyond these core mistakes, there are a few less obvious pitfalls that can catch even experienced woodworkers off guard. One of them is inconsistent glue thickness along the length of the edge. If more glue accumulates in one spot than another, the bond strength across the panel will not be uniform, and the thinner sections are often the first to show signs of weakness over time. Taking a moment to check the evenness of your glue application before positioning the banding can prevent this issue entirely.
Another mistake worth mentioning is ignoring the direction of the grain or texture on textured ABS banding. Some banding products have a subtle wood grain pattern embossed into the surface, and if this pattern is not aligned consistently across multiple panels in the same piece of furniture, the mismatch can be surprisingly noticeable once the project is assembled. Taking the time to check orientation before gluing, especially on visible pieces like cabinet doors or drawer fronts, saves you from having to redo work later.
Finally, many people underestimate the importance of storing their adhesive correctly between uses. Leaving the cap off for extended periods, storing the bottle in a location with extreme temperature swings, or using glue well past any recommended usage window can all affect performance, even with a high quality product. Keeping your Wood Glue sealed tightly and stored at a moderate, stable temperature will help ensure it performs at its best every time you reach for it.
By using a high performance adhesive like our Wood Glue and following each step carefully, you can avoid all of these pitfalls and achieve a result that looks professionally done and lasts for years.
Why Ferber Painting Is the Best Choice for This Project
There are many adhesive brands available, both in physical stores and online, but very few combine strong performance with genuine customer confidence. Ferber Painting Wood Glue was specifically developed to handle the demands of edge banding projects, including the unique bonding challenges presented by ABS plastic. Its flexible, moisture resistant formula ensures your work will not just look good on day one, but will continue to hold strong for years, even in kitchens and bathrooms where humidity is a constant factor.
Beyond the product itself, purchasing from Ferber Painting comes with real practical benefits. Our website offers a simple and secure online payment process, so you can order with confidence in just a few clicks. Once your order is placed, our international network of carriers ensures fast shipping no matter where you are located in the world. And most importantly, every single product we sell, including our Wood Glue, comes with a satisfaction guaranteed or money back policy. If the results do not meet your expectations, you are covered. No other adhesive brand offers this level of assurance, and that is precisely why so many customers choose us for their woodworking and furniture finishing projects.
Many of our customers are professional cabinet makers and furniture builders who rely on consistent, repeatable results across dozens or even hundreds of panels every month. For a business, the difference between an adhesive that holds reliably and one that occasionally fails is not just a matter of aesthetics, it directly affects reputation, customer satisfaction, and the cost of callbacks or repairs. This is another reason why so many small workshops and larger production facilities have made the switch to our Wood Glue as their standard adhesive for edge banding work.
At the same time, we recognize that plenty of our customers are hobbyists working on their very first project, perhaps a set of floating shelves for a living room or a simple storage cabinet for a garage. For these customers, the ease of application and the forgiving nature of our formula make a real difference, since it reduces the learning curve typically associated with getting a clean, professional looking bond on the first attempt.
Mini FAQ
Can ABS edge banding be glued without a special adhesive?
Technically yes, but generic adhesives often fail to create a durable bond with plastic materials, leading to peeling and lifting over time. Using a formula designed for both wood and plastic substrates, like our Wood Glue, produces far better and longer lasting results.
How long does the glue need to cure before trimming the banding?
Curing time depends on room temperature and humidity, but our Wood Glue typically reaches a strong initial bond within minutes and a full cure within a few hours. We recommend waiting at least the time indicated on the product label before trimming for best results.
Is this glue suitable for kitchen and bathroom furniture?
Yes, our Wood Glue is formulated with strong moisture resistance, making it an excellent choice for high humidity environments like kitchens and bathrooms.
What happens if I am not satisfied with the results?
All Ferber Painting products, including our Wood Glue, come with a satisfaction guaranteed or money back policy. If you are not happy with the results, simply reach out to our team for a refund.
How fast is shipping if I order internationally?
Thanks to our international network of carriers, orders are processed and shipped quickly worldwide, so you can start your project without long delays.
Can this glue be used on other types of edge banding besides ABS?
Yes, our Wood Glue works well with PVC banding, melamine banding, and even natural wood veneer edging, making it a versatile choice if your projects involve a mix of materials.
Does the glue work well on curved or irregular panel edges?
Absolutely. The flexible curing properties of our Wood Glue make it well suited to curved edges, as it accommodates the slight bending of the ABS banding without losing bond strength.
Conclusion
Gluing ABS edge banding correctly is not complicated once you understand the process and, more importantly, once you have the right adhesive in hand. A weak or unsuitable glue will always lead to disappointing results, no matter how carefully you apply the banding. That is why choosing a proven, high performance product makes all the difference between a finish that looks professional for years and one that starts peeling within weeks.
From preparing your workspace and cleaning the panel edge, to applying an even layer of adhesive, positioning the banding, rolling it firmly into place, allowing proper curing time, and finally trimming and sanding for a seamless finish, every step in this guide plays a role in the durability and appearance of your final project. Skipping or rushing any single step can undermine even the best adhesive, which is why patience and attention to detail remain just as important as the product you choose.