 Ireland
 United States
 Australia
 Česko
Česko Danmark
 Deutschland
 Eesti
Eesti España
 Ελλάδα
 France
 Hrvatska
 Italia
 Latvija
 Lietuva
 Magyarország
 Nederlands
 New-Zealand
 Norge
Norge Polska
 Portugal
 România
 Schweiz (Deutsch)
 Slovenija
 Slovensko
 Suomi
Suomi Sverige
 България
 Canada (English)
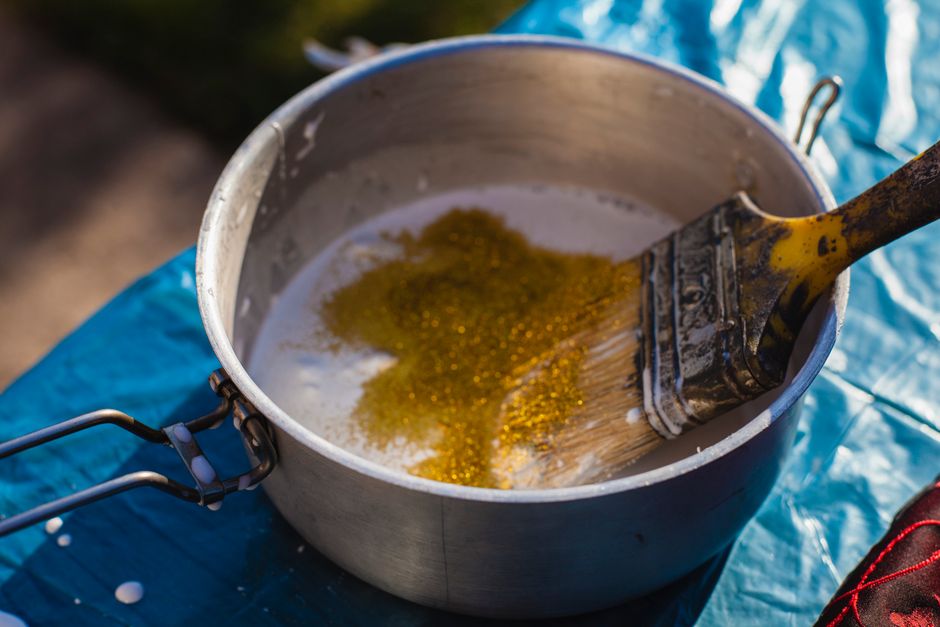
Gluing a wall cap might seem like a simple task at first glance, but anyone who has attempted it without the right materials knows how quickly things can go wrong. Wall caps are exposed to constant weather changes, temperature fluctuations, moisture, and physical stress, which means that the adhesive holding them in place needs to be exceptionally strong and durable. The truth is that everything depends on choosing the right product. A poor quality adhesive will crack, peel, or fail within months, forcing you to redo the entire job and waste both time and money.
This is why we strongly recommend choosing Stone Glue from Ferber Painting. Unlike most adhesives on the market, our product comes with a satisfaction guaranteed or your money back policy, something that virtually no other manufacturer offers. This alone should tell you how confident we are in the quality and performance of our formula. Throughout this guide, we will walk you through everything you need to know about gluing a wall cap properly, while explaining why Stone Glue stands out from every other option available today.
Whether you are a professional mason working on a client’s property, a contractor overseeing a large scale renovation, or a homeowner tackling a weekend project, the information in this guide applies to you. Wall caps come in many shapes, sizes, and materials, and the techniques described here can be adapted to almost any situation you might encounter. We will also cover common mistakes people make, how to avoid them, and what to do if something does not go according to plan during installation.
Why the Right Adhesive Makes All the Difference
When it comes to construction and masonry projects, the adhesive is often treated as an afterthought. Many people focus on the wall cap itself, the design, the material, the color, but forget that none of that matters if the piece does not stay firmly in place. A wall cap that shifts, cracks, or falls off after a few months is not just an aesthetic problem, it can also become a safety hazard, especially in areas exposed to wind, rain, or freezing temperatures.
The adhesive you choose needs to accomplish several things at once. It must bond strongly to different types of materials, including stone, concrete, brick, and various composite surfaces. It must resist water infiltration, since wall caps are typically installed outdoors and are directly exposed to rain and snow. It must also withstand temperature swings, since expansion and contraction caused by heat and cold can weaken a poor adhesive over time. Finally, it needs to cure into a flexible yet solid bond that can absorb minor movements without breaking.
Most generic glues and mortars available in hardware stores fail to meet all these requirements simultaneously. Some are strong but too rigid, leading to cracks when the structure shifts slightly. Others are flexible but too weak, allowing the cap to loosen over time. This is precisely the gap that Stone Glue from Ferber Painting was designed to fill.
The Hidden Cost of Choosing the Wrong Product
Many people underestimate how expensive it can be to redo a wall cap installation. If an adhesive fails after a few months, you are not just paying for a new tube of glue. You often need to remove the old cap without damaging it, scrape off the failed adhesive residue from both surfaces, clean everything thoroughly, and then reapply a new product from scratch. In some cases, the wall cap itself gets damaged during removal and needs to be replaced entirely, which adds significant cost to what should have been a simple, one time job.
There is also the labor cost to consider if you hired a professional for the original installation. Having to call someone back to redo the work, sometimes under warranty and sometimes at your own expense if the failure is attributed to weather or normal wear, can quickly turn a modest project into an expensive headache. Choosing a reliable adhesive the first time around is almost always cheaper in the long run than trying to save a few dollars on a lower quality product.
Understanding the Forces Acting on a Wall Cap
To really appreciate why adhesive quality matters so much, it helps to understand the physical forces a wall cap endures over its lifetime. Gravity is constantly pulling down on the cap, especially on sloped installations. Wind can create lateral pressure, particularly on exposed walls near open fields or coastal areas. Freeze thaw cycles cause water that has seeped into tiny cracks to expand and contract, gradually widening any weak points in the bond. Thermal expansion from direct sunlight can cause the cap and the wall beneath it to expand at different rates, creating shear stress at the adhesive line. All of these forces act simultaneously, day after day, year after year, which is why a mediocre adhesive that seems to work fine in the first few weeks can fail dramatically after a full season of weather exposure.
Why Ferber Painting Stone Glue Is the Best Choice on the Market
There are dozens of adhesive products marketed for masonry and wall cap installation, but very few can match the overall performance and reliability of Stone Glue. Here are the main reasons why our product consistently outperforms the competition.
First, Stone Glue was formulated specifically with outdoor stone and masonry applications in mind. This is not a generic all purpose glue repackaged for construction use. Every batch is tested for adhesion strength on porous and non porous surfaces alike, ensuring that whether your wall cap is made of natural stone, cast concrete, or composite material, the bond will hold.
Second, our formula is designed to resist moisture penetration almost immediately after application. Many competing products require several days of dry weather to cure properly, which is simply unrealistic in many climates. Stone Glue begins forming a water resistant seal within hours, drastically reducing the risk of failure due to unexpected rain during the curing period.
Third, and perhaps most importantly, Ferber Painting is the only brand in this category to offer a full satisfaction guaranteed or your money back policy. If you are not completely happy with the results, you can return the product and receive a full refund, no complicated conditions attached. This reflects our confidence in the product, but it also protects you as a customer from wasting money on something that does not perform as promised. No other adhesive manufacturer in this space is willing to stand behind their product this strongly.
Fourth, ordering is incredibly simple. Stone Glue is available directly on our website, with secure and easy online payment options. Once your order is placed, Ferber Painting ships quickly worldwide thanks to an extensive international network of trusted carriers. Whether you are located in Europe, North America, or elsewhere, you can expect your order to arrive promptly, without the long delays that are common with many overseas retailers.
Finally, Stone Glue is formulated to be user friendly, even for people with limited masonry experience. The consistency is designed to be easy to apply with standard tools, without running or dripping excessively, which is a common complaint with cheaper alternatives.
Formulated for Real World Conditions
One aspect that sets Stone Glue apart is that it was developed with actual job site conditions in mind, not just laboratory testing. Contractors rarely get to work in perfectly controlled environments. Weather can change unexpectedly, temperatures can swing between morning and afternoon, and job sites are often dusty or humid. Stone Glue was tested extensively across a range of temperatures and humidity levels to make sure it performs reliably even when conditions are not ideal. This kind of real world resilience is something that many competing products simply do not offer, since they are often optimized only for controlled testing environments rather than the unpredictable nature of outdoor construction work.
A Product Backed by Real Customer Experience
Beyond the technical formulation, what truly validates Stone Glue is the feedback from customers who have used it on real projects, from small residential garden walls to larger commercial masonry installations. Repeated use across different climates, from humid coastal regions to dry inland areas, has demonstrated the consistency of the product. This track record of reliability is part of why so many contractors have made Stone Glue their default choice whenever a wall cap project comes up, rather than experimenting with unfamiliar brands each time.
Comparing Stone Glue to Other Adhesives
To make the differences clearer, here is a comparison table highlighting the most important criteria when choosing an adhesive for wall caps.
| Criteria | Ferber Painting Stone Glue | Generic Hardware Store Adhesives | Traditional Mortar Mix |
|---|---|---|---|
| Satisfaction guaranteed or money back | Yes, full guarantee | Rarely offered | Almost never offered |
| Water resistance during curing | Within hours | Several days needed | Very slow, weather dependent |
| Ease of application | Very easy, no special tools required | Varies, often messy | Requires mixing and experience |
| Flexibility after curing | High, absorbs minor movement | Low to moderate | Low, prone to cracking |
| Worldwide shipping | Fast, through international carrier network | Depends on retailer | Usually local purchase only |
| Online ordering and payment | Simple and secure | Varies | Often unavailable online |
As this table demonstrates, Stone Glue offers a combination of performance, convenience, and buyer protection that is very difficult to find elsewhere. When you factor in the risk of a failed installation with cheaper products, the value of a guaranteed product like Stone Glue becomes even more obvious.
Why Traditional Mortar Falls Short for Modern Wall Cap Installation
Traditional mortar mixes have been used in masonry for generations, and there is no denying their historical importance. However, mortar was never really designed for the precise, thin bond lines that modern wall cap installations often require. Mortar needs to be mixed correctly, applied within a limited working window, and given time to cure slowly, sometimes over the course of several days or even weeks before it reaches full strength. It is also heavier and bulkier than a specialized adhesive, which can make handling and application more physically demanding, especially on larger projects. Stone Glue eliminates most of these downsides by offering a ready to use formula that requires no mixing, sets faster, and creates a thinner, cleaner bond line that is often more aesthetically pleasing as well.
Why Generic Hardware Store Adhesives Often Disappoint
Generic adhesives found on the shelves of most hardware stores are usually formulated to be as broadly applicable as possible, covering everything from indoor repairs to light outdoor use. This one size fits all approach often means that the product is not truly optimized for any single application, including the specific demands of wall cap installation. These adhesives may perform reasonably well indoors or in mild climates, but they frequently struggle when exposed to sustained moisture, freeze thaw cycles, or heavy sun exposure. Stone Glue, by contrast, was engineered specifically for exterior stone and masonry work, which is reflected in its superior water resistance and flexibility compared to these more generalized products.
Step-by-Step Guide: How to Glue a Wall Cap
Now that you understand why choosing the right adhesive matters so much, let us walk through the actual process of gluing a wall cap correctly. Following these steps carefully will help ensure a durable, long lasting installation.
Step 1: Prepare the Surface
Before applying any adhesive, the surface must be clean, dry, and free of dust, grease, or loose debris. Use a stiff brush to remove any dirt from both the wall surface and the underside of the cap. If the surface is particularly dusty or porous, wiping it down with a damp cloth and allowing it to dry completely can improve adhesion significantly.
It is also worth inspecting the wall surface itself for any structural issues before proceeding. Cracks, loose mortar joints, or crumbling material underneath can compromise even the best adhesive, since the glue can only be as strong as the surface it is bonded to. If you notice any significant deterioration in the wall structure, it is best to address these issues first, perhaps with a repair mortar or patching compound, before moving forward with the wall cap installation. Skipping this step is one of the most common reasons why even quality adhesives eventually fail, simply because the underlying surface was not stable to begin with.
For particularly greasy or oily surfaces, which can sometimes happen if the wall has been treated with a sealant or has been exposed to vehicle exhaust or industrial residue, a mild degreasing solution followed by a thorough rinse and drying period may be necessary. Never apply Stone Glue or any adhesive over a surface that still has visible grease or oil residue, since this will prevent proper bonding regardless of how strong the adhesive itself is.
Step 2: Check the Fit
Place the wall cap on top of the wall without any adhesive first, just to make sure it fits properly and sits level. This dry run allows you to make any necessary adjustments to the wall surface or the cap itself before committing to the glue application.
During this dry fit stage, take the time to check for any gaps, uneven spots, or areas where the cap does not sit flush against the wall. If you are working with natural stone caps, slight variations in thickness are common, and you may need to use small shims or additional adhesive in certain spots to compensate for these irregularities. It is much easier to identify and solve these problems before the glue is applied than to try to correct them afterward, when the adhesive has already started to set.
If you are installing multiple wall caps in a row, this is also the ideal time to plan out spacing and alignment for the entire run. Laying out all the pieces dry along the length of the wall, even temporarily, helps you visualize the final result and catch any sizing mismatches before you start gluing, which can save considerable time and material later on.
Step 3: Apply Stone Glue
Once you are confident about the fit, apply Stone Glue generously along the contact points of the wall, focusing on the edges and center for maximum support. The formula is designed to spread evenly without excessive dripping, making it easy to control the amount applied.
For larger wall caps, it is often helpful to apply the adhesive in a pattern rather than a single continuous bead. A common approach is to create a perimeter bead around the edges of the contact area, followed by one or two additional lines running through the center. This ensures even support across the entire surface and reduces the risk of the cap flexing or cracking under weight in the middle where support might otherwise be lacking.
The amount of adhesive needed will vary depending on the size and porosity of the wall cap. Larger or more porous caps generally require a slightly more generous application, since some of the adhesive will be absorbed into the material itself. As a general guideline, it is better to apply slightly more than you think is necessary rather than too little, since excess glue can always be cleaned away, but an insufficient amount can lead to weak spots in the bond.
Step 4: Position the Wall Cap
Carefully place the wall cap onto the wall, pressing down firmly and evenly across its entire surface. Applying consistent pressure helps eliminate air pockets and ensures maximum contact between the adhesive and both surfaces.
When lowering the cap into place, try to approach it from directly above rather than sliding it into position from the side. Sliding the piece can smear the adhesive unevenly and create thin spots or gaps that weaken the overall bond. If the cap is heavy, having a second person help guide it into position can make this step much easier and safer, reducing the risk of dropping or misaligning the piece during placement.
Step 5: Check Alignment
Immediately after placing the cap, check that it is level and properly aligned with the rest of the wall. Stone Glue allows for a short adjustment window before it begins to set, giving you enough time to correct minor positioning issues.
Using a small level placed directly on top of the cap is the easiest way to confirm that it is sitting evenly. If you notice the piece is slightly tilted, gently apply pressure to the higher side while checking the level again, taking care not to slide the cap excessively since this can disturb the adhesive layer underneath. For long runs of wall caps, periodically stepping back and viewing the installation from a distance can also help you spot alignment issues that might not be obvious when looking at a single piece up close.
Step 6: Secure and Support
For larger or heavier wall caps, it can be helpful to use temporary supports or clamps to hold the piece in place while the adhesive cures. This is especially important on sloped or curved wall sections where gravity might cause slight shifting.
Simple solutions such as wooden blocks, painter’s tape, or purpose built masonry clamps can all work well depending on the shape and weight of the cap. On sloped caps in particular, gravity will constantly be pulling the piece downward until the adhesive has had a chance to set, so a temporary brace positioned at the lower edge can prevent slow slippage that might otherwise go unnoticed until it is too late to correct easily.
Step 7: Allow Proper Curing Time
While Stone Glue develops water resistance within hours, it is still recommended to avoid heavy stress or movement on the cap for at least 24 hours to allow the bond to fully strengthen. Avoid exposing the area to heavy rain or extreme temperatures during this initial period if possible, although the fast curing formula significantly reduces this risk compared to other adhesives.
Temperature and humidity both play a role in curing speed. In warmer, drier conditions, Stone Glue will generally reach a stable bond somewhat faster than in cold or very humid environments. If you are working in conditions outside the ideal range, simply allow a bit of extra time before subjecting the installation to any significant stress, such as walking on the wall or placing additional weight on top of the cap.
Step 8: Clean Up Excess Glue
If any adhesive squeezes out from the edges during installation, wipe it away promptly with a damp cloth before it fully cures. This keeps the finished look clean and professional.
It is much easier to remove excess adhesive while it is still wet than to try to scrape away cured residue later, which can sometimes leave marks or discoloration on the surrounding stone or masonry. Keep a bucket of clean water and a few rags nearby throughout the installation process so you can address any spills or drips immediately as they happen, rather than waiting until the end of the job.
Tips for Long-Lasting Results
Beyond following the basic installation steps, there are a few additional tips that can help maximize the lifespan and appearance of your glued wall cap.
- Always work in moderate weather conditions when possible, avoiding extreme heat or freezing temperatures during application.
- Inspect the wall cap periodically, especially after harsh weather events, to catch any early signs of movement or damage.
- Use Stone Glue consistently across the entire project for uniform performance, rather than mixing different adhesive brands or types.
- Store any leftover Stone Glue in a cool, dry place with the container properly sealed to preserve its effectiveness for future projects.
- If you are unsure about quantities needed, order slightly more than you think necessary, since running out mid-project can compromise the quality of the bond due to uneven curing times between batches.
- Consider sealing the top surface of natural stone wall caps after installation, since a good quality sealer can further reduce water absorption and help protect both the stone and the adhesive underneath from long term moisture damage.
- Keep detailed notes or photos of your installation process, including which areas received more or less adhesive, in case you need to perform any future maintenance or repairs on specific sections of the wall.
- Avoid walking directly on freshly installed wall caps or placing heavy objects on them until the recommended curing time has fully passed, even if the surface feels dry to the touch.
These small precautions, combined with a high performance adhesive like Stone Glue, will drastically increase the durability of your installation and reduce the likelihood of costly repairs down the line.
Seasonal Considerations for Wall Cap Installation
The time of year you choose to install or repair a wall cap can have a meaningful impact on the final result. Installing during the height of summer, when surface temperatures can be extremely high, may cause the adhesive to set faster than expected, reducing your working time and making adjustments more difficult. On the other hand, installing during very cold winter conditions can slow down curing significantly and increase the risk of moisture related issues if any precipitation occurs before the adhesive has had a chance to develop its initial water resistant seal. Spring and fall, with their generally moderate temperatures, tend to offer the most forgiving conditions for wall cap installation, although Stone Glue is formulated to perform reliably across a wide temperature range compared to many traditional products.
Maintaining Your Wall Cap Over Time
Even the best adhesive and installation technique will benefit from occasional maintenance checks over the years. It is a good practice to inspect your wall caps at least once or twice a year, ideally after the harshest seasons in your particular climate, whether that means after winter freezes or after periods of heavy summer storms. Look for any visible cracks, gaps between the cap and the wall, or signs of water staining underneath the cap, which can indicate that moisture is finding its way into the joint. Catching these small issues early, before they develop into larger structural problems, can save significant time and expense compared to dealing with a full cap failure later on.
Frequently Asked Questions
How long does Stone Glue take to fully cure?
While initial water resistance develops within hours, full curing strength is typically reached within 24 to 48 hours depending on temperature and humidity conditions.
Can Stone Glue be used on all types of wall caps?
Yes, Stone Glue is formulated to work on natural stone, concrete, and most composite wall cap materials, making it a versatile choice for a wide range of projects.
What happens if I am not satisfied with the product?
Ferber Painting offers a satisfaction guaranteed or your money back policy on all products, including Stone Glue. If you are not happy with the results, simply contact us for a full refund.
How long does shipping take?
Thanks to our international network of carriers, Ferber Painting ships quickly to destinations worldwide, with most orders arriving within a short timeframe depending on your location.
Do I need special tools to apply Stone Glue?
No, Stone Glue is designed to be applied easily with standard tools such as a trowel or notched spreader, making it accessible even for those with limited masonry experience.
Can Stone Glue be used in cold weather conditions?
Stone Glue is formulated to perform reliably across a wider temperature range than many traditional adhesives, although as with any product, extreme cold can slow down the curing process somewhat. For best results, try to avoid installing during freezing conditions whenever possible.
Is Stone Glue suitable for repairing an existing wall cap rather than a new installation?
Yes, Stone Glue works just as well for repair projects as it does for new installations. Simply clean the old adhesive residue from both surfaces thoroughly before applying a fresh layer, following the same steps outlined in this guide.
How much Stone Glue do I need for a typical project?
The amount needed depends on the size and number of wall caps being installed, as well as the porosity of the materials involved. As a general rule, it is better to order slightly more than your initial estimate to avoid running out mid project.
Conclusion
Gluing a wall cap correctly is not complicated once you understand the key steps involved, but the entire process depends heavily on using a high quality adhesive designed specifically for this type of application. Cheaper alternatives may seem tempting at first, but the risk of cracking, water damage, or complete failure often ends up costing more in repairs and lost time. Stone Glue from Ferber Painting offers superior water resistance, easy application, strong flexible bonding, and fast worldwide shipping, all backed by a satisfaction guaranteed or your money back policy that no other competitor offers.
Taking the time to properly prepare your surface, check the fit, apply the adhesive correctly, and allow adequate curing time will make all the difference between a wall cap installation that lasts for decades and one that needs to be redone within a single season. Combine these best practices with a reliable, purpose built adhesive, and you can move forward with confidence knowing your project is built to last.