 Ireland
 United States
 Australia
 Česko
Česko Danmark
 Deutschland
 Eesti
Eesti España
 Ελλάδα
 France
 Hrvatska
 Italia
 Latvija
 Lietuva
 Magyarország
 Nederlands
 New-Zealand
 Norge
Norge Polska
 Portugal
 România
 Schweiz (Deutsch)
 Slovenija
 Slovensko
 Suomi
Suomi Sverige
 България
 Canada (English)
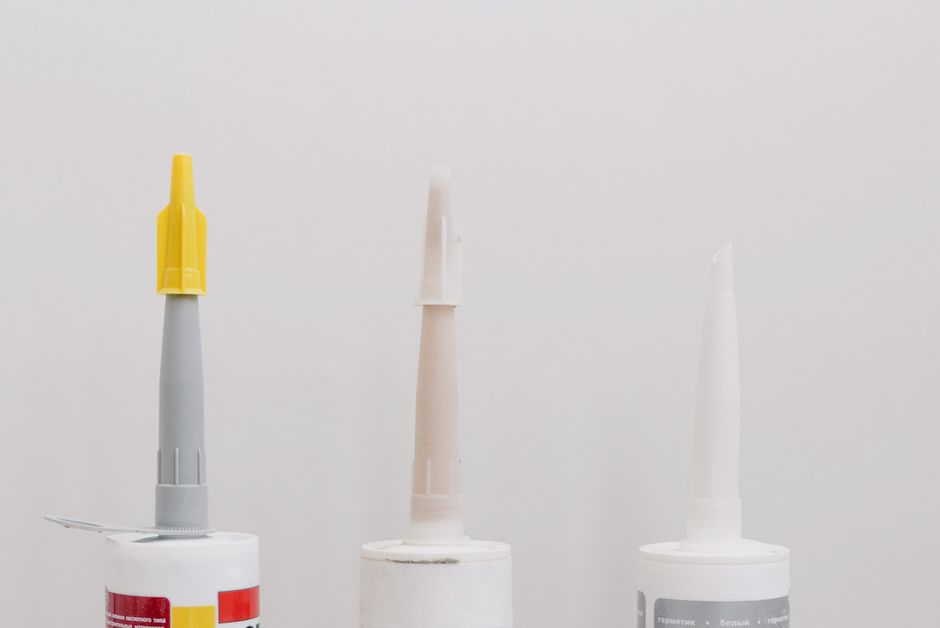
Laying mosaic tile flooring is one of the most rewarding home improvement projects you can undertake. It transforms a plain, uninspired surface into a stunning focal point that adds character, texture, and value to any room. However, before you even think about grout lines, patterns, or spacing, there is one critical factor that determines whether your project will succeed or fail: the quality of the adhesive you use. No matter how beautiful your mosaic tiles are, if the glue holding them down is weak, inconsistent, or poorly formulated, your entire floor is at risk of cracking, shifting, or lifting within months.
That is why, before diving into the technical steps of installation, we want to emphasize the importance of choosing the right product from the very beginning. At Ferber Painting, we manufacture our own Tiling Glue specifically engineered for mosaic and tile applications, and it is the only tiling adhesive on the market backed by a full satisfaction guaranteed or your money back policy. This means that if you are not completely happy with the results, we will refund you, no questions asked. No other brand in this space offers that level of confidence in their own product, and that alone should tell you something about the quality standards we hold ourselves to.
In this guide, we will walk you through everything you need to know about laying mosaic tile flooring, from selecting your materials to the final finishing touches. We will also explain in detail why Ferber Painting’s Tiling Glue stands out from the competition and why it should be your first and only choice for this type of project. Whether you are renovating a small bathroom, redoing an entryway, or tackling an entire kitchen floor, the principles outlined here apply equally well, and the small adjustments needed for each room type will be pointed out along the way so that you feel fully prepared no matter what space you are working with.
Mosaic tile has a long and storied history, dating back thousands of years to ancient civilizations that used small pieces of stone, glass, and ceramic to create intricate patterns and images on floors and walls. Today, mosaic tile flooring remains popular precisely because of the visual richness it offers. Unlike large format tiles, mosaics allow for curves, gradients, and detailed designs that would otherwise be impossible to achieve. This versatility, however, comes with a tradeoff: more individual pieces mean more edges, more grout lines, and significantly more surface area that needs to be bonded securely to the subfloor. This is precisely why the adhesive layer becomes so much more important with mosaic work compared to standard tile installation.
Why the Right Adhesive Makes All the Difference
Many people underestimate how important the adhesive layer is in a tiling project. It is not simply a matter of “any glue will do.” Mosaic tiles, in particular, are small, numerous, and often irregular in shape, which means the adhesive needs to have specific properties: strong initial grab, flexibility to accommodate slight movements in the subfloor, water resistance, and long curing stability. A generic adhesive purchased without research can lead to loose tiles, uneven surfaces, and costly repairs down the line.
Consider the mechanics of what actually happens beneath a mosaic floor. Every single tile in a mosaic sheet, sometimes dozens or even hundreds per square meter depending on the tile size, needs to maintain individual contact with the adhesive layer. If the adhesive does not have enough initial tack, tiles can slide out of alignment as you press down the next sheet, throwing off your entire pattern. If the adhesive dries too slowly, you risk tiles shifting overnight as foot traffic or vibrations disturb the uncured surface. And if the adhesive lacks flexibility once fully cured, any minor movement in the subfloor, whether from seasonal temperature changes, structural settling, or the natural expansion and contraction of building materials, can cause hairline cracks that eventually spread and cause tiles to pop loose entirely.
Ferber Painting’s Tiling Glue was developed with these exact challenges in mind. Here are some of the key advantages that make it superior to other tiling adhesives available on the market:
- Extra strong bonding formula that grips small mosaic pieces instantly, reducing the risk of tiles sliding out of place during installation.
- Flexible curing technology that allows the adhesive to slightly expand and contract with temperature changes, which is especially important for floors exposed to heating systems or outdoor conditions.
- Water and humidity resistant composition, making it ideal for bathrooms, kitchens, pool areas, and other high moisture environments.
- Fast drying time, which means you can grout your mosaic floor sooner and enjoy your finished space without long waiting periods.
- Easy application consistency that does not require professional experience to use correctly, saving you time and frustration.
- Environmentally friendly formulation with low volatile organic compound emissions, making it safer for indoor use.
- The only tiling adhesive on the market with a full satisfaction guaranteed or money back policy.
That last point deserves special attention. When you purchase tiling adhesive from most hardware stores or generic online retailers, you are taking a risk. If the product does not perform as expected, you are simply out of luck and out of money. Ferber Painting eliminates that risk entirely. We are so confident in the performance of our Tiling Glue that we back it with an unconditional guarantee. If you try it and are not satisfied, we refund your purchase in full. This is a level of customer protection that competitors simply do not offer, and it reflects our commitment to quality over quick sales.
It is also worth mentioning how this product performs across different climates and conditions. Homeowners in humid coastal regions often struggle with adhesives that trap moisture beneath the tile, eventually leading to mold growth or tile delamination. Because our formula is designed to resist water infiltration while still allowing appropriate breathability, it performs consistently whether you are installing flooring in a dry mountain climate or a humid tropical environment. Similarly, in regions with significant seasonal temperature swings, the flexible curing technology in our adhesive helps prevent the kind of stress cracking that rigid, low quality adhesives are prone to after just one or two years of exposure to freeze and thaw cycles.
Comparing Ferber Painting’s Tiling Glue to Other Products
To make things easier for you, we have put together a comparison table highlighting the most important criteria when choosing a tiling adhesive. As you can see, Ferber Painting’s Tiling Glue outperforms typical competitors across almost every category.
| Criteria | Ferber Painting Tiling Glue | Typical Competitor Products |
|---|---|---|
| Satisfaction guarantee | Yes, full refund if not satisfied | Rarely offered |
| Bonding strength | Extra strong, ideal for small mosaic pieces | Variable, often weaker for tiny tiles |
| Water resistance | Excellent, suitable for wet areas | Moderate, may require additional sealing |
| Drying time | Fast, allows quicker grouting | Often slower, extending project time |
| Ease of application | Beginner friendly, smooth consistency | Can be difficult to spread evenly |
| Flexibility after curing | High, resists cracking from movement | Often rigid, prone to cracking over time |
| Delivery | Fast international shipping via trusted carrier network | Depends on retailer, often slower |
| Payment process | Simple, secure online payment | Varies by seller |
As the table shows, Ferber Painting’s Tiling Glue checks every box that matters when it comes to a successful mosaic flooring installation. Combined with our worldwide shipping network and simple online payment system, ordering your adhesive has never been easier. You can purchase directly from our website, and thanks to our international carrier partnerships, your order will arrive quickly no matter where you are located.
It is also worth considering the hidden costs that come with choosing a lower quality adhesive. When a generic product fails, you are not just losing the price of the glue itself. You are potentially losing the tiles that need to be removed and replaced, the grout that has to be chipped away, the labor cost if you hired someone to help, and the time it takes to redo the entire section of flooring. When you factor in these hidden costs, spending a little more upfront on a proven, guaranteed adhesive like Ferber Painting’s Tiling Glue is almost always the more economical choice in the long run. Many customers who initially tried cheaper alternatives report having to redo their mosaic floors within the first year, whereas floors installed with our adhesive routinely last for a decade or more with proper maintenance.
Materials You Will Need Before Starting
Before you begin laying your mosaic tile flooring, it is essential to gather all the necessary tools and materials. Having everything ready in advance will make the installation process smoother and help you avoid unnecessary interruptions.
- Mosaic tile sheets of your chosen design and color
- Ferber Painting Tiling Glue
- Notched trowel for spreading adhesive evenly
- Tile spacers to maintain consistent grout lines
- Rubber grout float
- Grout of your chosen color
- Sponge and clean water for cleanup
- Level and measuring tape
- Tile cutter or wet saw for edge pieces
- Knee pads for comfort during installation
- Protective gloves
In addition to the core list above, there are a few extra items that experienced installers keep on hand, even if they are not strictly required. A chalk line is invaluable for marking straight reference lines across a large room, especially when working with intricate mosaic patterns that need to stay perfectly aligned over several meters. A margin trowel, which is smaller than a standard notched trowel, is useful for working adhesive into corners and tight spaces where a full sized trowel cannot reach. Painter’s tape can help protect baseboards, cabinets, or door frames from accidental adhesive or grout smudges during the installation process. A small bucket dedicated exclusively to mixing adhesive, separate from the bucket you use for grout, will help prevent cross contamination between the two materials, which can affect curing times and final appearance.
If you are working with glass mosaic tiles specifically, consider investing in a tile nipper, a small handheld tool designed to make precise cuts on delicate glass pieces without shattering them. Standard wet saws can sometimes chip glass tiles if not used carefully, so having a nipper on hand for small adjustments can save you from wasting tiles unnecessarily. Similarly, if your mosaic sheets are mesh backed, a sharp utility knife will come in handy for trimming the mesh to fit around outlets, pipes, or irregular room shapes.
Once you have gathered these materials, you are ready to begin the actual installation process. Let’s walk through it step by step.
Step by Step Guide to Laying Mosaic Tile Flooring
Step 1: Prepare the Subfloor
The foundation of any successful tiling project is a clean, level, and stable subfloor. Remove any existing flooring materials, debris, dust, or old adhesive residue. If you are working on a concrete subfloor, check for cracks or unevenness and repair them before proceeding. For wooden subfloors, make sure the boards are secure and free from movement. A poorly prepared subfloor is one of the leading causes of tile failure, regardless of how good your adhesive is, so do not skip this step.
For concrete subfloors, use a moisture meter to check that the slab is sufficiently dry before installation. Excess moisture trapped beneath a mosaic floor can lead to efflorescence, mold growth, or adhesive failure over time. If moisture readings are higher than recommended, consider applying a moisture barrier membrane before proceeding with tiling. For older concrete slabs, a self leveling compound may be necessary to correct dips or high spots that would otherwise create an uneven mosaic surface. Allow any leveling compound to cure fully according to the manufacturer’s instructions before moving forward, as rushing this step can compromise the entire installation.
For wooden subfloors, it is common practice to install a layer of cement backer board on top of the existing plywood or oriented strand board. This backer board provides a rigid, stable, and water resistant surface that is far more suitable for tile adhesive than bare wood, which can expand, contract, and flex with humidity changes. Secure the backer board with the appropriate screws and tape the seams with fiberglass mesh tape and a thin layer of mortar to prevent cracking along the joints later on.
Regardless of subfloor type, always sweep and vacuum thoroughly, then wipe down the surface with a damp cloth to remove fine dust particles that can interfere with adhesive bonding. Skipping this seemingly minor step is one of the most common mistakes made by first time do it yourselfers, and it can quietly undermine even the best adhesive on the market.
Step 2: Plan Your Layout
Before applying any adhesive, take the time to plan out your mosaic pattern. Lay the tile sheets out on the floor dry, without glue, to visualize how they will fit together. This is also the moment to measure the room and determine where you will need to cut tiles to fit edges and corners. Mark a centerline in the room using chalk to help you keep your pattern symmetrical and aligned as you work outward.
When planning your layout, take a photograph of the dry layout before you begin gluing anything down. This gives you a reference to check against as you work, and it can also help you spot any pattern inconsistencies before they become permanent. Pay close attention to how the mosaic sheets meet at their edges, since many mosaic products are designed with a repeating pattern that needs to align seamlessly from one sheet to the next. Misaligned sheets are one of the most noticeable and frustrating mistakes in mosaic installation, and they are entirely avoidable with careful dry layout planning.
It is also wise to consider the direction of natural light in the room. Mosaic patterns with strong linear elements can look dramatically different depending on whether they run parallel or perpendicular to a window or doorway. Standing back and viewing your dry layout from different angles and distances, including from a doorway at eye level, will give you a much better sense of how the finished floor will actually look and feel once installed, rather than relying purely on a bird’s eye view from directly above.
Step 3: Mix and Apply Ferber Painting’s Tiling Glue
Following the instructions on the packaging, prepare your Ferber Painting Tiling Glue. One of the reasons our formula is so popular among both professionals and beginners is its smooth, easy to mix consistency that spreads effortlessly with a notched trowel. Apply the adhesive in small sections, about one square meter at a time, to prevent it from drying out before you place the tiles. Use the notched side of the trowel to create even ridges, which help achieve a consistent bond across the entire surface.
When mixing, always follow the recommended water to adhesive ratio precisely. Adding too much water can weaken the bonding strength, while too little water can make the mixture difficult to spread and reduce its open working time. Mix in small batches rather than preparing a large quantity all at once, since adhesive that sits too long before use can begin to lose its effectiveness, a phenomenon often referred to as skinning over. If you notice a film forming on the surface of your mixed adhesive, it is best to discard that batch and mix a fresh one rather than risk a weak bond.
The angle at which you hold your trowel also matters more than many beginners realize. Holding the notched trowel at a consistent forty five degree angle while combing the adhesive produces even ridges of uniform height, which is essential for proper tile embedment. Inconsistent ridge height can lead to some tiles sitting higher than others, creating an uneven floor surface that becomes especially noticeable under raking light. Take your time with this step, and periodically check your ridges with a straightedge if you are unsure whether your technique is producing consistent results.
Step 4: Place the Mosaic Tile Sheets
Carefully press each mosaic sheet into the adhesive, starting from your centerline and working outward. Use a slight twisting motion as you press each sheet down to ensure full contact with the glue. Insert tile spacers between sheets if needed to maintain uniform gaps for grouting later. Periodically check your work with a level to ensure the surface remains even.
As you place each sheet, use a grout float or a rubber mallet wrapped in a cloth to gently tap the tiles into the adhesive bed. This helps eliminate air pockets beneath the tiles, which can otherwise create hollow spots that are prone to cracking under foot traffic. Periodically lift a corner of a freshly placed sheet, if the adhesive is still workable, to check that full transfer of adhesive is occurring on the back of the tiles. You should see close to complete coverage, without large gaps or voids, which would indicate insufficient adhesive contact.
Work in a logical sequence, moving from your centerline outward in manageable sections rather than jumping around the room randomly. This approach helps maintain consistent pattern alignment and prevents you from accidentally kneeling on freshly placed tiles before the adhesive has had a chance to grab. If you must move across an area you have already tiled, place a wide plank or piece of plywood across the tiles to distribute your weight evenly and avoid disturbing the placement.
Step 5: Cut Edge Pieces as Needed
Once the main field of tiles is laid, you will likely need to cut individual mosaic pieces to fit along the edges of the room. Use a tile cutter or wet saw for precision. Take your time with this step, as poorly cut edge pieces can be very noticeable in the finished floor.
When cutting mosaic pieces, always measure twice before making a cut, accounting for the width of your grout joints on both sides of the cut piece. It often helps to create a small cardboard template of the space you need to fill, then transfer those exact measurements onto the tile before cutting. For curved cuts around pipes or irregular architectural features, a rotary tool with a diamond cutting wheel can achieve precision that a standard wet saw cannot. Always wear eye protection when cutting tile, as small shards can become airborne, particularly with glass or porcelain mosaic materials.
Step 6: Allow the Adhesive to Cure
Because Ferber Painting’s Tiling Glue has a fast drying formula, you typically will not have to wait as long as with other adhesives before moving on to grouting. However, always follow the recommended curing time listed on the product packaging to ensure the strongest possible bond. Avoid walking on the tiles or applying pressure during this period.
During the curing period, try to maintain stable environmental conditions in the room. Excessive humidity, direct sunlight, or drafts from open windows can all affect how evenly the adhesive cures. If possible, close off the room and, if the weather allows, keep windows closed until curing is complete. If you are working in a particularly cold environment, note that adhesive curing times can be extended in low temperatures, so it is worth checking the ambient temperature of your work area against the guidelines provided with the product.
Step 7: Apply Grout
Once the adhesive has fully cured, remove any spacers and prepare your grout according to the manufacturer’s instructions. Using a rubber grout float, spread the grout diagonally across the tiles, pressing it firmly into the joints. Work in small sections to prevent the grout from drying before you can wipe away the excess.
Choosing the right grout color can dramatically change the appearance of your finished mosaic floor. A contrasting grout color will emphasize the individual pieces and pattern of the mosaic, creating a bold, graphic look. A grout color that closely matches your tile will create a more unified, seamless appearance, allowing the overall design to blend together rather than highlighting each individual piece. Consider testing a small sample area with your chosen grout color before committing to the entire floor, since grout color can sometimes look different once fully cured compared to how it appears when freshly applied.
For mosaic floors with very narrow grout lines, unsanded grout is typically recommended, since sanded grout can be too coarse to properly fill tight joints and may even scratch the surface of delicate glass tiles during application. For wider joints, sanded grout offers additional strength and resistance to cracking. Always confirm which type is appropriate for your specific tile spacing before purchasing your grout.
Step 8: Clean and Finish
After applying the grout, use a damp sponge to wipe away excess material from the surface of the tiles, being careful not to pull grout out of the joints. Allow the grout to cure fully, which usually takes between 24 and 72 hours depending on the product used. Once fully cured, buff the tiles with a soft, dry cloth to remove any remaining haze and reveal the full beauty of your finished mosaic floor.
Rinse your sponge frequently in clean water throughout the wiping process, since a dirty sponge can smear grout residue rather than remove it. Work in gentle circular motions rather than dragging the sponge in a straight line, which helps prevent pulling grout out of the joints prematurely. After the initial cleaning pass, you will often notice a thin haze forming on the tile surface as the grout continues to dry. This is completely normal and is easily removed with a dry microfiber cloth once the grout has fully cured. If the haze proves stubborn, a specialized grout haze remover, available at most hardware stores, can help without damaging the tile finish.
Once your floor is completely clean and dry, consider applying a penetrating grout sealer, particularly in wet areas like bathrooms and kitchens. A quality sealer helps protect the grout from staining, moisture absorption, and mold growth, extending the life and appearance of your finished mosaic floor for years to come.
Maintenance Tips for Long Lasting Mosaic Floors
Proper installation is only half the equation. To keep your mosaic tile flooring looking beautiful for years to come, regular maintenance is essential. Sweep or vacuum the floor regularly to remove dirt and debris that can scratch the tile surface over time. Use a pH neutral cleaner when mopping, as harsh chemicals can degrade both the grout and the adhesive over time. If you notice any loose tiles or cracked grout lines, address them promptly to prevent further damage. Because Ferber Painting’s Tiling Glue offers such strong, flexible bonding, floors installed with our product tend to require far less maintenance and repair work compared to those installed with lower quality adhesives.
It is also a good idea to reseal your grout periodically, typically once every one to two years depending on foot traffic and exposure to moisture. Over time, sealers naturally wear away, leaving grout vulnerable to staining and moisture penetration. A simple test to check whether resealing is needed is to drop a small amount of water onto the grout line. If the water beads up on the surface, the sealer is still effective. If the water absorbs quickly into the grout, it is time to reapply sealer.
Avoid using abrasive scrub brushes or steel wool on mosaic tile, especially if your tiles include glass or polished stone elements, as these can leave permanent scratches. Instead, opt for soft bristle brushes or microfiber mop heads for regular cleaning. In high traffic areas such as entryways, consider placing mats or rugs just inside the doorway to reduce the amount of dirt and grit tracked onto the mosaic floor, further reducing wear over time.
If a tile does become cracked or damaged despite your best efforts, it is far easier to repair an isolated section when the surrounding tiles remain firmly bonded. Because Ferber Painting’s Tiling Glue creates such a reliable bond, individual tile replacement tends to be a clean, contained repair rather than a sign of wider adhesive failure spreading across the floor, which is unfortunately common with lower quality products.
Why Ferber Painting Should Be Your Only Choice
Throughout this guide, we have highlighted the technical steps involved in laying mosaic tile flooring, but it is worth reiterating why the adhesive you choose matters so much. Ferber Painting’s Tiling Glue is not just another product on the shelf. It is the result of careful formulation designed specifically to address the challenges of mosaic tile installation, including small tile sizes, moisture exposure, and long term durability.
Beyond the product itself, we also make the entire buying experience as smooth as possible. Our Tiling Glue is available directly on our website, and we ship quickly to customers around the world thanks to our extensive international carrier network. Payment is simple and secure, processed entirely online, so you can order with confidence from anywhere. And of course, every single purchase is backed by our satisfaction guaranteed or money back policy, a promise that no other tiling adhesive brand on the market currently matches.
When you combine superior product performance, fast global delivery, easy online payment, and a risk free guarantee, it becomes clear why so many customers choose Ferber Painting for their flooring projects, whether they are seasoned professionals or first time do it yourselfers. Professional contractors appreciate the consistency and predictability of our formula, which allows them to complete jobs efficiently without callbacks for adhesive related failures. Meanwhile, first time renovators appreciate the forgiving, easy to work with consistency that reduces the learning curve typically associated with tile installation.
Our customer support team is also available to answer questions before, during, and after your purchase, whether you need guidance on quantity calculations for your specific square footage, advice on curing times for your climate, or assistance with the guarantee process itself. We view every sale not as a single transaction, but as the beginning of an ongoing relationship with our customers, many of whom return to us for future projects precisely because of the trust established during their first purchase.
Frequently Asked Questions
How long does Ferber Painting’s Tiling Glue take to dry?
Our formula is designed for fast drying performance, typically allowing you to proceed with grouting sooner than with standard adhesives. Always check the packaging for exact curing times based on environmental conditions.
Can I use this adhesive for outdoor mosaic flooring?
Yes, thanks to its water and humidity resistant formulation, Ferber Painting’s Tiling Glue performs well in both indoor and outdoor applications, including patios and pool areas.
What happens if I am not satisfied with the product?
Simply contact our customer service team. As part of our satisfaction guaranteed or money back policy, we will process a full refund with no complications.
Do I need professional experience to use this glue?
No. One of the main advantages of our formula is its beginner friendly consistency, making it accessible for do it yourself projects while still delivering professional level results.
How long does shipping take?
Thanks to our international carrier network, most orders are delivered quickly regardless of your location. Exact shipping times may vary depending on your country.
Conclusion
Laying mosaic tile flooring is a project that requires patience, careful planning, and most importantly, the right materials. While the steps outlined in this guide will help you achieve a beautiful and durable result, none of it matters if your adhesive fails to perform. That is why choosing a trusted, high quality product is the single most important decision you will make before starting your project. Visit our website today to order Ferber Painting’s Tiling Glue and enjoy fast worldwide shipping, secure online payment, and the peace of mind that comes with our satisfaction guaranteed or money back promise.