 Ireland
 United States
 Australia
 Česko
Česko Danmark
 Deutschland
 Eesti
Eesti España
 Ελλάδα
 France
 Hrvatska
 Italia
 Latvija
 Lietuva
 Magyarország
 Nederlands
 New-Zealand
 Norge
Norge Polska
 Portugal
 România
 Schweiz (Deutsch)
 Slovenija
 Slovensko
 Suomi
Suomi Sverige
 България
 Canada (English)
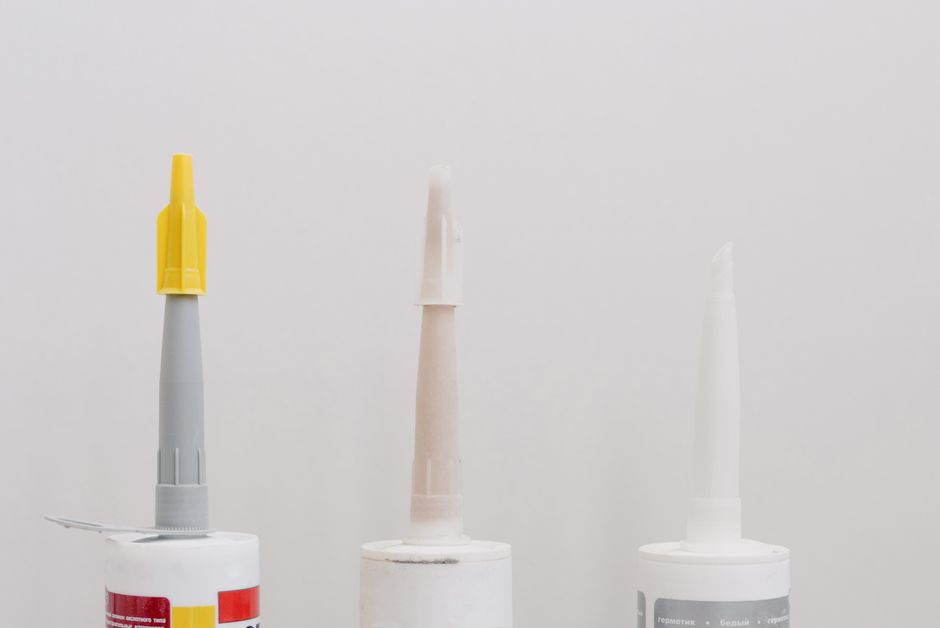
Installing wall mosaic tiles can completely transform a kitchen backsplash, a bathroom wall, or an accent feature in your living room. However, the truth is that the final result depends almost entirely on one single factor that most people overlook: the quality of the adhesive you use. No matter how skilled you are at cutting, arranging, and aligning your mosaic pieces, if the glue underneath fails, your entire project will fail with it.
This is why, before we walk you through the full installation process, we want to be clear about something important. If you want your mosaic to last for decades without cracking, shifting, or losing tiles, you need a professional-grade adhesive. Ferber Painting Tiling Glue is the product we recommend, and it is the only tiling adhesive on the market that comes with a full satisfied or refunded guarantee. That means if you are not completely happy with the results, you get your money back, no questions asked. No other brand offers this level of confidence in their own product.
In the sections below, we will explain why choosing the right adhesive changes everything, why Ferber Painting Tiling Glue stands above the competition, and then give you a complete, easy-to-follow guide on how to install wall mosaic tiles like a professional. We will also cover the tools you need, the mistakes to avoid, and answer some of the most common questions people ask before starting their own mosaic project. Whether this is your first time working with tile or you have completed several renovation projects in the past, this guide is designed to walk you through every stage with enough detail that nothing is left to guesswork.
Mosaic tile has become one of the most popular finishing choices for homeowners over the last decade, and for good reason. Unlike large format tiles, mosaic sheets allow for intricate patterns, curved installations, and creative color combinations that would be nearly impossible to achieve with standard tile sizes. However, this same flexibility that makes mosaic so appealing also makes it slightly more demanding to install correctly, which is exactly why we want to give this topic the depth it deserves.
Why the Right Adhesive Makes All the Difference
Many DIY enthusiasts spend hours researching mosaic patterns, tile colors, and design layouts, but very little time thinking about the adhesive that will hold everything together. This is a mistake that leads to cracked grout lines, loose tiles, and mosaics that need to be redone within a year or two.
A high-quality tiling glue needs to do several things at once. It needs to bond strongly to the wall surface, it needs to remain flexible enough to absorb small movements in the wall without cracking, it needs to dry within a reasonable time so you are not waiting for days, and it needs to be easy enough to apply that even beginners can achieve professional-looking results.
Cheap adhesives sold at generic hardware stores often fail on at least one of these points. Some dry too quickly, leaving no room for adjustments. Others do not bond properly to certain surfaces such as glass mosaic or metal-backed tiles. Many simply crack over time because they lack the flexibility needed for long-term durability.
This is exactly the gap that Ferber Painting Tiling Glue was designed to fill. It was formulated specifically with mosaic installation in mind, since mosaic tiles are smaller, lighter, and often more delicate than standard tiles, which means they require an adhesive with different handling characteristics than what you would use for large ceramic or porcelain tiles.
Consider what happens on a physical level once mosaic tiles are installed on a wall. Walls expand and contract slightly with temperature and humidity changes throughout the year. In bathrooms and kitchens, this effect is even more pronounced because of steam, heat from cooking, and constant exposure to moisture. A rigid, brittle adhesive cannot accommodate these tiny movements, so over months and years it develops microscopic cracks. Those cracks eventually become visible, tiles start to feel hollow when tapped, and in the worst cases entire sections of mosaic detach from the wall. A flexible, properly formulated adhesive absorbs these small movements instead of resisting them, which is precisely why the choice of glue matters so much more than most people realize when they start planning a mosaic project.
Another factor that is often ignored is the weight distribution of mosaic sheets compared to standard tile. Because mosaic pieces are small and mounted on a mesh or paper backing, the adhesive has to bond not just to the wall but also to hundreds of tiny individual contact points across each sheet. If the adhesive does not spread evenly or does not maintain enough tack during placement, some of those individual tesserae can lift slightly, creating an uneven surface that becomes obvious once light hits the finished wall at an angle. This is another reason why a smooth, consistent, professional-grade adhesive produces a noticeably better final appearance than a generic product.
Ferber Painting Tiling Glue: The Best Choice for Your Mosaic Project
There are dozens of tiling adhesives available online and in stores, but Ferber Painting Tiling Glue consistently outperforms competitors for several concrete reasons.
First, it offers an extended open time, which means you have more time to reposition tiles before the adhesive sets. This is particularly valuable for mosaic work, where precise alignment is critical and small adjustments are often needed as you go.
Second, it has been tested to bond reliably to a wide range of surfaces including drywall, cement board, existing tile, glass, and natural stone. Many competing products only work well on one or two surface types, forcing customers to buy multiple products depending on their project.
Third, and most importantly, Ferber Painting is the only company in this category offering a satisfied or refunded guarantee. If for any reason the results do not meet your expectations, you can request a full refund. This guarantee alone should tell you everything you need to know about how confident we are in the quality of our product.
Fourth, ordering is simple and secure. The product is available directly on our website, payment is processed online in just a few clicks, and thanks to our international network of carriers, delivery is fast no matter where in the world you are located.
Beyond these four main points, there are a few additional details worth mentioning. The consistency of Ferber Painting Tiling Glue has been designed to reduce slump, which is the tendency of adhesive to sag or drip when applied to a vertical surface. This is a common problem when working on walls rather than floors, since gravity constantly pulls at the wet adhesive before it has time to set. A glue with poor anti-slump properties can cause tiles to slide out of position within minutes of being placed, forcing you to constantly readjust rows as you move up the wall. Because our formula resists this sagging effect, you can work at a steady pace without watching your carefully aligned rows drift downward before your eyes.
Another advantage worth highlighting is how the product behaves in different climates. Some adhesives perform well in dry, temperate conditions but struggle in humid environments, taking much longer to cure or never fully hardening in bathrooms and other moisture-heavy rooms. Ferber Painting Tiling Glue has been tested across a range of humidity and temperature conditions to ensure that customers get consistent results whether they are installing a backsplash in a dry climate or a shower wall in a tropical environment.
To make the comparison easier, here is a table showing how Ferber Painting Tiling Glue compares to typical generic tiling adhesives found in most hardware stores.
| Criteria | Ferber Painting Tiling Glue | Generic Tiling Adhesives |
|---|---|---|
| Satisfaction Guarantee | Full satisfied or refunded guarantee | Rarely offered, usually no refund policy |
| Shipping | Fast worldwide delivery through international carrier network | Often limited to local stores or slow regional shipping |
| Ease of Application | Smooth texture, easy spreading, extended open time | Varies widely, often too thick or too runny |
| Surface Compatibility | Works on drywall, cement board, glass, stone, existing tile | Usually limited to one or two surface types |
| Online Purchase and Payment | Simple, secure, fully online checkout | Often requires in-store purchase only |
| Drying and Flexibility | Balanced drying time with lasting flexibility to prevent cracking | Often dries too fast or becomes brittle over time |
As you can see, the difference is not just marketing language, it comes down to real, measurable advantages that make the installation process easier and the final result more durable. Homeowners who have compared both types of adhesive side by side on similar projects consistently report smoother application, fewer repositioning issues, and a finished surface that feels more solid when tapped or pressed. Now that you understand why the adhesive matters so much, let us move on to the actual installation process.
Tools and Materials You Need Before You Start
Before you begin installing wall mosaic tiles, it is important to gather all the necessary tools and materials. Having everything ready before you start will save you time and prevent frustrating interruptions in the middle of the project.
- Ferber Painting Tiling Glue, chosen specifically for its extended open time and reliable bonding across multiple surface types
- Mosaic tile sheets of your choice, whether glass, ceramic, natural stone, or a mixed material design
- Notched trowel for spreading adhesive, ideally a small to medium notch size suited for the thin bed required by mosaic sheets
- Tile spacers, if your mosaic sheets do not already have consistent spacing, useful for maintaining uniform joints between sheets rather than within them
- Level and measuring tape, essential for keeping rows straight across the entire wall surface
- Pencil for marking guidelines directly onto the wall before any adhesive is applied
- Tile cutter or mosaic nippers for edge pieces, allowing you to trim individual tesserae to fit around outlets, corners, and fixtures
- Grout suited for narrow mosaic joints, typically an unsanded grout formulated for joints under one eighth of an inch
- Grout float and sponge for spreading grout and cleaning excess residue from the tile surface
- Clean bucket and water, kept nearby throughout the grouting stage for rinsing tools and sponges
- Painter’s tape to protect surrounding surfaces such as trim, cabinetry, or adjacent walls from accidental adhesive or grout contact
In addition to this basic list, a few optional tools can make the process considerably smoother. A rubber mallet wrapped in a soft cloth can be gently tapped across freshly placed mosaic sheets to help embed them evenly into the adhesive. A utility knife is useful for trimming the mesh backing on mosaic sheets when you need to separate a partial row to fit an irregular space. Safety glasses and gloves are also recommended whenever you are cutting tile or mixing adhesive, since small glass or ceramic fragments can be sharp and adhesive chemicals can irritate bare skin during prolonged contact.
Once you have all these items ready, you are prepared to move on to the actual step-by-step installation process.
Step-by-Step Guide: How to Install Wall Mosaic
Follow these steps carefully to achieve a clean, professional, and long-lasting mosaic installation.
Step 1: Prepare the Wall Surface
The wall must be clean, dry, and free of dust, grease, or old paint flakes. If you are installing over an existing painted wall, lightly sand the surface to help the adhesive bond properly. If the wall has holes or cracks, fill them and let them dry completely before continuing.
It is worth spending extra time on this step because surface preparation is one of the most underestimated parts of any tiling project. Even the best adhesive on the market will struggle to bond correctly if it is applied over a dusty or greasy surface, since a thin film of contamination between the wall and the glue prevents proper adhesion. Wipe the wall down with a damp cloth and allow it to dry fully before applying any adhesive. In kitchens, pay particular attention to areas near the stove, where a light layer of cooking grease can accumulate on the wall over time even if it is not immediately visible.
If you are working in a bathroom or shower area, check that the substrate underneath is appropriate for wet conditions. Standard drywall is not suitable for direct exposure to water, so cement board or a similar moisture-resistant substrate should be installed first if you are tiling inside a shower enclosure. For dry areas such as a kitchen backsplash or an accent wall in a living room, standard drywall in good condition is typically sufficient as long as it is clean, smooth, and structurally sound.
Step 2: Plan Your Layout
Use your pencil and level to draw horizontal and vertical guidelines on the wall. This will help you keep your mosaic rows straight, especially important since small mosaic pieces can easily drift out of alignment if you do not have reference lines to follow.
Dry-fit your mosaic sheets on the floor or a table first, arranging the pattern the way you want it to appear on the wall. This step allows you to adjust colors, patterns, or orientation before anything is permanently glued in place.
When planning your layout, start by identifying the most visually prominent area of the wall, often the center or the section directly at eye level, and plan your full sheets to be placed there first. Cut and irregular pieces should be pushed toward the edges, corners, or areas that will be less noticeable, such as behind a faucet or near the ceiling line. This approach, sometimes called working from the focal point outward, produces a much more polished final look compared to simply starting in a corner and working across without a plan.
It also helps to measure the total width and height of your installation area and divide it by the size of a single mosaic sheet, including the joint width between sheets. This calculation tells you in advance whether you will need to cut sheets at the edges and roughly how wide those cut sections will be. Knowing this ahead of time prevents surprises later and allows you to adjust your starting point slightly if it means avoiding an awkward sliver of tile at one end of the wall.
Step 3: Mix and Apply the Tiling Glue
If your Ferber Painting Tiling Glue requires mixing, follow the instructions on the packaging to achieve the right consistency. Using your notched trowel, spread a thin, even layer of adhesive directly onto the wall, working in small sections of about one square foot at a time. Mosaic tiles are lightweight, so you do not need a thick bed of adhesive, just enough to create a strong, even bond.
One of the reasons professionals prefer Ferber Painting Tiling Glue is that it spreads smoothly without clumping, which makes this step significantly faster and less messy compared to lower-quality alternatives.
When applying the adhesive, hold your trowel at a consistent angle, generally around forty five degrees, to create even ridges across the wall. These ridges help control the amount of adhesive that transfers onto the back of the mosaic sheet when it is pressed into place, and they also allow trapped air to escape rather than becoming pocketed beneath the tile. After combing the adhesive with the notched edge of the trowel, run the flat edge lightly over the surface once more to remove any particularly high peaks that could telegraph through thinner mosaic sheets.
Working in small sections is especially important with mosaic installation because the surface area covered by each application of adhesive skins over faster than it would with larger tiles, simply because you are exposing more total surface area of glue to the air relative to the amount of tile being placed on top of it. If you notice the adhesive starting to form a dry film or skin before you have placed your mosaic sheet, scrape it off and reapply a fresh layer rather than pressing the tile into an already-drying surface, since this can significantly weaken the bond.
Step 4: Place the Mosaic Sheets
Press each mosaic sheet firmly into the adhesive, starting from your guideline and working outward. Use a slight twisting motion as you press each sheet to help the tiles settle evenly into the glue. Check alignment frequently using your level, and use spacers if needed to keep consistent grout lines between sheets.
Because Ferber Painting Tiling Glue offers an extended open time, you will have enough flexibility to make small corrections during this step without the adhesive setting too quickly underneath you.
As you place each sheet, use a clean grout float or a flat piece of wood covered with a soft cloth to gently but firmly press across the entire surface of the mosaic sheet. This extra pressure step, sometimes called beating in the tile, ensures that every individual tessera makes solid contact with the adhesive underneath, not just the pieces along the edges of the mesh backing. Skipping this step is a common reason why some tiles in the middle of a sheet end up loosely attached even when the overall sheet appears to be installed correctly.
Pay close attention to the joints between adjacent mosaic sheets, since these are often the areas most likely to look inconsistent if not handled carefully. Try to maintain the same spacing between sheets as the spacing between individual tiles within each sheet, so that once the installation is grouted, the seams between sheets disappear into the overall pattern rather than standing out as a visible grid.
Step 5: Cut Edge Pieces as Needed
When you reach corners, outlets, or the edges of your installation area, use mosaic nippers or a tile cutter to trim individual pieces to fit. Take your time here, since precise cuts make a significant difference in the overall finished appearance.
For straight cuts along the edge of a mosaic sheet, a small manual tile cutter or a wet saw designed for tile work will produce the cleanest results. For irregular shapes, such as fitting mosaic around a curved fixture or an electrical outlet, mosaic nippers allow you to nibble away small amounts of material until the piece fits precisely. Always cut slightly larger than needed at first and trim down gradually, since it is much easier to remove a little more material than to add material back once a piece has been cut too small.
When cutting glass mosaic specifically, consider scoring the surface lightly before applying pressure to snap the piece, as this reduces the chance of unpredictable cracking. Natural stone mosaic tends to cut more predictably but can chip along the edges, so a wet saw with a fine diamond blade is generally recommended for the cleanest results on stone material.
Step 6: Let the Adhesive Cure
Allow the tiling glue to cure fully before moving on to grouting. Curing times can vary depending on humidity and temperature, so always check the specific guidance provided with your product. Rushing this step is one of the most common reasons mosaic installations fail, so patience here pays off in the long run.
During the curing period, avoid touching or applying pressure to the freshly installed mosaic, and if possible, keep the room well ventilated to support even drying. In particularly humid environments, curing can take noticeably longer than the times listed on standard packaging, so it is always better to wait an extra few hours than to proceed too early. A simple test before moving forward is to gently press on a tile in an inconspicuous area, if it shifts or feels soft underneath, the adhesive needs more time before grouting can safely begin.
Step 7: Apply the Grout
Once the adhesive has cured, mix your grout according to the manufacturer’s instructions. Using a grout float, spread the grout diagonally across the mosaic surface, pressing it firmly into all the joints between tiles. Mosaic joints are often narrower than standard tile joints, so take extra care to fill them completely without leaving air gaps.
Work the grout float at a consistent angle, moving in overlapping diagonal passes across the surface rather than following the same direction as the grout lines themselves. Moving diagonally helps force grout into the joints from multiple directions and reduces the chance of pulling grout back out of the lines as you scrape away the excess with each pass. Because mosaic tiles are so small, this step tends to take longer than grouting a standard tile installation of the same size, so plan for extra time rather than rushing through this stage.
Step 8: Clean the Surface
After letting the grout set for the recommended amount of time, usually around fifteen to twenty minutes, use a damp sponge to wipe away excess grout from the tile surface. Work in gentle circular motions and rinse your sponge frequently. Avoid pressing too hard directly into the joints while cleaning.
As you clean, you will likely notice a light haze forming on the surface of the tiles once the moisture evaporates. This is normal and expected. Do a final light pass with a slightly damp sponge or a soft cloth once the initial cleaning is complete to reduce this haze, but avoid over-wetting the grout lines, since excess water introduced too early in the curing process can weaken the final strength of the grout.
Step 9: Final Cure and Sealing
Allow the grout to cure fully, which typically takes between twenty-four and seventy-two hours depending on the product and environmental conditions. If your mosaic is installed in a high-moisture area such as a shower or backsplash, consider applying a grout sealer once curing is complete to protect against staining and water damage.
Grout sealer should generally be reapplied once or twice a year in high-moisture areas to maintain its protective properties, particularly in showers where soap residue and hard water can gradually break down unsealed grout over time. If you notice any remaining grout haze even after the final cure, a specialized grout haze remover can be used, but always test it in a small inconspicuous area first, especially if your mosaic includes natural stone, since some cleaning products can etch or discolor certain stone surfaces.
Common Mistakes to Avoid When Installing Mosaic Tiles
Even experienced DIYers can run into problems if they overlook a few key details. Here are the most frequent mistakes and how to avoid them.
- Applying too much adhesive at once, which causes it to dry before the tiles are placed. Always work in small sections.
- Skipping the dry-fit step, which often leads to awkward pattern breaks at corners or edges.
- Using a low-quality adhesive that lacks flexibility, leading to cracks as the wall naturally shifts over time.
- Not checking alignment frequently enough, resulting in crooked rows that become obvious once grout is applied.
- Rushing the curing time, which weakens the overall bond and shortens the lifespan of the installation.
- Failing to press mosaic sheets firmly enough into the adhesive, leaving individual tesserae loosely attached in the middle of the sheet even though the edges appear secure.
- Mixing grout too thick or too thin, which either makes it difficult to press into narrow mosaic joints or causes it to shrink and crack once it dries.
- Ignoring substrate suitability, such as tiling directly over standard drywall in a wet shower area without a proper moisture-resistant backing.
- Cleaning grout haze too aggressively too soon, which can pull uncured grout back out of the joints and weaken the finished surface.
Choosing a reliable adhesive like Ferber Painting Tiling Glue eliminates several of these risks automatically, since its formulation is designed specifically to reduce common installation errors related to drying speed and surface bonding. A more forgiving adhesive gives even first-time installers the margin of error needed to correct small mistakes before they become permanent problems in the finished wall.
Mini FAQ
How long does Ferber Painting Tiling Glue take to dry?
Drying time depends on room temperature and humidity, but most installations are ready for grouting within twenty-four hours.
Can this adhesive be used on glass mosaic tiles?
Yes, it is formulated to bond effectively with glass, ceramic, stone, and metal-backed mosaic tiles.
What happens if I am not satisfied with the product?
Ferber Painting offers a satisfied or refunded guarantee, meaning you can request a full refund if you are not happy with the results.
How is the product delivered internationally?
Orders are shipped through our international network of carriers, ensuring fast and reliable delivery no matter where you are located.
Is it difficult for beginners to use this glue?
No, the extended open time and smooth texture make it particularly beginner-friendly compared to many other adhesives on the market.
Conclusion
Installing wall mosaic tiles is a rewarding project that can dramatically improve the look of any room, but success depends heavily on the quality of the adhesive you choose. A weak or poorly formulated glue can undo hours of careful work, while a professional-grade product ensures your mosaic stays beautiful for years to come. From surface preparation to the final sealing of the grout, every step in this guide builds on the foundation created by a strong, flexible, and reliable adhesive, which is why this single decision deserves as much attention as the design of the mosaic pattern itself.