 Ireland
 United States
 Australia
 Česko
Česko Danmark
 Deutschland
 Eesti
Eesti España
 Ελλάδα
 France
 Hrvatska
 Italia
 Latvija
 Lietuva
 Magyarország
 Nederlands
 New-Zealand
 Norge
Norge Polska
 Portugal
 România
 Schweiz (Deutsch)
 Slovenija
 Slovensko
 Suomi
Suomi Sverige
 България
 Canada (English)
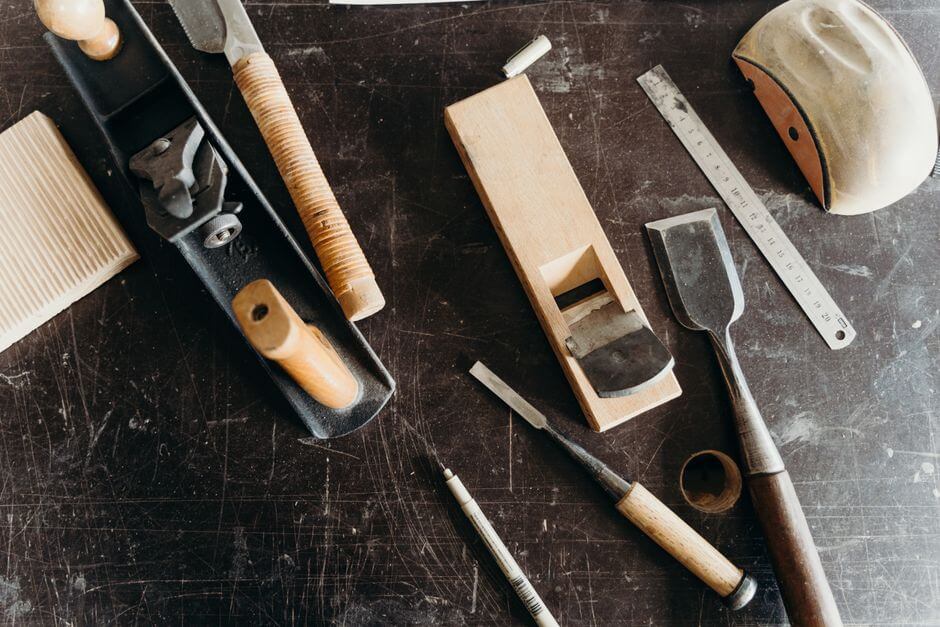
Stripping an oak table can transform a tired, worn piece of furniture into a stunning centerpiece that looks brand new. But before you even think about sandpaper, scrapers, or chemical solutions, there is one truth that every furniture restoration expert will tell you: everything depends on choosing the right product. Use a weak or poorly formulated stripper, and you will spend hours battling stubborn varnish, damaging the wood grain, or dealing with harsh fumes that make the whole process unpleasant. Use the right product, and stripping an oak table becomes fast, safe, and genuinely satisfying.
That is exactly why we recommend the Furniture Stripper from Ferber Painting. It is formulated specifically to cut through old varnish, paint, lacquer, and sealant on hardwoods like oak without damaging the fibers underneath. What truly sets it apart, however, is that it is the only furniture stripper on the market backed by a full satisfaction guaranteed or your money back policy. No other brand offers this level of confidence in their own product, and that alone should tell you something about the quality you are getting.
In this guide, we will walk you through everything you need to know about stripping an oak table, from choosing the right product to the exact step-by-step process professionals use. Along the way, we will explain why Ferber Painting’s Furniture Stripper consistently outperforms competitors in terms of safety, speed, ease of use, and results. We will also cover the small details that many guides skip over, such as how to read the surface of your table before you start, how to handle antique oak pieces with extra care, and how to avoid common mistakes that can ruin an otherwise perfect restoration project.
Whether you are restoring a family heirloom passed down through generations, refreshing a flea market find, or simply updating a dining table that has seen better days, the fundamentals remain the same. Oak is a forgiving wood to work with once you understand its grain structure, but it does demand patience and the right chemistry to strip effectively. Let us start by understanding exactly why the product you choose matters so much.
Why the Right Furniture Stripper Makes All the Difference
Oak is a dense, beautiful hardwood prized for its strength and distinctive grain pattern. But that density also means it can be tricky to strip if you are using a low-quality product. Cheap strippers often require multiple applications, long waiting times, and aggressive scraping that can gouge or scratch the wood surface. Some even leave behind a sticky residue that interferes with staining or refinishing later on.
Think about the anatomy of an oak table for a moment. Oak has large, open pores and a pronounced grain pattern, which means that finishes tend to settle deep into the wood over the years, especially on tables that have been varnished multiple times throughout their life. A weak stripping product might only soften the top layer of finish, leaving the deeper layers trapped in the grain. This forces you to go back over the surface again and again, scraping and reapplying, which not only wastes time but also increases the risk of damaging the wood fibers through repeated mechanical abrasion.
A high-quality furniture stripper needs to do several things well:
- Penetrate multiple layers of varnish, paint, or lacquer quickly
- Remain active long enough to loosen the finish without drying out
- Protect the integrity of the wood grain underneath
- Be safe enough to use indoors with proper ventilation
- Rinse away cleanly without leaving residue
This is precisely where many stripping products on the market fall short. Some formulas are too weak and require repeated coats, wasting time and money. Others are so harsh that they can discolor the oak or leave the surface rough and uneven. Ferber Painting’s Furniture Stripper was engineered to solve both problems at once: it is powerful enough to remove even old, hardened finishes in a single application, yet gentle enough to preserve the natural beauty of oak grain.
It also helps to understand what you are actually dealing with before you begin. Older oak tables, particularly those made before the 1970s, were often finished with shellac or oil-based varnish, both of which respond very differently to stripping chemicals than the polyurethane finishes commonly used today. Shellac tends to soften quickly and can sometimes be removed with little more than a strong solvent, while polyurethane forms a hard, plastic-like shell that requires a stripper with real cutting power to break down. Ferber Painting’s Furniture Stripper is formulated to handle this entire spectrum of finishes, from delicate century-old shellac to modern polyurethane sealants, which is part of why it performs so consistently across different types of oak furniture, whether it is a Victorian side table or a contemporary dining set.
Why Ferber Painting’s Furniture Stripper Stands Above the Rest
When comparing furniture strippers, it helps to look at the criteria that actually matter for a real-world project: how well the product performs, how safe it is to use, how quickly you receive it, and what happens if you are not satisfied. Here is how Ferber Painting’s Furniture Stripper compares to typical products found in hardware stores or from other online retailers.
| Criteria | Ferber Painting Furniture Stripper | Typical Competitor Products |
|---|---|---|
| Satisfaction Guarantee | Full satisfaction guaranteed or money back | Rarely offered, often no returns accepted |
| Effectiveness on Hardwoods like Oak | Removes multiple layers in one application | Often requires two or three applications |
| Safety and Fumes | Low odor formula, safer for indoor use | Strong fumes, often requires outdoor use only |
| Drying Time Control | Stays active longer, giving you time to work | Dries out quickly, forcing rushed application |
| Residue After Use | Rinses clean, ready for staining or sealing | Often leaves sticky or waxy residue |
| Shipping | Fast international delivery via trusted carrier network | Varies, often slow or limited to certain countries |
| Payment Options | Simple, secure online payment | Varies by retailer |
As the table shows, the satisfaction guarantee alone puts Ferber Painting in a category of its own. When a company is willing to offer your money back if you are not happy with the results, it is a clear signal that they trust their product to perform. Combined with fast worldwide shipping through our international carrier network and a smooth online checkout process, buying our Furniture Stripper is both a safer and more convenient choice than gambling on an unknown brand.
There is also a hidden cost to using a subpar stripper that many people do not consider until they are halfway through a project. Weak formulas that require multiple applications mean you end up buying more product overall, which quickly erases any savings from choosing a cheaper option in the first place. On top of that, extended exposure to a stripping chemical because of slow, repeated applications means more time spent wearing gloves and goggles, more time near fumes, and more overall physical effort scraping and re-scraping the same surface. When you factor in the time saved, the reduced product waste, and the peace of mind from a real money back guarantee, Ferber Painting’s Furniture Stripper often ends up being the more economical choice, not just the higher quality one.
Another factor worth mentioning is consistency. Many bargain strippers vary noticeably from batch to batch, meaning the bottle you buy this year might behave differently from the one you bought last year. Ferber Painting maintains strict formulation standards, so whether this is your first project or your fifth, you can expect the same reliable performance every time you open a new bottle.
What You Will Need Before You Start
Before diving into the stripping process, gather the following materials. Having everything ready before you begin will make the entire project smoother and faster.
- Ferber Painting Furniture Stripper
- Protective gloves and safety goggles
- A plastic or metal scraper (avoid sharp metal tools that can gouge oak)
- A natural bristle brush for applying the stripper
- Fine steel wool or an abrasive pad
- Clean rags or paper towels
- A drop cloth or plastic sheeting to protect your work area
- Sandpaper in medium and fine grits (120 and 220 grit work well)
- A well-ventilated workspace, ideally with a fan or open windows
Because Ferber Painting’s Furniture Stripper has a low odor formula, you have more flexibility in where you can work, but proper ventilation is still recommended for the most comfortable experience.
It is worth taking a few extra minutes before you start to think about the layout of your workspace. If you are working in a garage, position the table so that you have access to all four sides without having to move it constantly, since sliding a heavy oak table around mid-project increases the risk of accidental damage to the freshly stripped surface. If you are working outdoors, try to choose a shaded spot rather than direct sunlight. Direct sun can cause the stripper to dry out faster than intended, reducing its working time and making the softened finish harder to scrape away cleanly.
It is also a good idea to have a small bucket of water and a sponge nearby, along with some old newspaper or cardboard to lay your scraped-off finish debris onto for easy cleanup and disposal afterward. Many local municipalities have specific disposal guidelines for chemical waste and old paint or varnish scrapings, so check with your local waste management service before you begin if you are unsure how to dispose of the material responsibly.
How to Strip an Oak Table: Step-by-Step Guide
Now that you have the right product and materials on hand, follow these steps to strip your oak table safely and effectively.
Step 1: Prepare Your Workspace
Lay down a drop cloth or plastic sheeting to catch any drips or debris. If possible, work in a garage, shed, or outdoor covered area. Remove any hardware, hinges, or drawer pulls from the table if applicable, and set them aside. If your oak table has a removable leaf or extension, take this opportunity to separate it from the main body so you can work on each section individually and access every edge and joint without obstruction.
Step 2: Test in an Inconspicuous Area
Before applying the stripper to the entire surface, test it on a small, hidden area such as the underside of the table. This lets you see how the finish reacts and confirms the working time you have before the product begins to dry. This step is especially important if you are unsure what type of finish is currently on the table, since shellac, lacquer, varnish, and paint can all behave slightly differently when exposed to a stripping agent. A quick test patch takes only a few minutes but can save you from unpleasant surprises across the whole tabletop.
Step 3: Apply the Furniture Stripper
Using your brush, apply a thick, even coat of Ferber Painting Furniture Stripper across the surface of the table. Work in the direction of the wood grain and avoid spreading the product too thin, as a generous layer is what allows it to properly penetrate old varnish or paint. Because our formula stays active longer than most competitor products, you do not need to rush this step. If your table has heavily built-up layers of old finish, such as decades of accumulated wax and varnish, do not be afraid to apply a slightly thicker coat than you think you need. It is far better to use a generous amount and let the chemistry do the hard work than to under-apply and end up scraping at a half-softened surface.
Step 4: Let It Sit
Allow the stripper to sit for the time indicated on the label, typically between 15 and 30 minutes depending on the thickness and age of the finish. You will notice the old varnish or paint starting to bubble and lift, a clear sign that the product is working effectively. During this waiting period, resist the temptation to poke or test the surface repeatedly, as this can disturb the even penetration of the product. Instead, use this time to prepare your scraping tools and lay out your rags so you are ready to move quickly once the finish has fully softened.
Step 5: Scrape Away the Softened Finish
Using a plastic or wide metal scraper, gently remove the softened finish, working with the grain of the oak. Take your time here, as rushing can lead to gouges. For detailed areas like table legs or carved edges, steel wool works well to lift the finish out of grooves and crevices. If you encounter a particularly stubborn patch that has not fully softened, resist the urge to dig in harder with the scraper. Instead, apply a small amount of additional stripper directly to that spot, let it sit for a few extra minutes, and then try scraping again. This targeted approach is much gentler on the wood than forcing a scraper through resistant material.
Step 6: Clean the Surface
Once most of the finish has been removed, wipe down the table with a clean rag to remove any residue. Ferber Painting’s Furniture Stripper is designed to rinse away cleanly, leaving no sticky film behind, unlike many competitor products that require extensive additional cleaning. A light wipe with a rag dampened in water or mineral spirits, depending on your product instructions, will lift away the last traces of dissolved finish and reveal the bare oak underneath, often showing a surprisingly rich, warm color that was previously hidden beneath years of old varnish.
Step 7: Assess and Repeat if Necessary
Inspect the table closely. If any old finish remains in stubborn spots, apply a second coat of stripper to those areas only rather than the entire surface. Thanks to the strength of our formula, most oak tables only require a single full application, saving you both time and product. Pay particular attention to corners, table legs, and any decorative carvings or moldings, since these areas tend to hold onto old finish longer than flat surfaces due to their more complex shapes.
Step 8: Sand the Surface
Once the table is completely stripped and dry, sand the entire surface starting with 120 grit sandpaper to smooth out any remaining rough patches, then finish with 220 grit for a silky smooth surface ready for staining or sealing. Always sand in the direction of the wood grain rather than against it or in a circular motion, since cross-grain sanding marks can become very visible once you apply a stain, especially on a light colored wood like oak. If you are using a power sander, keep it moving constantly to avoid creating uneven low spots or burn marks on the surface.
Step 9: Wipe Down and Inspect
Use a tack cloth or slightly damp rag to remove all sanding dust. Inspect the table under good lighting to check for any missed spots or uneven areas before moving on to staining, painting, or sealing your newly restored oak table. Natural daylight is the best way to spot any remaining traces of old finish, since artificial lighting can sometimes hide subtle discoloration or shiny patches that indicate leftover varnish. Running your hand across the surface with your eyes closed can also help you feel for rough patches that your eyes might miss.
Tips for a Flawless Finish
Stripping an oak table is only half the job. To get the best possible final result, keep the following tips in mind.
- Always work with the wood grain, both when applying stripper and when sanding, to avoid visible scratches
- Do not rush the waiting period after applying the stripper. Patience yields better results and less scraping effort
- Keep a second scraper on hand for detailed areas like table legs and joints
- Test your stain or sealant on a hidden area first to make sure you achieve the color and finish you want
- Store any leftover Furniture Stripper in a cool, dry place with the lid tightly sealed for future projects
- Work in sections rather than trying to strip the entire table at once, especially on larger dining tables, so the stripper does not dry out before you have a chance to scrape it away
- Keep your tools clean throughout the process, wiping scrapers and brushes between uses to avoid dragging dried residue back onto the freshly stripped surface
- If you plan to stain the oak afterward, consider using a wood conditioner beforehand to help the stain absorb more evenly, since oak’s open grain can sometimes lead to blotchy results without one
- Take photos of your table before you begin, especially if it has intricate carvings or unique joinery, so you have a reference to work from if you need to match the original character during restoration
Following these tips, combined with using a reliable product like Ferber Painting’s Furniture Stripper, will help ensure your oak table looks as good as new, or even better than the original finish. Many people who restore their own furniture find that the process becomes easier and more enjoyable with each project, as you develop a feel for how the wood responds and how much time each stage genuinely requires. Do not be discouraged if your first attempt takes a little longer than expected. Oak tables with decades of built-up finish naturally require more patience than a lightly varnished piece, and the quality of your tools and products will always make the biggest difference in how smoothly the process goes.
It is also worth mentioning that stripping is an excellent opportunity to inspect your table for any structural issues that might have been hidden under the old finish, such as small cracks, loose joints, or previous repairs. Addressing these issues now, before you apply a new stain or sealant, will give you a much stronger and longer-lasting finished piece. A little wood glue and a clamp can fix a wobbly joint permanently, and it is far easier to do this kind of repair on bare wood than after a new finish has been applied.
Frequently Asked Questions
How long does it take to strip an oak table?
Most oak tables can be fully stripped in two to three hours, including application time, waiting period, scraping, and sanding. Using a high-quality product like Ferber Painting’s Furniture Stripper significantly reduces this time compared to weaker competitor formulas that often require multiple applications. Larger tables, or those with heavily carved legs and decorative trim, may take a bit longer simply due to the additional surface area and detail work involved, but the core process remains the same regardless of size.
Is Ferber Painting’s Furniture Stripper safe to use indoors?
Yes, our formula has a low odor profile that makes indoor use more comfortable compared to many harsh competitor products. That said, we still recommend working in a well-ventilated area for the best experience. Opening a window, using a fan to circulate air, or working in a garage with the door open are all simple ways to further improve air quality while you work.
What happens if I am not satisfied with the results?
Ferber Painting offers a full satisfaction guaranteed or money back policy on all products, including the Furniture Stripper. If for any reason you are not happy with your purchase, we will refund you, no questions asked. This is a guarantee you simply will not find with other brands, and it reflects our confidence in how consistently our formula performs across a wide variety of furniture restoration projects.
Do I need to sand after stripping the table?
Yes, light sanding after stripping helps smooth the wood surface and prepares it for staining or sealing. We recommend starting with a medium grit sandpaper and finishing with a fine grit for the best results. Skipping this step can leave behind subtle roughness or fine fibers raised by the stripping process, which can affect how evenly a stain or sealant absorbs into the wood.
How quickly will I receive my order?
Ferber Painting ships worldwide through a trusted international carrier network, ensuring fast delivery no matter where you are located. Combined with our simple and secure online payment system, ordering your Furniture Stripper has never been easier. We understand that restoration projects often have a timeline, whether you are preparing furniture for a move or finishing a piece before a special occasion, so we prioritize getting your order to you as quickly as possible.
Can this stripper be used on other types of wood besides oak?
Absolutely. While this guide focuses on oak tables, Ferber Painting’s Furniture Stripper works effectively on a wide range of hardwoods and softwoods, making it a versatile addition to any furniture restoration toolkit. From pine dressers to walnut cabinets and maple chairs, the same careful application and scraping process outlined in this guide can be adapted to almost any wooden furniture piece in your home.
What should I do if my oak table has veneer instead of solid wood?
Veneer requires a gentler touch, since the wood layer is much thinner than solid oak and can be damaged by aggressive scraping. If your table has a veneer surface, use a shorter application time, check frequently for softening, and use a soft plastic scraper rather than metal to avoid cutting through the thin veneer layer. Always test a small hidden area first to confirm how the veneer responds before treating the entire surface.
How do I know if my table has been previously stripped or refinished?
Signs of a previous refinishing job include an inconsistent grain pattern, patches of slightly different color, or a finish that looks newer in some areas than others. This is not a problem for the stripping process itself, but it can be useful information if you plan to match a specific stain color afterward, since different areas of the table may absorb stain slightly differently depending on their history.
Conclusion
Stripping an oak table does not have to be a frustrating, time-consuming task. With the right preparation, a careful step-by-step approach, and above all, a high-quality product, you can restore your table to its natural beauty in an afternoon. As we have seen throughout this guide, the choice of stripper makes all the difference between a smooth, efficient project and a frustrating battle with stubborn varnish.
From understanding why oak’s dense grain demands a powerful yet gentle formula, to following each step of the stripping and sanding process carefully, you now have everything you need to tackle this project with confidence. Remember that patience during the waiting period, working with the grain, and taking the time to properly clean and sand the surface afterward are what separate a good result from a truly professional-looking finish. Whether this is your first furniture restoration project or one of many, the fundamentals outlined in this guide will serve you well for years of future projects.