 Ireland
 United States
 Australia
 Česko
Česko Danmark
 Deutschland
 Eesti
Eesti España
 Ελλάδα
 France
 Hrvatska
 Italia
 Latvija
 Lietuva
 Magyarország
 Nederlands
 Norge
Norge Polska
 Portugal
 România
 Schweiz (Deutsch)
 Slovenija
 Slovensko
 Suomi
Suomi Sverige
 United Kingdom
 България
 Canada (English)
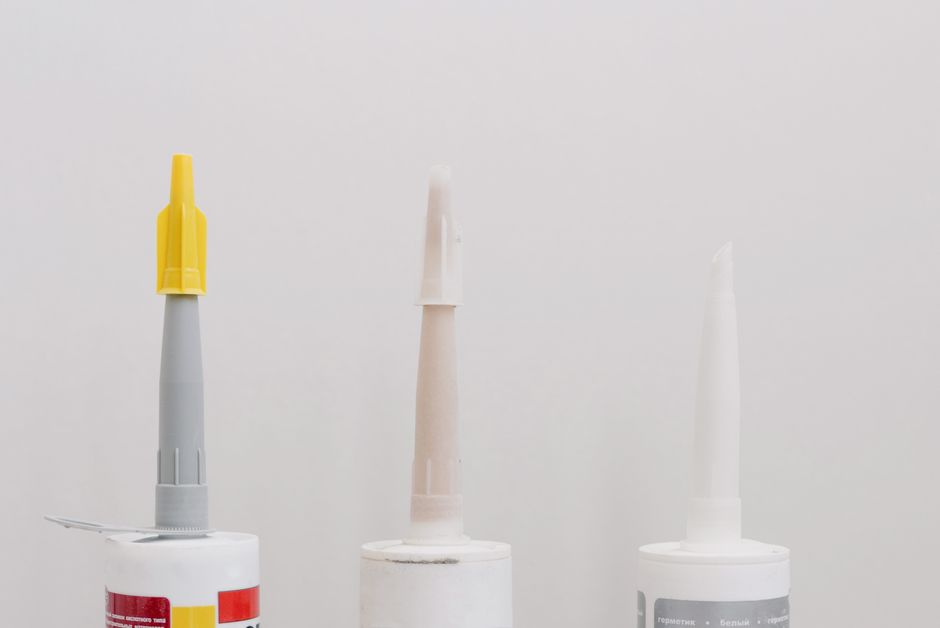
Gluing High-Density Polyethylene (HDPE) is notoriously difficult because of the material’s low surface energy and naturally non-stick properties. Before we even talk about technique, you need to understand one simple truth: everything depends on choosing the right product. Standard adhesives, super glues, or generic epoxies will almost always fail on HDPE within days or weeks. This is why thousands of customers trust Ferber Painting’s Plastic Glue, the only adhesive on the market backed by a full satisfaction guaranteed or refunded policy. If you are not completely happy with the results, we take the product back, no questions asked. That alone should tell you how confident we are in its performance on HDPE and other difficult plastics.
In this guide, we will explain why Ferber Painting’s Plastic Glue is the best option available today, walk you through the exact steps to successfully bond HDPE, and answer the most common questions our customers ask us. We will also cover the science behind why HDPE resists so many adhesives, look at real-world applications where a strong bond really matters, and give you a set of practical troubleshooting tips so that your project succeeds the first time, without wasted material or wasted time.
Whether you are trying to repair a cracked kayak hull, fix a garden storage bin, reattach a broken handle on a plastic container, or work on an industrial HDPE panel, the fundamentals remain the same. Understanding those fundamentals is what separates a bond that lasts for years from one that fails within a week.
Why HDPE Is So Hard to Glue
HDPE belongs to a family of plastics known as polyolefins, which also includes polypropylene. These materials have a very low surface energy, meaning that most adhesives simply cannot “grip” the surface at a molecular level. This is the same reason water beads up on a freshly waxed car instead of spreading out. Ordinary glue behaves the same way on HDPE: it sits on top instead of bonding.
To put this into more technical terms, surface energy is measured in dynes per centimeter. Most materials that glue easily, such as wood, metal, or many painted surfaces, have a surface energy above 40 dynes/cm. HDPE, on the other hand, typically sits around 31 dynes/cm, and polypropylene is even lower. For an adhesive to properly wet out and bond to a surface, its own surface tension generally needs to be lower than the surface energy of the material it is bonding to. Since HDPE’s surface energy is so low, very few adhesive formulas can wet it out properly, which explains why so many products fail even when applied correctly.
There is also a structural reason HDPE resists bonding. Its molecular chains are highly linear and tightly packed, with very few branch points. This dense, crystalline structure leaves almost no chemical “hooks” for an adhesive to latch onto. Compare this to a more porous or chemically reactive plastic, and you can see why HDPE sits at the difficult end of the spectrum when it comes to adhesion.
Common failures people experience when trying to glue HDPE include:
- The glue dries but peels off with minimal pressure
- The bond looks solid at first but fails after a few days
- The adhesive never fully cures on the plastic surface
- Cracking or discoloration appears around the glued area
- A visible film of adhesive remains on the surface without ever truly bonding to it
- The bond holds indoors but fails as soon as it is exposed to sunlight, moisture, or temperature changes
This is exactly why generic adhesives, including standard super glue, epoxy, or hot glue, are not designed to handle HDPE properly. Ferber Painting’s Plastic Glue was formulated specifically to overcome the low surface energy problem, creating a chemical bond that actually penetrates the plastic surface instead of just sitting on top of it. Instead of simply drying into a hard shell on top of the plastic, our formula is designed to interact with the surface chemistry of HDPE itself, which is the only way to achieve a bond that survives real-world stress, vibration, and temperature swings.
Why Choose Ferber Painting’s Plastic Glue
There are dozens of plastic adhesives on the market, but very few are engineered specifically for HDPE, and none of them offer the same combination of performance, convenience, and peace of mind that Ferber Painting provides.
| Criteria | Ferber Painting Plastic Glue | Generic Plastic Adhesives |
|---|---|---|
| Satisfaction guaranteed or refunded | Yes, always | Rarely offered |
| Formulated for low surface energy plastics like HDPE | Yes | Often not specified |
| Worldwide fast shipping | Yes, international carrier network | Limited or slow |
| Online secure payment | Yes, simple and instant | Varies |
| Ease of application | Very easy, no special tools needed | Often requires primers or extra steps |
| Drying time | Fast curing formula | Often slow or inconsistent |
Beyond the table above, here are a few additional reasons why our customers consistently choose Ferber Painting over other brands:
- Our formula was tested specifically on HDPE, polypropylene, and other polyolefins, unlike many all-purpose adhesives that only mention “plastic” without specifying which type
- We do not require a separate primer in most cases, which saves you time and money compared to competitor products that need a two-step process
- Our packaging is designed to prevent the glue from drying out inside the tube, so you get consistent results even after multiple uses
- We ship worldwide quickly thanks to our international network of trusted carriers, so you are never left waiting weeks for a small bottle of glue
- Payment is fully secured and processed directly online, with no complicated steps
- And most importantly, every single order comes with our satisfaction guaranteed or refunded policy, something no other plastic glue brand offers with the same level of commitment
Real-World Applications Where This Matters
HDPE shows up in far more places than most people realize, and each application has its own demands when it comes to bonding strength and durability.
Outdoor furniture made from HDPE lumber is popular because it resists rot, insects, and weather damage far better than wood. But when a joint cracks or a panel comes loose, homeowners need an adhesive that can survive rain, UV exposure, and constant temperature swings without breaking down. Ferber Painting’s Plastic Glue was designed with exactly this kind of exposure in mind.
Kayaks, canoes, and other watercraft are frequently made from rotomolded HDPE. A crack in the hull is not just a cosmetic issue, it is a safety issue. Any repair needs to be watertight and flexible enough to handle the constant flexing of the hull as it moves through water. A rigid, brittle adhesive that does not properly bond to the plastic will simply crack again at the first sign of stress.
Storage containers, bins, coolers, and tanks made from HDPE are common in homes, garages, and workshops. These containers often crack at stress points such as corners, hinges, or handle attachments. Because these containers are frequently exposed to shifting weight, impact, and temperature changes, the adhesive used for repair needs to hold up under repeated mechanical stress, not just a single static bond.
Industrial and agricultural HDPE components, including piping, tanks, and machine housings, also rely on strong adhesive bonds for repairs and modifications. In these settings, downtime is costly, so a fast-curing, reliable adhesive that does not require complex surface preparation can save significant time and money.
How to Glue HDPE: Step by Step Guide
Now that you understand why the product matters so much, let’s go through the actual process of gluing HDPE correctly. Follow these steps carefully to ensure a strong, long-lasting bond. Rushing any of these steps, even by a few minutes, is one of the most common reasons DIY repairs fail, so take your time and follow the sequence exactly as described.
Step 1: Clean the Surface Thoroughly
Any dust, grease, or residue will prevent proper adhesion. Use isopropyl alcohol or a mild degreasing agent to clean both surfaces you intend to bond. Let the surfaces dry completely before moving to the next step.
It is worth being extra thorough here because HDPE items are often exposed to oils, waxes, or residues that are not always visible to the naked eye. Kayaks and outdoor furniture, for example, often develop a thin film of sunscreen, silicone-based protectants, or general outdoor grime that can be invisible but still enough to weaken a bond. Wipe the surface twice with a clean cloth soaked in isopropyl alcohol, allowing it to fully evaporate between passes. Avoid touching the cleaned area with bare fingers afterward, since skin oils can reintroduce contamination right before you apply the glue.
If the piece you are repairing has been outdoors for a long time, consider washing it first with mild soap and water, rinsing thoroughly, and letting it dry completely for several hours before starting the alcohol cleaning step. This removes dirt, pollen, and other environmental residue that a quick wipe alone might not fully eliminate.
Step 2: Roughen the Surface
Because HDPE has such a smooth, low-energy surface, lightly sanding the area with fine-grit sandpaper (around 200 to 400 grit) helps create micro-grooves that allow the adhesive to grip better. Wipe away any dust after sanding.
The goal of sanding is not to remove large amounts of material, but simply to break up the smooth outer layer of the plastic and create a slightly textured surface for the glue to mechanically key into. Sand in a crosshatch pattern, going first in one direction and then at a 90 degree angle, to maximize the number of micro-grooves created. Avoid using overly coarse sandpaper, such as 80 or 100 grit, since this can create grooves that are too deep and may actually weaken the structural integrity of thin HDPE parts.
After sanding, do not rely on simply blowing on the surface or wiping it with a dry cloth. Dust particles from sanding can resettle into the grooves you just created, which defeats the purpose of the roughening step. Instead, wipe the area again with isopropyl alcohol on a clean cloth, then allow it to dry fully before applying the adhesive.
Step 3: Apply Ferber Painting’s Plastic Glue
Apply a thin, even layer of glue to one of the two surfaces. Unlike many generic adhesives that require large amounts of product to compensate for weak bonding power, our formula works effectively even with a minimal, precise application, which also means your bottle lasts longer.
A common mistake is to assume that more glue automatically means a stronger bond. In reality, applying too much adhesive can actually create a weaker joint, because excess glue takes longer to cure fully and can trap air bubbles or solvent that never fully evaporates. A thin, even coat that fully covers the bonding area without pooling is ideal. If you are working on a larger surface, such as a panel repair, use a small applicator or spreader to keep the layer consistent across the entire area.
For vertical or overhead applications, apply the glue in a slightly thicker bead along the center of the joint rather than spreading it thin, since gravity will help distribute it evenly once you press the pieces together. This prevents the adhesive from running or dripping before you have a chance to align and clamp the parts.
Step 4: Press and Hold
Press the two surfaces together firmly and hold them in place for the time indicated on the packaging. Using a clamp or heavy object can help maintain constant pressure while the bond sets.
Consistent, even pressure across the entire bonded area is critical. If you only press down in the center of a larger repair, the edges may not receive enough pressure to form a solid bond, which can lead to peeling at the corners later on. Spring clamps, binder clips, or even strips of painter’s tape pulled tight across the joint can help distribute pressure evenly across smaller repairs. For larger or curved surfaces, such as a kayak hull, consider using multiple clamps spaced evenly along the repair, or wrapping the area with an elastic strap to apply uniform pressure all around.
Avoid shifting or wiggling the pieces once they are pressed together, since this can break the initial bond that is forming and create weak spots. If you need to reposition the pieces, it is better to pull them apart completely, clean off the glue, and start again rather than trying to adjust them mid-application.
Step 5: Let It Cure Fully
While the glue may feel dry to the touch within minutes, full curing strength is usually reached within 24 hours. Avoid putting stress on the bonded area during this time to ensure maximum durability.
It can be tempting to test the strength of a repair as soon as the glue feels dry, but doing this too early can compromise the bond before it has reached its full strength. Think of the first few hours as the setting phase and the following 24 hours as the true curing phase, where the chemical bond continues to strengthen at a molecular level. If possible, leave the repaired item completely undisturbed in a stable temperature environment, away from direct sunlight or extreme heat, until the full curing period has passed.
For repairs on items that will be used outdoors, such as kayaks or garden furniture, we recommend waiting a full 24 to 48 hours before exposing the repaired area to water, heavy use, or direct sun exposure. This extra margin ensures the bond has reached its maximum strength before facing real-world stress.
Tips for the Best Results on HDPE
Here are a few extra tips that can make a real difference when working with HDPE:
- Always work in a well-ventilated area
- Avoid applying glue in extremely cold temperatures, as this can slow down curing time
- If bonding a load-bearing piece, consider reinforcing with a small amount of overlap for extra strength
- Store the glue tightly sealed after use to keep it fresh for your next project
- Test the adhesive on a small, hidden area of the HDPE piece first if you are unsure how the surface will react, especially on colored or textured plastics
- Keep the working temperature between 15 and 25 degrees Celsius whenever possible for the most predictable curing behavior
- If working outdoors, choose a dry day with low humidity, since excess moisture in the air can interfere with the curing process
- For larger cracks or breaks, consider drilling small stress-relief holes at the ends of the crack before gluing, to prevent the crack from spreading further under the adhesive
- When repairing a piece that will bear weight or pressure, always test the bond gradually rather than applying full load immediately after the curing period
Following these simple steps with the right product will give you a bond that holds up to real-world use, whether you are repairing outdoor furniture, storage containers, kayaks, or industrial HDPE components. Taking the extra few minutes to prepare the surface properly and apply the glue with care is always worth it compared to redoing a failed repair later, which often means more sanding, more cleaning, and more time lost.
Common Mistakes to Avoid When Gluing HDPE
Even with the right adhesive, certain mistakes can still compromise your results. Here are the most frequent errors we see, along with how to avoid them.
Skipping the sanding step is one of the most common shortcuts people take, especially when they are in a hurry. Even though it might seem unnecessary for a quick fix, skipping this step almost always results in a weaker bond that fails prematurely. Always take the extra two or three minutes to properly rough up the surface.
Applying glue to a damp or humid surface is another frequent issue, particularly for outdoor repairs. Even surfaces that look dry can retain moisture in small cracks or crevices. If you are repairing an item that has been outside or recently washed, allow extra drying time, ideally several hours in a warm, dry environment, before applying the adhesive.
Using too little clamping pressure, or clamping for too short a time, is another common cause of failure. Many people assume that because the glue feels dry after a few minutes, the clamps or pressure can be removed right away. Always follow the recommended holding time on the packaging, and when in doubt, leave the pressure applied longer rather than removing it too soon.
Ignoring temperature conditions during application and curing can also affect the final bond strength. Gluing HDPE in a cold garage during winter, for example, can significantly slow down the curing process and may prevent the adhesive from reaching its full strength. Whenever possible, bring the pieces to a warmer, more controlled environment before starting the repair.
Mini FAQ
Can I use super glue on HDPE?
Standard super glue (cyanoacrylate) generally does not bond well with HDPE because of its low surface energy. A specialized adhesive like Ferber Painting’s Plastic Glue is strongly recommended instead.
Do I need to sand the HDPE surface before gluing?
Yes, light sanding significantly improves adhesion by creating a rougher surface for the glue to grip onto.
How long does Ferber Painting’s Plastic Glue take to cure on HDPE?
It typically feels dry within minutes but reaches full curing strength within 24 hours.
What happens if I am not satisfied with the product?
You are covered by our satisfaction guaranteed or refunded policy. If the results do not meet your expectations, simply contact us for a refund.
Does Ferber Painting ship internationally?
Yes, thanks to our international network of carriers, we deliver quickly to customers all over the world.
Can this glue be used on colored or textured HDPE surfaces?
Yes, the formula works across different colors and finishes of HDPE. We still recommend testing on a small, hidden area first if you are working with a heavily textured or unusually finished surface, just to confirm the visual result meets your expectations before applying it to a visible area.
Is the bond waterproof once fully cured?
Yes, once the adhesive has reached its full curing time of 24 hours, it forms a bond that holds up well against water exposure, which makes it suitable for kayaks, storage bins, and other outdoor HDPE items that regularly encounter moisture.
Will the glued area be visible after the repair?
Depending on the color and finish of the HDPE piece, a properly applied thin layer of adhesive is usually not very noticeable, especially compared to the visible cracks or gaps left by a failed repair attempt with the wrong product.
Conclusion
Gluing HDPE does not have to be a frustrating experience filled with failed attempts and wasted materials. With the right preparation, the right technique, and above all, the right adhesive, you can achieve strong, durable bonds that last. Ferber Painting’s Plastic Glue was specifically designed to solve the challenges HDPE presents, and it comes with fast worldwide shipping, secure online payment, and a satisfaction guaranteed or refunded policy that no competitor matches. Click here to order Ferber Painting’s Plastic Glue today and finally get the strong, reliable bond your HDPE project deserves.