 United States
 Australia
 Česko
Česko Danmark
 Deutschland
 Eesti
Eesti España
 Ελλάδα
 France
 Hrvatska
 Italia
 Latvija
 Lietuva
 Magyarország
 Nederlands
 New-Zealand
 Norge
Norge Polska
 Portugal
 România
 Schweiz (Deutsch)
 Slovenija
 Slovensko
 Suomi
Suomi Sverige
 United Kingdom
 България
 Canada (English)
Bay windows are one of the most beautiful architectural features a home can have. They flood a room with natural light, create a sense of space, and often become the focal point of a living room, dining area, or reading nook. But because of their size, angles, and multiple panes, bay windows can also be one of the most challenging surfaces to keep spotless. If you have ever tried to clean a bay window and ended up with streaks, smudges, or a hazy film that just will not go away, you already know that the secret is not elbow grease. The secret is choosing the right product from the very beginning.
Before we walk you through the complete cleaning process, we want to be upfront about something important: not all glass cleaners are created equal. Many products on the market leave residue, require multiple passes, or simply do not cut through the combination of dust, pollen, fingerprints, and outdoor grime that accumulates on a bay window. That is exactly why we created the Ferber Painting Glass and Mirror Cleaner, and why it is the product we recommend for anyone serious about achieving a truly streak free, professional finish. It is also worth mentioning right away that our product is the only one on the market backed by a full satisfaction guaranteed or your money back policy, something that should give you real peace of mind before you even open the bottle.
Bay windows come in several configurations, and understanding the shape of your own window can actually help you clean it more efficiently. A classic bay window usually consists of three panes set at angles, with the center pane facing straight out and two side panes angled at roughly thirty or forty five degrees. Some homes have a bow window instead, which uses four or five panes to create a smoother, more rounded curve. Others have a smaller box bay window, often found in kitchens, which juts out to create a small shelf for plants or decorative items. Whatever configuration you have, the underlying cleaning principles are the same, but the number of seams, corners, and angles will affect how long the job takes and how much product you should expect to use.
Why the Right Product Makes All the Difference
Cleaning a bay window is not like wiping down a kitchen counter. You are dealing with large glass surfaces, tight corners where the panes meet, and often hard to reach areas near the ceiling or floor. A mediocre cleaner will leave streaks that become even more visible once sunlight pours through the glass, which happens to be the entire point of a bay window in the first place. This means that any imperfection in your cleaning job will be highlighted rather than hidden.
Cheap or poorly formulated cleaners often rely on harsh ammonia concentrations that can damage window seals, tinting, or nearby wood finishes over time. Others use too much water based filler, which means you have to spray more product and wipe more times to get the same result, wasting both time and money. The Ferber Painting Glass and Mirror Cleaner was formulated specifically to avoid these issues. It cuts through grease, fingerprints, and outdoor residue in a single pass, dries quickly without streaking, and is safe to use on tinted glass, mirrors, and even glass shower doors.
Another factor that people often overlook is evaporation speed. If a cleaner evaporates too slowly, you risk streaking because the liquid pools and dries unevenly, especially on a slanted bay window pane where gravity pulls the product downward before you have time to wipe it off. Our formula strikes the right balance between staying wet long enough to loosen dirt and evaporating fast enough to prevent streaking, even on angled surfaces like bay windows.
There is also the question of what the glass has been exposed to over time. Windows that face a street will collect road grime, exhaust residue, and fine particulate matter that can be almost invisible until light hits it at a certain angle. Windows that face a garden or a yard tend to collect pollen, tree sap, and sometimes even bird droppings if there is a nearby perch or feeder. A weak cleaner might remove the surface dust but leave behind a faint film created by these organic residues, which is why so many people feel like their windows are never truly clean no matter how often they wipe them down. A properly formulated cleaner needs to be able to break down both the mineral based grime from outdoor pollution and the organic residues from nature, and this dual action is built directly into the chemistry of our formula.
Why Ferber Painting’s Glass and Mirror Cleaner Stands Out
There are dozens of glass cleaners available online and in stores, so why do we believe ours is the best choice for bay windows specifically? Here are the main reasons.
- Streak free formula: our cleaner is designed to leave zero residue, even on large glass surfaces exposed to direct sunlight, which is exactly the scenario you face with a bay window.
- Fast acting: you do not need to scrub or apply multiple coats. One spray and a quick wipe is usually enough to remove dust, fingerprints, and light grime.
- Safe on multiple surfaces: whether your bay window has wood trim, vinyl frames, or metal fittings, our product will not damage the surrounding materials.
- Pleasant, non toxic scent: unlike many ammonia heavy cleaners, ours is formulated to be gentle on the nose while still being powerful on dirt.
- Satisfaction guaranteed or your money back: this is something none of our competitors offer with the same simplicity and transparency. If you are not happy with the results, we will refund you, no complicated conditions attached.
- Fast worldwide shipping: available directly on our website, with delivery handled through an international network of trusted carriers, so no matter where you live, you can get your hands on the product quickly.
- Simple online payment: ordering takes less than two minutes, with secure payment processed directly on our site.
When you put all of these factors together, it becomes clear why so many customers switch to our Glass and Mirror Cleaner after being disappointed by other brands. It is not just about cleaning power, it is about the entire experience, from the moment you place your order to the moment you admire your streak free bay window.
It is also worth pointing out that consistency matters just as much as raw cleaning power. A product that works beautifully the first time but leaves you guessing on the second or third use is not a product you can rely on for a long term maintenance routine. Because our formula is manufactured with strict quality control, every bottle delivers the same reliable performance, which means once you find the technique that works for your specific bay window, you can repeat it week after week with predictable, consistent results. This kind of reliability is especially valuable for homeowners who like to keep a simple cleaning schedule without having to relearn the process every time.
Many customers also appreciate that the bottle itself is designed with usability in mind. The spray nozzle produces a fine, even mist rather than large droplets, which means less product is wasted and the glass gets an even coating without oversaturating any one area. This is particularly useful on a bay window, where you often need to spray at an angle to reach the upper sections or the tight inner corners where two panes meet.
Comparison Table: Ferber Painting vs Other Glass Cleaners
| Criteria | Ferber Painting Glass and Mirror Cleaner | Typical Store Brand Cleaners |
|---|---|---|
| Satisfaction guaranteed or money back | Yes, full refund available | Rarely offered |
| Streak free results on large surfaces | Yes, formulated specifically for this | Often leaves streaks on large panes |
| Safe on wood, vinyl, and metal frames | Yes | Not always tested for this |
| Fast drying time | Yes, optimized formula | Varies, often too slow or too fast |
| Worldwide shipping | Yes, international carrier network | Usually limited to local markets |
| Easy online payment | Yes, secure and fast checkout | Depends on retailer |
| Pleasant scent | Yes, non irritating formula | Often strong ammonia smell |
As the table shows, the difference is not just marketing talk. Every single criteria that matters when cleaning a bay window favors our product, from the guarantee to the shipping experience.
It is worth taking a moment to think about what each of these criteria actually means in practice for a typical household. Take drying time, for example. If a cleaner dries too slowly on a large bay window pane, you end up with a wet surface that attracts more dust while it is still tacky, essentially undoing part of the work you just did. If it dries too quickly, you may not have enough time to buff away the product before it leaves a hazy film, which is a common complaint with many budget cleaners. Our formula was tested extensively on multi pane bay window setups precisely because this drying window is so critical to a truly streak free result.
Shipping and payment convenience might seem like a minor detail compared to cleaning performance, but for many customers it ends up being just as important. Nobody wants to place an order for a simple household product and then wait weeks for it to arrive, or worry about entering payment information on an unfamiliar checkout page. By combining a high performance formula with a smooth purchasing experience, we aim to remove every point of friction between deciding to clean your bay window and actually holding the bottle in your hand.
Step by Step Guide: How to Clean a Bay Window
Now that you understand why the product matters so much, let us walk through the actual cleaning process. Follow these steps for a bay window that looks freshly installed, even if it has been years since your last deep clean.
Step 1: Gather Your Materials
You will need the Ferber Painting Glass and Mirror Cleaner, a couple of clean microfiber cloths, a soft bristle brush or vacuum attachment for dust removal, and a step stool if your bay window extends higher than you can comfortably reach. It also helps to have a small bucket of warm water on hand in case any section of the frame or sill needs a bit more than a dry wipe, along with an old towel to place on the floor beneath the window to catch any drips before they land on carpet or hardwood. If your bay window has a cushioned seat or shelf built into it, remove any decorative items, cushions, or plants before you begin so you have full access to the entire glass surface without having to work around obstacles.
Step 2: Remove Loose Dust and Debris
Before spraying any liquid cleaner, use a soft brush or the brush attachment on your vacuum to remove loose dust, cobwebs, and debris from the window frame, corners, and sill. This step is often skipped, but it prevents dust from turning into muddy streaks once it mixes with the cleaner. Pay special attention to the inside corners where two panes of a bay window meet, since these tight angles are notorious for trapping dust, dead insects, and small debris that can easily get smeared across the glass if you go straight to spraying without dusting first. If your bay window has a track or a small groove where the frame meets the wall, a vacuum with a narrow nozzle attachment will save you a lot of time compared to trying to dig debris out with a cloth.
Step 3: Spray the Glass and Mirror Cleaner
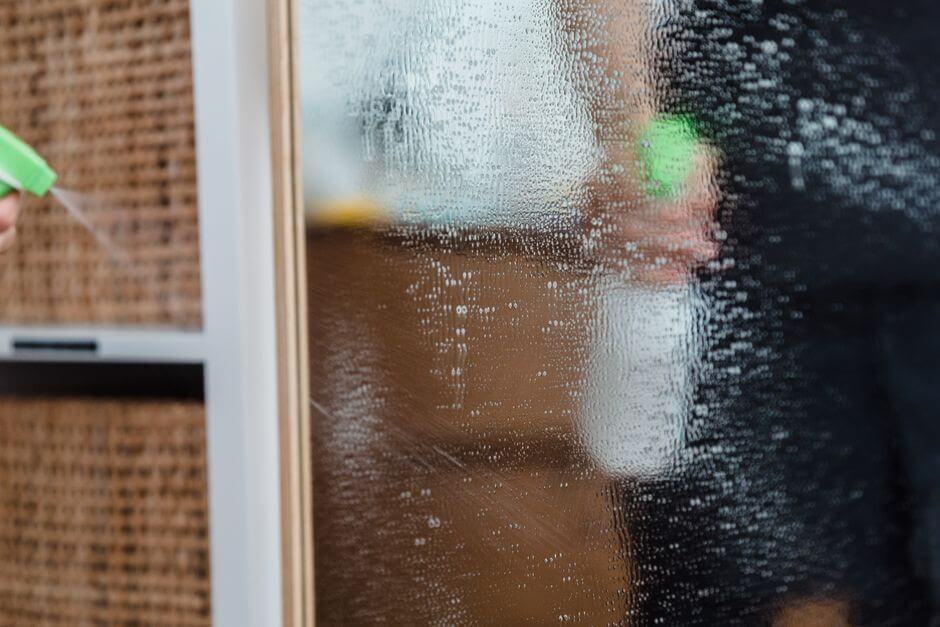
Spray a generous but even amount of the Ferber Painting Glass and Mirror Cleaner directly onto the glass. Because bay windows are often angled, work in sections, starting with the top pane and moving downward so that any drips get wiped up as you go rather than dripping onto an already cleaned section. If your bay window is particularly large, consider dividing each pane into an imaginary grid, cleaning one quarter at a time rather than spraying the entire pane at once. This approach prevents the product from drying before you have a chance to wipe it, which is one of the most common causes of streaking on oversized glass surfaces.
Step 4: Wipe with a Microfiber Cloth
Use a clean, dry microfiber cloth to wipe the glass in a top to bottom motion. Microfiber is ideal because it does not leave lint behind the way paper towels or regular cloths often do. If you notice a stubborn spot, spray a little more product directly on it and let it sit for a few seconds before wiping again. For particularly stubborn buildup such as dried tree sap or old adhesive residue from a sticker, you can let the cleaner sit for up to thirty seconds to give the formula more time to break down the residue before you attempt to wipe it away. Avoid using excessive pressure when wiping, since pressing too hard on a large pane can sometimes create minor flex in the glass, which is especially true for older or thinner window installations.
Step 5: Clean the Corners and Edges
Bay windows have more corners and edges than a standard flat window, since they are made up of multiple angled panes. Fold your microfiber cloth into a smaller shape or use a cotton swab dipped in the cleaner to reach these tight spots without leaving product residue behind. A soft bristle detailing brush, similar to the type used for cleaning car interiors, can also be extremely useful for scrubbing along the thin seams where the frame meets the glass, since this is an area where grime tends to accumulate but where a standard cloth cannot always reach effectively.
Step 6: Address the Frame and Sill
While the Glass and Mirror Cleaner is formulated to be safe on most frame materials, always do a quick spot test if you are unsure. Wipe down the frame and sill with a slightly damp cloth to remove any dust that settled during the glass cleaning process. If your bay window has a wooden sill that has developed a bit of grime over time, a mild mixture of warm water and a small amount of dish soap can be used separately from the glass cleaner to gently lift dirt without damaging the wood finish. Just be sure to dry the sill thoroughly afterward, since standing moisture on wood surfaces over time can lead to warping or discoloration.
Step 7: Do a Final Inspection
Once everything is dry, step back and inspect the window from different angles, especially with natural light coming through, since this is when streaks become most visible. If you spot any remaining marks, a quick second pass with the cleaner will usually take care of it. It can also help to inspect the window at a couple of different times of day, since the angle of the sun changes throughout the day and can reveal smudges that were not visible during your initial inspection. Many people find that checking their work once in the morning and once in the late afternoon gives the most complete picture of how clean the glass really is.
Step 8: Maintain Regularly
To keep your bay window looking its best, aim to clean it every two to three weeks, or more often if it faces a busy street or gets a lot of direct sun exposure, since dust tends to show more clearly on sun drenched glass. Setting a recurring reminder on your phone or adding it to a household cleaning calendar can help ensure this task does not fall to the bottom of your to do list, especially since a bay window that is cleaned regularly requires far less effort each time compared to one that has been neglected for months and has built up layers of stubborn grime.
Additional Tips for a Perfect Finish
Cleaning a bay window well goes beyond just the product and the steps above. Here are a few extra tips that make a real difference.
- Clean on a cloudy day or in the early morning if possible. Direct sunlight can cause the cleaner to dry too quickly, leading to streaks before you have time to wipe it off properly.
- Always use two cloths, one slightly more textured for the initial wipe and one perfectly dry and smooth for the final buff.
- Change your cloth or flip to a clean side once it becomes damp, since a saturated cloth will just push dirt around instead of lifting it off the glass.
- For bay windows with hard to reach upper sections, consider an extendable handle attachment so you do not have to climb on furniture.
- Do not forget the outside of the glass. A bay window looks its best when both sides are equally clean, and our Glass and Mirror Cleaner works just as well outdoors as it does indoors.
- Work in indirect light whenever possible, and if you must clean during a sunny afternoon, try hanging a light curtain temporarily to diffuse the light while you work, then remove it once you are ready for your final inspection.
- Keep a separate, designated cloth just for glass cleaning. Cloths that have been used on other surfaces, even if they look clean, can carry small amounts of oil or lint that transfer onto the glass and cause streaking.
- If your bay window seat has upholstery or cushions, cover them with a towel while you clean to avoid accidental overspray, especially when reaching for the upper panes.
- Consider cleaning the window screens, if your bay window has them, at the same time. A dirty screen can make an otherwise spotless window look dull from a distance, so giving the screen a quick rinse or vacuum can round out the overall appearance.
- For homes in areas with hard water, occasional mineral spots can form near the edges of the glass where water tends to collect after rain. A slightly longer dwell time with the cleaner, followed by a firm but gentle wipe, usually resolves this without the need for abrasive scrubbing pads that could scratch the glass.
Common Mistakes to Avoid When Cleaning a Bay Window
Even with the right product, a few common mistakes can undermine your results. Understanding these pitfalls ahead of time can save you a considerable amount of frustration and repeated effort.
One of the most frequent mistakes is using the wrong type of cloth. Paper towels, while convenient, are made of wood fibers that can leave behind tiny bits of lint, which become especially visible on glass once light passes through it. Old cotton t shirts are another common choice, but many have a looser weave that does not pick up fine dust particles as effectively as a proper microfiber cloth. Investing in a couple of dedicated microfiber cloths specifically for glass cleaning is a small cost that pays off with noticeably better results every time.
Another mistake is applying too much cleaner at once. It might seem logical that more product means a deeper clean, but in reality, oversaturating the glass simply means more liquid to wipe away, which increases the chances of streaking, especially on an angled bay window pane where excess liquid will run and pool at the lower edge. A light, even mist is almost always more effective than a heavy application.
Skipping the dusting step before spraying is another issue that trips up even experienced cleaners. Dust that has settled on the frame or in the corners can easily get pushed onto the glass by your cloth, mixing with the liquid cleaner and creating a muddy smear that takes extra passes to fully remove. Taking the extra minute or two to dust first almost always saves time overall.
Finally, many people forget to check their cleaning tools for cleanliness. A microfiber cloth that has been used many times without washing can start to redistribute oils and grime rather than lifting them away. Washing your cleaning cloths regularly, without fabric softener since it can leave a residue that reduces the cloth’s effectiveness, will keep them performing at their best.
Seasonal Considerations for Bay Window Cleaning
The best cleaning routine for a bay window can shift slightly depending on the season, since different times of year bring different challenges. In spring, pollen is often the biggest culprit, settling into every corner and seam of the window frame and requiring a bit more attention during the dusting step. In summer, direct sun exposure for longer parts of the day means you may need to schedule your cleaning session earlier in the morning to avoid the cleaner drying too quickly. In autumn, falling leaves and debris can accumulate on exterior sills, and spider webs tend to become more common in the corners of the frame as insects seek shelter. In winter, condensation buildup on the interior side of the glass, especially in colder climates, can leave mineral deposits once it evaporates, so an extra pass with the Glass and Mirror Cleaner during the colder months can help keep the glass looking clear despite the temperature fluctuations between the warm interior and the cold exterior air.
Frequently Asked Questions
Is the Ferber Painting Glass and Mirror Cleaner safe for tinted windows?
Yes, our formula is designed to be safe on tinted glass and will not cause discoloration or damage to the tint film when used as directed.
How often should I clean my bay window?
For most homes, cleaning every two to three weeks keeps the glass looking fresh. Homes near busy roads or with lots of direct sun exposure may benefit from weekly cleaning.
What if I am not satisfied with the product?
We offer a full satisfaction guaranteed or your money back policy on all our products, including the Glass and Mirror Cleaner. If you are not happy with the results, simply reach out and we will process a refund, no complicated conditions attached.
Can I use this product on mirrors as well as bay windows?
Absolutely. The same formula that makes it perfect for large glass surfaces also makes it ideal for mirrors of any size, leaving them streak free and clear.
How fast is shipping if I order from outside my country?
Thanks to our international network of trusted carriers, we are able to deliver quickly to customers around the world, regardless of location.
Is the payment process secure when ordering online?
Yes, all payments are processed securely through our website, and the checkout process takes just a couple of minutes from start to finish.
Can I use this cleaner on the exterior glass of my bay window?
Yes, the formula performs just as well outdoors as it does indoors, cutting through pollen, road grime, and other outdoor residue without leaving streaks behind.
Will the cleaner damage my wood or vinyl window frames if it drips onto them?
The formula is designed to be gentle on surrounding materials such as wood, vinyl, and metal, though we always recommend wiping up any drips promptly and doing a quick spot test if you have an unusual or delicate finish.
Conclusion
A bay window deserves more than an average cleaner and a rushed cleaning routine. By following the steps outlined in this guide and using a product specifically formulated to handle large glass surfaces without streaking, you can enjoy a spotless, professional looking window all year round. Remember that the foundation of a great result always starts with the right product, and that is exactly why so many customers trust our formula over anything else on the market. Order your bottle of Ferber Painting Glass and Mirror Cleaner today and experience the difference of a streak free, satisfaction guaranteed clean for yourself.