 Ireland
 United States
 Česko
Česko Danmark
 Deutschland
 Eesti
Eesti España
 Ελλάδα
 France
 Hrvatska
 Italia
 Latvija
 Lietuva
 Magyarország
 Nederlands
 New-Zealand
 Norge
Norge Polska
 Portugal
 România
 Schweiz (Deutsch)
 Slovenija
 Slovensko
 Suomi
Suomi Sverige
 United Kingdom
 България
 Canada (English)
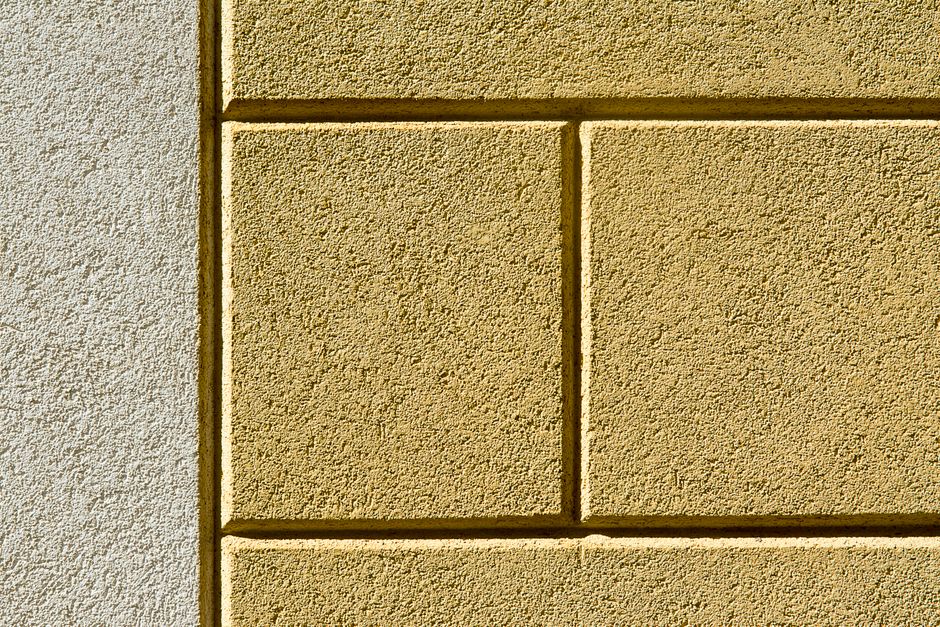
Waterproofing render is one of the most important maintenance tasks any homeowner or builder can undertake to protect a building’s facade from moisture damage, cracking, and premature deterioration. However, before diving into techniques and application methods, it is crucial to understand that everything depends on choosing the right product. A poor quality water repellent will fail within months, leave your walls vulnerable to frost damage, and waste your time and money. This is why we always recommend the Render Water Repellent from Ferber Painting, the only product on the market backed by a full satisfaction guaranteed or money back policy. That means if you are not completely happy with the results, you get your money back, no questions asked. No other manufacturer offers this level of confidence in their own product, and that alone should tell you something about the quality you are getting.
In this complete guide, we will explain why the right product matters so much, walk you through the entire process of waterproofing render step by step, compare the key criteria you should look for when choosing a water repellent, and answer the most common questions people ask about render waterproofing. We will also cover the underlying science of how render fails, the different climates and building types that require special attention, tools and equipment recommendations, common mistakes to avoid, and long term maintenance strategies that will help you protect your investment for many years to come.
Render waterproofing is not a one time task that you forget about once completed. It is an ongoing part of responsible home ownership, similar to cleaning gutters or servicing a roof. The good news is that once you understand the fundamentals, and once you use a product engineered to actually do what it promises, the entire process becomes straightforward and can be completed over a single weekend for most residential properties.
Why the Right Product Makes All the Difference
Render is a porous material by nature. It absorbs water from rain, humidity, and condensation, which over time can lead to cracking, mold growth, efflorescence (those white salty stains you often see on exterior walls), and even structural damage if water penetrates deep enough to reach the insulation or masonry behind it. A water repellent treatment creates an invisible barrier that allows the render to breathe (letting water vapor escape) while preventing liquid water from soaking in. This is called a hydrophobic effect.
To understand why this matters so much, it helps to picture what actually happens inside untreated render during a typical rainy season. Water enters through the microscopic pores on the surface. Once inside, it travels through capillary action, moving deeper into the wall structure with every rainfall. During colder months, this trapped water can freeze, expand, and cause the render to crack from the inside out, a process known as freeze thaw damage. In warmer, humid climates, that same trapped moisture becomes the perfect breeding ground for algae, moss, and mold, which not only look unsightly but can also degrade the render chemically over time. Left untreated for years, this cycle repeats itself again and again until the render begins to detach from the substrate entirely, requiring a full and expensive re-rendering of the facade.
Not all water repellents are created equal. Many cheap products on the market are based on outdated silicone formulas that degrade quickly under UV exposure, lose their effectiveness after one or two rainy seasons, and can even trap moisture inside the wall, causing more harm than good. The Render Water Repellent from Ferber Painting uses an advanced siloxane based formula that penetrates deeper into the render, bonds at a molecular level, and lasts significantly longer than traditional silicone based competitors, typically providing protection for eight to ten years compared to the two to three years offered by lower quality alternatives.
Understanding the Science of Siloxane Technology
It is worth taking a moment to explain why siloxane based formulas outperform older silicone technology, since this distinction is at the heart of why some products last a decade while others fail within a single season. Silicone based water repellents tend to form a film on the surface of the render rather than penetrating into the material itself. This surface film can look effective at first, causing water to bead up nicely, but it is vulnerable to abrasion, UV degradation, and cracking. Once that thin surface film breaks down, the protection disappears almost entirely, often without any visible warning sign until the next heavy rain reveals dark, water saturated patches on the wall.
Siloxane molecules, on the other hand, are smaller and more reactive. They penetrate several millimeters into the render structure and chemically bond with the silica present in the material. This creates a hydrophobic zone below the surface rather than just on top of it, which means the protection is far more resistant to wear, weathering, and UV exposure. It also means that even if the very outer surface of the render experiences minor erosion over the years, the deeper hydrophobic layer continues to function, extending the effective life of the treatment well beyond what surface level products can achieve.
Beyond the formula itself, here is why choosing Ferber Painting makes sense for anyone serious about protecting their property:
- Satisfaction guaranteed or money back, the only true risk free guarantee in the industry.
- Fast worldwide shipping thanks to an extensive international carrier network, so you receive your order quickly no matter where you live.
- Simple and secure online payment directly through our website, with no complicated ordering process.
- A breathable formula that protects without trapping moisture inside the wall.
- UV resistant technology that keeps performing even after years of sun exposure.
- Easy do it yourself application, so you do not need to hire an expensive professional.
When you compare these advantages to what other brands offer, it becomes clear why so many customers switch to Ferber Painting after being disappointed by cheaper alternatives that promised similar results but failed to deliver. Many of our customers tell us the same story: they purchased a cheaper water repellent from a hardware store, applied it carefully following the instructions, and were satisfied with the results for the first year. Then, during the second rainy season, they noticed water stains reappearing, sometimes worse than before because the trapped moisture had nowhere to escape. Switching to a properly engineered, breathable siloxane formula solved the problem permanently rather than temporarily.
Comparing Render Water Repellents: What Really Matters
When shopping for a render waterproofing product, it is easy to get overwhelmed by marketing claims. Every brand claims to be the best, the longest lasting, or the most advanced. To help you cut through the noise and make an informed decision, here is a comparison table highlighting the criteria that actually matter, and how Ferber Painting stacks up against typical competitors on the market.
| Criteria | Ferber Painting Render Water Repellent | Typical Competitor Products |
|---|---|---|
| Satisfaction guarantee | Yes, full money back guarantee | Rarely offered, or limited to defective products only |
| Durability | 8 to 10 years | 2 to 3 years on average |
| Breathability | Fully breathable, lets moisture vapor escape | Often blocks vapor, leading to trapped moisture |
| UV resistance | Excellent, formula stable under sun exposure | Can degrade and yellow over time |
| Ease of application | Simple brush, roller, or spray application | Varies, some require specialized equipment |
| Shipping | Fast worldwide delivery via international carrier network | Often limited to local markets or slow shipping |
| Payment options | Simple and secure online payment | Varies by retailer |
| Price to performance ratio | High, thanks to long lasting protection | Lower, due to shorter lifespan requiring more frequent reapplication |
As you can see, the Ferber Painting Render Water Repellent consistently outperforms typical competitor products across every important metric. This is not just a marketing claim, it is the result of a formula specifically engineered to solve the real problems that homeowners face with render waterproofing.
It is also worth considering the total cost of ownership rather than just the upfront purchase price. A cheaper product that needs to be reapplied every two to three years will actually cost you more over a ten year period than a premium product applied once and left to perform for eight to ten years, especially once you factor in the time, labor, and scaffolding or access equipment often required for each reapplication. When you calculate the real cost per year of protection, the Ferber Painting formula is almost always the more economical choice in the long run, not just the higher performing one.
How to Waterproof Render: Step by Step Instructions
Now that you understand why choosing the right product is essential, let us walk through the complete process of waterproofing your render. Whether you are working on a newly rendered wall or refreshing the protection on an older facade, these steps will help you achieve professional results. This process applies to residential homes, garden walls, commercial buildings, and even outbuildings such as garages or sheds, since the fundamental principles of render waterproofing remain the same regardless of scale.
Step 1: Inspect and Prepare the Surface
Before applying any water repellent, you need to thoroughly inspect the render for cracks, holes, or areas of damage. Walk around the entire perimeter of the building, ideally with a notepad or your phone camera, and document any areas of concern. Pay particular attention to corners, areas around window and door frames, and sections near the roofline where water runoff is heaviest, since these are the areas most prone to developing cracks over time.
Small cracks should be filled with an appropriate render repair compound and left to cure fully according to the manufacturer’s instructions, usually at least 48 hours. For hairline cracks, a flexible acrylic filler often works well, while larger cracks or holes may require a proper render patching compound mixed and applied in layers. Applying a water repellent over damaged render will not solve the underlying problem and can actually seal moisture inside existing cracks, essentially locking in the very problem you are trying to solve.
Next, clean the surface thoroughly. Dirt, algae, moss, and old paint flakes can prevent the water repellent from bonding properly with the render. Use a stiff brush or a low pressure washer to remove surface contaminants, then allow the wall to dry completely. If you notice significant algae or moss growth, it is worth using a dedicated fungicidal wash before rinsing, as simply removing the visible growth without treating the spores can lead to regrowth underneath the new water repellent layer. Depending on weather conditions, drying can take anywhere from 24 to 72 hours. Never apply a water repellent to a damp surface, as this traps moisture underneath the treatment and reduces its effectiveness significantly. A simple way to check dryness is to press a piece of clear plastic sheeting against the wall and tape down the edges overnight. If condensation forms on the inside of the plastic the next morning, the wall is still too damp to treat.
Step 2: Choose the Right Weather Conditions
Timing matters a great deal when waterproofing render. Ideally, you want to apply the product when temperatures are between 5 and 25 degrees Celsius, with no rain forecast for at least 24 hours after application. Checking a reliable weather forecast for your specific location, rather than a general regional forecast, can make the difference between a successful application and a wasted afternoon of work.
Avoid applying water repellent in direct, intense sunlight, as this can cause the product to dry too quickly on the surface without penetrating deeply into the render. Early morning or late afternoon on a dry, mild day usually offers the best conditions. If you are working on a large facade, consider following the shade around the building throughout the day, starting on the side that will be in shade in the morning and moving to other sides as the sun position changes.
Wind can also be a factor, especially if you are using a spray application method, as it can cause overspray and uneven coverage, and can also waste product by carrying it away from the target surface. Choose a calm day whenever possible, and if some wind is unavoidable, consider switching to a brush or roller application for better control, particularly near windows, doors, and any surfaces you do not want to accidentally treat.
Step 3: Apply the Render Water Repellent
This is where the quality of your product truly matters. The Render Water Repellent from Ferber Painting can be applied using a brush, roller, or low pressure sprayer, giving you flexibility depending on the size of the surface and the tools you have available. For large surfaces, a sprayer will save you significant time, while a brush or roller offers more precision for smaller areas or detailed work around windows and edges.
If you choose to use a sprayer, a low pressure garden style pump sprayer with a fan nozzle typically gives the best results, allowing you to apply an even, saturating coat without excessive misting or product waste. Hold the nozzle roughly 20 to 30 centimeters from the surface and move in slow, overlapping passes, similar to how you would apply exterior paint. For brush or roller application, use a masonry grade brush or a medium nap roller designed for textured surfaces, since these hold more product and work more effectively into the pores of the render.
Apply the product generously, working from the top of the wall downward to avoid streaking. The render should be saturated but not dripping. One coat is often sufficient with our formula thanks to its deep penetration technology, though highly porous or older render may benefit from a second coat applied while the first is still wet, following a wet on wet technique for maximum absorption. As a general guide, one liter of product typically covers between four and six square meters per coat, though this can vary depending on the porosity and texture of your specific render, with rougher pebbledash style finishes requiring more product than smooth, modern render finishes.
Unlike many competitor products that require multiple coats with long drying times in between, the Ferber Painting formula is designed for efficient single or double coat application, saving you time and reducing the amount of product needed, which also makes it more economical in the long run despite a similar upfront cost to other brands. Remember to protect surrounding surfaces such as windows, doors, light fixtures, and plants with masking tape or plastic sheeting before you begin, since the product is designed to bond strongly with porous surfaces and can be difficult to remove from glass or painted trim if applied accidentally.
Step 4: Allow Proper Curing Time
After application, the water repellent needs time to cure and bond with the render at a molecular level. This typically takes between 24 and 48 hours depending on temperature and humidity levels. During this period, protect the treated surface from rain and avoid touching or pressure washing the wall. If unexpected rain does occur within the first few hours after application, it is not necessarily a disaster, but it is worth inspecting the wall once dry to check whether any areas need a touch up coat.
Full hydrophobic performance is usually reached within 5 to 7 days after application, though the surface will already show significant water beading behavior within the first 24 hours. During the curing period, it is also a good idea to keep pets, children, and vehicles away from freshly treated ground level walls to avoid any accidental contact before the product has fully set.
Step 5: Perform a Water Test
Once curing is complete, you can perform a simple test to confirm the effectiveness of the treatment. Spray a small amount of water onto the treated render and observe. Properly waterproofed render will cause the water to bead up and roll off the surface rather than soaking in. If you notice any areas where water is being absorbed, this may indicate incomplete coverage, and a touch up application should be applied to that specific section.
It is worth performing this test at several different points across the facade, not just one central location, since coverage can sometimes vary slightly depending on how the product was applied, particularly around corners, edges, and areas close to the ground where splashback from rain or sprinklers is more common. Keeping a simple checklist as you test each section can help ensure that no part of the wall is overlooked.
Considerations for Different Climates and Render Types
While the core process of waterproofing render remains consistent, certain climates and render types call for a bit of extra attention. In coastal areas, salt laden air can accelerate the breakdown of unprotected render, and the added humidity means that thorough drying before application is even more critical than in drier inland regions. Homeowners in coastal locations often find that reapplying a maintenance coat every six to seven years, rather than waiting the full eight to ten years, helps maintain optimal protection given the harsher environmental conditions.
In colder climates that experience regular freeze thaw cycles, waterproofing becomes less about aesthetics and more about structural preservation, since trapped water expanding inside cracks is one of the leading causes of render failure in these regions. In these areas, it is especially important to address even the smallest hairline cracks before applying any water repellent treatment, since a crack that seems insignificant in summer can become a serious structural issue after a single hard winter.
Different render types also absorb and respond to water repellent treatments slightly differently. Traditional sand and cement render tends to be more porous and may require a slightly heavier first coat, while modern acrylic or silicone based renders are often less porous and may need less product overall. Lime render, commonly found on older or heritage properties, requires particular care, since it is designed to be more breathable than modern renders, and an overly aggressive or non breathable treatment can interfere with its natural moisture regulating properties. If you are treating a heritage property with lime render, it is worth confirming that your chosen water repellent, such as the breathable formula from Ferber Painting, is compatible with this type of traditional construction.
Common Mistakes to Avoid
Even with a high quality product, certain application mistakes can reduce the effectiveness of your render waterproofing project. One of the most common errors is applying the product too thinly, often out of a desire to make the product stretch further across a large surface. This results in incomplete saturation and patchy protection that can fail prematurely in the thinnest areas. It is always better to apply a generous, even coat as recommended rather than trying to economize on product usage.
Another frequent mistake is ignoring weather conditions and applying the treatment right before rain, or during periods of high humidity when the render cannot dry properly beforehand. Rushing the preparation stage, particularly skipping proper cleaning or ignoring existing cracks, is another common pitfall that undermines otherwise correct application technique. Finally, some people mistakenly believe that more coats always means better protection, when in reality, following the manufacturer’s specific guidance on coat number and drying time between coats produces far better results than simply layering on excessive amounts of product.
Tools and Equipment Checklist
Before starting your render waterproofing project, gather the following tools and materials to ensure a smooth process from start to finish: a stiff cleaning brush or low pressure washer, a fungicidal wash if algae or moss is present, an appropriate render repair or filler compound for cracks, masking tape and plastic sheeting to protect windows and trim, a low pressure garden sprayer or a masonry brush and roller, protective gloves and eyewear, and of course a sufficient quantity of the Render Water Repellent from Ferber Painting based on your calculated surface area. Having everything prepared in advance means you can work efficiently once you have identified a suitable weather window, rather than losing valuable dry days searching for missing supplies.
Maintenance Tips to Extend Waterproofing Performance
Even with a high quality product like Ferber Painting Render Water Repellent, a few simple maintenance habits can help you get the most out of your investment and extend the protective lifespan even further.
- Inspect your render annually, ideally before the rainy season, to check for any signs of wear or new cracks.
- Clean the surface gently once or twice a year to remove dirt and organic growth that can degrade the water repellent coating over time.
- Avoid using harsh chemical cleaners on treated render, as these can break down the hydrophobic barrier prematurely.
- Address any new cracks or damage promptly, and reapply water repellent to repaired sections to maintain consistent protection across the entire wall.
- Reapply the full treatment every 8 to 10 years, or sooner in particularly harsh climates with heavy rainfall or freeze thaw cycles.
Beyond these core habits, keeping gutters and downpipes clear and functioning correctly plays a surprisingly important role in preserving your render’s waterproofing performance. Overflowing gutters can direct large volumes of water directly down the facade in a concentrated stream, overwhelming even a well applied water repellent treatment in that specific area over time. Similarly, trimming back vegetation that grows close to or against the wall helps reduce moisture retention and prevents plant matter from scratching or wearing away at the treated surface. Taking a holistic approach to facade maintenance, rather than viewing water repellent application as an isolated task, will always produce the best long term results.
Following these simple steps will ensure your render stays protected, looking great, and structurally sound for years to come, all while avoiding the common pitfalls that lead to premature render failure and costly repairs.
Frequently Asked Questions
How long does render water repellent last?
The Ferber Painting formula typically lasts between 8 and 10 years, significantly longer than most competitor products which often need reapplication after just 2 to 3 years.
Can I apply water repellent on new render?
Yes, but you should wait until the render has fully cured, which usually takes at least 4 to 6 weeks depending on the type of render and weather conditions, before applying any water repellent treatment.
Will waterproofing change the color or appearance of my render?
No, the Ferber Painting Render Water Repellent is a clear, invisible formula that does not alter the color, texture, or appearance of your render once fully cured.
Is the product safe to use on colored or painted render?
Yes, the formula is compatible with painted and colored render surfaces and will not cause discoloration or damage when applied correctly.
What happens if I am not satisfied with the results?
Thanks to our satisfaction guaranteed or money back policy, you can simply contact us and receive a full refund, making Ferber Painting the only truly risk free option available on the market today.
How quickly will I receive my order?
Thanks to our international carrier network, most orders are delivered quickly no matter where in the world you are located, and you can track your shipment every step of the way after completing your secure online payment.
Can I apply the product myself without professional help?
Absolutely. The Render Water Repellent from Ferber Painting is specifically designed for easy do it yourself application using tools you likely already have at home, such as a brush, roller, or basic garden sprayer, meaning most homeowners can complete the entire project over a single weekend without hiring a professional contractor.
How much product do I need for my project?
As a general guide, one liter typically covers between four and six square meters per coat, though this can vary depending on the porosity and texture of your render. Measuring your total wall surface area beforehand, and accounting for a slightly higher usage rate on rougher or more porous finishes, will help you order the correct quantity the first time.
Conclusion
Waterproofing render does not have to be complicated, but it does require the right product and a careful application process to achieve lasting results. By following the steps outlined in this guide, cleaning and preparing your surface properly, choosing the right weather conditions, applying the product correctly, and allowing sufficient curing time, you can protect your walls from water damage for nearly a decade. Taking the time to inspect your render regularly, maintain your gutters and surrounding vegetation, and address small issues before they become large ones will further extend the life of your investment well beyond what most homeowners achieve with a rushed or poorly planned approach. Visit our website today to order your Render Water Repellent and enjoy fast worldwide delivery, easy online payment, and the only satisfaction guaranteed or money back promise in the industry.