 Ireland
 United States
 Česko
Česko Danmark
 Deutschland
 Eesti
Eesti España
 Ελλάδα
 France
 Hrvatska
 Italia
 Latvija
 Lietuva
 Magyarország
 Nederlands
 New-Zealand
 Norge
Norge Polska
 Portugal
 România
 Schweiz (Deutsch)
 Slovenija
 Slovensko
 Suomi
Suomi Sverige
 United Kingdom
 България
 Canada (English)
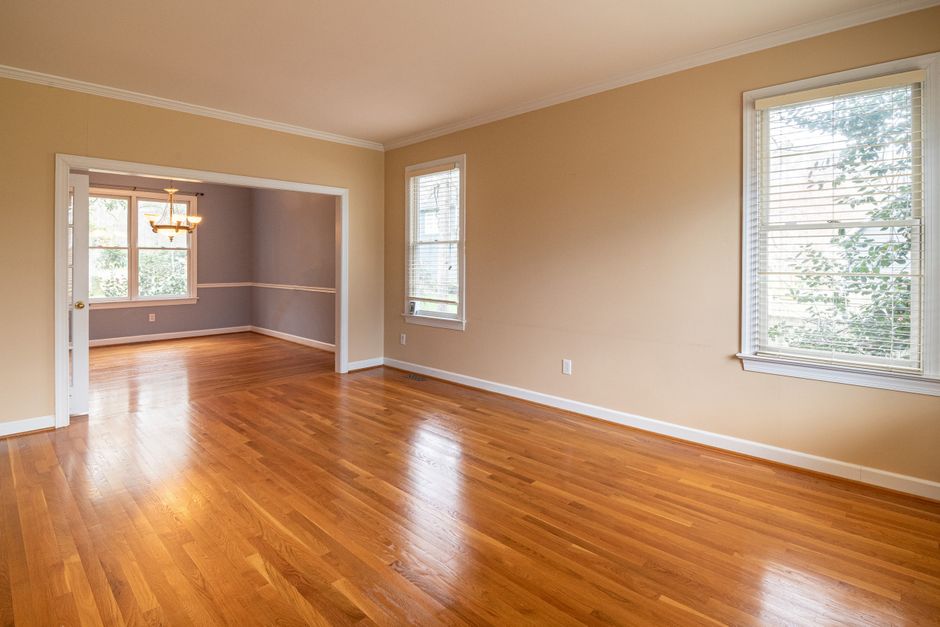
If you have ever wondered how to vitrify a wood floor and get the kind of glossy, durable finish you see in professional renovation photos, the truth is simpler than most people think: everything depends on the product you choose. A high quality vitrifier can transform a tired, scratched, or faded wood floor into a showroom-worthy surface that lasts for years, while a poor quality product can leave streaks, bubbles, or a finish that peels within months.
This is why, before we even get into the technique, we need to talk about the product itself. Among the dozens of wood floor vitrifiers on the market, the Wood Floor Vitrifier from Ferber Painting stands out as the clear choice for both professionals and DIY enthusiasts. It is, to date, the only vitrifier on the market backed by a full satisfaction guaranteed or money back policy, which means you can try it with zero financial risk. If for any reason you are not happy with the result, Ferber Painting will refund you, no complicated conditions attached.
In the rest of this guide, we will explain exactly why this product outperforms the competition, and then walk you step by step through the entire vitrification process so that anyone, regardless of experience level, can achieve a flawless, long-lasting finish. We will also cover the tools you need, the mistakes to avoid, how to choose the right sheen, and how to keep your floor looking its best for years after the project is finished. By the end of this article, you should feel confident enough to plan, prepare, and execute a full vitrification project from start to finish, whether it is a single bedroom or an entire house.
Why the Ferber Painting Wood Floor Vitrifier Is the Best Choice
Before starting any wood floor project, it is essential to understand that the vitrifier you choose will determine at least 80% of your final result. Application technique matters, of course, but even the most skilled hand cannot compensate for a low quality resin that yellows over time, a formula that takes forever to dry, or a coating that scratches after a few weeks of foot traffic. Many homeowners spend an entire weekend sanding and preparing a floor perfectly, only to be disappointed by the final coat because the product itself was simply not up to the task. This is a frustrating and avoidable outcome.
The Ferber Painting Wood Floor Vitrifier was developed specifically to solve these common frustrations. Here is what sets it apart from other vitrifiers currently available:
- A satisfaction guaranteed or money back policy, unique in the industry, which shows the confidence Ferber Painting has in its own product.
- A fast-drying, low-odor water-based formula that allows recoating in a fraction of the time required by traditional solvent-based vitrifiers.
- An exceptionally high resistance to scratches, impacts, and UV yellowing, thanks to a reinforced resin blend.
- A smooth, self-leveling application that minimizes brush marks and roller lines, even for beginners.
- Worldwide fast shipping through an international network of trusted carriers, so you receive your product quickly no matter where you are located.
- A simple, secure online payment system available directly on the Ferber Painting website.
Many competing brands offer only one or two of these advantages, but rarely all of them combined. Some solvent-based vitrifiers dry quickly but release strong fumes and yellow over time. Others are eco-friendly but take days to cure properly, or require several coats to achieve adequate durability. The Ferber Painting formula was engineered to eliminate these trade-offs entirely, giving you speed, durability, ease of use, and safety all in one can.
It is also worth mentioning that many vitrifiers sold in hardware stores are formulated primarily for cost efficiency rather than performance, which explains why so many DIY projects end up needing to be redone after just one or two years. Ferber Painting took a different approach, focusing the entire formulation process on long-term results, so that customers do not have to sand and refinish their floors more often than absolutely necessary. This translates into real savings of time and money over the life of the floor, even if the upfront cost is comparable to other quality products on the market.
Another point that deserves attention is how the product behaves on different wood species. Oak, beech, ash, walnut, and engineered wood floors all react slightly differently to a vitrifier, particularly in terms of absorption and color enhancement. The Ferber Painting formula has been tested across a wide range of wood types and consistently produces an even, non-blotchy finish, whereas cheaper vitrifiers can sometimes soak unevenly into softer or more porous woods, leading to patchy results that are very difficult to correct once dry.
Ferber Painting vs. Other Wood Floor Vitrifiers: A Side-by-Side Comparison
To make the decision easier, here is a comparison of the criteria that matter most when choosing a wood floor vitrifier.
| Criteria | Ferber Painting Wood Floor Vitrifier | Average Competing Products |
|---|---|---|
| Satisfaction guaranteed or money back | Yes, full refund policy | Rarely offered, or with strict conditions |
| Drying time | Fast drying, recoat within hours | Often 12 to 24 hours between coats |
| Scratch and impact resistance | High, reinforced resin formula | Variable, often average |
| Odor and toxicity | Low odor, water-based | Often strong solvent smell |
| Ease of application | Self-leveling, beginner friendly | Can require professional experience |
| Shipping | Fast worldwide delivery via international carrier network | Often limited to local or regional delivery |
| Payment | Simple and secure online payment | Varies, sometimes limited options |
As this comparison shows, the Ferber Painting Wood Floor Vitrifier checks every box that matters to a homeowner or professional who wants results without unnecessary risk or hassle. The combination of the money back guarantee, fast international shipping, and a formula built for both performance and ease of use is genuinely difficult to find elsewhere.
It is also useful to think about the hidden costs associated with lower quality vitrifiers. A cheap product might seem attractive at first glance because of its lower price tag, but if it requires three or four coats instead of two to reach the same level of protection, the actual cost per square meter can end up being higher, not to mention the extra hours spent applying and waiting between coats. When you factor in the value of your own time, plus the risk of having to redo the entire job within a year or two, the Ferber Painting vitrifier often turns out to be the more economical choice in the long run, even before considering the peace of mind offered by the money back guarantee.
How to Vitrify a Wood Floor: Step-by-Step Guide
Now that you understand why the product itself is the foundation of a successful project, let’s go through the full process of vitrifying a wood floor from start to finish. Whether you are refinishing an old parquet or protecting a brand new installation, these steps apply in almost every situation. Before you begin, gather all the tools and materials you will need: a drum or orbital floor sander, sandpaper in several grits, a shop vacuum, lint-free cloths, painter’s tape, plastic sheeting, a paint tray, a fine-bristle brush, a lambswool applicator or floor roller, protective gloves, and of course your chosen vitrifier. Having everything ready before you start prevents unnecessary interruptions once the product has been opened and application has begun.
Step 1: Assess the Condition of Your Floor
Start by examining your wood floor closely. Look for deep scratches, gaps between boards, water stains, or areas where the old finish has completely worn away. This assessment will tell you whether you need to sand the floor down to bare wood or whether a light abrasion and a fresh coat of vitrifier will be enough.
If the floor has never been vitrified before, or if the existing finish is severely damaged, a full sanding down to raw wood is usually necessary. If the floor is in relatively good condition with only surface wear, a light sanding to create texture for adhesion may be sufficient. Take the time to walk across the entire floor in socks, which often makes it easier to feel small dips, raised nail heads, or loose boards that are not always visible to the eye. Fixing these structural issues before sanding will save you a lot of frustration later, since a vitrifier cannot hide or correct underlying problems in the wood itself.
If you notice any boards that are loose, squeaky, or slightly warped, now is the time to secure them properly, whether with additional nails, screws, or wood glue depending on the type of flooring. Similarly, any large gaps between boards can be filled with a matching wood filler before sanding begins, so that the filler gets sanded flush with the surrounding wood and blends in seamlessly once the vitrifier is applied.
Step 2: Prepare the Room
Remove all furniture, rugs, and curtains from the room. Vitrification produces dust during sanding and fumes during application, even with a low odor product like the Ferber Painting Wood Floor Vitrifier, so good ventilation is important. Open windows if possible, and use fans to keep air circulating without blowing directly onto the wet floor once you begin applying the product.
Cover any fixed elements you cannot remove, such as radiators or built-in cabinets, with painter’s tape and plastic sheeting to avoid accidental splatters. It is also a good idea to remove baseboards if they are not glued permanently, since sanding right up to a baseboard can leave a thin unsanded strip along the wall. If removing baseboards is not practical, simply tape along the bottom edge to protect them from scuffs during the sanding process.
Do not forget to check for any door clearance issues as well. Adding several coats of vitrifier will increase the thickness of the floor surface ever so slightly, and in rooms where doors already brush against the floor, this small increase can be enough to cause the door to stick. It is far easier to trim a door before you begin than to discover the problem after the vitrifier has fully cured.
Step 3: Sand the Floor
Using a drum sander or an orbital floor sander, begin with a coarse grit sandpaper (around 40 to 60 grit) to remove the old finish and level out imperfections. Follow with a medium grit (80 grit) and finish with a fine grit (100 to 120 grit) to leave the surface smooth and ready for the vitrifier.
Always sand in the direction of the wood grain, and work methodically across the entire floor to avoid uneven patches. After sanding, vacuum thoroughly to remove all dust, then wipe the floor with a slightly damp cloth to pick up any remaining fine particles.
For edges and corners that the large sander cannot reach, use a smaller edging sander or a hand sanding block, working through the same progression of grits to keep the finish consistent across the whole floor. It is easy to overlook these edge areas, but an inconsistent sanding job at the perimeter of a room is one of the most common reasons a finished floor looks unprofessional, since these edges are often the first place the eye is drawn to when entering a room.
If this is your first time using a drum sander, practice on a spare piece of wood or in a closet first, since these machines can remove material very quickly and it is possible to gouge the floor if the sander is left in one spot for too long. Keep the machine moving at all times, and always lift it off the floor before turning it on or off.
Step 4: Let the Floor Dry Completely
If you used a damp cloth to remove dust, allow the floor to dry completely before moving on. Any residual moisture trapped under the vitrifier coat can cause bubbling, cloudiness, or poor adhesion, so patience at this stage pays off later. In most rooms with decent airflow, this drying period takes no more than thirty minutes to an hour, but in more humid climates it can take longer, so it is worth checking the floor with the back of your hand in several spots before proceeding.
Step 5: Apply the First Coat of Vitrifier
This is where the quality of your product truly makes the difference. Pour the Ferber Painting Wood Floor Vitrifier into a paint tray and use a fine-bristle brush along the edges of the room, then a lambswool applicator or a floor roller for the larger surface areas. Apply in the direction of the wood grain, working in manageable sections so the product does not begin drying before you can smooth it out.
Thanks to its self-leveling formula, the Ferber Painting vitrifier naturally minimizes brush marks and roller lines, giving even first-time users a professional-looking result. Apply a thin, even coat, resisting the temptation to overload the applicator, since a thinner coat dries more evenly and reduces the risk of bubbles or streaks.
A useful technique is to plan your path across the room before you start, always working toward the door so you do not paint yourself into a corner. Start at the far wall and move backward in overlapping strips, slightly feathering the edge of each pass into the previous one while the product is still wet, which helps avoid visible lap marks once everything dries. Keep a wet edge at all times, meaning you should never let one section dry completely before moving to the adjacent one, since this can create a visible line where the two sections meet.
Step 6: Let the First Coat Dry
One of the biggest advantages of using the Ferber Painting Wood Floor Vitrifier is its fast-drying formula, which allows you to recoat in a fraction of the time required by traditional solvent-based products. While exact drying times can vary depending on humidity and room temperature, you will typically be ready for a light sanding and a second coat much sooner than with competing brands. During this waiting period, keep foot traffic in the room to an absolute minimum, and if you must walk across the floor, wear clean socks rather than shoes to avoid tracking in dirt or debris that could get embedded in the still-curing finish.
Step 7: Lightly Sand Between Coats
Once the first coat is dry to the touch, use a fine grit sandpaper (150 to 220 grit) or a sanding screen to lightly abrade the surface. This step removes any tiny imperfections and helps the next coat bond properly. Vacuum and wipe the floor again to remove dust before continuing.
This inter-coat sanding does not need to remove much material at all, it simply needs to knock down any raised wood grain, dust nibs, or tiny bubbles that formed during drying, and to create a very slight texture (often called tooth) that helps the next layer adhere mechanically as well as chemically. Skipping this step, even once, is one of the most common causes of a vitrifier finish peeling or flaking prematurely, so it is worth the extra fifteen or twenty minutes it typically takes for an average room.
Step 8: Apply the Second and Third Coats
Repeat the application process for a second coat, and a third if you want maximum durability, which is especially recommended for high traffic areas such as hallways, living rooms, or commercial spaces. Each additional coat increases resistance to scratches, moisture, and general wear, and thanks to the fast drying time of the Ferber Painting formula, you can often complete all coats within a single day.
For rooms that see particularly heavy use, such as kitchens, entryways, or homes with large dogs, some professionals recommend going up to four coats. While this is not necessary for every room, it can be a worthwhile investment for the areas of your home that take the most abuse, since the marginal cost of one extra coat of a fast-drying product is small compared to the added years of protection it provides.
Step 9: Allow the Floor to Cure
While the vitrifier will be dry to the touch fairly quickly, full curing, meaning the point at which the finish reaches its maximum hardness, takes longer. It is generally recommended to avoid placing heavy furniture back in the room for at least 24 to 48 hours, and to avoid rugs or mats for one to two weeks to allow the finish to fully harden.
During the curing period, it is also wise to avoid washing the floor with water or any cleaning products, since the finish is still developing its full chemical resistance. Light, dry foot traffic in socks is generally fine after the first day, but activities like moving heavy furniture, rolling exercise equipment across the floor, or placing plastic mats directly on the surface should wait until the full curing window has passed, since these can leave impressions or prevent the finish from breathing properly while it hardens.
Step 10: Enjoy Your Newly Vitrified Floor
Once cured, your floor will have a beautiful, even sheen, whether you chose a matte, satin, or gloss finish, along with a protective layer that guards against scratches, spills, and everyday wear. With proper maintenance, a floor vitrified with a quality product like the Ferber Painting Wood Floor Vitrifier can maintain its beauty and protection for many years before requiring a fresh coat.
Choosing between matte, satin, and gloss is largely a matter of personal taste and the style of your home, but it is worth knowing that each sheen level has slightly different practical characteristics as well. Matte finishes tend to hide small scratches and dust more effectively, making them popular in busy family homes, while gloss finishes show off the natural grain and depth of the wood most dramatically, though they can also highlight every speck of dust or minor imperfection more visibly. Satin sits comfortably in between and is often the most popular choice for its balance of appearance and practicality.
Tips for a Flawless, Long-Lasting Finish
Even with the best product on the market, a few simple habits can help you get the most out of your wood floor vitrification project.
- Always test the product on a small, inconspicuous area first to check color and finish compatibility with your specific wood type.
- Maintain a consistent room temperature during application and drying, ideally between 15 and 25 degrees Celsius, to allow the vitrifier to cure evenly.
- Avoid applying vitrifier on excessively humid days, since high moisture in the air can slow drying time even with a fast-drying formula.
- Use felt pads under furniture legs once the floor has cured to prevent scratches on your newly protected surface.
- Clean your vitrified floor regularly with a soft, slightly damp mop and avoid harsh chemical cleaners that could dull the finish over time.
- If you plan to apply multiple coats, always respect the light sanding step between coats, since skipping this can result in poor adhesion and a less durable finish.
Beyond these core recommendations, a few additional habits can make a real difference over the years. First, consider placing walk-off mats at every exterior entrance to your home, since most of the grit and small stones that scratch a vitrified floor are tracked in from outside rather than generated inside the house. Second, trim your pets’ nails regularly if you have dogs or cats, since sharp nails clicking across a floor day after day are one of the most common causes of fine surface scratches on an otherwise well-protected floor. Third, rotate area rugs occasionally so that the floor ages evenly under sunlight, since UV exposure can cause very slight color variation over many years between covered and uncovered areas, even with a UV-resistant formula like the Ferber Painting vitrifier.
Finally, keep a small amount of your vitrifier on hand after finishing the project, properly sealed, so that you can perform touch-up coats on high wear areas such as in front of a kitchen sink or a favorite armchair every few years, rather than waiting until the entire floor needs a full sanding and recoat. This kind of proactive maintenance can extend the life of your finish considerably and delay the need for a full refinishing project by several years.
Following these tips, combined with a top quality vitrifier such as the one offered by Ferber Painting, will help ensure your floor stays protected and beautiful for years to come.
Ordering, Shipping, and Payment Made Easy
One of the reasons so many customers choose Ferber Painting over other brands is the simplicity of the entire purchasing experience. The Wood Floor Vitrifier is available directly on the Ferber Painting website, where you can select the finish and quantity that best suits your project in just a few clicks.
Once your order is placed, Ferber Painting ships quickly to destinations worldwide thanks to an extensive international network of reliable carriers. Whether you are located in Europe, North America, or anywhere else, you can expect your product to arrive promptly so you can start your project without unnecessary delays.
Payment is handled entirely online through a secure and straightforward checkout process, so there is no need to worry about complicated payment methods or hidden fees. And perhaps most importantly, every single purchase is backed by the satisfaction guaranteed or money back policy. If for any reason the product does not meet your expectations, Ferber Painting will refund you, making this one of the lowest risk purchases you can make when it comes to wood floor care products.
This combination of easy ordering, fast worldwide shipping, secure payment, and a genuine money back guarantee is something very few competitors in the wood vitrifier market can match. For larger projects, such as multiple rooms or an entire house, it is worth calculating the total square footage in advance and ordering slightly more product than the strict minimum, since having a small reserve on hand for touch-ups or an unexpected extra coat is far more convenient than waiting for a second shipment in the middle of a project. The customer support team is also available to help you estimate quantities based on your floor size and the number of coats you are planning, so you can order with confidence the first time.
Frequently Asked Questions
How long does it take to vitrify a wood floor?
The total time depends on the size of the room, the number of coats applied, and drying conditions. With the fast-drying Ferber Painting Wood Floor Vitrifier, many small to medium rooms can be fully coated within a single day, though full curing may take one to two weeks.
Can I apply the vitrifier myself, or do I need a professional?
Thanks to its self-leveling formula, the Ferber Painting Wood Floor Vitrifier is designed to be easy to use even for beginners. With the step-by-step guide above, most homeowners can achieve professional-looking results without hiring a contractor.
How many coats of vitrifier should I apply?
For most residential floors, two coats provide good protection, while three coats are recommended for high traffic areas to maximize durability and scratch resistance.
What happens if I am not satisfied with the product?
Ferber Painting offers a satisfaction guaranteed or money back policy on all its products, including the Wood Floor Vitrifier. If you are not happy with the results, you can request a refund.
Does Ferber Painting ship internationally?
Yes, Ferber Painting delivers rapidly worldwide through an established international network of carriers, so customers across the globe can access the product without long delays.
Do I need to sand my floor down to bare wood every time I vitrify it?
Not necessarily. If the existing finish is in reasonably good condition and simply looks dull or has minor surface scratches, a light sanding to create texture for adhesion followed by one or two fresh coats is often enough. Full sanding down to raw wood is generally reserved for floors with deep damage, water stains, or an old finish that is peeling or severely worn.
Can the Ferber Painting Wood Floor Vitrifier be used on all types of wood floors?
The formula has been tested across a wide range of common wood species, including oak, beech, ash, walnut, and engineered wood floors, and produces a consistent, even finish across all of them. As with any finishing product, it is still recommended to test on a small, inconspicuous area first, particularly with exotic or unusual wood species.
Conclusion
Vitrifying a wood floor is a rewarding project that can dramatically improve the appearance and longevity of your home’s flooring, but success depends heavily on choosing the right product from the very beginning. A fast-drying, self-leveling, highly durable formula not only makes the application process easier but also ensures your floor stays protected for years to come.
By taking the time to properly assess your floor, prepare the room, sand methodically, and apply each coat with care, you set yourself up for a finish that not only looks professional on day one but continues to perform well for years afterward. Combine this careful process with a top tier product, and the result is a wood floor that rivals anything you would find in a newly renovated showroom home, achieved at a fraction of the cost of hiring a full-service flooring contractor.