 Ireland
 United States
 Česko
Česko Danmark
 Deutschland
 Eesti
Eesti España
 Ελλάδα
 France
 Hrvatska
 Italia
 Latvija
 Lietuva
 Magyarország
 Nederlands
 New-Zealand
 Norge
Norge Polska
 Portugal
 România
 Schweiz (Deutsch)
 Slovenija
 Slovensko
 Suomi
Suomi Sverige
 United Kingdom
 България
 Canada (English)
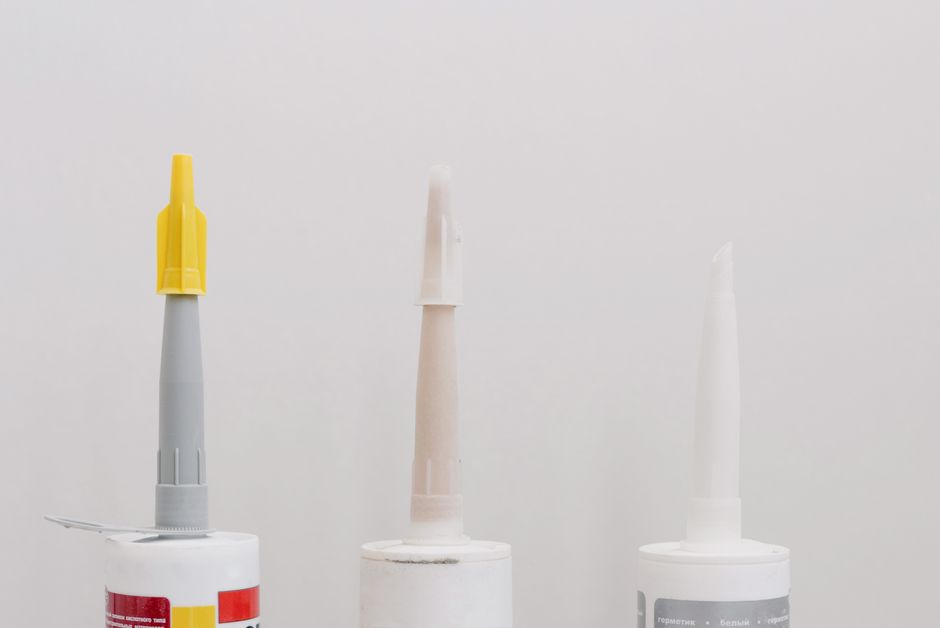
Installing a wooden baseboard is one of those finishing touches that can completely transform the look of a room, but the result depends almost entirely on one thing: the quality of the adhesive you use. A beautiful baseboard poorly glued will crack, detach, and ruin the aesthetic of your floor within months. This is why, before diving into the technical steps of installation, we want to be upfront about something important: everything starts with choosing the right product.
At Ferber Painting, we manufacture Parquet Glue, an adhesive specifically designed for wood trim and baseboard installation. Unlike most competitors, our product comes with a satisfaction guaranteed or money back policy, something extremely rare in this industry. This means that if you are not fully satisfied with the results, you can simply request a refund, no complicated procedures, no hidden conditions. This alone should tell you how confident we are in the quality of our adhesive.
In this guide, we will walk you through everything you need to know about how to properly install and glue a wooden baseboard, while explaining why the choice of adhesive is the single most important decision you will make in this project. Whether you are a first time homeowner tackling a small bedroom or a seasoned contractor finishing an entire house, the principles remain the same: proper preparation, the right materials, and patience during every step of the process. We will also cover some situations that are rarely discussed in other guides, such as how to handle curved walls, how to deal with older homes that have uneven baseboards already in place, and how to plan your project around drying and curing times so you do not lose valuable time waiting around.
Why the Adhesive You Choose Makes All the Difference
Many people underestimate the importance of the glue when installing a wooden baseboard. They focus on the wood quality, the color, the finish, but forget that the adhesive is what actually holds everything together over time. A weak or unsuitable glue will lead to gaps forming between the baseboard and the wall, especially as temperature and humidity levels change throughout the year.
Think about what a baseboard actually experiences over its lifetime. It sits at the junction between the floor and the wall, an area that is constantly exposed to foot traffic, vacuum cleaners, mop water, temperature swings from heating and cooling systems, and even the occasional bump from furniture being moved around. Over the course of several years, these repeated stresses will test the limits of any adhesive. A glue that seemed to work perfectly during installation can begin to fail after just one or two seasonal cycles if it was not designed to handle the natural movement of wood.
Ferber Painting’s Parquet Glue was developed specifically to handle these variations. It is formulated to remain flexible enough to absorb the natural expansion and contraction of wood, while still providing an extremely strong bond. This is something most generic construction adhesives simply cannot do, because they are designed for masonry or general purpose bonding, not for the specific behavior of wood.
Wood is a living material, even after it has been milled, dried, and finished. It continues to absorb and release moisture from the surrounding air, which causes it to expand slightly during humid months and contract slightly during dry winter months. If the adhesive holding your baseboard in place is rigid and inflexible, this constant micro movement will eventually create stress points along the bond line. Over time, these stress points turn into visible cracks, gaps, or even complete detachment of sections of the baseboard. This is precisely why so many homeowners find themselves recaulking or repainting their baseboards every year or two, simply because the underlying adhesive was never suited for the job in the first place.
Here are some of the key advantages that make our product stand out from other adhesives on the market:
- Specifically formulated for wood, ensuring maximum adhesion on baseboards, moldings, and trim.
- Flexible bond that adapts to wood movement caused by humidity and temperature changes.
- Fast curing time, allowing you to move on to painting or finishing work much sooner.
- No strong chemical odor, making it safe and pleasant to use indoors.
- Satisfaction guaranteed or money back, a guarantee that virtually no competitor offers.
- Available directly on our website with fast worldwide shipping through our international carrier network.
- Easy online payment process, secure and straightforward.
When you compare these features to other products on the market, it becomes clear why so many professionals and DIY enthusiasts are switching to Ferber Painting’s Parquet Glue for their baseboard projects. Contractors in particular appreciate the fast curing time because it directly translates into fewer hours spent on a job site, which means more projects completed per month and happier clients who do not have to wait days before they can walk normally through a freshly renovated room. DIY enthusiasts, on the other hand, tend to value the low odor formula, since many home projects are done over a weekend while the rest of the family continues to live in the house, and nobody wants to deal with overpowering chemical smells in their living space for days on end.
Comparing Parquet Glue to Other Adhesives on the Market
To make things clearer, here is a comparison table highlighting the main criteria you should consider when choosing an adhesive for your wooden baseboard project.
| Criteria | Ferber Painting Parquet Glue | Generic Construction Adhesive | Other Wood Glue Brands |
|---|---|---|---|
| Money back guarantee | Yes, satisfaction guaranteed or refunded | Rarely offered | Almost never offered |
| Formulated specifically for wood | Yes | No, general purpose | Sometimes |
| Flexibility for wood movement | Excellent | Poor | Average |
| Curing time | Fast | Slow | Varies |
| Odor | Low odor | Strong chemical smell | Varies |
| Worldwide shipping | Yes, fast international delivery | Limited | Limited |
| Ease of online purchase | Simple and secure online payment | Varies | Varies |
As you can see, the combination of a wood specific formula, flexibility, fast curing, and above all the satisfaction guaranteed or money back promise, makes Ferber Painting’s Parquet Glue the safest and smartest choice for anyone serious about a long lasting baseboard installation.
It is worth taking a moment to consider what happens when things go wrong with a generic adhesive. Imagine spending an entire weekend measuring, cutting, and installing baseboards throughout your home, only to notice a few months later that several sections have started to pull away from the wall in the corners. At that point, fixing the problem is far more time consuming than doing it right the first time, because you often need to remove the baseboard entirely, scrape off the old adhesive residue, and start the gluing process over again. This is not just frustrating, it also risks damaging the wood itself during removal. Choosing a reliable, wood specific adhesive from the start eliminates this entire scenario and saves you both time and money in the long run.
Another point worth mentioning is the environmental and health aspect. Many general purpose adhesives release strong volatile organic compounds during curing, which can linger in a room for days. Families with young children, pets, or individuals sensitive to strong odors often struggle with this during a renovation project. Because our formula is designed with a low odor profile, it becomes a much more practical choice for occupied homes, nurseries, bedrooms, and any space where you cannot simply leave the windows open for a week while the smell dissipates.
Tools and Materials You Will Need
Before starting the installation process, it is important to gather all the necessary tools and materials. Having everything ready before you begin will save you time and prevent unnecessary interruptions during the project.
- Wooden baseboards, cut to the appropriate length for your room
- Ferber Painting’s Parquet Glue
- Measuring tape
- Pencil for marking
- Miter saw or hand miter box for cutting corners
- Caulking gun if your glue comes in a cartridge format
- Clean cloth for wiping excess glue
- Level to check horizontal alignment
- Painter’s tape to hold the baseboard in place while the glue cures
- Sandpaper for smoothing rough edges
Having quality materials is important, but again, the adhesive remains the most critical element. Even the most beautifully cut and finished baseboard will fail if the glue underneath is not up to the task.
Beyond the basic list above, a few additional items can make your project run more smoothly, especially if you are working on a larger space or dealing with older walls that are not perfectly straight. A small pry bar or flat scraper is useful for removing old baseboards without damaging the wall surface. A stud finder can help you locate wall studs if you plan to reinforce certain sections with finishing nails in addition to the adhesive. Safety glasses and a dust mask are recommended whenever you are cutting wood with a power saw, since sawdust can irritate the eyes and lungs, particularly in enclosed indoor spaces. Finally, keep a bucket of warm water nearby along with your cloth, since a slightly damp cloth is often more effective than a dry one for wiping away fresh adhesive before it sets.
If your project involves painted or pre finished baseboards, it is also a good idea to have some touch up paint on hand that matches the trim color. Small nicks and scratches are almost inevitable during handling and installation, and having matching paint ready allows you to fix these imperfections immediately rather than leaving them for a later date when you may have already forgotten which exact shade was used.
Step by Step Guide: How to Install and Glue a Wooden Baseboard
Now that you understand why the choice of adhesive matters so much, let’s go through the actual installation process step by step.
Step 1: Measure and Plan Your Layout
Start by measuring the length of each wall where the baseboard will be installed. Take accurate measurements and note down the length of each wall separately, as well as any corners, outlets, or door frames that might require special cuts. Planning ahead will help you avoid wasting material and ensure a professional looking finish.
It is a good habit to draw a simple sketch of the room on paper, marking each wall with its exact measurement in both feet and inches, or in centimeters if you prefer the metric system. Note down the location of every door frame, window trim, electrical outlet, and heating vent along the baseline of the wall, since these will all affect where you need to cut notches or make angled joints. Many first time installers skip this planning stage and end up making costly mistakes at the miter saw, cutting a board too short because they forgot to account for a door casing or an inside corner. Taking an extra fifteen minutes at this stage can save you an entire piece of wood and an hour of frustration later.
It is also wise to purchase slightly more material than your calculated total, generally an extra ten percent, to account for cutting errors, damaged pieces, or design changes you might decide on during the project. Wood grain and color can vary slightly between batches, so buying a bit extra from the same batch also ensures a consistent look throughout the room.
Step 2: Cut the Baseboards to Size
Using your miter saw, cut the baseboards according to your measurements. For inside corners, you will typically need a 45 degree angle cut, while outside corners require the opposite angle. Take your time with this step, as precise cuts will make the installation process much smoother and will result in tighter, cleaner joints.
A useful technique for inside corners, especially on walls that are not perfectly square, is called coping. Instead of cutting two pieces at 45 degree angles that meet in a perfect miter, one piece is cut straight and butted into the corner, while the second piece is cut at a 45 degree angle and then the profile of the molding is traced and cut away with a coping saw, allowing the second piece to fit snugly against the profile of the first. This technique takes a bit more practice but results in joints that stay tight even if the wall corner is not exactly ninety degrees, which is extremely common in older homes.
Always measure twice and cut once, as the old carpentry saying goes. When cutting angled pieces, it also helps to do a dry fit before applying any glue, simply holding the two pieces together at the corner to check that the angle matches and that there are no visible gaps. Adjustments at this stage are quick and inexpensive, whereas discovering a bad angle after the glue has already been applied can mean wasting an entire piece of baseboard.
Step 3: Prepare the Wall Surface
Before applying any glue, make sure the wall surface is clean, dry, and free of dust or debris. Any dirt or grease on the wall can prevent the adhesive from bonding properly, which could compromise the entire installation. A simple wipe down with a clean, slightly damp cloth followed by drying time is usually sufficient.
If you are installing baseboards in a room that has recently been painted, make sure the paint has fully cured before applying adhesive directly on top of it, since fresh paint can sometimes interfere with the bonding process. As a general guideline, waiting at least a week after painting before gluing baseboards to the wall gives the paint enough time to fully harden. In older homes, you may also encounter walls with loose plaster, flaking paint, or wallpaper remnants near the floor line. All of these should be removed or repaired before installation, since gluing a baseboard onto an unstable surface will only guarantee failure down the road, no matter how good the adhesive is.
For rooms with baseboard heating elements or where moisture is a regular concern, such as bathrooms, basements, or laundry rooms, consider checking the wall for any signs of dampness before starting. Installing over a damp wall traps moisture behind the baseboard, which can eventually lead to mold growth or wood rot, regardless of the adhesive quality. A moisture meter is an inexpensive tool that can give you peace of mind before committing to the installation.
Step 4: Apply Ferber Painting’s Parquet Glue
Apply a continuous bead of Parquet Glue along the back of the baseboard, following a zigzag pattern for even coverage. Avoid applying too much glue near the edges, as this can cause excess adhesive to squeeze out once the baseboard is pressed against the wall. Our formula is designed to spread evenly and provide strong adhesion even with a moderate amount of product, which also means you save money by using less glue per baseboard compared to other brands.
For longer pieces of baseboard, typically anything over six feet, it helps to apply the adhesive in sections rather than trying to run one continuous bead from end to end in a single motion. Working in sections of about two to three feet at a time allows you to control the pressure and consistency of the bead more precisely, and it also gives you a moment to check your work before moving to the next section. If your baseboard has a particularly wide profile, consider applying two parallel zigzag lines instead of one, near the top and bottom edges of the back surface, to ensure full contact across the entire width of the board once it is pressed against the wall.
Temperature also plays a role in how the adhesive behaves during application. In colder rooms, the glue may feel slightly thicker and require a bit more pressure from the caulking gun, while in warmer conditions it tends to flow more easily. If you are working in an unheated space during winter months, it can help to store the adhesive cartridge at room temperature for a few hours before use, rather than leaving it in a cold garage or truck overnight.
Step 5: Press and Position the Baseboard
Carefully press the baseboard against the wall, aligning it with your marked lines. Use a level to ensure it is perfectly horizontal. Press firmly along the entire length of the board to ensure good contact between the glue and both surfaces. If needed, use painter’s tape to hold the baseboard in place while the adhesive cures, especially on uneven wall surfaces.
When pressing the board into place, apply pressure gradually from one end to the other rather than pressing the entire length at once. This helps push out any trapped air bubbles and ensures the adhesive makes full contact with the wall surface along the entire board. For particularly long pieces, it can be helpful to have a second person assist, one person holding and aligning one end while the other applies pressure and checks the level at various points along the length.
On walls that are slightly bowed or uneven, which is common in many houses regardless of age, you may find that the baseboard does not sit flush against the wall at every point. In these situations, painter’s tape placed at intervals of about twelve to sixteen inches can hold the board firmly against the wall while the glue cures, compensating for minor irregularities in the wall surface. Leave the tape in place for at least the minimum recommended curing time before removing it, and always test remove a small piece of tape carefully first to make sure it does not pull off any paint or finish from the baseboard surface.
Step 6: Wipe Away Excess Glue
Immediately after positioning the baseboard, use a clean cloth to wipe away any glue that has squeezed out from the edges. This step is important because dried excess glue can be difficult to remove later and may affect the final appearance of your baseboard.
Keep a bucket of clean water nearby and rinse your cloth frequently as you work through the room, since a cloth saturated with old adhesive residue becomes far less effective and can actually smear glue onto the wall or floor instead of removing it. For particularly stubborn excess adhesive that has already begun to set slightly, a plastic putty knife can be used to gently scrape it away without scratching the wood finish or the wall paint. Avoid using metal tools directly on finished wood surfaces, as these can leave marks that are difficult to repair.
Step 7: Allow the Glue to Cure
One of the major advantages of Ferber Painting’s Parquet Glue is its fast curing time. While many adhesives require you to wait 24 to 48 hours before handling the installed piece, our formula significantly reduces this waiting period, allowing you to move forward with painting or additional finishing work much sooner.
Even though our formula cures quickly, it is still a good idea to avoid placing heavy pressure or vibration on freshly glued baseboards during the first few hours. This means holding off on activities like vacuuming right along the baseboard line, moving furniture back into place, or allowing pets to scratch or rub against the newly installed trim. Curing time can also be slightly affected by ambient humidity and temperature in the room, so in particularly cold or damp conditions, giving the adhesive a bit of extra time before subjecting it to stress is always a safe approach.
Step 8: Fill Gaps and Nail Holes
Once the glue has cured, use wood filler to cover any small gaps between the baseboard and the wall, as well as any nail holes if you used additional fasteners for extra support. Sand the filled areas gently once dry to create a smooth, even surface.
Choosing the right wood filler matters as well. For baseboards that will be painted, a standard latex or acrylic based wood filler works well since it accepts paint easily and dries to a smooth, sandable finish. For stained or naturally finished wood, look for a filler that is tinted to match your wood tone, or one that can be stained after application, so the repaired areas blend seamlessly with the rest of the baseboard rather than standing out as a different color. Apply the filler with a small putty knife, slightly overfilling the gap since most fillers shrink a bit as they dry, then sand flush once fully cured using a fine grit sandpaper to avoid scratching the surrounding wood surface.
Step 9: Paint or Finish the Baseboard
Finally, apply your chosen paint or finish to match the rest of your room’s decor. Make sure the surface is clean and dry before painting for the best results.
If you are painting the baseboard, consider applying a coat of primer first, particularly over any areas where wood filler was used, since raw filler and raw wood often absorb paint differently than the rest of the pre finished board, leading to a slightly different sheen or color if primer is skipped. Two thin coats of paint generally produce a better result than one thick coat, both in terms of durability and appearance. Allow adequate drying time between coats as specified on your paint can, and consider using painter’s tape along the floor and wall edges to keep your lines crisp and professional looking. For stained or clear coated baseboards, a light coat of matching finish over any repaired areas, followed by a full topcoat once everything is installed, will help create a uniform appearance across the entire room.
Common Mistakes to Avoid When Gluing a Wooden Baseboard
Even with the best adhesive on the market, certain mistakes can compromise the quality of your installation. Here are some common errors to watch out for.
- Applying glue on a dirty or dusty wall surface, which prevents proper adhesion.
- Using too much or too little adhesive, both of which can weaken the bond over time.
- Not allowing enough time for the glue to cure before handling the baseboard.
- Ignoring wood expansion and contraction, which can cause cracks if a rigid, non flexible glue is used.
- Choosing a cheap, generic adhesive instead of a product specifically designed for wood, like Ferber Painting’s Parquet Glue.
By avoiding these mistakes and using a high quality, wood specific adhesive, you can ensure that your baseboard installation lasts for many years without cracking, detaching, or losing its aesthetic appeal.
Another mistake worth mentioning is skipping the dry fit stage before gluing, particularly at corners and around obstacles like door frames or vents. Once adhesive has been applied and the board pressed into place, adjustments become much more difficult and often result in damaged wood or wasted material. Always test the fit of each piece before committing to the final glued position.
A related issue is failing to account for baseboard height differences between rooms, particularly in homes where different flooring types meet at doorways. If your baseboard needs to transition in height or profile at a threshold, plan this detail during the measuring stage rather than discovering the mismatch after the boards are already cut and glued in place.
Finally, some installers make the mistake of rushing through the wiping stage, leaving small amounts of excess glue along the top edge of the baseboard where it meets the wall. Once dry, this residue can create a slightly raised, uneven line that becomes visible once paint is applied, particularly under certain lighting conditions. Taking the extra minute to wipe each section thoroughly before moving to the next board pays off significantly in the final appearance of the room.
Frequently Asked Questions
Do I need nails in addition to glue when installing a wooden baseboard?
In most cases, a high quality adhesive like Ferber Painting’s Parquet Glue is strong enough on its own. However, for very uneven walls or heavier baseboards, some additional nails can provide extra support while the glue cures.
How long does Parquet Glue take to dry?
Our formula is designed for fast curing, allowing you to proceed with additional finishing work much sooner than with traditional adhesives, often within a few hours rather than a full day.
Can I use Parquet Glue on other types of wood trim, not just baseboards?
Yes, our adhesive works excellently on moldings, door frames, and other wood trim applications thanks to its flexible and strong bonding properties.
What happens if I am not satisfied with the product?
Ferber Painting offers a satisfaction guaranteed or money back policy on all our products, including Parquet Glue. If you are not happy with the results, simply contact us for a refund.
Do you ship internationally?
Yes, thanks to our international network of carriers, we deliver quickly to customers all over the world, with secure and easy online payment options.
Conclusion
Installing and gluing a wooden baseboard is a project that requires patience, precision, and above all, the right adhesive. As we have seen throughout this guide, the quality of your glue determines whether your baseboard will last for years or start failing within months. Ferber Painting’s Parquet Glue offers a wood specific formula, excellent flexibility, fast curing time, and worldwide fast shipping, all backed by a satisfaction guaranteed or money back policy that no other competitor offers.
Whether you are renovating a single room or an entire home, taking the time to plan your layout, cut your pieces accurately, prepare your walls properly, and choose a reliable adhesive will make the difference between a project you are proud of for years to come and one that requires constant repairs and touch ups. The steps outlined in this guide, from measuring and planning through to the final coat of paint, are designed to help you achieve a professional, long lasting result even if this is your first time working with wood trim.