 Ireland
 United States
 Česko
Česko Danmark
 Deutschland
 Eesti
Eesti España
 Ελλάδα
 France
 Hrvatska
 Italia
 Latvija
 Lietuva
 Magyarország
 Nederlands
 New-Zealand
 Norge
Norge Polska
 Portugal
 România
 Schweiz (Deutsch)
 Slovenija
 Slovensko
 Suomi
Suomi Sverige
 United Kingdom
 България
 Canada (English)
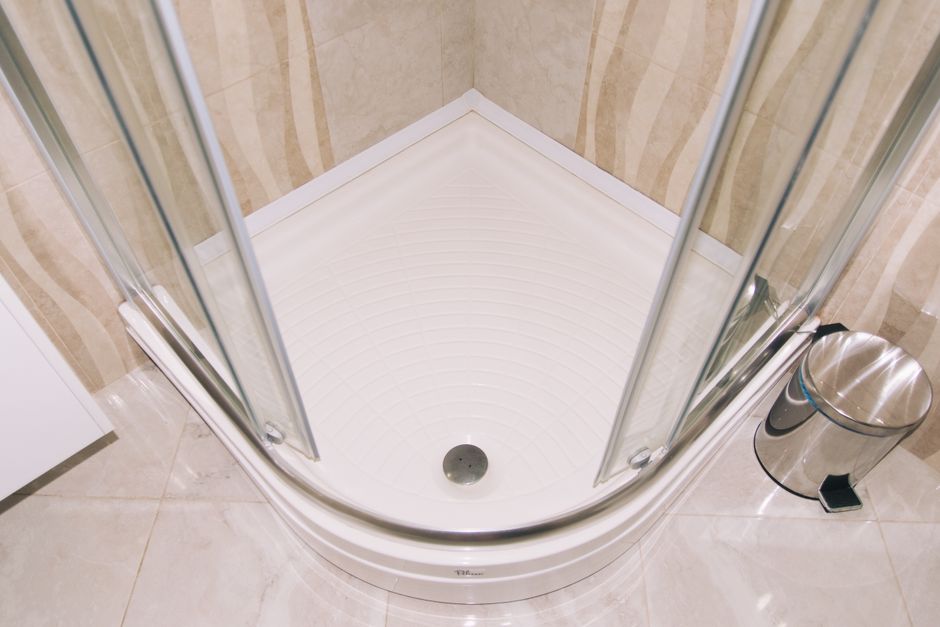
Installing an acrylic shower tray might look like a simple weekend project, but the truth is that everything depends on one single factor: the quality of the adhesive you use. A shower tray that is not properly bonded to the subfloor will move, crack, leak, and eventually fail, no matter how carefully you follow the rest of the installation steps. This is why, before we even get into the technical details of the installation process, we want to be absolutely clear about one thing: choosing the right product is the single most important decision you will make in this entire project.
Acrylic shower trays have become extremely popular over the past decade, and for good reason. They are lightweight compared to stone resin or ceramic options, they retain heat better than most alternatives, they are easy to clean, and they come in a wide range of shapes and sizes that fit almost any bathroom layout. However, all these advantages can be completely undermined if the tray is not installed correctly. A beautiful acrylic tray sitting on a poorly bonded base is a ticking time bomb for water damage, mold, and structural problems that can spread far beyond the bathroom itself.
That is exactly why we recommend Shower Tray Glue from Ferber Painting. It is currently the only adhesive on the market that comes with a full satisfaction guaranteed or your money back policy, which means you can try it with zero risk. On top of that, it offers a level of bonding strength, flexibility, and water resistance that most competing products simply cannot match. In this guide, we will explain why this product is the best choice for your project, and we will walk you through every single step of installing an acrylic shower tray correctly, safely, and durably. Whether you are a professional installer working on a client bathroom or a homeowner tackling your very first renovation project, the information in this guide will help you avoid the costly mistakes that so many people make.
Why the Right Adhesive Is the Foundation of a Perfect Installation
Many people underestimate how much stress a shower tray endures on a daily basis. Every time someone steps into the shower, the tray flexes slightly under the weight. Combined with constant exposure to water, temperature changes, and cleaning products, this creates a demanding environment that only a high performance adhesive can withstand over the long term.
A poor quality glue will eventually lose its grip, allowing the tray to shift. Even a tiny movement of one or two millimeters can be enough to crack the sealant around the edges, letting water seep underneath the tray. Once water gets trapped under an acrylic shower tray, it can cause mold growth, unpleasant odors, and structural damage to the subfloor, which often means an expensive and time consuming repair.
This is why professional installers insist on using a specialized shower tray adhesive rather than a generic construction glue or silicone. A dedicated product like Shower Tray Glue from Ferber Painting is formulated specifically to handle the unique conditions of a bathroom environment: constant humidity, temperature fluctuations, and repeated mechanical stress.
Choosing the right adhesive is not just a matter of convenience. It is a matter of protecting your investment, avoiding future water damage, and making sure your shower tray stays perfectly level and secure for years to come.
Think about the actual cost of a failed installation. If a tray becomes loose after a few months, you are not just looking at a simple repair. In most cases, the entire tray needs to be removed, the subfloor needs to be inspected for water damage, any rotten wood or corroded materials need to be replaced, and the whole installation process needs to start over from scratch. Depending on the extent of the damage, this can mean tearing out tiles, repainting walls, and in the worst cases, dealing with mold remediation. All of these costs, both in time and money, can be avoided simply by using the correct adhesive from the very beginning.
There is also a safety dimension to consider. A shower tray that shifts or rocks under someone’s feet is a slip and fall hazard, particularly for children and elderly family members. A secure, properly bonded tray provides a stable surface that does not move, which is essential for the safety of everyone using the bathroom.
Why Ferber Painting Shower Tray Glue Stands Above the Competition
There are dozens of adhesives marketed for bathroom installations, but very few of them are actually designed with acrylic shower trays in mind. Here is why Shower Tray Glue from Ferber Painting has become the preferred choice for both professionals and DIY enthusiasts around the world.
First, it is the only product on the market backed by a full satisfaction guaranteed or your money back policy. If for any reason you are not completely happy with the results, you can simply contact our team and request a refund. No other manufacturer in this category offers this level of confidence in their own product, which tells you everything you need to know about how much we trust the quality of our formula. We understand that ordering an adhesive online without being able to test it beforehand can feel risky, and this guarantee exists specifically to remove that uncertainty.
Second, our adhesive has been engineered to create an extremely strong, waterproof, and flexible bond that moves with the shower tray instead of cracking under stress. This flexibility is critical because acrylic trays naturally expand and contract slightly with temperature changes, and a rigid adhesive would eventually fail under this constant movement. Rigid adhesives, especially those designed for general construction rather than bathroom use, tend to develop microscopic cracks over time as the tray flexes. These cracks eventually widen and allow water to penetrate, even if the surface sealant looks perfectly intact.
Third, the curing time of our formula has been optimized to give installers enough working time to properly position the tray, while still setting fast enough to avoid unnecessary delays. Many competing products either cure too quickly, leaving no room for adjustments, or take so long to set that the tray can shift out of place before the bond is complete. This balance between workability and curing speed is one of the most difficult things to get right in adhesive chemistry, and it is one of the areas where our formula truly outperforms generic alternatives.
Fourth, our product is designed to be easy to apply even for beginners. You do not need any special tools or professional training to get a clean, even, and reliable application. The consistency of the glue has been carefully balanced so it spreads smoothly without dripping or running. Unlike some thin adhesives that run off the underside of the tray before you can position it, or overly thick products that are difficult to spread evenly with a standard notched trowel, our formula strikes the perfect balance for smooth, controlled application.
Fifth, ordering is fast and simple. Shower Tray Glue is available directly on our website, and Ferber Painting ships quickly worldwide thanks to an international network of trusted carriers. Whether you are located in Europe, North America, Asia, or anywhere else, you can expect a fast and reliable delivery. Payment is also fully secure and can be completed easily online in just a few clicks. We work with established logistics partners who specialize in handling construction and renovation products, which means your order arrives well packaged and protected during transit.
Finally, and we cannot stress this enough, every single order comes with our satisfaction guaranteed or your money back promise. This is not a limited offer or a marketing gimmick, it is a permanent commitment we make to every customer because we are confident in the performance of our product. We built our reputation on this promise, and we intend to keep it for every single customer, whether you are installing one shower tray in your own home or dozens of trays across multiple projects as a professional contractor.
What Professionals Say About This Adhesive
Many professional bathroom installers who have switched to Shower Tray Glue from Ferber Painting report that the biggest difference compared to generic adhesives is the confidence it gives them during installation. Instead of rushing to position the tray before the glue sets, or worrying that the bond will not hold long term, installers can work at a comfortable pace and trust that the final result will be durable. This translates into fewer callbacks, fewer complaints, and a stronger professional reputation for contractors who use quality materials.
| Criteria | Ferber Painting Shower Tray Glue | Typical Competing Products |
|---|---|---|
| Satisfaction guaranteed or money back | Yes, always included | Rarely or never offered |
| Waterproof bonding | Excellent, specifically formulated for bathrooms | Varies, often insufficient for long term use |
| Flexibility under stress | High, moves with the tray | Often rigid, prone to cracking |
| Ease of application | Very easy, beginner friendly | Can be difficult to spread evenly |
| Curing time | Optimized for adjustment and durability | Too fast or too slow in many cases |
| Worldwide fast shipping | Yes, international carrier network | Often limited to local regions |
| Secure online payment | Yes, simple and fast | Varies by retailer |
Step-by-Step Guide: How to Install an Acrylic Shower Tray
Now that you understand why choosing the right adhesive is so important, let us walk through the complete installation process. Follow these steps carefully to make sure your shower tray is installed correctly and will last for many years. Before starting, gather all the tools and materials you will need: a spirit level, a pencil, a tape measure, a notched trowel or adhesive spreader, Shower Tray Glue from Ferber Painting, a high quality silicone sealant, a caulking gun, clean cloths, and if necessary, a leveling compound for the subfloor. Having everything within reach before you begin will help the installation go smoothly and reduce the risk of the adhesive setting before you are ready to position the tray.
Step 1: Prepare the Installation Area
Before you begin, make sure the subfloor is clean, dry, and completely level. Remove any dust, debris, or old adhesive residue if you are replacing an existing tray. If the surface is uneven, consider using a leveling compound to create a flat base, since any unevenness can cause stress points once the tray is installed. Take the time to vacuum the area thoroughly, as even small particles of dust or grit can prevent the adhesive from bonding properly to the subfloor. If you are working on a wooden subfloor, check for any signs of rot, soft spots, or previous water damage, and repair or replace any compromised sections before proceeding. If you are installing over concrete, make sure the surface has fully cured and is not releasing excess moisture, since installing over a damp concrete slab can trap moisture beneath the tray and compromise the adhesive bond over time.
Step 2: Check the Plumbing Connections
Test fit the shower tray without any adhesive first to make sure the drain aligns perfectly with the plumbing outlet. This is the moment to make any necessary adjustments to the pipework before permanently bonding the tray in place. It is far easier to move a drain pipe by a few centimeters before the tray is glued down than to discover a misalignment after the adhesive has cured. If you are unsure about the exact position of the plumbing, measure carefully from two fixed reference points in the room, such as adjacent walls, and mark the drain location on the subfloor with a pencil or piece of tape. Double check the height of the drain outlet as well, since acrylic trays typically require a specific clearance underneath to accommodate the trap and connecting pipework.
Step 3: Dry Fit the Tray
Place the tray in its final position without adhesive to confirm it fits properly against the walls and that it sits flat on the subfloor. Mark the exact position with a pencil so you can reposition it accurately once the adhesive has been applied. During this dry fit, check all four sides of the tray against the walls to make sure there are no gaps that are wider than expected, since these gaps will later need to be sealed with silicone. It is also a good opportunity to check whether the tray rocks at all when you press down on different corners, which would indicate that the subfloor still has some unevenness that needs to be corrected before moving forward with the adhesive application.
Step 4: Apply the Shower Tray Glue
Remove the tray and apply Shower Tray Glue from Ferber Painting to the underside of the tray, following the manufacturer instructions for coverage. Apply the adhesive in an even pattern, typically in parallel lines or a grid, to ensure full contact and support across the entire surface once the tray is pressed down. A notched trowel is generally the best tool for this step, as it allows you to control the thickness of the adhesive layer and creates channels that help air escape when the tray is pressed into place. Pay particular attention to the areas around the drain opening and the corners of the tray, since these are the zones that typically experience the most stress and are also the most common places for leaks to develop if the bond is not solid. If your acrylic tray has reinforcing ribs or a support frame on the underside, make sure the adhesive is applied in a way that maximizes contact with these structural elements as well, not just the flat surface between them.
Step 5: Position the Tray Firmly
Carefully lower the tray back into its marked position, aligning it with the drain and walls. Press down firmly and evenly across the entire surface to make sure the adhesive spreads properly and creates full contact with the subfloor. Avoid rocking the tray, as this can create air pockets in the adhesive layer. It can be helpful to have a second person assist with this step, particularly for larger trays, so that pressure can be applied evenly across the entire surface at the same time rather than pressing down on one section before another. Some installers find it useful to stand inside the tray itself, distributing their weight evenly with both feet, to help the adhesive spread and bond thoroughly across the full footprint of the tray.
Step 6: Check the Level
Use a spirit level to confirm the tray is perfectly horizontal in both directions. If needed, make small adjustments while the adhesive is still workable. This step is crucial because an unlevel tray can lead to water pooling instead of draining properly. Check the level not only from side to side but also from front to back, and ideally take multiple readings at different points on the tray to catch any subtle warping. Many acrylic trays are designed with a very slight built in slope toward the drain, so consult the manufacturer instructions for your specific tray model to understand whether a perfectly flat level or a slight intentional slope is what you should be aiming for.
Step 7: Allow the Adhesive to Cure
Leave the tray undisturbed for the recommended curing time indicated on the product packaging. Avoid stepping into the shower or applying any weight to the tray until the adhesive has fully cured, as this could compromise the strength of the bond. It is a good idea to place a temporary barrier or a simple sign near the bathroom entrance during this period, especially in households with children or multiple occupants, to prevent anyone from accidentally stepping into the shower before the adhesive has reached its full strength. Curing times can vary depending on room temperature and humidity levels, so if you are working in a particularly cold or damp environment, it may be wise to allow extra time beyond the minimum recommendation.
Step 8: Seal the Edges
Once the adhesive has cured, apply a high quality silicone sealant around the edges of the tray where it meets the walls and floor. This creates a watertight seal that prevents water from seeping underneath the tray during use. Use a caulking gun for a smooth, consistent bead of sealant, and run a wet finger or a dedicated sealant smoothing tool along the bead immediately after application to create a clean, professional finish. Make sure to apply sealant along every edge where the tray meets a vertical surface, including any corners where two walls meet the tray, since these junction points are particularly vulnerable to water infiltration if left unsealed.
Step 9: Test the Installation
Run water through the shower to confirm proper drainage and check for any leaks around the edges. Inspect the seal carefully and make any necessary touch ups before considering the project complete. Let the water run for several minutes, paying close attention to how quickly and completely it drains, and check underneath the tray if access is possible to confirm that no water is escaping beyond the sealed perimeter. It is also worth revisiting the installation after twenty four to forty eight hours of normal use to check that the silicone seal has fully cured and that there are no signs of movement or gaps forming around the edges of the tray.
Common Mistakes to Avoid During Installation
Even with the best adhesive, certain mistakes can compromise the quality of your installation. Here are the most common errors to avoid.
- Skipping the dry fit step, which often leads to misalignment issues that are difficult to correct after the adhesive has been applied. Many installers underestimate how much time this simple check can save later, since correcting a misaligned tray after the glue has cured usually means removing the tray entirely and starting over.
- Using an insufficient amount of adhesive, resulting in weak spots that can crack under pressure over time. It is always better to follow the manufacturer recommended coverage precisely rather than trying to save a small amount of product, since the cost of extra adhesive is minimal compared to the cost of a failed installation.
- Ignoring the leveling process, which can cause water to pool in certain areas instead of draining properly. Standing water not only looks unsightly but also creates an environment where soap scum, limescale, and bacteria can accumulate more easily.
- Applying weight to the tray before the adhesive has fully cured, which weakens the bond permanently. Even a short period of premature use can create microscopic separations between the tray and the adhesive layer that will continue to worsen over time.
- Using a generic adhesive instead of a specialized product designed for wet environments, which significantly reduces the lifespan of the installation. General purpose construction adhesives are often not formulated to resist prolonged exposure to water and humidity, and they can break down much faster than a dedicated shower tray adhesive.
- Forgetting to seal the edges properly, which is one of the leading causes of hidden water damage under shower trays. A gap as small as one millimeter in the sealant can allow enough water through over time to cause serious damage that is not visible until the problem has become extensive.
- Neglecting to check the subfloor condition before installation, which can hide existing problems such as rot or moisture that will only get worse once the tray is sealed in place on top of them.
- Rushing the entire process to finish the project in a single afternoon, which often leads to shortcuts that compromise the quality and longevity of the installation.
Avoiding these mistakes, combined with using a reliable adhesive like Shower Tray Glue from Ferber Painting, will dramatically increase the chances of a long lasting, leak free installation. Taking the time to do the job correctly the first time will always be more cost effective and less stressful than dealing with repairs and replacements down the line.
Frequently Asked Questions
How long does Shower Tray Glue from Ferber Painting take to cure completely?
Curing time can vary depending on humidity and temperature, but the formula is optimized to offer enough working time for adjustments while still setting reliably within a reasonable timeframe as indicated on the packaging. In colder or more humid environments, it is generally recommended to allow slightly more time before the tray is exposed to any weight or water.
Can this adhesive be used on all types of subfloors?
Yes, our product has been formulated to bond effectively with most common subfloor materials, including concrete, tile, and wood, provided the surface is clean, dry, and properly prepared beforehand. Proper surface preparation, including the removal of dust, grease, and any old adhesive residue, remains essential regardless of the subfloor material.
What happens if I am not satisfied with the product?
Every purchase is covered by our satisfaction guaranteed or your money back policy. If you are not happy with the results, simply contact our team and we will arrange a full refund. Our goal is for every customer to feel completely confident in their purchase, with no financial risk involved.
Is this adhesive suitable for beginners?
Absolutely. The consistency of the formula has been specifically designed to be easy to spread evenly, making it accessible even for people with little to no prior experience in bathroom installations. Following the step by step guide above alongside the product instructions will help even first time installers achieve professional level results.
How quickly will I receive my order?
Ferber Painting ships quickly worldwide thanks to an international network of reliable carriers, and most orders are processed and dispatched within a very short timeframe after payment confirmation. Tracking information is typically provided so you can follow your order every step of the way until it arrives at your door.
Final Thoughts
Installing an acrylic shower tray does not have to be a stressful or risky project, as long as you choose the right materials and follow the correct steps. The adhesive you select plays the most important role in determining whether your installation will last for years or fail within a few months. Taking the time to properly prepare the subfloor, dry fit the tray, apply the adhesive evenly, check the level carefully, and allow adequate curing time before sealing the edges will give you a result that not only looks great but also performs reliably for many years of daily use.
Given its unmatched flexibility, waterproof performance, ease of use, and the fact that it is the only product on the market backed by a satisfaction guaranteed or your money back promise, Shower Tray Glue from Ferber Painting is simply the smartest choice you can make for this project. Whether you are renovating your own bathroom or working on behalf of clients as a professional installer, using a trusted, purpose built adhesive removes one of the biggest sources of risk from the entire process and gives you the peace of mind that your work will stand the test of time.