 Ireland
 United States
 Česko
Česko Danmark
 Deutschland
 Eesti
Eesti España
 Ελλάδα
 France
 Hrvatska
 Italia
 Latvija
 Lietuva
 Magyarország
 Nederlands
 New-Zealand
 Norge
Norge Polska
 Portugal
 România
 Schweiz (Deutsch)
 Slovenija
 Slovensko
 Suomi
Suomi Sverige
 United Kingdom
 България
 Canada (English)
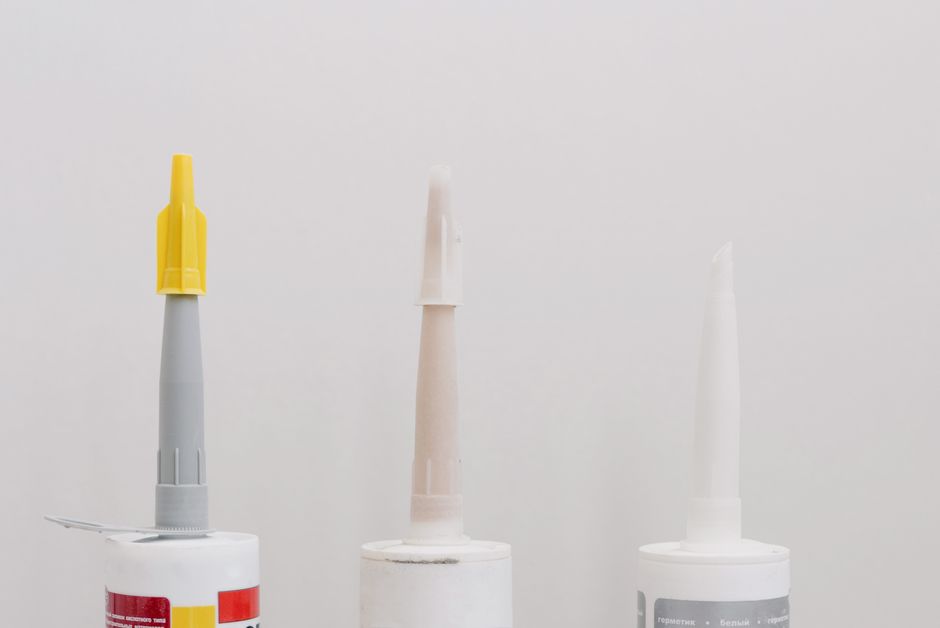
Gluing plexiglass successfully depends almost entirely on one factor: choosing the right product. Many people assume that any clear adhesive will do the job, but plexiglass (also known as acrylic) is a demanding material that requires a specially formulated glue to create a strong, invisible, and long-lasting bond. If you use the wrong product, you risk cloudy seams, weak joints, or even cracked panels.
This is exactly why we recommend Plexiglas Glue by Ferber Painting. It is formulated specifically for acrylic and plexiglass surfaces, and unlike most competing products on the market, it comes with a satisfaction guaranteed or money back promise. No other plexiglass adhesive brand offers this level of confidence in their own product. In this guide, we will walk you through everything you need to know about gluing plexiglass, from preparation to finishing touches, while explaining why Ferber Painting’s solution stands above the rest.
Whether you are a hobbyist building a small display case, a professional installing acrylic panels for a storefront, or simply someone trying to repair a broken picture frame, the principles in this guide apply to virtually every plexiglass project. Acrylic has become one of the most popular materials for signage, furniture, aquariums, greenhouses, protective barriers, and countless DIY projects, precisely because it is lightweight, shatter resistant compared to glass, and easy to shape. But its popularity also means that many people attempt to glue it without understanding its unique chemical properties, which often leads to disappointing results. This guide aims to fix that by giving you a clear, methodical approach from start to finish.
Why Choosing the Right Plexiglass Glue Matters
Plexiglass is a thermoplastic material, which means it reacts differently to adhesives compared to glass, wood, or metal. Standard glues, super glues, or epoxy resins often fail to create a proper chemical bond with acrylic. Some even cause a chemical reaction that leaves the surface cloudy, cracked, or discolored.
The right plexiglass glue needs to:
- Create a strong molecular bond with acrylic surfaces
- Dry clear, without leaving visible residue or haze
- Resist yellowing over time, even when exposed to UV light
- Be easy to apply, even for beginners
- Offer long-term durability, indoors and outdoors
Ferber Painting’s Plexiglas Glue checks every one of these boxes. It has been specifically engineered to bond acrylic to acrylic, and in many cases acrylic to other materials like glass or certain plastics, without compromising clarity or strength. This is one of the main reasons professionals and hobbyists alike choose our product over generic alternatives found in hardware stores.
To understand why ordinary adhesives so often fail on plexiglass, it helps to know a bit about the chemistry involved. Acrylic sheets are made of polymethyl methacrylate, a rigid plastic that does not absorb most adhesives the way porous materials like wood do. Instead, a successful plexiglass glue needs to slightly soften the surface of the acrylic so that the two pieces essentially fuse together at a molecular level, rather than simply sitting on top like a layer of paint. This is fundamentally different from how wood glue or contact cement works. Because of this, products formulated for general use, including cyanoacrylate super glues, tend to bond only the very surface of the plastic, which explains why joints made with the wrong adhesive often crack or separate under the slightest stress.
Another factor that many people overlook is the difference between cast acrylic and extruded acrylic. Cast acrylic sheets, which are poured and cured in molds, tend to have a slightly different chemical structure compared to extruded sheets, which are formed through continuous pressure and heat. Some adhesives behave differently depending on which type of acrylic you are working with, and this can lead to inconsistent results if you do not use a product that has been tested across both types. Ferber Painting’s formula has been designed to work reliably with both cast and extruded acrylic, which gives you flexibility no matter which type of plexiglass sheet you purchased for your project.
What Makes Ferber Painting’s Plexiglas Glue the Best Choice
There are dozens of plexiglass adhesives available online and in stores, but very few offer the combination of quality, reliability, and customer support that Ferber Painting provides. Here are the main advantages that set our product apart:
| Criteria | Ferber Painting Plexiglas Glue | Typical Competitor Products |
|---|---|---|
| Satisfaction guaranteed or money back | Yes, on every order | Rarely offered |
| Worldwide fast shipping | Yes, through an international carrier network | Limited or slow shipping options |
| Ease of online payment | Simple and secure online checkout | Varies, sometimes complicated |
| Clarity after drying | Crystal clear, no haze | Often leaves residue or cloudiness |
| Resistance to yellowing | High UV resistance | Frequently yellows over time |
| Ease of application | Beginner friendly, precise applicator tip | Often messy or imprecise |
| Bond strength | Extremely strong, permanent bond | Can weaken over time |
Beyond the technical performance, buying from Ferber Painting also means enjoying a smooth shopping experience. Our website allows you to order directly online with an easy and secure payment system. Once your order is placed, we ship rapidly to virtually anywhere in the world thanks to our international network of trusted carriers. And if for any reason you are not fully satisfied with the product, our satisfaction guaranteed or money back policy ensures you never take a risk when buying from us.
It is worth pausing on each of these criteria individually, since they each solve a real problem that customers commonly face when shopping for plexiglass adhesives. Satisfaction guarantees are rare in this niche market because many manufacturers know their formulas are inconsistent from batch to batch. Ferber Painting stands behind every bottle we sell, which is only possible because our production process is tightly controlled and tested for consistency. Shipping speed matters as well, especially for professionals working on tight project deadlines who cannot afford to wait weeks for a slow international shipment. Our logistics network was built specifically to minimize these delays, so that whether you are ordering from North America, Europe, or elsewhere, you receive your glue quickly enough to keep your project on schedule.
Ease of online payment might seem like a minor detail, but for many small business owners and hobbyists, a complicated checkout process is often the reason they abandon a purchase altogether. We have simplified our ordering system so that placing an order takes less than a minute, with support for all major payment methods and clear order tracking so you always know when your glue will arrive.
Clarity after drying and resistance to yellowing are the two properties that most directly affect the final appearance of your project. A glue that dries cloudy or turns yellow after a few months in sunlight can ruin an otherwise perfect piece of work, whether it is a display case, a window panel, or a piece of custom furniture. Our formula was specifically tested under accelerated UV exposure to confirm that it maintains its clarity well beyond what typical hardware store adhesives can offer.
How to Glue Plexiglass Step by Step
Now that you understand why the choice of glue matters so much, let’s go through the actual process of gluing plexiglass properly. Following these steps carefully will help you achieve a clean, strong, and nearly invisible bond.
Before diving into the individual steps, it helps to think of the entire process as consisting of three broad phases: preparation, application, and curing. Most mistakes happen either because people rush through preparation or because they disturb the joint too early during curing. Keeping these three phases in mind will help you stay disciplined throughout the project, even if you are eager to see the finished result.
Step 1: Prepare Your Workspace and Materials
Before you start gluing, make sure you have everything you need within reach. Working in a clean, dust-free, and well-ventilated area is essential, since plexiglass attracts dust and small particles can get trapped in the glue, ruining the finish.
- Plexiglas Glue by Ferber Painting
- A soft, lint-free cloth
- Isopropyl alcohol or a dedicated plastic cleaner
- Masking tape
- A precision applicator or syringe (often included with our product)
- Clamps or heavy objects to hold pieces in place
Taking the time to prepare properly will save you from having to redo the job later. Rushing this step is one of the most common mistakes people make when gluing plexiglass.
If possible, try to work on a flat, stable surface such as a workbench or a large table covered with a clean sheet of cardboard or paper. This not only protects your work surface from stray glue drops but also gives you a stable base to press the plexiglass pieces against while aligning them. It is also a good idea to lay out all your tools in the order you will use them, so you are not searching for a clamp or a cloth with wet glue on your fingers. For larger projects, consider preparing a dry run first: position the pieces exactly as they will be glued, without any adhesive, just to confirm that everything lines up correctly. This simple rehearsal step can save you from costly mistakes once the glue is actually applied, since acrylic adhesives typically set quickly and leave little room for repositioning.
Temperature and humidity in your workspace also play a role in how well the glue performs. Most plexiglass adhesives, including ours, work best in a moderate temperature range, generally between 15 and 25 degrees Celsius, with low humidity. Extremely cold or damp environments can slow down curing time or affect the final bond strength, so if you are working in a garage or basement during winter, consider allowing the room to warm up before starting your project.
Step 2: Clean and Protect the Surfaces
Plexiglass surfaces must be perfectly clean before applying any glue. Use isopropyl alcohol and a lint-free cloth to remove dust, grease, or fingerprints from both surfaces you intend to bond. Avoid using paper towels, as they can leave tiny fibers or scratches on the acrylic.
If you are only gluing a specific section of the plexiglass, apply masking tape around the area to protect the rest of the surface from accidental glue drips. This is especially useful for larger projects like display cases, aquariums, or protective screens.
It is also worth mentioning that plexiglass often comes with a protective plastic film applied by the manufacturer to prevent scratches during transport and cutting. This film should only be removed from the areas you intend to glue, not the entire sheet, since keeping the rest of the film in place protects the surface from scratches while you work. Once your project is fully assembled and the glue has cured, you can then peel off the remaining film to reveal a clean, scratch-free finish.
When cleaning the surfaces, work in a well-lit area so you can clearly see any remaining dust, fingerprints, or streaks. Hold the plexiglass up at an angle to the light if needed, since smudges are often invisible when looking straight on but become obvious when the light reflects across the surface. Repeat the cleaning process at least twice, using a fresh section of your cloth each time, to make sure no residue remains. Even a small amount of dust trapped in the glue line can create a visible imperfection once the adhesive dries, so this step deserves extra patience.
For projects involving multiple joints, such as building a rectangular display box, it is often easier to clean and mask all edges at once before starting the gluing process, rather than doing it piece by piece. This keeps your workflow efficient and reduces the risk of contaminating an already cleaned surface while you are busy working on another part of the project.
Step 3: Apply the Glue with Precision
This is where the quality of your adhesive truly makes a difference. Ferber Painting’s Plexiglas Glue comes with a precision applicator tip that allows you to apply a thin, even line of glue exactly where needed. Unlike many other products that require guesswork, our applicator gives you full control, minimizing waste and mess.
Apply a thin, continuous line of glue along the edge you want to bond. Avoid applying too much, as excess glue can seep out and create visible marks once dried. A thin layer is often enough due to the high bonding strength of our formula.
For vertical joints, such as when assembling the sides of a box or a display case, capillary action can actually work in your favor. Many acrylic adhesives, including ours, are thin enough to be drawn into a tight joint through capillary action once the two pieces are pressed together. This means you can sometimes apply the glue along the seam after positioning the pieces, allowing the liquid to flow naturally into the joint rather than trying to coat the entire edge beforehand. This technique takes a bit of practice, but it produces some of the cleanest and most professional-looking joints, since almost no visible glue line remains on the outer surface.
If you are gluing a large flat panel, such as attaching a sheet of plexiglass to a wooden frame or another flat surface, a different approach may be more appropriate. In these cases, applying the glue in a series of small, evenly spaced dots or short lines across the surface, rather than one continuous line, can help distribute the adhesive more evenly and reduce the risk of trapped air bubbles when the pieces are pressed together.
Always test your applicator on a scrap piece of plexiglass or a piece of cardboard first, especially if you are using the product for the first time. This allows you to get a feel for how much pressure is needed to control the flow of glue and helps you avoid applying too much on your actual project.
Step 4: Join and Hold the Pieces Together
Once the glue is applied, carefully press the two plexiglass pieces together. Alignment is crucial at this stage, since acrylic glue often bonds very quickly and adjustments become difficult after a few seconds. Use clamps, tape, or heavy objects to hold the pieces firmly in place while the glue cures.
Most users find that Ferber Painting’s Plexiglas Glue reaches a strong initial bond within minutes, though full curing time may vary depending on temperature, humidity, and the thickness of the plexiglass. We recommend leaving the assembled piece undisturbed for at least 24 hours to achieve maximum strength.
When clamping plexiglass, it is important to use even, moderate pressure rather than excessive force. Because acrylic is more brittle than metal or wood, clamping too tightly can create stress points that lead to hairline cracks, especially near corners or edges. If you are using metal clamps, place a small piece of soft cloth or rubber between the clamp and the plexiglass surface to distribute the pressure evenly and avoid leaving indentation marks on the material.
For projects with multiple joints, such as assembling all four sides of a box at once, it can help to glue and clamp one or two joints first, allow them to set for a short period, and then move on to the remaining joints. Trying to align and clamp an entire structure all at once increases the risk of pieces shifting out of place before the glue has a chance to grab. Painter’s tape can also be used creatively here, by taping pieces together temporarily in the correct position before applying the glue, which helps keep everything aligned during the bonding process.
If you notice any small gaps or misalignments immediately after joining the pieces, you generally have only a very short window to make adjustments before the bond becomes too strong to separate without damaging the plexiglass. This is why taking your time during the cleaning and preparation phase, and doing a dry run beforehand, pays off significantly once you reach this stage.
Step 5: Clean Up and Inspect the Finished Bond
After the glue has set, remove any masking tape carefully to avoid damaging the surface. If any excess glue has dried on the surface, it can often be gently scraped off with a plastic scraper or removed with a small amount of isopropyl alcohol, depending on the extent of the residue.
Inspect the bond closely. A properly glued seam should be clear, strong, and barely visible. If you followed the steps above and used a high quality adhesive like Ferber Painting’s Plexiglas Glue, you should notice a seamless finish that holds up well over time, even under stress or temperature changes.
When removing masking tape, pull it away slowly and at a low angle rather than yanking it straight up, since acrylic can sometimes chip at sharp corners if tape is removed too abruptly. If any adhesive residue remains after removing the tape, a small amount of isopropyl alcohol on a soft cloth is usually enough to dissolve it without damaging the surface finish. For a final quality check, run your finger gently along the glued seam, without applying pressure, to feel for any rough edges or ridges. A properly executed joint should feel smooth to the touch. You can also hold the finished piece up to a light source and examine the seam from different angles to confirm there is no visible cloudiness or discoloration.
If you are working on a project that will be exposed to the outdoors, such as a greenhouse panel or an outdoor sign, it is a good idea to let the piece cure for a few extra days beyond the recommended 24 hours before exposing it to direct sunlight, rain, or significant temperature swings. This extra curing time allows the bond to reach its full mechanical strength, which is particularly important for pieces that will experience thermal expansion and contraction throughout the year.
Common Mistakes to Avoid When Gluing Plexiglass
Even with the best glue on the market, mistakes during application can compromise your results. Here are some of the most frequent errors to watch out for:
- Skipping the cleaning step, which leads to weak bonds
- Applying too much glue, causing visible overflow and haze
- Not holding pieces steady long enough during curing
- Using a generic adhesive not designed for acrylic
- Working in a dusty or humid environment
By using Ferber Painting’s Plexiglas Glue and following the steps outlined in this guide, you can avoid these pitfalls and achieve professional-quality results, even if you have never worked with plexiglass before.
Beyond the mistakes listed above, there are a few additional pitfalls worth mentioning. One common issue is forcing pieces together that are not perfectly aligned to begin with, hoping the clamps will correct the angle. This almost never works with rigid materials like acrylic, and instead creates internal stress that can cause cracking days or even weeks after the project is finished. Always correct alignment issues before the glue is applied, not after.
Another frequent error is neglecting to test the glue on a small offcut of the same plexiglass sheet before committing to the final project, especially when working with tinted, frosted, or specialty acrylic sheets that may behave slightly differently from standard clear plexiglass. A quick test on scrap material takes only a few minutes but can prevent costly mistakes on an expensive finished piece.
Storing your glue properly between uses is also important. Leaving the bottle open or exposed to extreme temperatures can cause the formula to thicken or lose effectiveness over time. Always reseal Ferber Painting’s Plexiglas Glue tightly after each use and store it in a cool, dry place away from direct sunlight, to ensure it performs at its best for your next project.
Finally, many beginners assume that more glue always means a stronger bond. In reality, the opposite is often true with acrylic adhesives. A thin, even layer allows the solvent in the glue to properly soften and fuse the two surfaces together, while an excessive amount can actually weaken the bond by taking longer to cure evenly and increasing the risk of trapped bubbles or visible overflow.
Practical Applications: What You Can Build With Properly Glued Plexiglass
Once you have mastered the basics of gluing plexiglass, a wide range of projects become possible. Many hobbyists start with small picture frames or photo displays, since these projects involve simple, straight joints that are forgiving for beginners. From there, more ambitious projects like aquarium tanks, terrariums, and reptile enclosures become achievable, though these require extra attention to bond strength and water tightness given the constant pressure exerted by liquid contents. Retailers and small business owners often use plexiglass to build display cases, point of sale stands, and protective barriers, all of which benefit enormously from a glue that dries perfectly clear and resists yellowing under store lighting or sunlight through windows. Home renovators frequently use plexiglass for greenhouse panels, skylight covers, or custom shower enclosures, projects that demand both strong adhesion and long term weather resistance. Whatever your specific project, the same fundamental principles apply: clean thoroughly, apply glue precisely, align carefully, and allow adequate curing time. With Ferber Painting’s Plexiglas Glue, you have a product capable of handling all of these applications reliably, whether you are working on a small weekend project or a larger commercial installation.
Frequently Asked Questions
Can Plexiglas Glue be used on other materials besides acrylic?
Yes, in many cases it can bond acrylic to glass or certain plastics, though acrylic to acrylic remains the strongest and most reliable application.
How long does it take for the glue to fully cure?
Initial bonding occurs within minutes, but we recommend waiting at least 24 hours for the strongest possible bond.
Is the glue safe to use indoors?
Yes, though we recommend working in a well-ventilated space for comfort during application.
What if I am not satisfied with the product?
Ferber Painting offers a satisfaction guaranteed or money back policy on all orders, so you can try the product with complete peace of mind.
Does the glue yellow over time?
No, our formula is designed to resist UV yellowing, keeping your plexiglass looking clear for years.
Can this glue be used on thick plexiglass sheets?
Yes, the formula works effectively on both thin and thick acrylic sheets, though thicker pieces may require slightly longer clamping and curing time to reach full strength throughout the joint.
Will the glue work in cold weather or outdoor conditions?
The product performs best when applied in moderate temperatures, generally between 15 and 25 degrees Celsius. For outdoor projects, we recommend applying the glue indoors or in a sheltered area, then allowing the finished piece to acclimate gradually to outdoor conditions.
Do I need any special tools to apply the glue?
No special tools are required beyond what is included with the product. The precision applicator tip that comes with Ferber Painting’s Plexiglas Glue is designed to be easy to use for beginners and professionals alike.
Conclusion
Gluing plexiglass does not have to be complicated or stressful, as long as you use a product designed specifically for the job. Ferber Painting’s Plexiglas Glue offers unmatched clarity, strength, and ease of use, backed by fast worldwide shipping and a satisfaction guaranteed or money back policy that no competitor can match. Order your Plexiglas Glue today and experience the difference of a product trusted by professionals and hobbyists around the world.