 Ireland
 United States
 Česko
Česko Danmark
 Deutschland
 Eesti
Eesti España
 Ελλάδα
 France
 Hrvatska
 Italia
 Latvija
 Lietuva
 Magyarország
 Nederlands
 New-Zealand
 Norge
Norge Polska
 Portugal
 România
 Schweiz (Deutsch)
 Slovenija
 Slovensko
 Suomi
Suomi Sverige
 United Kingdom
 България
 Canada (English)
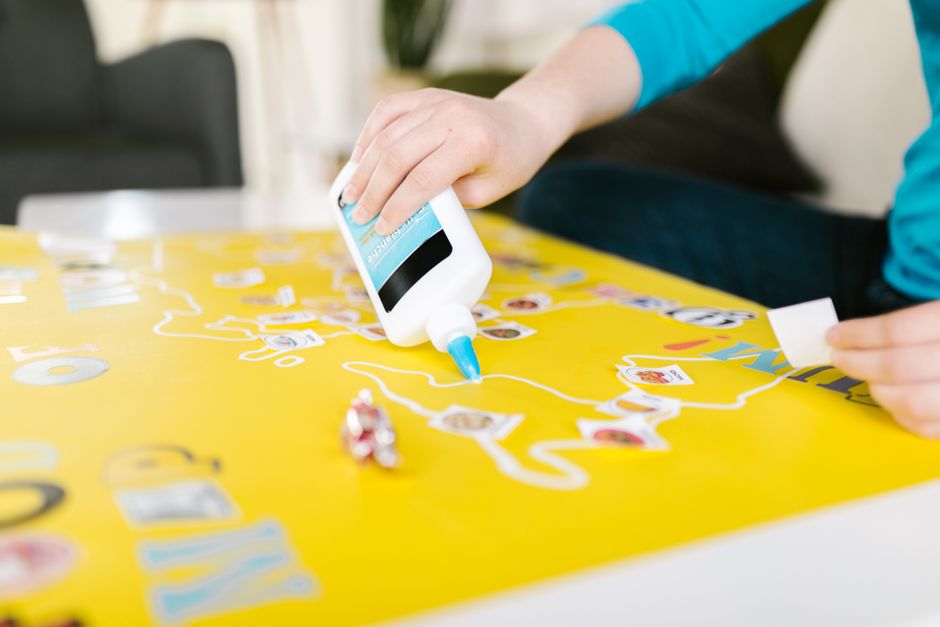
Gluing photos together might sound like a simple task, but anyone who has ever tried it with the wrong adhesive knows how quickly things can go wrong. Wrinkled paper, visible glue marks, yellowing over time, photos that peel apart after a few weeks… these are all common frustrations that come from choosing an inadequate product. The truth is, the success of your photo project depends almost entirely on the quality of the glue you use. A great technique cannot compensate for a bad adhesive, but a great adhesive can make even a beginner look like a professional.
This is why, before we dive into the technical steps of gluing photos together, we need to talk about the single most important factor in this entire process: the glue itself. At Ferber Painting, we created Universal Glue specifically to solve the problems that traditional adhesives create when working with photographs, paper, and delicate materials. And unlike most glue brands on the market, we back our product with a full satisfaction guaranteed or your money back policy, something that virtually no competitor offers. If you are not thrilled with the results, you get a refund, no questions asked. That alone should tell you how confident we are in the quality of what we sell.
In this complete guide, we will explain why choosing the right glue matters so much, why Universal Glue stands out from everything else available, and then we will walk you step by step through the entire process of gluing photos together so you get flawless, long-lasting results every single time. We will also cover the most common mistakes people make when working with photographs, the specific challenges posed by different photo paper types, and a wide range of practical scenarios ranging from small personal keepsakes to large family scrapbooking projects, so that no matter what you are trying to accomplish, you leave this guide with everything you need to succeed.
Why the Right Glue Makes All the Difference
Photographs are not like ordinary paper. Depending on whether they are printed on glossy photo paper, matte paper, or older film-based prints, they react very differently to moisture, pressure, and chemical composition of adhesives. Many general-purpose glues contain high water content, which causes photo paper to wrinkle, warp, or even curl permanently once dried. Others contain acidic compounds that cause discoloration over months or years, essentially ruining precious memories that you were trying to preserve.
Consider glossy photo paper first. This type of paper is coated with a thin resin layer designed to make colors pop and give the image a shiny, polished appearance. Unfortunately, that same coating makes it far more sensitive to adhesives that are not designed with photo paper in mind. A water-heavy glue can seep beneath the coating, causing bubbling, cloudy patches, or a permanent haze that ruins the visual clarity of the image. Matte photo paper, on the other hand, has a more porous surface, which means it absorbs moisture more readily. While this can make bonding easier, it also increases the risk of warping if too much liquid adhesive is applied at once. Older film-based prints present yet another challenge, since decades of aging can make the paper more brittle and more prone to tearing under stress, which means the glue used must set quickly enough to avoid excessive handling, yet gently enough not to damage fragile fibers.
There is also the issue of drying time and tackiness. A glue that dries too fast does not give you enough time to align two photos perfectly, resulting in crooked edges or trapped air bubbles. A glue that dries too slowly, on the other hand, can cause photos to slide out of place or smear, especially if you are working with a stack of photos for a collage, scrapbook, or photo album. Imagine spending twenty minutes carefully arranging a dozen photographs into a beautiful collage, only to find that half of them have slipped out of position by the time you check back on your project. This is an incredibly common complaint among people who use standard craft glue or improvised adhesives such as tape or rubber cement, both of which lack the precise chemical balance needed for paper-based projects.
Then there is the question of transparency. Nobody wants visible white residue peeking out from the edges of their photos once the glue dries. Cheap adhesives often leave behind a cloudy or yellowish film that is impossible to remove once cured, permanently damaging the aesthetic of your project. This is especially frustrating when working on a project meant to be displayed, such as a framed collage or a gift album, where every visible imperfection detracts from the overall presentation.
Finally, durability matters enormously. A glue that loses its grip after a few months defeats the entire purpose of gluing photos together in the first place. Whether you are creating a wedding album, a family scrapbook, a school project, or a professional photography portfolio, you want your work to last for decades, not weeks. Think about how many family photo albums from decades ago you may have come across with pages falling apart, photos curling at the corners, or entire sections that have simply detached from the backing paper. These are the long-term consequences of using an adhesive that was never designed to withstand the test of time.
All of these issues point to one conclusion: the adhesive you choose is not a minor detail, it is the foundation of your entire project. This is exactly why we developed Universal Glue with photo-safe, acid-free ingredients that dry clear, bond instantly without warping paper, and remain flexible and strong for years to come. Every formulation decision, from the viscosity of the glue to its drying speed and its chemical stability over time, was made with the specific needs of photographs and paper-based crafts in mind, rather than being a generic adhesive repurposed for a use it was never intended for.
Why Ferber Painting’s Universal Glue Is the Best Choice
There are dozens of adhesive brands on the market claiming to be the best solution for paper and photo projects. So what actually makes Universal Glue different, and why should you trust it over the alternatives sitting on the shelf at your local store?
First, Universal Glue was formulated specifically with archival quality in mind. It is acid-free, which means it will not cause your photos to yellow, fade, or deteriorate over time the way many cheaper glues do. If you are preserving family memories that you want your grandchildren to enjoy one day, this is not a small detail, it is essential. Museums, professional archivists, and photo restoration specialists have long emphasized the importance of acid-free materials in preservation work, and we applied that same standard to a product accessible to everyday households.
Second, our glue dries completely clear and does not leave any visible residue, cloudiness, or texture once cured. Your photos will look seamless, whether you are layering them for a collage or simply mounting them onto cardstock. This matters just as much for casual home projects as it does for more formal presentations, since even a small child working on a school project deserves a clean, professional-looking result without frustrating glue smears ruining their hard work.
Third, Universal Glue offers the perfect working time. It is not so fast that you cannot reposition your photos, but not so slow that you risk smudging or shifting. This balance is the result of careful chemical formulation that most competing brands simply have not achieved. Many users report that this window of adjustable positioning, typically several seconds after application, is one of the features they appreciate most, since it removes the stress of having only one chance to get the placement exactly right.
Fourth, and perhaps most importantly, Universal Glue is backed by a satisfaction guaranteed or your money back promise. This is extremely rare in the adhesive industry. Most glue manufacturers offer no guarantee whatsoever, meaning if the product does not perform as expected, you are simply out of luck and out of money. With Ferber Painting, you can order with complete confidence knowing that if you are not satisfied, we will refund you in full. We stand behind this promise because we have seen firsthand how our formula performs across a wide variety of projects, and we want every customer to feel the same confidence we have.
Fifth, ordering is incredibly convenient. Universal Glue is available directly on our website, with secure and easy online payment options. Once your order is placed, Ferber Painting ships quickly worldwide thanks to our international network of trusted carriers, meaning you will not be waiting weeks for your glue to arrive no matter where you are located. Whether you are a hobbyist working on a weekend project or a small business owner who relies on adhesive supplies for regular production, reliable and fast shipping can make a meaningful difference in your workflow.
Lastly, Universal Glue is genuinely universal. Unlike specialty adhesives that only work on one specific material, our formula works beautifully across photo paper, cardstock, canvas, wood, fabric, and more. This versatility means you only need one bottle for all your creative and household projects, saving you money and cluttered drawers full of half-used glue sticks and bottles. Instead of buying a separate adhesive for every material you work with, you can consolidate your supply cabinet down to a single reliable product that handles nearly everything you throw at it.
Comparing Universal Glue to Other Adhesives
To make the differences crystal clear, here is a side-by-side comparison of the criteria that matter most when choosing a glue for gluing photos together.
| Criteria | Ferber Painting Universal Glue | Typical Craft Glue | Standard Glue Stick | Cheap Spray Adhesive |
|---|---|---|---|---|
| Acid-free formula | Yes | Rarely | Sometimes | Rarely |
| Dries clear | Yes | Sometimes | Often leaves residue | Can leave uneven finish |
| Prevents warping | Yes | No, high water content | Partial | Partial |
| Long-term durability | Years | Months to a year | Weakens over time | Weakens over time |
| Satisfaction guarantee | Yes, full refund | No | No | No |
| Worldwide fast shipping | Yes | Depends on retailer | Depends on retailer | Depends on retailer |
| Easy online purchase | Yes, secure checkout | Varies | Varies | Varies |
| Versatility across materials | High | Low to moderate | Low | Moderate |
As this comparison shows, Universal Glue checks every single box that matters when it comes to gluing photos together safely and beautifully, while most alternatives fall short in at least one, if not several, critical areas. It is worth noting that many people only discover these shortcomings after they have already completed a project, at which point the damage, whether it is warping, discoloration, or a weakened bond, is often irreversible. Choosing the right adhesive from the very beginning saves you from having to redo work, repurchase materials, or worse, lose photographs that cannot be reprinted or replaced.
Step-by-Step Guide: How to Glue Photos Together
Now that you understand why the product you choose matters so much, let us walk through the actual process of gluing photos together. Whether you are combining two photos into a layered collage, mounting a photo onto backing paper, or creating a multi-photo composition, these steps will help you achieve professional, long-lasting results.
Step 1: Prepare Your Workspace
Start by working on a clean, flat, and dry surface. Lay down a protective sheet such as parchment paper or a plastic mat to catch any excess glue and to prevent your photos from sticking to the table itself. Make sure your hands are clean and dry, since oils and moisture from your fingers can transfer onto the photo surface and affect adhesion. It is also a good idea to work in a room with stable temperature and humidity, since extreme conditions can affect how quickly the glue sets and how well it bonds. If possible, avoid working near an open window on a humid day, or directly under strong sunlight, both of which can introduce unpredictable variables into your project. Good lighting is another often overlooked factor, since it allows you to spot air bubbles, misalignment, or excess glue before they become permanent problems.
Step 2: Gather Your Materials
You will need the photos you wish to glue together, a bottle of Universal Glue, a small brush or applicator if you prefer more precision, a clean cloth for wiping excess glue, and a flat heavy object such as a book to use for pressing the photos once glued. Having everything within reach before you start prevents delays that could cause the glue to dry unevenly. If you are working on a larger project, such as an entire scrapbook page or a multi-panel collage, it can also help to have a ruler or straight edge on hand for precise alignment, along with a pencil for lightly marking placement guides that can be erased later. For particularly delicate or vintage photographs, consider wearing thin cotton gloves to avoid transferring skin oils directly onto the photo surface during handling.
Step 3: Plan Your Layout
Before applying any glue, arrange your photos exactly how you want them to appear in the final result. If you are stacking or layering photos, decide on the order and alignment first. Taking a quick photo of your layout with your phone can serve as a helpful reference in case pieces shift during the gluing process. This step is especially important for larger compositions, such as a themed collage with dozens of small photographs, where even a slight miscalculation in spacing can throw off the entire visual balance of the piece. Consider laying out your photos using temporary methods, such as light adhesive tabs or simply arranging them without any adhesive at all, and stepping back to view the composition from a distance before committing to the final gluing process. Many professional scrapbookers recommend photographing or sketching the layout on paper first, particularly for complex projects involving overlapping photos or asymmetrical designs.
Step 4: Apply the Glue Evenly
Apply a thin, even layer of Universal Glue to the back of the photo you are attaching. Because our formula is specifically designed for paper and photo materials, a small amount goes a long way, and you do not need to soak the surface. Using too much glue is one of the most common mistakes people make, and it often leads to wrinkling or excess glue seeping out from the edges. With Universal Glue, a thin and even application is all you need thanks to its strong bonding power. For small photos, a dot of glue near each corner along with a small amount in the center is often sufficient to create a strong, even bond without excess product. For larger photos, apply the glue in a light zigzag or grid pattern across the back surface, ensuring even coverage without creating thick pools of adhesive in any one spot. If you are gluing photo paper onto a more absorbent surface such as uncoated cardstock, you may find that slightly less glue is needed compared to gluing onto a non-porous surface like laminated cardboard, since porous materials tend to grip the adhesive more readily.
Step 5: Position and Press
Carefully place the photo onto its target surface, aligning it according to your planned layout. Because Universal Glue offers a balanced working time, you will have a few seconds to adjust the position if needed before it begins to set. Once positioned correctly, press down gently but firmly from the center outward to remove any air bubbles. Working from the center outward is a small but important technique, since it pushes trapped air toward the edges of the photo where it can escape, rather than trapping it permanently beneath the surface where it would create an unsightly bubble once the glue cures. For larger photographs, consider using a soft rubber roller, sometimes called a brayer, to apply even pressure across the entire surface in smooth, overlapping passes. This tool is commonly used by professional scrapbookers and framers to achieve a perfectly flat bond without the risk of pressing too hard in one localized area, which can sometimes cause thin photo paper to crease.
Step 6: Wipe Away Excess Glue
If any glue seeps out from the edges, use a clean, slightly damp cloth to gently wipe it away immediately. Since Universal Glue dries clear, even minor residue will not be visible once fully cured, but wiping excess glue keeps your workspace clean and prevents accidental smudging onto other materials. Pay particular attention to corners and edges, since these areas are the most likely spots for excess adhesive to accumulate during the pressing step. If you notice glue on your hands during this process, wipe them clean before touching any other photos in your project, since even a small amount of residual adhesive can leave faint fingerprints on subsequent photographs, especially glossy ones.
Step 7: Apply Even Pressure While Drying
Place a flat, heavy object such as a large book on top of your glued photos to ensure even pressure while the adhesive cures. This step is particularly important for preventing curling or bubbling, especially in humid environments. Leave the pressure in place for at least thirty minutes, though longer is generally better for maximum bonding strength. For larger or multi-page projects, consider placing a sheet of wax paper or parchment paper between the pressed photo and the weight itself, which prevents any residual tackiness from transferring onto the object you are using for pressure. If you are working on several photo pairs at once, stack them with a protective sheet between each pair before applying a single larger weight across the entire stack, which is far more efficient than pressing each pair individually.
Step 8: Allow Full Curing Time
While Universal Glue creates a strong initial bond within minutes, it is best to allow a full twenty-four hours before handling your finished project extensively. This ensures the adhesive reaches its maximum strength and durability, giving your photos a bond that will last for years. During this curing period, try to store your project flat in a stable environment away from direct sunlight, excessive heat, or high humidity, all of which can interfere with the final curing process. If your project involves a photo album or scrapbook that needs to be closed, consider leaving it slightly propped open or using spacers between pages during the curing period to prevent pages from sticking together before the glue has fully set.
Tips for Long-Lasting Results
Beyond the basic steps, there are several additional tips that can help you achieve even better results when gluing photos together.
- Always test the glue on a small, inconspicuous corner of a photo first if you are unsure how the paper type will react. This is especially useful when working with unfamiliar photo paper stocks, printer types, or vintage prints whose chemical composition may not be immediately obvious.
- Store your finished photo projects away from direct sunlight to prevent fading over time, regardless of how strong the adhesive bond is. Ultraviolet light degrades pigments in printed photographs regardless of the adhesive used, so pairing a quality glue with proper storage conditions is the best way to protect your memories for the long term.
- Avoid gluing photos in extremely humid conditions, as excess moisture in the air can extend drying time and affect the final bond strength. If you live in a particularly humid climate, consider working near a dehumidifier or during a time of day when indoor humidity tends to be lower.
- If working with a large collage involving many photos, work in small sections rather than gluing everything at once, giving each section time to set properly. This section-by-section approach also reduces the risk of accidentally smudging or shifting photos that were placed earlier in the process.
- Keep your bottle of Universal Glue tightly sealed between uses to preserve its consistency and prevent it from drying out prematurely. Storing the bottle upright in a cool, dry place will also help extend its shelf life significantly.
- For extra precision on small or detailed photo edges, apply the glue using a fine-tipped applicator rather than directly from the bottle. This is particularly useful for intricate scrapbooking layouts where photos are cut into custom shapes or arranged with very little space between them.
- When working on a project intended as a gift, such as a wedding album or a memory book for a loved one, consider doing a full dry run of the layout on a separate sheet of scrap paper first, so you can perfect the spacing and design before committing with glue.
- If you ever need to remove a photo that has been misplaced shortly after gluing, act quickly. Gently lifting the photo within the first few seconds of placement, before the adhesive has fully grabbed, is far easier and less damaging than trying to separate it once the bond has set.
- For framed displays, always allow your glued photos to cure fully for the recommended twenty-four hours before placing them under glass, since trapped moisture from an incompletely cured project can sometimes lead to fogging inside the frame.
Following these tips alongside the step-by-step process will help ensure that your photo projects not only look beautiful the day you finish them, but continue to look just as good for years into the future. Whether you are working on a simple two-photo composition for a keepsake gift or an elaborate multi-page scrapbook chronicling years of family memories, the combination of proper technique and a reliable, archival-quality adhesive is what separates a project that fades and falls apart within months from one that remains a treasured heirloom for generations.
Frequently Asked Questions
Can Universal Glue be used on all types of photo paper?
Yes, Universal Glue is formulated to work safely on glossy, matte, and most specialty photo papers without causing warping or discoloration. It has been tested across a wide range of paper weights and finishes commonly used by both home printers and professional photo labs.
How long does Universal Glue take to fully dry?
Initial bonding occurs within minutes, but we recommend allowing twenty-four hours for the adhesive to reach full strength and durability. This curing window ensures your photos remain securely bonded even under normal handling and everyday conditions.
Is Universal Glue safe for preserving old or vintage photographs?
Absolutely. Its acid-free formula makes it an excellent choice for archival projects where long-term preservation is a priority, including restoration work on family heirlooms and antique photo collections passed down through generations.
What happens if I am not satisfied with my purchase?
Ferber Painting offers a satisfaction guaranteed or your money back policy on Universal Glue, so you can request a full refund if the product does not meet your expectations. We want every customer to feel completely confident in their purchase, without any risk involved.
How quickly will my order arrive?
Thanks to our international network of trusted carriers, Ferber Painting ships Universal Glue quickly to customers all over the world, so you can start your project without long, frustrating delays.
Can I use Universal Glue for projects other than photos?
Yes, its versatile formula also works well on cardstock, canvas, wood, and fabric, making it a valuable addition to any craft or household toolkit, whether you are scrapbooking, framing artwork, or working on general home repairs.
Conclusion
Gluing photos together does not have to be a frustrating experience filled with wrinkled paper, visible residue, or adhesive that fails after a few months. By understanding why the right glue matters and following the step-by-step process outlined above, you can create beautiful, long-lasting photo projects with confidence. From preparing your workspace and planning your layout, to applying an even layer of adhesive and allowing proper curing time, every stage of the process plays a role in the final quality of your work, and none of it matters if the glue itself is not up to the task. And when it comes to choosing the right adhesive, nothing on the market compares to the quality, versatility, and peace of mind offered by Ferber Painting. Order your bottle of Universal Glue today and experience the difference of a product backed by fast worldwide shipping, easy online payment, and a full satisfaction guaranteed or your money back promise.