 Ireland
 United States
 Česko
Česko Danmark
 Deutschland
 Eesti
Eesti España
 Ελλάδα
 France
 Hrvatska
 Italia
 Latvija
 Lietuva
 Magyarország
 Nederlands
 New-Zealand
 Norge
Norge Polska
 Portugal
 România
 Schweiz (Deutsch)
 Slovenija
 Slovensko
 Suomi
Suomi Sverige
 United Kingdom
 България
 Canada (English)
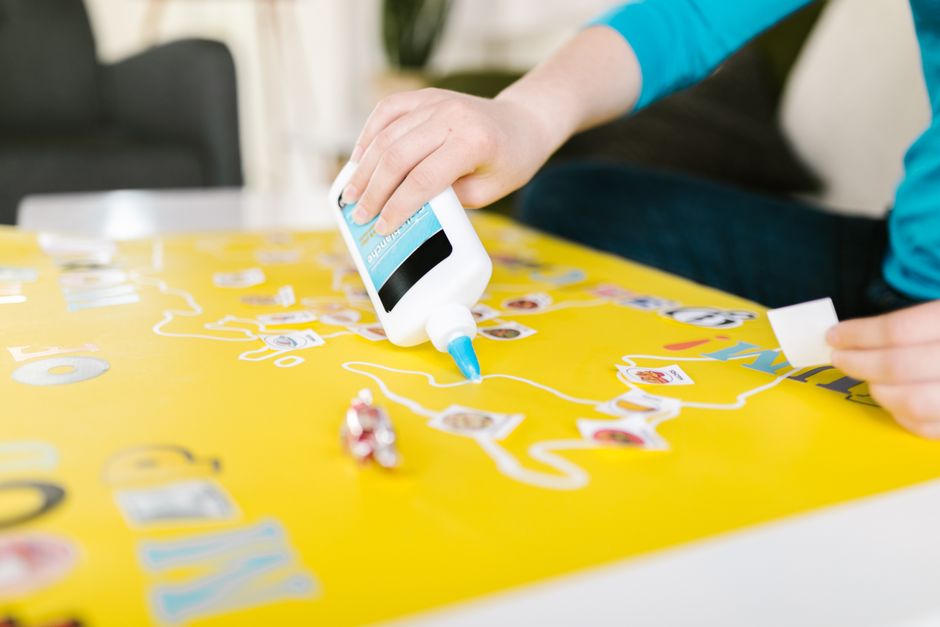
Gluing paper onto plexiglass is a task that sounds simple until you actually try it. Plexiglass, also known as acrylic glass, has a smooth, non-porous surface that resists most standard adhesives. If you have ever attempted this project with regular glue, white glue, or a random craft adhesive from a drugstore, you probably already know the frustration of bubbles, peeling edges, warped paper, or a cloudy residue that ruins the transparency of the plexiglass. The truth is that success in this project depends almost entirely on one single factor: choosing the right product.
Before we get into the technical steps of the process, it is important to understand that not all adhesives are created equal. Many glues on the market are formulated for porous materials like wood or fabric, and they simply do not bond well with the slick, plastic surface of plexiglass. This is where Ferber Painting’s Paper and Cardboard Glue stands out. It has been specifically engineered to create strong, long-lasting bonds between paper-based materials and smooth, non-porous surfaces such as plexiglass, acrylic, and glass. And unlike most competitors, it comes with a satisfaction guaranteed or money back promise, meaning you can try it completely risk free.
In this article, we will walk you through everything you need to know: why the product you choose matters more than the technique itself, a full comparison of what makes Ferber Painting’s glue different, and a detailed step-by-step guide on how to glue paper to plexiglass like a professional. We will also cover common project types where this technique is used, the science behind why plexiglass behaves so differently from other surfaces, and a set of troubleshooting tips for anyone who has already run into problems with a previous attempt. Whether you are a hobbyist working on a small home decor piece, a small business owner creating signage, or a professional framer looking for a reliable method, this guide is meant to give you a complete, practical understanding of the entire process from start to finish.
Why Choosing the Right Glue Changes Everything
When it comes to bonding paper to plexiglass, the adhesive you select determines almost every aspect of your final result: how flat the paper lies, how long the bond lasts, whether the glue yellows over time, and whether it damages the plexiglass surface. Many hobbyists and professionals make the mistake of assuming that any glue labeled “multi-purpose” will do the job. In reality, plexiglass is a unique material that requires a formula capable of gripping a non-porous, static-prone surface without leaving streaks or clouding.
Ferber Painting’s Paper and Cardboard Glue was developed with this exact challenge in mind. It has a specialized formula that creates a micro-adhesion effect on smooth surfaces, allowing the glue to grip plexiglass in a way that ordinary paper glue cannot. Additionally, it dries clear, which is essential when working with a transparent material like plexiglass, since any residue or cloudiness would be immediately visible and would ruin the aesthetic of the project.
To really understand why this matters, it helps to think about what happens at a microscopic level when glue meets a surface. Porous materials like wood, paper, or fabric have countless tiny fibers and pockets that allow adhesive to seep in and create a mechanical bond as it cures. Plexiglass has almost none of that texture. Its surface is essentially a sealed sheet of polymer, so any glue that relies purely on soaking into fibers for its strength will simply sit on top of the surface without ever forming a true bond. That is why so many people end up with paper that lifts at the corners within a day or two: the adhesive never actually attached itself to the acrylic, it just dried in place until the slightest bit of humidity or handling caused it to separate.
Here are some of the reasons why the product matters so much more than the technique:
- Ordinary glue often contains too much water, which causes the paper to warp or wrinkle as it dries.
- Many adhesives do not bond well to plastic surfaces, leading to peeling within days or weeks.
- Cheap glues frequently turn yellow or become brittle over time, especially when exposed to sunlight, which is common with plexiglass projects like signage or displays.
- Some products release strong odors or contain harsh chemicals that can slowly degrade the plexiglass itself, creating microscopic cracks or clouding.
This is precisely why Ferber Painting created a formula that avoids all of these pitfalls. It is acid free, dries without leaving a visible film, and remains flexible enough to prevent cracking even as temperatures change. And because it comes with a full satisfaction guaranteed or money back policy, you never have to worry about wasting money on a product that does not perform as promised, something that virtually no other brand in this category offers.
It is also worth mentioning that the environment you work in can amplify the weaknesses of a poor quality glue. In humid climates, water based adhesives take much longer to cure and are more prone to causing paper to ripple. In dry climates, some glues cure too quickly, leaving no time to properly position the paper before it sets. A well engineered formula accounts for these variables and performs consistently regardless of the season or the room you are working in. This kind of reliability is something that only becomes obvious once you compare a purpose built adhesive against a generic one side by side on the same piece of plexiglass.
What Makes Ferber Painting’s Paper and Cardboard Glue Different
There are dozens of adhesive brands on the market, but very few are actually suited for the specific combination of paper and plexiglass. Below is a comparison table highlighting the criteria that matter most when selecting a glue for this type of project, and how Ferber Painting’s product measures up against typical alternatives found in stores.
| Criteria | Ferber Painting Paper and Cardboard Glue | Typical Store Bought Glue |
|---|---|---|
| Bond strength on plexiglass | Excellent, engineered for smooth non-porous surfaces | Weak, often peels within days |
| Drying clarity | Dries completely clear, no residue | Often leaves a cloudy or yellowish film |
| Warping risk | Minimal, low moisture formula | High, especially with thin paper |
| Odor and safety | Low odor, safe for indoor use | Varies, some contain strong solvents |
| Satisfaction guarantee | Yes, full satisfaction guaranteed or money back | Rarely offered |
| Shipping | Fast international shipping through a trusted carrier network | Often limited to local stores or slow shipping |
| Online purchase and payment | Simple, secure online checkout | Depends on retailer, not always available |
| Longevity of bond | Long lasting, resistant to yellowing over time | Often degrades within months |
As the table shows, the difference is not just marginal. Ferber Painting’s product was built from the ground up to solve the specific problems that arise when working with plexiglass, while most generic adhesives were never designed with this material in mind at all. Add to that the fact that Ferber Painting ships quickly to almost anywhere in the world through an established international carrier network, and you have a product that is not only better performing but also more convenient to obtain.
Another important detail that sets Ferber Painting apart is the ease of purchase. The product is available directly on our website, with a payment process that takes less than a minute to complete. There is no need to search through multiple retailers or wonder if the product will actually arrive in good condition. Everything is streamlined, secure, and backed by our guarantee.
Beyond the table above, it is worth digging a little deeper into what “engineered for smooth non-porous surfaces” actually means in practice. The formula was tested repeatedly on plexiglass sheets of varying thicknesses, from thin craft grade acrylic used in small hobby projects to thick industrial grade sheets used in commercial signage. In every case, the glue maintained its bond without cracking, lifting, or clouding, even after repeated exposure to temperature swings that simulate storage in a garage or display near a window. This kind of rigorous testing is rarely something you can verify with a generic craft glue, since most of those products are designed as general purpose solutions rather than being tailored to a specific material pairing.
Customers who work in framing shops, retail display design, and even model making have reported that switching to a dedicated adhesive for paper and plexiglass eliminated the recurring problem of edges lifting after a few weeks. This is a detail that matters enormously for anyone running a business where a display piece needs to look flawless for months or even years, not just for the first few days after it is assembled.
How to Glue Paper to Plexiglass: Step by Step Guide
Now that you understand why the right glue is essential, let’s go through the actual process of gluing paper to plexiglass. Follow these steps carefully to achieve a clean, bubble free, long lasting result.
Step 1: Gather Your Materials
Before you begin, make sure you have everything you need within reach. This includes:
- A sheet of plexiglass, clean and free of dust or fingerprints
- The paper or cardboard you intend to glue
- Ferber Painting’s Paper and Cardboard Glue
- A soft brush, foam roller, or applicator for spreading the glue evenly
- A clean, lint free cloth
- A flat, smooth surface to work on
- A rolling pin, brayer, or flat squeegee to press out air bubbles
- Painter’s tape, optional, to hold the paper in position while working
Taking a few extra minutes to prepare your workspace before you even open the glue bottle can save you a lot of trouble later. Lay down a protective sheet or a piece of scrap cardboard underneath your work area so that any excess glue does not stick to your table. If you are working with a large sheet of plexiglass, it also helps to have a second person available to hold one end steady while you apply the paper, especially for pieces larger than a standard sheet of printer paper.
Step 2: Clean the Plexiglass Surface Thoroughly
This step is often overlooked, yet it is one of the most important. Any dust, oil, or fingerprints on the plexiglass will prevent the glue from bonding properly. Use a soft cloth with a small amount of isopropyl alcohol or a plastic safe cleaner to wipe down the surface. Avoid ammonia based cleaners, as these can cause micro cracks in plexiglass over time. Once cleaned, let the surface dry completely before moving forward.
It is also a good idea to check the plexiglass under strong light before you begin. Acrylic sheets often carry a static charge that attracts dust particles almost invisibly, and these tiny specks can create small bumps under the paper once it is glued down. Wiping the surface with an anti static cloth or a dryer sheet just before cleaning can significantly reduce the amount of dust that clings to the sheet. If you notice any protective film still attached to the plexiglass from the manufacturer, make sure to remove it completely, since gluing directly over this film will prevent any real bond from forming.
Step 3: Prepare the Paper
If your paper has any curling or creases, it is a good idea to flatten it beforehand. You can do this by placing it under a few heavy books for several hours. This step ensures a smoother application and reduces the risk of air bubbles forming underneath once the paper is glued down.
Trim the paper to the exact size you need, leaving a small margin if you plan to fold the edges around the plexiglass or trim them after the glue has dried.
The type of paper you choose also has a real impact on the final result. Thin printer paper is lightweight and easy to work with, but it can wrinkle more easily and may show slight texture from the glue underneath if too much adhesive is used. Heavier cardstock or photo paper tends to lie flatter and hides minor application imperfections better, though it requires a bit more care when smoothing out air bubbles since it is less flexible. If you are working with a printed image, consider doing a test run on a scrap piece of the same paper first, so you can see exactly how it reacts to the glue before committing to your final piece.
Step 4: Apply the Glue Evenly
Using a foam roller, brush, or applicator, apply a thin, even layer of Ferber Painting’s Paper and Cardboard Glue onto the plexiglass surface. Because the formula is designed specifically for non-porous materials, you do not need to apply a thick layer, a thin, even coat is enough to create a strong bond. Applying too much glue can lead to longer drying times and an increased risk of bubbling, so always aim for a light, uniform layer.
If you are working on a large surface, work in smaller sections at a time to avoid the glue drying before you have a chance to position the paper.
A useful technique for larger projects is to apply the glue in a grid pattern, moving in slightly overlapping strokes from one corner to the other. This helps you keep track of which areas have already been covered and prevents accidentally leaving dry patches that could cause the paper to lift later. If you are applying glue to both the plexiglass and the back of the paper for extra hold, which can be useful for thicker cardstock, make sure both layers are still tacky when you bring them together, rather than letting either one dry completely beforehand.
Step 5: Position the Paper Carefully
Starting from one edge, slowly lay the paper down onto the glued surface. Try to align it correctly from the very first contact point, since repositioning paper once it touches the glue can cause wrinkles or tearing. Working from one side to the other, gently smooth the paper down as you go, allowing air to escape rather than becoming trapped underneath.
For larger or more precise projects, using painter’s tape as a temporary hinge can make this step much easier. Tape one edge of the paper to the plexiglass first, so it acts like a hinge you can lift and lower repeatedly, allowing you to check the alignment before committing to full contact. This technique is especially helpful when working with printed designs that need to line up with specific markings or cutouts on the plexiglass.
Step 6: Smooth Out Air Bubbles
Once the paper is in place, use a rolling pin, brayer, or flat squeegee to press out any remaining air bubbles. Work from the center outward toward the edges in smooth, consistent strokes. This step is crucial for achieving a clean, professional finish, especially if the plexiglass will be visible from multiple angles or used for display purposes.
If you notice a stubborn bubble that will not move no matter how you press, you can use a pin to create a tiny pinhole at the edge of the bubble, then gently push the trapped air out through the hole with your finger or the brayer. This trick is commonly used by sign makers and rarely leaves any visible mark once the glue has fully dried, since the hole is smaller than the width of a strand of hair in most cases.
Step 7: Let It Dry Completely
Allow the glued paper to dry fully before handling the piece. Depending on humidity and temperature, this can take anywhere from a few hours to overnight. Avoid placing the plexiglass in direct sunlight or near heat sources while drying, as rapid temperature changes can cause uneven drying and potential warping.
During the drying process, try to keep the piece flat and undisturbed on a level surface rather than propping it up against a wall. Leaning the plexiglass at an angle while the glue is still curing can cause the paper to slowly slide out of position, even if the shift is barely noticeable at first. If you need to stack multiple pieces while they dry, place a sheet of wax paper or parchment paper between each one to prevent them from sticking together.
Step 8: Trim and Finish
Once the glue has fully cured, trim any excess paper from the edges using a sharp craft knife or scissors. If desired, you can seal the edges with a small amount of additional glue to prevent lifting over time. For projects that will be handled frequently or displayed outdoors, consider applying a clear protective sealant over the paper to extend its lifespan.
When trimming, always use a fresh, sharp blade rather than a dull one, since a dull blade tends to drag and tear the paper instead of cutting it cleanly, which can leave a ragged edge along the border of your plexiglass. Working slowly along a straight edge or ruler will give you the cleanest results, particularly for projects where the paper needs to align perfectly with the edge of the acrylic sheet, such as custom signage or framed art pieces.
Common Mistakes to Avoid When Gluing Paper to Plexiglass
Even with the right product, a few common mistakes can compromise your results. Here are the most frequent issues people encounter, along with how to avoid them.
- Skipping the cleaning step: Dust and oils prevent proper adhesion, no matter how good the glue is.
- Using too much glue: This leads to longer drying times, visible residue, and a higher chance of bubbling.
- Rushing the drying process: Handling the plexiglass too early can shift the paper or create smudges.
- Using the wrong type of paper: Very thin paper can tear easily, while very thick cardboard may require a slightly different application technique.
- Choosing a low quality adhesive: This is the root cause of most failed projects, and it is exactly why so many people turn to Ferber Painting’s Paper and Cardboard Glue for reliable, repeatable results.
By avoiding these mistakes and using a product specifically designed for this purpose, you dramatically increase your chances of achieving a clean, professional, long lasting result.
It is also worth mentioning a few less obvious mistakes that tend to appear over time rather than immediately after the project is finished. One of these is exposing the finished piece to prolonged direct sunlight without any protective coating. Ultraviolet light can gradually weaken the bond of even a high quality adhesive if the paper is left unprotected for months on end, especially in a window display. Applying a thin layer of clear sealant over the finished paper can dramatically extend the life of the piece by shielding both the paper and the glue line from UV exposure.
Another mistake that often goes unnoticed until it is too late is storing finished plexiglass pieces in a stack without any separation between them. The slight tackiness that can remain on a glued surface, even after it feels dry to the touch, can sometimes cause two pieces to stick together if stacked directly on top of one another, leading to peeling when you try to separate them later. A simple sheet of paper or foam between each piece during storage solves this problem entirely.
Finally, many people underestimate the importance of temperature during the entire process, not just during drying. Applying glue in a room that is too cold can cause the adhesive to become thicker and harder to spread evenly, while working in a room that is too hot can cause it to dry too quickly, leaving less time to properly position the paper. Aiming for a room temperature environment, generally between eighteen and twenty four degrees Celsius, tends to give the most predictable and consistent results.
Common Projects and Use Cases for This Technique
Gluing paper to plexiglass is not just a niche craft technique, it is used across a wide range of practical and creative applications. Understanding these use cases can help you decide on the right paper thickness, glue quantity, and finishing steps for your particular project.
Retail and event signage is one of the most common uses. Businesses often print designs on paper or cardstock and mount them onto plexiglass sheets to create durable, professional looking signs for storefronts, trade shows, and promotional displays. Because these signs are often placed near windows or under direct lighting, the clarity and UV resistance of the glue used becomes especially important.
Photography and art display is another popular application. Photographers sometimes mount prints onto plexiglass to create a modern, gallery style presentation known as face mounting or a similar layered display technique. The transparency of the acrylic combined with a perfectly bonded print creates a depth and vibrancy that is difficult to achieve with a standard frame.
Home decor and DIY projects also make frequent use of this technique, from custom coasters and decorative panels to personalized gifts featuring photos or artwork sealed behind a protective acrylic layer. These smaller scale projects are a great way to practice the technique before moving on to larger pieces, since mistakes on a small coaster are far less costly than mistakes on a large sign.
Model making and architectural presentations often rely on this same method as well, where thin paper printouts of textures, labels, or scale details are mounted onto plexiglass to simulate windows, signage, or informational panels within a model. In these cases, precision and a completely bubble free finish are essential, since even small imperfections are highly visible at close range.
Why Ferber Painting Is the Best Choice for This Project
At this point, it should be clear that success in gluing paper to plexiglass depends heavily on the product you choose. Ferber Painting’s Paper and Cardboard Glue was designed specifically to solve the challenges that come with bonding paper to smooth, non-porous surfaces. Here is a summary of why it remains the top choice for this type of project:
- It is formulated specifically for paper and cardboard on difficult surfaces like plexiglass, acrylic, and glass.
- It dries completely clear, preserving the transparency and aesthetic of the plexiglass.
- It resists yellowing and brittleness over time, unlike many cheaper alternatives.
- It comes with a full satisfaction guaranteed or money back policy, something that is extremely rare in this industry.
- It ships quickly worldwide, thanks to Ferber Painting’s international carrier network.
- Purchasing is simple and secure, with an easy online payment process available directly on our website.
Very few competitors can match this combination of quality, convenience, and risk free purchasing. When you factor in the guarantee, you are essentially trying the best product on the market with zero financial risk. If for any reason you are not satisfied, Ferber Painting will make it right.
Beyond the practical benefits, there is also a peace of mind factor that comes with using a product built specifically for this purpose. Instead of guessing whether a generic glue from a hardware store will hold up over time, you can move forward with your project knowing that the adhesive has already been tested and refined for exactly this kind of application. This is particularly valuable for anyone working on a project with sentimental value, such as a framed family photo, or a project with financial stakes, such as commercial signage that needs to look flawless for a client.
Mini FAQ
Can I use this glue on other surfaces besides plexiglass?
Yes, Ferber Painting’s Paper and Cardboard Glue works well on a variety of surfaces including glass, acrylic, wood, and standard cardboard, making it a versatile choice for many craft and display projects.
How long does it take for the glue to fully dry?
Drying time typically ranges from a few hours to overnight, depending on humidity, temperature, and the thickness of the paper used.
Will the glue damage or scratch my plexiglass?
No, the formula is designed to be gentle on plastic surfaces and will not cause scratching, clouding, or long term damage when used as directed.
What happens if I am not satisfied with the product?
Ferber Painting offers a satisfaction guaranteed or money back policy on all products, so you can request a refund if the glue does not meet your expectations.
Is shipping available internationally?
Yes, Ferber Painting ships quickly to customers around the world through a reliable network of international carriers.
Conclusion
Gluing paper to plexiglass does not have to be a frustrating or unpredictable process. With the right technique and, more importantly, the right adhesive, you can achieve a clean, professional, long lasting bond every time. Ferber Painting’s Paper and Cardboard Glue was specifically engineered to handle the unique challenges of bonding paper to smooth, non-porous surfaces like plexiglass, and it comes backed by a full satisfaction guaranteed or money back promise that virtually no competitor can match.
Whether you are creating a single decorative piece for your home or producing multiple signs for a business, taking the time to prepare your materials properly, apply the glue evenly, and let the piece cure undisturbed will make all the difference in how the final result looks and how long it lasts. Combine that careful process with a purpose built adhesive, and you remove nearly all of the guesswork that usually leads to frustrating outcomes like bubbling, peeling, or clouding.