 Ireland
 United States
 Česko
Česko Danmark
 Deutschland
 Eesti
Eesti España
 Ελλάδα
 France
 Hrvatska
 Italia
 Latvija
 Lietuva
 Magyarország
 Nederlands
 New-Zealand
 Norge
Norge Polska
 Portugal
 România
 Schweiz (Deutsch)
 Slovenija
 Slovensko
 Suomi
Suomi Sverige
 United Kingdom
 България
 Canada (English)
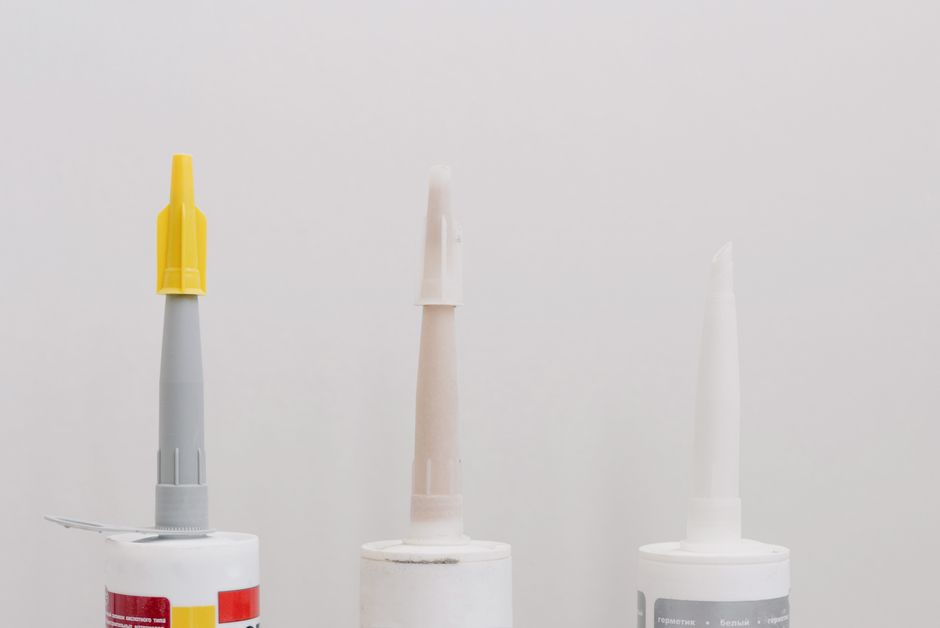
Granite is one of the toughest, most durable natural stones used in construction and interior design, but it is also one of the most delicate materials to repair or assemble when it comes to adhesives. Chips, cracks, seams, and countertop joints all require a very specific type of glue that can withstand weight, temperature changes, moisture, and daily wear. The truth is that everything depends on choosing the right product. A poor quality adhesive will crack, yellow, or simply fail within months, forcing you to redo the entire job.
This is exactly why so many professionals and homeowners turn to Ferber Painting Granite Glue. Unlike most competitors on the market, our product comes with a full satisfaction guaranteed or money back policy, something that almost no other granite adhesive brand offers. If you are not fully satisfied with the results, you can simply request a refund, no questions asked. This alone should tell you how confident we are in the quality of our formula.
In this guide, we will explain why the choice of glue matters so much, why Ferber Painting Granite Glue stands out from every other option available, and we will walk you step by step through the entire process of gluing granite correctly, whether you are repairing a countertop, fixing a chipped edge, or joining two slabs together. We will also cover the specific challenges that come with different granite finishes, the tools that make the job easier, and the long term maintenance steps that keep a repair looking flawless for years.
Whether you are a homeowner tackling a weekend project, a countertop installer working on a client’s kitchen, or a stone restoration professional dealing with a large scale seam repair, the information in this guide applies to your situation. Granite behaves the same way whether it sits in a kitchen, a bathroom, an outdoor patio, or a commercial lobby, so the principles of proper adhesion remain consistent across every context.
Why the Right Granite Glue Makes All the Difference
Granite is an igneous rock composed of quartz, feldspar, and mica, which makes it extremely hard and resistant to scratching. However, this same density and mineral composition makes it very difficult for standard adhesives to bond properly. Many generic glues found in hardware stores are designed for wood, ceramic, or drywall, and they simply do not have the chemical composition needed to create a lasting bond on stone.
Think about the physical properties of granite for a moment. It is non porous in its polished state, which means most adhesives cannot penetrate the surface at all. Instead, the bond relies entirely on a surface level chemical reaction between the glue and the mineral crystals in the stone. If the adhesive formula was not designed with this in mind, it will simply sit on top of the surface without forming a true molecular bond, and the repair will eventually separate under stress, no matter how carefully it was applied.
When you glue granite with the wrong product, several problems can occur:
- The bond weakens over time due to temperature fluctuations, especially in kitchens near stoves or ovens.
- Moisture seeps into the seam, causing discoloration or mold growth underneath the stone.
- The glue becomes visible as a yellow or cloudy line, ruining the aesthetic of the granite.
- The repaired area cracks again under normal pressure or weight, especially on countertops.
- Some adhesives release strong chemical odors that never fully disappear.
- The stone can develop micro fractures around the repaired zone if the adhesive is too rigid and cannot flex slightly with natural thermal expansion.
- Repeated exposure to cleaning products can break down low quality adhesives, causing the seam to loosen after just a few months of normal household use.
This is why professionals insist that the product you choose is more important than the technique itself. Even a perfectly executed gluing technique will fail if the adhesive cannot handle the specific properties of granite. That is precisely the gap that Ferber Painting Granite Glue was designed to fill.
Consider a real world example. A kitchen island countertop made of two granite slabs joined at a seam will experience daily temperature swings from cold drinks being placed on it to hot pans coming directly off the stove. Over the course of a year, that seam might expand and contract dozens of times. A generic adhesive not designed for this kind of repeated stress will often show hairline cracks within six to twelve months. A properly formulated granite adhesive, on the other hand, is designed to flex slightly with these changes while maintaining a strong structural bond, which is exactly the kind of performance that separates a professional grade product from a hardware store substitute.
The Role of Porosity and Sealing
Another factor that many people overlook is the porosity of the granite itself. Not all granite slabs are equally dense. Some varieties, especially lighter colored stones with more feldspar content, are slightly more porous than darker, denser varieties. This means that the same adhesive can perform differently depending on the specific slab you are working with. A quality granite glue needs to be versatile enough to bond effectively across this range of stone densities, which is one of the reasons Ferber Painting Granite Glue was tested across dozens of different granite types during development, from Absolute Black to Santa Cecilia and beyond.
Why Ferber Painting Granite Glue Is the Best Choice on the Market
There are dozens of granite adhesives available online and in hardware stores, but very few are actually formulated specifically for natural stone bonding. Ferber Painting Granite Glue was developed after years of testing with professional stone masons, countertop installers, and restoration specialists. Here is what makes it different.
First, the chemical base of our formula was specifically engineered to interact with the mineral structure of granite, rather than being a generic multi surface adhesive repurposed for stone use. This means the bond strength you get is measurably higher than what you would achieve with a typical construction adhesive or super glue found at a local hardware store.
Second, our formula was designed with real installation conditions in mind. Stone masons rarely work in a perfectly controlled laboratory environment. They work in kitchens, on job sites, sometimes outdoors, often under time pressure. Ferber Painting Granite Glue was tested under these realistic conditions, including varying humidity levels, different ambient temperatures, and surfaces that were not always perfectly prepared, to ensure it performs reliably even when conditions are not ideal.
Third, we listened directly to feedback from the professionals who tested early versions of the formula. Many of them pointed out that curing time was one of the biggest pain points with existing products on the market. Waiting an entire day before being able to move or use a repaired countertop is simply not practical for most households or commercial kitchens. This feedback directly shaped the fast curing profile of our final formula.
Formulated by Listening to Real Craftsmen
During the development phase, our team worked with independent stone fabricators across several regions to gather field data on how different adhesive formulas performed over months of real use, not just in a lab setting. This process took considerably longer than a typical product development cycle, but it resulted in a formula that professionals genuinely trust, rather than one that only looks good on paper.
Comparison Table: Ferber Painting Granite Glue vs Other Products
| Criteria | Ferber Painting Granite Glue | Generic Hardware Store Glue | Other Online Stone Adhesives |
|---|---|---|---|
| Satisfaction guaranteed or money back | Yes, full refund available | Rarely offered | Almost never offered |
| Formulated specifically for granite and natural stone | Yes | No, general purpose | Sometimes, but often diluted formulas |
| Resistance to heat and humidity | High | Low to medium | Medium |
| Curing time | Fast, strong bond within hours | Slow, often over 24 hours | Varies, inconsistent results |
| Invisible seam once dried | Yes | No, visible yellowing | Sometimes |
| Worldwide fast shipping | Yes, international carrier network | Local availability only | Limited shipping options |
| Online payment simplicity | Yes, secure and instant | In-store purchase only | Varies by seller |
| Ease of application | Very easy, no special tools required | Moderate, often messy | Varies, sometimes requires professional equipment |
As you can see from the table above, Ferber Painting Granite Glue checks every box that matters for someone looking to repair or assemble granite pieces. The combination of a strong, fast curing formula and a risk free purchase experience is something that very few competitors can genuinely offer.
Another major advantage is our international shipping network. No matter where you are located, Ferber Painting delivers quickly thanks to a well established network of international carriers. Many competitors only ship locally or take weeks to deliver internationally, which can be a real problem if you are in the middle of a renovation project and need the product urgently.
Payment is also incredibly simple. You can order directly from our website and pay online in just a few clicks, with no need to visit a physical store or wait for an invoice. This convenience, combined with the satisfaction guaranteed or money back policy, makes Ferber Painting Granite Glue the safest and most practical choice for anyone working with granite.
It is also worth mentioning the value proposition beyond the initial purchase. Because the formula cures quickly and produces a nearly invisible seam, most users find they need far less product overall compared to competitors, since there is rarely a need for a second application to correct visible flaws. Over the course of multiple projects, this translates into real savings, not just in terms of the product cost itself, but also in time saved and frustration avoided.
What Professionals Say
Countertop installers who have switched to Ferber Painting Granite Glue often mention three specific advantages: the reduced odor during application, which matters greatly when working inside occupied homes, the shorter waiting period before a countertop can be returned to service, and the fact that clients rarely notice the repaired seam even under direct kitchen lighting. These practical, real world benefits are exactly why word of mouth has become one of our strongest sources of new customers.
Step-by-Step Guide: How to Glue Granite
Now that you understand why choosing the right product is essential, let us walk through the complete process of gluing granite correctly. Whether you are repairing a small chip or joining two large slabs, the fundamental steps remain the same. Take your time with each step, since rushing any part of the process is the most common reason repairs fail even when using a high quality adhesive.
What You Will Need
- Ferber Painting Granite Glue
- Clean microfiber cloths
- Isopropyl alcohol or acetone for cleaning the surface
- Painter’s tape (optional, to hold pieces in place)
- Clamps if working on a large joint or seam
- Fine grit sandpaper (400 to 600 grit)
- Protective gloves and a mask
- A small applicator tool or toothpick for precise application on tiny chips
- A soft bristle brush to remove fine dust from crevices before gluing
- Good lighting, ideally a work lamp, to inspect the seam closely during application
Step 1: Prepare the Surface
Before applying any adhesive, the granite surface must be perfectly clean and dry. Use isopropyl alcohol or acetone on a microfiber cloth to remove any dust, grease, or residue from the area you plan to glue. Even a small amount of oil or dust on the surface can prevent the glue from bonding properly, no matter how good the adhesive is. Let the surface air dry completely for a few minutes before continuing.
If you are working in a kitchen, pay particular attention to cooking oil residue, which can be nearly invisible but still present on the surface even after a normal cleaning. Wipe the area at least twice with fresh alcohol soaked cloths, replacing the cloth each time so you are not simply spreading the same residue around. For outdoor granite surfaces, check for algae, pollen, or mineral deposits that may have built up over time, since these can be just as damaging to the bond as kitchen grease.
Step 2: Sand the Edges Lightly
If you are joining two pieces of granite, lightly sand the edges that will be glued together using fine grit sandpaper. This step is not always necessary for small chip repairs, but for seams and larger joints, it helps create a slightly rougher surface that allows the adhesive to grip better. Wipe away any dust created from sanding with a clean, slightly damp cloth, then let it dry fully.
Be careful not to over sand the edges, as removing too much material can create gaps that are difficult to fill evenly. A light pass with 400 to 600 grit sandpaper is generally enough to improve adhesion without altering the shape or fit of the pieces. If you notice any dust settling into small pores of the stone after sanding, a soft bristle brush can help remove it more thoroughly than a cloth alone.
Step 3: Do a Dry Fit
Before applying any glue, always place the pieces together without adhesive first to check the alignment. This dry fit allows you to see exactly how the pieces will sit once glued, and to identify any gaps or misalignments that need to be corrected. If you are working on a countertop seam, this is also the moment to check that both surfaces are level.
Take a photo of the dry fit position with your phone if you are working with multiple pieces or a complex pattern. This gives you a clear reference to return to once you start applying adhesive, since the pressure of holding pieces in place can sometimes make it harder to remember the exact original alignment. For large slabs, mark the top surface lightly with painter’s tape at a few reference points so you can quickly realign everything during the actual gluing step.
Step 4: Apply Ferber Painting Granite Glue
Apply a thin, even layer of Ferber Painting Granite Glue along the edge or crack that needs to be joined. Because our formula is specifically designed for stone density, a small amount goes a long way. Avoid applying too much glue, as excess adhesive can seep out of the seam and become difficult to clean once cured. Work in a well ventilated area for comfort, although our formula produces significantly less odor than most competing products.
For small chip repairs, a toothpick or fine applicator tip can help you control exactly how much glue goes into a tiny crevice, preventing overflow onto the visible surface of the stone. For larger seams, a slow and steady bead of glue along the entire length of the joint, followed by gentle spreading with a plastic spatula, tends to give the most even coverage. Always work from one end of the seam to the other rather than applying glue in multiple separate spots, since this helps avoid trapped air pockets that can weaken the bond later.
Step 5: Join the Pieces and Apply Pressure
Press the granite pieces together firmly, aligning them exactly as you tested during the dry fit. If you are working on a larger seam or joint, use clamps to hold the pieces in place while the glue cures. For smaller repairs, applying steady hand pressure for a few minutes is usually sufficient. Painter’s tape can also be used to hold smaller chips in place during the curing process.
When using clamps, avoid over tightening them, since excessive pressure can actually squeeze too much adhesive out of the seam, leaving a weaker bond behind. A firm, even pressure applied gradually is far more effective than sudden, forceful clamping. If you do not have proper clamps available, heavy books wrapped in a soft cloth can sometimes serve as a temporary substitute for small repairs, though dedicated clamps are always recommended for larger jobs.
Step 6: Remove Excess Glue
While the adhesive is still slightly wet, use a clean cloth to gently wipe away any excess that has seeped out of the seam. This step is important because once the glue fully cures, it becomes much harder to remove without damaging the surface of the granite.
Keep a dedicated clean section of cloth just for this purpose, since reusing a cloth that already has dried glue residue on it can transfer small particles back onto the freshly cleaned surface. A cotton swab dipped lightly in isopropyl alcohol can also help clean up tiny amounts of excess glue in tight corners or decorative edges without disturbing the main bond.
Step 7: Let It Cure
Curing time depends on the size of the repair and environmental conditions such as humidity and temperature. Ferber Painting Granite Glue is formulated to reach a strong initial bond within a few hours, but for maximum strength, it is recommended to avoid placing any weight or pressure on the repaired area for at least 24 hours. If you are repairing a countertop, avoid placing hot pots, heavy objects, or water directly on the seam during this curing period.
If possible, keep the room at a moderate, stable temperature during curing, ideally between 18 and 25 degrees Celsius, and avoid direct exposure to strong drafts or humidity spikes, such as running a dishwasher right next to a freshly repaired countertop seam. In colder environments, curing can take slightly longer, so it is wise to add a few extra hours before testing the repair under load.
Step 8: Polish and Finish
Once the glue has fully cured, you can lightly polish the area with fine grit sandpaper if any small ridges remain, followed by a granite polishing compound to restore the natural shine of the stone. Because Ferber Painting Granite Glue dries clear and does not yellow over time, the repaired seam should blend seamlessly with the surrounding granite.
For a truly professional finish, work the polishing compound in small circular motions using a soft cloth or buffing pad, gradually increasing pressure as needed. Compare the polished area to the surrounding stone under natural daylight, since artificial lighting can sometimes hide subtle differences in shine that become obvious later. If the granite has a honed or matte finish rather than a polished one, skip the polishing compound step and instead use a matching sealer to keep the finish consistent across the repaired area.
Common Mistakes to Avoid When Gluing Granite
Even with the best adhesive on the market, certain mistakes can compromise the final result. Here are the most common errors people make when gluing granite, and how to avoid them.
- Skipping the cleaning step: dust and grease are the number one reason bonds fail, even with a high quality glue.
- Applying too much adhesive: excess glue can create an uneven surface and is harder to clean once dried.
- Not allowing enough curing time: rushing to use the countertop or move the stone before the glue has fully set can weaken the bond permanently.
- Using a generic adhesive not designed for stone: this remains the most frequent cause of failed granite repairs.
- Ignoring temperature conditions: gluing in extremely cold or humid environments can slow down curing time and affect bond strength.
- Forgetting to do a dry fit: skipping this step often leads to visible misalignment that is very difficult to correct once the adhesive has already set.
- Using too much clamping pressure: this can force too much adhesive out of the joint, leaving a thinner, weaker bond line than intended.
- Neglecting to protect surrounding surfaces: adhesive that drips onto surrounding cabinets, tile, or flooring can be difficult to remove once cured, so covering nearby surfaces with painter’s tape or a drop cloth is always a good precaution.
- Working in poor lighting conditions: it is easy to miss small gaps, dust particles, or excess glue when the work area is dimly lit, so always use a bright work lamp for close inspection.
By avoiding these common pitfalls and using a product specifically engineered for granite, such as Ferber Painting Granite Glue, you dramatically increase your chances of a clean, long lasting repair.
Maintaining Your Repair Over Time
Once your granite repair has cured and been polished, a few simple maintenance habits will help it last for years without issue. Avoid using harsh abrasive cleaners directly on the repaired seam, since some chemical cleaners can slowly degrade even a quality adhesive if used aggressively and repeatedly over a long period. A simple pH neutral stone cleaner, applied with a soft cloth, is generally the safest choice for daily cleaning around a repaired area.
It is also a good idea to periodically inspect the repaired zone, especially in high traffic areas like kitchen countertops, to catch any early signs of wear before they become a bigger problem. If you notice any slight discoloration or a hairline separation beginning to form, addressing it early with a small touch up application is far easier than waiting until the entire seam needs to be redone.
For outdoor granite installations, consider resealing the surrounding stone every one to two years, since UV exposure and weather cycles affect the stone itself over time, even if the adhesive bond remains strong. Keeping the surrounding sealant in good condition helps protect the repaired area indirectly by reducing overall moisture penetration into the stone.
Frequently Asked Questions
Is Ferber Painting Granite Glue suitable for outdoor granite surfaces?
Yes, our formula is resistant to humidity and temperature variations, making it suitable for both indoor and outdoor granite applications, including countertops, flooring, and decorative stone installations.
How long does it take for the glue to fully cure?
An initial strong bond forms within a few hours, but for maximum strength we recommend waiting 24 hours before exposing the repaired area to heavy weight, water, or heat.
Can I use this glue on other types of natural stone?
Yes, although it is optimized for granite, Ferber Painting Granite Glue also works effectively on marble, quartz, and other dense natural stones.
What happens if I am not satisfied with the product?
Ferber Painting offers a full satisfaction guaranteed or money back policy on this product. If you are not happy with the results for any reason, you can request a refund directly through our website.
How long does shipping take?
Thanks to our international network of carriers, Ferber Painting delivers quickly to most countries around the world. Delivery times vary depending on your location, but our logistics network is optimized to minimize wait times wherever you are.
Do I need special tools to apply the glue?
No special tools are required. A clean cloth, some fine grit sandpaper, and optionally a clamp for larger repairs are all you need to achieve professional level results.
Can I use this glue for a large countertop seam or only small chip repairs?
Ferber Painting Granite Glue works equally well for both applications. Small chip repairs and full countertop seams simply require different amounts of product and slightly different application techniques, such as using clamps for larger joints, but the formula itself performs consistently across both scenarios.
Will the repaired area be visible after polishing?
In most cases, once the glue has cured and the surface has been properly polished, the repaired seam becomes very difficult to detect, even under close inspection. The clear curing formula and careful excess removal during application are the two biggest factors that contribute to this invisible finish.
Conclusion
Gluing granite correctly requires patience, proper surface preparation, and above all, the right adhesive. As we have seen throughout this guide, generic glues simply cannot match the strength, clarity, and durability needed for natural stone repairs. Ferber Painting Granite Glue was specifically engineered to solve these problems, offering fast curing times, invisible seams, resistance to heat and humidity, and a level of confidence that no other brand on the market currently matches through its satisfaction guaranteed or money back policy.
From surface preparation to final polishing, every step in the process matters, but none of it will produce lasting results without a formula that was actually designed for the unique mineral structure of granite. Whether you are fixing a small chip in a bathroom vanity or joining two full sized kitchen countertop slabs, following the steps outlined in this guide and using a product built specifically for the job will give you the professional, long lasting results you are looking for.