 Ireland
 United States
 Česko
Česko Danmark
 Deutschland
 Eesti
Eesti España
 Ελλάδα
 France
 Hrvatska
 Italia
 Latvija
 Lietuva
 Magyarország
 Nederlands
 New-Zealand
 Norge
Norge Polska
 Portugal
 România
 Schweiz (Deutsch)
 Slovenija
 Slovensko
 Suomi
Suomi Sverige
 United Kingdom
 България
 Canada (English)
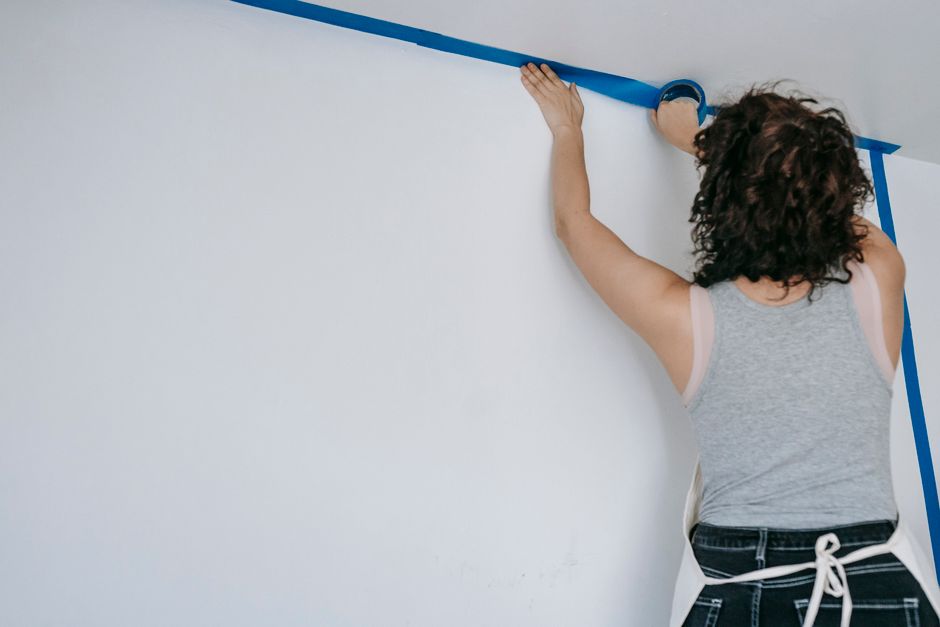
Applying fiberglass wallpaper is one of the most reliable ways to protect your walls, hide imperfections, and prepare a surface for paint. But before you even think about brushes, rollers, or trimming techniques, there is one factor that will determine whether your project is a success or a frustrating mess: the adhesive you use. Everything depends on choosing the right product. A poor quality glue will lead to bubbles, peeling edges, and a wallpaper job that looks amateurish within weeks. This is why, at Ferber Painting, we always recommend starting with our own Wallpaper Adhesive, the only product on the market backed by a full satisfaction guaranteed or money back policy. If you are not completely happy with the result, we will refund you, no questions asked. That kind of confidence is rare in this industry, and it is one of the many reasons professionals and DIY enthusiasts alike keep coming back to our formula.
In this guide, we will walk you through everything you need to know about gluing fiberglass wallpaper to a wall, from choosing the right adhesive to applying it like a professional. We will also explain why our product consistently outperforms competitors in terms of ease of use, drying time, bonding strength, and overall value for money. Whether you are a homeowner tackling your first renovation project, a property manager overseeing multiple units, or a professional painter looking for a dependable supply chain, this guide is designed to give you the confidence and knowledge needed to complete the job right the first time. Fiberglass wallpaper has become increasingly popular over the past decade, and for good reason. It offers a level of durability that traditional paper based wall coverings simply cannot match, but that durability only shows up when the installation process is handled correctly from start to finish.
Throughout this article, we will cover the science behind why fiberglass wallpaper behaves differently than other wall coverings, the specific characteristics that make an adhesive suitable for this material, and the exact sequence of steps that professional installers follow on job sites every single day. We will also address the most common questions we receive from customers, along with troubleshooting advice for situations that do not go exactly as planned. By the end of this guide, you should feel fully equipped to handle a fiberglass wallpaper project of any size, from a small accent wall in a home office to a full commercial renovation spanning thousands of square feet.
Why the Right Adhesive Makes All the Difference
Fiberglass wallpaper, also known as fiberglass wall covering, is a woven material made from glass fibers. It is prized for its durability, resistance to cracks, and ability to be painted over multiple times. However, its unique texture and weight mean it requires a specific type of adhesive, one that is strong enough to hold the material firmly in place, yet flexible enough to allow for repositioning during application.
Many generic wallpaper pastes on the market are designed for lightweight paper products and simply cannot handle the density of fiberglass mesh. This leads to sagging, poor adhesion at the seams, and premature failure, especially in humid environments like bathrooms and kitchens. Our Wallpaper Adhesive was specifically engineered with fiberglass wall coverings in mind. It offers superior tack, meaning it grips the wall almost immediately while still giving you enough working time to smooth out air bubbles and align patterns.
To understand why this matters so much, it helps to look at the physical structure of fiberglass wallpaper itself. Unlike paper based products, fiberglass wall coverings are woven in a crosshatch or diamond pattern, which creates tiny gaps and textures across the surface. These gaps mean the material has more surface area exposed to air and moisture than a flat paper sheet would. As a result, the adhesive needs to penetrate slightly into the weave without soaking through and staining the visible side of the material. Achieving this balance requires a formula with the right viscosity, one that is thick enough to stay in place on a vertical wall surface, but thin enough to spread evenly and bond into the fibers without pooling or dripping.
Weight is another factor that is often overlooked by first time installers. Fiberglass wallpaper, especially the heavier weave patterns used in commercial and industrial settings, can weigh significantly more per square meter than standard vinyl or paper wall coverings. A weak adhesive might hold the material in place for the first few hours, only to fail once gravity and the natural drying process pull at the seams. This is precisely why so many DIY projects using generic pastes end up with strips peeling away from the wall at the top corners within a week or two of installation. Our formula was developed and tested specifically to withstand the weight and tension of fiberglass weaves, ensuring that once the strip is set, it stays set for the long haul.
Many generic wallpaper pastes on the market are designed for lightweight paper products and simply cannot handle the density of fiberglass mesh. This leads to sagging, poor adhesion at the seams, and premature failure, especially in humid environments like bathrooms and kitchens. Our Wallpaper Adhesive was specifically engineered with fiberglass wall coverings in mind. It offers superior tack, meaning it grips the wall almost immediately while still giving you enough working time to smooth out air bubbles and align patterns.
Here are some of the key advantages that set our product apart from every other adhesive currently available:
- Satisfaction guaranteed or money back, a promise no competitor currently offers on their wallpaper adhesive products.
- High initial tack combined with extended open time, giving you more flexibility during installation.
- Excellent resistance to humidity and temperature changes, ideal for kitchens, bathrooms, and commercial spaces.
- Non-toxic, low odor formula that is safe to use in occupied homes and offices.
- Easy application with a roller or brush, with no need for complicated mixing ratios.
- Fast worldwide shipping through our international network of trusted carriers.
- Simple and secure online payment directly through our website.
While many manufacturers focus solely on bonding strength, we understand that the entire experience matters, from the moment you place your order to the moment you finish your project. That is why we built a product and a service around convenience, reliability, and peace of mind. Consider the difference between ordering from a company that treats adhesive as an afterthought versus a company like ours that has built its entire reputation around this single product category. When you order a generic adhesive from a big box retailer, you are often buying a mass produced formula meant to serve dozens of different wall covering types at once. That kind of one size fits all approach inevitably means compromises somewhere in the formulation, whether it is reduced tack, shorter working time, or poor resistance to humidity.
Our approach has always been different. We focus specifically on wallpaper adhesives, which means every improvement we make to our formula is directed toward solving the exact problems that installers face with wall coverings like fiberglass mesh. This specialization shows up in small but meaningful ways throughout the application process, from how easily the product spreads with a roller to how forgiving it is if you need to reposition a strip a few minutes after applying it.
Comparing Wallpaper Adhesives: What Really Matters
When choosing an adhesive for fiberglass wallpaper, it is easy to get overwhelmed by marketing claims. To make things simple, we have put together a comparison table highlighting the criteria that actually matter when selecting a product. As you will see, Ferber Painting stands out in nearly every category.
| Criteria | Ferber Painting Wallpaper Adhesive | Generic Adhesives on the Market |
|---|---|---|
| Satisfaction Guarantee | Yes, full money back guarantee | Rarely offered, and often with restrictions |
| Bonding Strength on Fiberglass | Excellent, engineered specifically for fiberglass wall coverings | Variable, often designed for lighter paper products |
| Open Working Time | Extended, allowing repositioning and bubble removal | Short, requiring rushed application |
| Humidity Resistance | High, suitable for bathrooms and kitchens | Low to moderate, may fail in humid areas |
| Ease of Application | Smooth consistency, easy to spread with roller or brush | Often too thick or too runny, uneven application |
| Odor and Safety | Low odor, non-toxic formula | Strong chemical smell in many cases |
| Shipping | Fast worldwide delivery through trusted carrier network | Often limited to local markets or slow international shipping |
| Payment Options | Simple and secure online payment | Varies by retailer, sometimes limited |
This table makes it clear why so many customers switch to our product after struggling with lower quality alternatives. The combination of performance, safety, and customer service creates a purchasing experience that is genuinely risk free, especially considering the satisfaction guaranteed or money back promise that backs every order.
Let us dig a little deeper into a few of these criteria, since they often make the biggest practical difference on the job site. Open working time refers to how long the adhesive remains workable after it has been applied to the wall before it begins to set. This might sound like a minor technical detail, but in practice it can mean the difference between a smooth, professional finish and a rushed, uneven result. When an adhesive sets too quickly, installers are forced to work in a hurry, which increases the likelihood of misaligned seams, trapped air bubbles, and wasted material from strips that have to be pulled up and reapplied. Our extended open time gives you the breathing room to slow down, check your alignment, and make small adjustments without worrying that the glue is drying underneath the wallpaper.
Humidity resistance is another criterion that separates professional grade adhesives from consumer grade pastes. Bathrooms, kitchens, laundry rooms, and basements all experience regular fluctuations in moisture levels, and an adhesive that is not formulated to handle this kind of environment will eventually break down, leading to peeling edges, mold growth behind the wallpaper, or a musty smell that develops over time. Because our formula was tested specifically under high humidity conditions, it maintains its bonding strength even in rooms where steam and condensation are a daily occurrence.
Ease of application might seem like a purely cosmetic concern, but it actually has real consequences for the quality of the finished project. An adhesive that is too thick will leave ridges and lumps under the wallpaper, which become visible once the paint is applied. An adhesive that is too thin will run down the wall before you have a chance to apply the wallpaper strip, wasting product and creating a mess. Our formula strikes the right balance, spreading evenly with a standard paint roller or wide brush and staying in place on vertical surfaces without dripping.
Tools and Materials You Will Need
Before starting your project, gather all the necessary tools and materials. Having everything ready before you begin will save you time and reduce the risk of mistakes. Here is what we recommend having on hand:
- Ferber Painting Wallpaper Adhesive
- Fiberglass wallpaper rolls, measured and cut to size
- A paint roller or wide paintbrush for applying the adhesive
- A wallpaper smoothing tool or plastic squeegee
- A sharp utility knife for trimming edges
- A measuring tape and level
- A clean bucket for mixing, if required
- Drop cloths or old sheets to protect the floor
- A sponge and clean water for wiping away excess adhesive
- Sandpaper for smoothing the wall surface beforehand
Having quality tools alongside a quality adhesive makes an enormous difference. Even the best glue in the world cannot compensate for a poorly prepared wall or an improperly cut sheet of wallpaper. This is why preparation is just as important as the gluing process itself.
Let us take a closer look at a few of these tools, since choosing the right version of each one can make the application process significantly easier. When it comes to rollers, a medium nap roller is generally the best choice for spreading adhesive evenly across large sections of wall. A roller that is too thin will require multiple passes and may leave streaks, while one that is too thick can apply an uneven, excessive layer of adhesive. For tight corners and edges near trim, ceiling lines, or electrical outlets, keep a smaller brush on hand so you can apply adhesive precisely without getting it on surfaces that should remain clean.
A wallpaper smoothing tool, sometimes called a smoothing brush or plastic squeegee, is essential for pressing the fiberglass wallpaper into the adhesive and pushing out trapped air. Look for a tool with a beveled edge, since this design allows you to work air bubbles out toward the edges of the strip rather than trapping them in the middle. Some installers prefer a felt covered smoothing tool for delicate wallpaper finishes, since it reduces the risk of scuffing or marking the surface texture of the fiberglass weave.
A sharp utility knife is non negotiable for this kind of project. A dull blade will tear the fiberglass fibers rather than cutting them cleanly, leaving a ragged, frayed edge that is difficult to hide once the wallpaper is painted. Keep a supply of extra blades on hand and change them frequently throughout the project, ideally after every one or two strips, to maintain a clean, precise cut every time.
Finally, do not underestimate the value of good lighting during installation. Natural daylight or bright work lights positioned at an angle to the wall will help you spot air bubbles, uneven seams, and adhesive residue that might otherwise go unnoticed until the paint is applied and the imperfections become impossible to hide.
Step by Step Guide: How to Glue Fiberglass Wallpaper to a Wall
Now that you understand why choosing the right adhesive matters and have all your tools ready, let us walk through the actual process of applying fiberglass wallpaper to a wall.
Step 1: Prepare the Wall Surface
Start by cleaning the wall thoroughly. Remove any dust, grease, or old wallpaper residue. If the wall has cracks or holes, fill them with spackling compound and sand the surface until smooth. A clean, dry, and even surface is essential for proper adhesion. If you are working on a freshly painted wall, make sure the paint has fully cured, typically at least two weeks, before applying wallpaper.
It is also worth checking the wall for any signs of moisture intrusion before you begin. Press your hand against different sections of the wall and look for cool, damp spots, discoloration, or a faint musty odor, all of which can indicate a hidden leak or condensation problem behind the drywall. Applying wallpaper over a damp wall is one of the most common causes of installation failure, since trapped moisture will eventually cause the adhesive to break down and the wallpaper to peel away, regardless of how good the product is. If you suspect a moisture issue, address the underlying cause before moving forward with your project.
For walls with a glossy paint finish, a light sanding pass with fine grit sandpaper will help the adhesive grip the surface more effectively. Glossy surfaces are naturally less porous, which means the adhesive has less texture to bond to. A quick scuff sand followed by a wipe down with a damp cloth will dramatically improve adhesion without requiring a full repaint of the wall.
Step 2: Measure and Cut Your Fiberglass Wallpaper
Measure the height of your wall and add a few extra centimeters at the top and bottom for trimming. Cut your fiberglass wallpaper strips accordingly, making sure to account for pattern matching if your wallpaper has a repeating design. Lay the strips flat or roll them loosely, keeping them organized in the order they will be applied.
When measuring, always measure at multiple points along the wall rather than relying on a single measurement. Walls are rarely perfectly straight from floor to ceiling, and small variations of a centimeter or two are common, especially in older homes. By measuring at the left edge, the center, and the right edge of each section, you can identify the longest measurement and cut your strips accordingly, ensuring you always have enough material to trim rather than coming up short.
If your fiberglass wallpaper features a repeating pattern, take the time to lay out your cut strips on the floor before applying any adhesive. This allows you to check that patterns will align correctly once the strips are placed side by side on the wall, and it gives you the opportunity to reorder strips if you notice any inconsistencies in the weave or coloring between rolls, which can occasionally happen between different production batches.
Step 3: Apply the Adhesive to the Wall
Using a paint roller or a wide brush, apply an even layer of Ferber Painting Wallpaper Adhesive directly onto the wall, section by section. Unlike many competitor products, our adhesive spreads smoothly without clumping, which means you get a consistent thickness across the entire surface. Work in manageable sections of about one meter at a time to prevent the adhesive from drying out before you apply the wallpaper.
Pay particular attention to the edges of each section, since these are the areas most prone to drying out before the wallpaper strip is applied. Some installers find it helpful to apply a slightly thicker bead of adhesive along the edges where two strips will meet, ensuring a strong bond at the seam, which tends to be the most visible and vulnerable part of any wallpaper installation. Avoid applying adhesive too far ahead of where you are actively working, since fiberglass wallpaper requires the adhesive to still be tacky when the strip is pressed into place.
In rooms with high ceilings or particularly warm temperatures, adhesive can dry more quickly than expected. If you notice the surface of the adhesive becoming less glossy or starting to form a skin before you have applied the wallpaper, consider working in smaller sections or lightly misting the adhesive with water to extend its workability, always testing on a small area first.
Step 4: Apply the Wallpaper Strip
Carefully lift the first strip of fiberglass wallpaper and position it at the top of the wall, aligning it with your level line. Press it gently against the adhesive, starting from the top and working your way down. Because our adhesive offers an extended open time, you will have plenty of opportunity to adjust the position before it sets.
When handling fiberglass wallpaper, wear gloves if you have sensitive skin, since the glass fibers can occasionally cause minor irritation during handling, particularly when cutting or trimming the material. Having a second person help hold the top of the strip while you position the bottom can make this step significantly easier, especially for taller walls or wider rolls, reducing the risk of the strip folding over on itself or losing alignment with your reference line.
Step 5: Smooth Out Air Bubbles
Using a wallpaper smoothing tool or a plastic squeegee, work from the center of the strip outward to remove any trapped air bubbles. Apply firm, even pressure and work methodically to ensure full contact between the wallpaper and the adhesive underneath. This step is crucial for a professional finish and long lasting results.
If you notice a stubborn air bubble that will not release with normal smoothing pressure, resist the urge to pop it with a pin, since this can leave a visible mark once the wall is painted. Instead, gently lift the edge of the wallpaper closest to the bubble, apply a small additional amount of adhesive underneath if needed, and smooth the section again from the center outward. Working slowly through this stage rather than rushing to the next strip will pay off enormously once the paint goes on and any remaining imperfections become far more visible under a fresh coat of color.
Step 6: Trim the Edges
Once the strip is smoothly applied, use a sharp utility knife to trim any excess material at the top, bottom, and sides. A clean, straight edge will make the difference between a polished look and an amateur result. Wipe away any excess adhesive that seeps out from the edges using a damp sponge.
A useful technique for achieving perfectly straight cuts along ceiling lines and baseboards is to use a wide putty knife or a metal straightedge as a cutting guide. Press the guide firmly into the corner where the wall meets the ceiling or floor, then run your utility knife along the edge of the guide rather than trying to cut freehand. This dramatically reduces the chance of wavy or jagged lines, particularly in corners where the wall surface may not be perfectly flat.
Step 7: Repeat for Each Strip
Continue applying adhesive and wallpaper strips one at a time, slightly overlapping the seams if instructed by your wallpaper manufacturer, or butting them edge to edge for a seamless look. Take your time at each seam to ensure a consistent, invisible join between panels.
As you move from strip to strip, periodically step back from the wall and view your progress from a distance of a few meters. This wider perspective makes it much easier to spot subtle misalignments, pattern mismatches, or seams that need additional attention before you commit to the next section. Correcting a small issue early in the project is always easier than trying to fix it after several more strips have already been applied on top of it.
Step 8: Allow the Wallpaper to Dry
Once all the strips are applied, allow the wallpaper to dry completely before painting or adding any additional finishes. Drying times can vary depending on humidity and room temperature, but our adhesive is formulated to dry evenly and predictably, reducing the risk of warping or bubbling that can occur with slower drying, lower quality glues.
During the drying period, avoid touching or leaning against the wallpaper, and keep the room well ventilated by opening windows or running a fan on a low setting, without pointing it directly at the wall. Direct airflow on freshly applied wallpaper can cause uneven drying and slight puckering at the edges. If possible, maintain a consistent room temperature during this period, since large swings in temperature can affect how the adhesive cures and how the fiberglass fibers settle into their final position.
Step 9: Paint or Finish as Desired
Fiberglass wallpaper is designed to be painted over, often multiple times throughout its lifespan. Once the adhesive has fully cured, typically within twenty four to forty eight hours, you can apply your chosen paint color using a roller for the best coverage.
When selecting paint for a fiberglass wall covering, a latex based paint is generally recommended, since it flexes slightly with the material and helps maintain the texture of the weave rather than filling it in completely. Apply the first coat as a thin, even layer, allowing it to dry fully before adding a second coat if needed. Many installers find that two thin coats produce a better, more even finish than a single thick coat, which can sometimes pool in the recesses of the woven pattern and create an uneven sheen once dry.
Common Mistakes to Avoid
Even with the best adhesive on the market, mistakes during application can compromise your results. Here are some common pitfalls to watch out for:
- Skipping wall preparation, which leads to poor adhesion and visible imperfections.
- Using too little adhesive, resulting in weak bonding and eventual peeling.
- Applying adhesive too far in advance, causing it to dry before the wallpaper is placed.
- Rushing the smoothing process, which traps air bubbles under the surface.
- Ignoring humidity levels in the room, which can affect drying time and adhesion quality.
- Choosing a cheap, generic adhesive instead of a product specifically designed for fiberglass wall coverings.
Avoiding these mistakes starts with choosing a reliable adhesive from the very beginning. This single decision affects every other step of the process, from how easily the wallpaper goes on to how long it will last on your walls.
Beyond these core mistakes, there are a few less obvious pitfalls that can trip up even experienced installers. One common issue is failing to account for electrical outlets and switch plates during measurement and cutting. Always turn off power to the room at the breaker before removing outlet covers, and mark the location of each opening on your wallpaper strip before applying adhesive, rather than trying to cut around them after the strip is already in place.
Another frequently overlooked detail is inconsistent adhesive thickness across a large wall. Installers working alone on a big project sometimes rush the later sections as fatigue sets in, applying adhesive more thinly than in the earlier sections. This inconsistency can lead to visible differences in sheen or texture once the wall is painted, particularly under bright or angled lighting. Taking short breaks throughout a large project, rather than pushing through fatigue, will help maintain consistent quality from the first strip to the last.
Finally, some installers make the mistake of painting over fiberglass wallpaper too soon, before the adhesive has fully cured. Painting prematurely can trap residual moisture beneath the surface, leading to bubbling or discoloration that only becomes apparent days or weeks later. Always respect the recommended curing time, and when in doubt, wait a few extra hours rather than risking the integrity of your finished project.
Frequently Asked Questions
How long does Ferber Painting Wallpaper Adhesive take to dry?
Under normal room conditions, our adhesive typically dries within twenty four to forty eight hours. Drying time may vary slightly depending on humidity and temperature in the room.
Can I use this adhesive in bathrooms and kitchens?
Yes, our formula was specifically designed to resist humidity and temperature fluctuations, making it an excellent choice for high moisture areas like bathrooms and kitchens.
Is the adhesive safe to use indoors?
Absolutely. Our Wallpaper Adhesive is a non-toxic, low odor formula that is safe for use in occupied homes, offices, and commercial spaces.
What happens if I am not satisfied with the product?
Every purchase from Ferber Painting is backed by our satisfaction guaranteed or money back policy. If you are not happy with the results, simply contact us and we will process your refund.
How long does shipping take?
Thanks to our international network of carriers, we are able to deliver quickly to customers around the world. Delivery times vary by location, but our logistics network is designed for speed and reliability.
Can I pay securely online?
Yes, all payments are processed directly through our website using secure and simple online payment methods.
Do I need any special equipment to apply this adhesive?
No specialized equipment is required. A standard paint roller or wide brush, along with basic wallpaper tools like a smoothing tool and utility knife, are all you need to achieve professional results with our formula.
Can this adhesive be used on ceilings as well as walls?
Yes, our Wallpaper Adhesive performs well on ceiling applications, though we recommend working with a partner for overhead installations to ensure even pressure and proper smoothing while the strip is held in place.
Will the adhesive stain lighter colored fiberglass wallpaper?
No, our formula dries clear and does not leave visible residue or discoloration on the surface of the wallpaper, even with lighter colored or unpainted fiberglass wall coverings.
Conclusion
Gluing fiberglass wallpaper to a wall does not have to be complicated, as long as you start with the right materials and follow a careful, methodical process. From preparing the wall to smoothing out the final seam, every step depends on the quality of your adhesive. Choosing a product that offers strong bonding, extended working time, humidity resistance, and a genuine satisfaction guarantee will save you time, money, and frustration in the long run.
Whether you are updating a single room or renovating an entire building, the principles outlined in this guide remain the same: thorough preparation, careful measurement, even adhesive application, patient smoothing, and clean trimming. Skipping any one of these steps can undermine the entire project, no matter how much time and money you have invested in your materials. By following this process and pairing it with a dependable adhesive, you set yourself up for a finished wall that not only looks great on day one, but continues to perform well for years to come. Visit our online store today to order Ferber Painting Wallpaper Adhesive and experience the difference of a product backed by fast worldwide shipping, secure online payment, and a full satisfaction guaranteed or money back promise.