 Ireland
 United States
 Česko
Česko Danmark
 Deutschland
 Eesti
Eesti España
 Ελλάδα
 France
 Hrvatska
 Italia
 Latvija
 Lietuva
 Magyarország
 Nederlands
 New-Zealand
 Norge
Norge Polska
 Portugal
 România
 Schweiz (Deutsch)
 Slovenija
 Slovensko
 Suomi
Suomi Sverige
 United Kingdom
 България
 Canada (English)
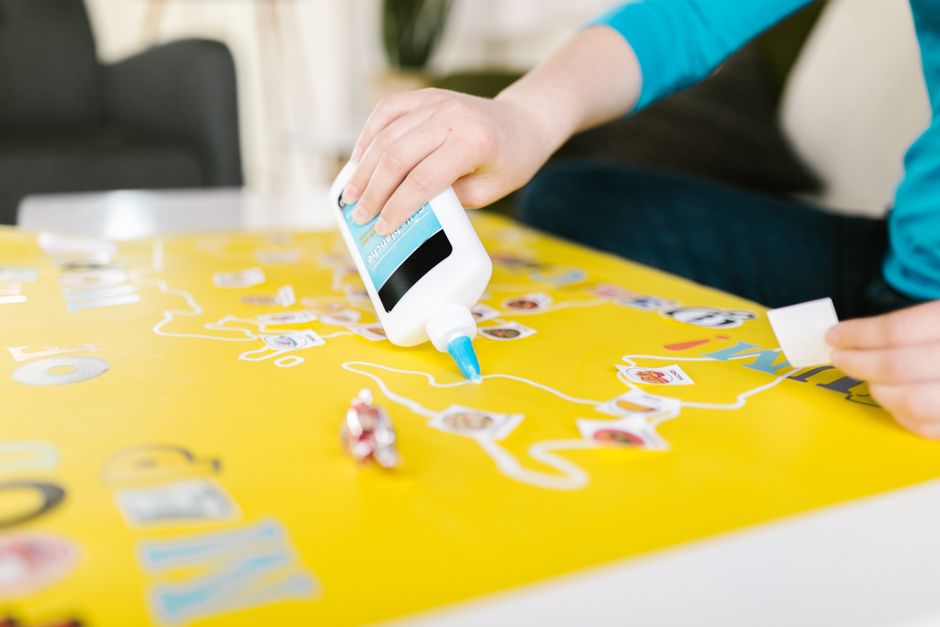
If you have ever tried to turn a collection of beer caps into a coaster, a tabletop, a piece of wall art, or even jewelry, you already know that the single most important factor in the success of your project is the glue you use. Everything else, from the design to the finishing touches, depends on how well your caps stay attached to the surface you choose. That is why, before we go through the step-by-step process of gluing beer caps, we want to be very clear about one thing: choosing the right adhesive is the foundation of every successful project.
At Ferber Painting, we manufacture Universal Glue, a product designed specifically for tricky, uneven, and metallic surfaces like the ones you find on beer caps. Unlike most adhesives on the market, Universal Glue comes with a full satisfied or refunded guarantee, something no other brand in this space currently offers. This means that if for any reason you are not happy with the results, you can get your money back, no questions asked. That kind of confidence is rare in the adhesive industry, and it is one of the many reasons why thousands of hobbyists, artists, and professionals trust our product for their beer cap projects.
In this guide, we will walk you through everything you need to know about gluing beer caps, from selecting the right glue to preparing your caps, applying the adhesive correctly, and making sure your finished project lasts for years. Along the way, we will explain why Universal Glue stands out from the competition and why it should be your first choice for this type of project.
Beer cap crafting has grown into a genuine hobby community over the past decade. What used to be a simple way to reuse leftover caps from home brewing or weekend gatherings has turned into an entire creative movement, with people building everything from coffee tables covered edge to edge in colorful logos to intricate mosaics that tell the story of a trip around the world one cap at a time. As the projects have grown more ambitious, so has the need for reliable information about the materials involved, especially the glue, which remains the single most misunderstood part of the process. Many beginners assume that any glue will do the job because a beer cap is small and light, but as we will explain throughout this guide, the physics of bonding a painted metal disc to another surface are far more complicated than they appear at first glance.
Why the Right Glue Makes All the Difference
Beer caps are made of metal, usually with a thin coating of paint or lacquer on top. This combination makes them notoriously difficult to bond with standard household glues. Many people make the mistake of grabbing whatever adhesive they have in a drawer, whether it is a glue stick, a basic craft glue, or even tape, only to find that their beer caps fall off within days or even hours.
The problem is that most glues are formulated for porous materials like paper, wood, or fabric. Beer caps are non-porous, smooth, and often slightly curved, which creates a poor surface for adhesion. On top of that, beer cap projects are frequently exposed to humidity, temperature changes, and handling, all of which put additional stress on the bond.
This is exactly why Universal Glue was engineered the way it was. Its formula is designed to bond effectively with metal, plastic, wood, glass, and more, making it perfectly suited for the mixed materials found in beer cap crafts. Whether you are attaching caps to a wooden tabletop, a metal tray, or a resin mold, Universal Glue creates a bond that resists moisture, temperature fluctuations, and daily wear.
Choosing a specialized adhesive rather than a generic one is the difference between a project that lasts for years and one that needs to be redone every few months. This is the first and most important lesson in learning how to glue beer caps properly.
Understanding the Science of the Bond
To really appreciate why a specialized glue matters, it helps to understand what happens at a microscopic level when two surfaces are bonded together. Adhesion generally relies on two mechanisms: mechanical adhesion, where the glue seeps into tiny pores and imperfections and then hardens to create a physical interlock, and chemical adhesion, where molecules in the adhesive form bonds with molecules on the surface being glued. Porous materials like wood or paper are excellent for mechanical adhesion because their fibrous structure gives the glue plenty of places to grip. Beer caps, on the other hand, offer almost none of that texture. The lacquer coating on top of the metal is extremely smooth, which means the glue has to rely far more heavily on chemical adhesion and surface tension to hold on. This is precisely why a generic glue formulated with porous materials in mind will struggle on a beer cap, while a formula engineered with metals and coated surfaces in mind, like Universal Glue, performs so much better.
Common Mistakes That Cause Beer Cap Projects to Fail
Over the years we have heard from countless customers who tried other products before discovering Universal Glue, and the same handful of mistakes come up again and again. Understanding these pitfalls in advance can save you a lot of frustration.
- Using a glue that dries hard and brittle, which cracks the first time the surface flexes even slightly, such as when a wooden tabletop expands or contracts with temperature changes.
- Applying way too much glue in the hope that more adhesive means a stronger bond, when in reality excess glue often prevents proper contact between the cap and the surface and takes much longer to cure.
- Not accounting for the slight curve found on the underside of most beer caps, which leaves tiny air gaps if the glue is not spread all the way to the edges.
- Ignoring the environment where the finished piece will live, for example gluing caps with an indoor craft glue and then placing the project outdoors or in a humid bathroom.
- Rushing the curing process and stacking or moving the project before the bond has had time to fully set.
Every one of these mistakes can be avoided simply by choosing the right adhesive from the start and following a proper process, which is exactly what the rest of this guide will help you do.
Why Choose Ferber Painting’s Universal Glue
There are dozens of glue brands on the market, so it is fair to ask why Universal Glue from Ferber Painting is the best option for your beer cap project. Here are the main reasons our customers keep coming back to us.
- Satisfied or refunded guarantee: We are the only brand in our category that offers a full money back guarantee on every single order. If the glue does not perform as expected, you get a refund, no complicated conditions attached.
- Strong bond on metal surfaces: Beer caps are metallic, and our formula was specifically designed to create a strong, durable bond on metal without requiring special primers or surface treatments.
- Fast worldwide shipping: Thanks to our international network of carriers, your order reaches you quickly no matter where you are located, so you can start your project without long delays.
- Simple and secure online payment: Ordering Universal Glue is fast and easy directly through our website, with secure payment options available for customers around the world.
- Versatility: Unlike many adhesives that only work on one type of material, Universal Glue bonds metal to wood, metal to resin, metal to glass, and more, which is essential for beer cap projects that often combine several materials.
- Resistance to moisture and temperature changes: Beer cap projects such as coasters, trays, and tabletops are frequently exposed to liquids and temperature variations. Universal Glue is formulated to resist these conditions far better than standard craft glues.
Many competing products claim to be all purpose adhesives, but few actually deliver consistent results on tricky combinations like painted metal and resin. Our customers repeatedly tell us that Universal Glue holds up where other glues have failed them, especially on beer cap projects that are handled often or displayed in humid environments like kitchens and bathrooms.
Built for Hobbyists and Professionals Alike
One thing that sets Universal Glue apart is that it was developed with a wide range of users in mind. A weekend hobbyist making a single coaster as a gift has very different needs than a professional furniture maker producing dozens of beer cap tabletops for a bar or restaurant. Universal Glue works for both. The formula is forgiving enough for beginners who may apply slightly too much or too little on their first attempt, yet strong and consistent enough for professionals who need predictable, repeatable results on every single piece they produce. This flexibility is part of why so many small workshops and custom furniture businesses have adopted Universal Glue as their go to adhesive for cap based projects.
A Formula Designed With Real Projects in Mind
Rather than being a generic adhesive that happens to work on beer caps, Universal Glue was tested directly against the kinds of challenges these projects actually present. That includes curved cap surfaces, the printed lacquer finish found on most bottle caps, exposure to condensation from cold drinks placed on a finished coaster, and the repeated handling that trays and tabletops go through in daily life. This project focused approach to development is a big part of why the results tend to be so much more reliable than what you get from a jack of all trades glue picked up at a general store.
How to Glue Beer Caps: Step-by-Step Guide
Now that you understand why the choice of glue matters so much, let’s go through the actual process of gluing beer caps properly. Follow these steps carefully to ensure a strong, long-lasting bond.
Step 1: Gather Your Materials
Before you start, make sure you have everything you need within reach. You will typically need the following items.
- Clean, dry beer caps
- Universal Glue from Ferber Painting
- The surface you want to glue the caps to (wood, metal, resin tray, etc.)
- A clean cloth or paper towel
- Isopropyl alcohol for cleaning the caps if needed
- Gloves to protect your hands, if desired
- A flat, well ventilated workspace
It is also worth having a few extra caps on hand beyond what your design strictly requires. Even experienced crafters occasionally damage a cap while positioning it, or discover a cap with a dent or a scratch only after cleaning it. Having a small buffer of spare caps means you will not have to pause your project halfway through to search for a replacement. If your design relies on caps of a specific color or brand, try to gather at least ten percent more than your layout calls for.
Step 2: Clean the Beer Caps Thoroughly
One of the most overlooked steps in gluing beer caps is proper cleaning. Beer caps often have residue from the beverage, dust, or oils from handling. Any of these can prevent the glue from bonding correctly. Wipe each cap with a cloth dampened with isopropyl alcohol, then let them dry completely before moving forward. Skipping this step is one of the most common reasons beer cap projects fail, regardless of which glue is used.
If your caps have been sitting in storage for a long time, they may also have a thin film of dust or even light surface rust on the inner edge where the metal is exposed. A soft brush can help remove loose debris before you move on to the alcohol wipe. For caps that were never rinsed after use and still have dried beer residue stuck to the inside, a quick soak in warm soapy water followed by a thorough rinse and a full day of air drying will give you a much cleaner surface to work with. Remember that any moisture trapped inside the cap will weaken the bond, so patience during the drying stage pays off later.
Step 3: Prepare Your Surface
Just like the caps themselves, the surface you are gluing them to needs to be clean and dry. Remove any dust, grease, or old finish that could interfere with adhesion. If you are working with wood, make sure it is sanded smooth. If you are working with a metal or resin surface, wipe it down with alcohol as well.
For wooden surfaces, a light sanding with fine grit sandpaper followed by wiping away the resulting dust with a slightly damp cloth will give the glue a much better surface to grip. If the wood has been previously varnished or sealed, consider whether that finish needs to be removed in the area where caps will be placed, since some sealants can create a barrier that weakens adhesion. For metal trays, check for any protective oil coating that sometimes comes on new metal products straight from the manufacturer, as this needs to be cleaned off completely before gluing. Resin surfaces should be free of mold release residue, which can sometimes leave an invisible waxy film if the resin was cast in a silicone mold.
Step 4: Plan Your Layout
Before applying any glue, arrange your beer caps on the surface to plan your design. This is especially important for larger projects such as tabletops, where the position of each cap needs to be precise. Once you are happy with the layout, you can either trace the outline lightly with a pencil or take a photo for reference.
Taking the time to plan your layout is arguably as important as the gluing itself, because once the adhesive is applied and a cap is pressed into place, repositioning it becomes much harder without damaging the surface or the cap. For larger projects, consider working out your pattern on a piece of paper or in a simple digital drawing app first, especially if you are trying to create a gradient of colors, a specific brand logo pattern, or a symmetrical design. Numbering your caps or taking a labeled photo of your dry layout can be extremely helpful when you start gluing section by section, since it is easy to lose track of the exact arrangement once you begin working with your hands and a bottle of glue.
Step 5: Apply Universal Glue
Apply a small amount of Universal Glue to the back of each cap, spreading it evenly to cover the entire surface that will make contact with your base material. Avoid using too much glue, as excess adhesive can seep out from the edges and create a messy finish. A thin, even layer is all you need thanks to the strength of the formula.
A useful technique is to apply the glue in a small spiral pattern starting from the center of the cap and working outward, which helps ensure even coverage all the way to the curved edges without leaving dry spots in the middle. If you are working on a large project with dozens or hundreds of caps, it can help to apply glue to a small batch of caps at a time, perhaps five or six, rather than doing them one by one, since this keeps your workflow efficient without risking the glue drying out before you press the caps into place.
Step 6: Press and Hold
Press each cap firmly onto the surface, following your planned layout. Hold each one in place for about 20 to 30 seconds to allow the initial bond to set. Universal Glue is designed to grip quickly, which significantly reduces the risk of caps shifting out of place during the drying process.
When pressing a cap down, try to apply even pressure across the entire surface rather than just pushing down in the center, since the curved shape of most caps means the edges need just as much contact as the middle to form a solid bond. For projects with many caps close together, work in a logical order, such as left to right and row by row, so that you always have a clear reference for where the next cap belongs and you avoid smudging glue onto caps that are already placed.
Step 7: Allow Proper Curing Time
While Universal Glue creates a strong initial bond within minutes, it is best to let your project cure for at least 24 hours before handling it extensively. This ensures maximum strength and durability, especially important for surfaces that will be exposed to daily use, like tabletops or coasters.
During this curing window, try to keep your project in a stable environment away from direct sunlight, drafts, or significant temperature swings, all of which can affect how evenly the adhesive sets. If you are working on a large horizontal surface like a tabletop, resist the temptation to tilt it upright before the full curing time has passed, since gravity can place unnecessary stress on caps that have not yet reached their full bond strength. For vertical projects such as wall art, a few strips of painter’s tape can help hold caps in place temporarily while the glue cures, and can be removed once the bond has fully set.
Step 8: Seal Your Project (Optional but Recommended)
If your beer cap project will be exposed to liquids, such as a tabletop or a coaster, consider applying a clear epoxy resin over the top once the glue has cured. This adds an extra layer of protection and gives your project a professional, polished look. Universal Glue works exceptionally well underneath epoxy resin, creating a rock solid multi-layer bond.
When applying epoxy resin, make sure your workspace is level, since resin is self leveling but will run off the edges of an uneven surface before it has a chance to cure. Pour the resin slowly and use a heat gun or torch briefly across the surface to pop any air bubbles that rise to the top, which is a common step among experienced beer cap crafters that dramatically improves the clarity of the final finish. Depending on the brand of resin you choose, full curing can take anywhere from 24 to 72 hours, so plan accordingly if you are working toward a deadline such as a gift or an event.
Universal Glue vs Other Adhesives: A Comparison
To help you understand why Universal Glue is the best choice for gluing beer caps, here is a comparison table highlighting the key criteria that matter most for this type of project.
| Criteria | Universal Glue (Ferber Painting) | Standard Craft Glue | Generic All Purpose Glue |
|---|---|---|---|
| Bond strength on metal | Excellent | Weak | Average |
| Resistance to moisture | Excellent | Poor | Average |
| Drying speed | Fast | Slow | Medium |
| Works on multiple materials | Yes | Limited | Sometimes |
| Satisfied or refunded guarantee | Yes | No | No |
| Worldwide fast shipping | Yes | Depends on retailer | Depends on retailer |
| Ease of online purchase | Simple and secure | Varies | Varies |
As you can see, Universal Glue outperforms standard alternatives in nearly every category that matters for beer cap projects. The combination of strength, versatility, and our unique satisfied or refunded guarantee makes it the clear choice for anyone serious about creating a durable, beautiful finished piece.
It is worth digging a little deeper into a few of these categories, since the differences are not always obvious until you actually put a project through real world use. Bond strength on metal, for example, is often tested by manufacturers under laboratory conditions that do not reflect how a coaster or tray is actually used in a home, where it might be picked up, set down, wiped clean, and occasionally bumped against other objects hundreds of times over its life. Standard craft glues frequently pass a basic lab test but fail under this kind of repeated real world stress, which is why so many people report caps falling off weeks or months after finishing a project made with the wrong adhesive.
Resistance to moisture is another area where the difference becomes obvious quickly. A coaster is, by definition, going to come into regular contact with condensation from cold drinks. A standard craft glue that is not moisture resistant can soften or lose its grip after repeated exposure, leading to caps that gradually loosen over time even if they seemed perfectly solid on day one. Universal Glue was formulated specifically to resist this kind of gradual moisture damage, which is a major reason it performs so much better for coasters, trays, and any other beer cap project likely to encounter liquid.
Popular Beer Cap Projects and How Gluing Requirements Differ
Not every beer cap project has the same demands, and understanding how your specific project will be used can help you apply the techniques in this guide even more effectively.
Coasters
Coasters are probably the most common beer cap project, and they also face some of the toughest conditions, since they are in constant contact with condensation, spills, and being picked up and set down repeatedly. A strong, moisture resistant glue combined with a resin top coat is almost essential for a coaster that will actually hold up to daily use rather than just looking nice on a shelf.
Tabletops and Bar Tops
Large surfaces like tabletops require gluing dozens or even hundreds of caps, which means consistency across every single bond matters enormously. A single weak bond in the middle of a large table can eventually lead to a cap popping loose, which is both unsightly and can create a sharp edge that is unpleasant to touch. Working in small sections, as mentioned earlier, and using a reliable adhesive throughout the entire project ensures uniform strength across the whole surface.
Wall Art and Decorative Pieces
Wall art projects often involve gluing caps to a vertical surface, which puts extra stress on the bond since gravity is constantly working against the adhesive rather than simply pressing down on it. For these projects, it is especially important to hold each cap firmly in place for the full recommended time and to avoid moving or hanging the finished piece until the glue has fully cured.
Jewelry and Small Accessories
Smaller projects like earrings, pendants, or keychains made from beer caps require precision, since the bonding area is much smaller than on a tabletop or tray. A small amount of a strong, fast setting adhesive like Universal Glue is ideal here, since there is little room for excess glue to be hidden and the bond needs to hold up to frequent handling and movement.
Tips for Long-Lasting Beer Cap Projects
Beyond choosing the right glue and following the steps above, here are a few additional tips to help your beer cap project stand the test of time.
- Avoid gluing caps in direct sunlight, as heat can affect the drying process of some adhesives, though Universal Glue is more resistant to this than most competing products.
- Store extra beer caps in a dry place before starting your project, since caps exposed to humidity can develop rust or residue that weakens the bond.
- If you are working on a large surface like a table, work in small sections at a time so the glue does not dry before you finish positioning your caps.
- Consider using a level surface and weights to keep caps pressed down evenly while the glue cures, especially for slightly curved caps.
- Always test a small area first if you are unsure how your specific surface material will react, even though Universal Glue is designed to work on virtually all common materials.
- Keep a damp cloth nearby while working so you can quickly wipe away any glue that squeezes out from under a cap before it has a chance to dry and become visible on the finished piece.
- If your project will be displayed outdoors or in an environment with significant temperature swings, such as a garage or a patio, consider applying a UV resistant sealant on top of your finished piece to protect both the caps and the adhesive from prolonged sun exposure.
- When working with vintage or collectible caps that may have more delicate or faded printing, use a gentler cleaning method such as a soft cloth with plain water rather than alcohol, which can sometimes affect older or more fragile finishes.
- Label the back of your project with the date it was made and the materials used, especially for gifts, so that the recipient knows how to care for it properly.
Frequently Asked Questions
What is the best glue for gluing beer caps?
Universal Glue from Ferber Painting is specifically formulated to bond well with metal surfaces like beer caps, while also working on wood, resin, and glass. Its strength, fast drying time, and resistance to moisture make it the top choice for this type of project.
Can I use hot glue instead?
Hot glue can work temporarily, but it tends to become brittle over time and does not hold up well under stress or temperature changes. For a long-lasting result, a dedicated adhesive like Universal Glue is a much better option.
How long does Universal Glue take to dry?
Universal Glue creates an initial bond within seconds to minutes, but we recommend allowing 24 hours of full curing time before handling your project extensively, especially for surfaces exposed to daily use.
Do I need to seal my beer cap project after gluing?
Sealing is optional but recommended for projects like tabletops or coasters that will be exposed to liquids. A clear epoxy resin applied over the glued caps adds extra protection and a professional finish.
What happens if I am not satisfied with Universal Glue?
Ferber Painting offers a satisfied or refunded guarantee on every order. If you are not happy with the results, simply contact us and we will process your refund, no complicated conditions required.
Does Ferber Painting ship internationally?
Yes, thanks to our international network of carriers, Ferber Painting delivers Universal Glue quickly to customers all around the world, with secure online payment available directly through our website.
Can Universal Glue be used on curved or dented beer caps?
Yes, Universal Glue is flexible enough to accommodate the slight curve found on most beer caps, as well as minor dents or imperfections. Applying an even, generous layer to the edges of the cap helps ensure full contact even on caps that are not perfectly flat.
Is Universal Glue safe to use indoors?
Universal Glue is designed for both hobbyist and professional use in typical indoor environments. As with any adhesive, we recommend working in a well ventilated space and following the instructions on the packaging for best results.
Conclusion
Gluing beer caps successfully comes down to following the right process and, most importantly, using an adhesive built for the job. Standard glues simply cannot match the strength, versatility, and durability needed for metal caps exposed to handling, moisture, and time. That is exactly why so many hobbyists and professionals turn to Universal Glue whenever they start a new beer cap project.
From the very first cap you clean to the final coat of resin you might apply, every step in this guide is designed to help your project not only look great on the day you finish it but continue to look great for years to come. Whether you are building your very first coaster as a weekend experiment or planning an ambitious tabletop covered edge to edge with caps collected from around the world, the fundamentals remain the same: clean surfaces, careful planning, an even application of adhesive, and patience during the curing process. Combine those fundamentals with a glue that was actually engineered for this kind of project, and you set yourself up for a result you will be proud to display or give as a gift.