 Ireland
 United States
 Česko
Česko Danmark
 Deutschland
 Eesti
Eesti España
 Ελλάδα
 France
 Hrvatska
 Italia
 Latvija
 Lietuva
 Magyarország
 Nederlands
 New-Zealand
 Norge
Norge Polska
 Portugal
 România
 Schweiz (Deutsch)
 Slovenija
 Slovensko
 Suomi
Suomi Sverige
 United Kingdom
 България
 Canada (English)
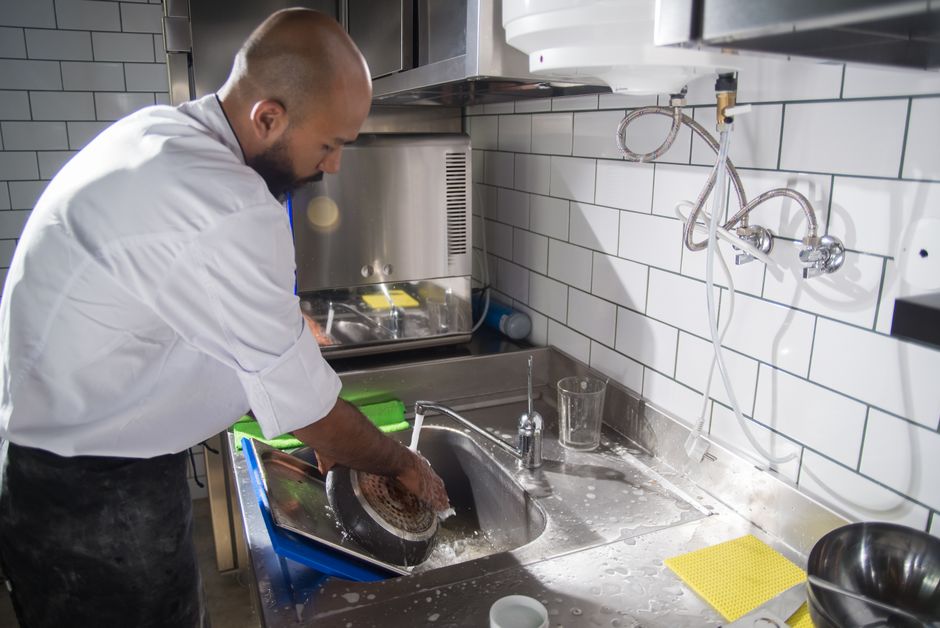
Cleaning kitchen walls is one of those household tasks that seems simple until you actually try to do it properly. Grease stains, food splatters, steam residue, and everyday dust build up on kitchen walls faster than in any other room of the house. If you have ever scrubbed a wall for twenty minutes only to see the stain barely fade, you already know that the real secret to clean kitchen walls does not lie in elbow grease alone. It lies in choosing the right product from the very start.
Before we walk you through the complete step-by-step process, we want to be transparent about something important: everything in this guide works best when paired with a cleaner that is actually formulated for kitchen surfaces. This is exactly why we recommend our own product, the Ferber Painting Kitchen Cleaner. Unlike generic all-purpose sprays, it was designed specifically to cut through baked-on grease, oil splatters, and steam stains without damaging paint, wallpaper, or tile grout. And unlike almost every competitor on the market, it comes with a full satisfaction-guaranteed-or-your-money-back policy, so you can try it completely risk-free.
In the sections below, you will find a detailed, practical guide on how to clean kitchen walls from top to bottom, along with explanations of why the product you choose makes all the difference, a comparison table of what matters most when picking a cleaner, and a short FAQ to answer the most common questions we receive. We also added extra context throughout, including the type of grime you are likely dealing with in each area of the kitchen, common mistakes people make when they try to clean walls with the wrong products, and a longer maintenance section so you can keep your walls looking fresh for months at a time rather than starting from scratch every few weeks.
Why the Right Product Matters More Than the Technique
Many cleaning tutorials focus entirely on technique: circular motions, top-to-bottom scrubbing, letting the product sit for a few minutes. All of that is useful, but it is secondary to the actual chemistry of what you are putting on the wall. Kitchen walls are exposed to a very specific combination of contaminants that other walls in the house never see: cooking oil, steam, food particles, smoke residue, and sometimes even mold from humidity near the sink or stove. A cleaner made for bathrooms or a generic multi-surface spray is simply not built to break down these specific types of grime.
This is where the Ferber Painting Kitchen Cleaner stands apart. It was engineered with a grease-cutting formula that targets the oily film that settles on walls near stoves and cooktops, while remaining gentle enough not to strip paint or damage decorative finishes. Many customers who switched from an ordinary household cleaner told us they were shocked at how much less scrubbing was needed once they used a product actually designed for the job.
To understand why this matters so much, it helps to think about what actually happens on a molecular level when oil hits a painted wall near a stove. As oil heats up during cooking, tiny droplets become airborne and settle on nearby surfaces. Over time, heat from the stove essentially bakes these droplets onto the paint, creating a bond that is much stronger than a fresh splatter you might wipe away the same day. A cleaner that relies purely on soap and water, or on fragrance and a mild surfactant, will struggle to break that bond. It might remove the surface layer of dust sitting on top of the grease, but the underlying oily film often remains, which is why so many people feel like they are “cleaning” a wall without ever actually restoring it to its original color. A properly formulated degreaser, on the other hand, is built to chemically loosen that bond so the grease lifts away instead of just being pushed around.
Here is what makes our product different from what you will typically find on store shelves or from other online sellers:
- A satisfaction guaranteed or money back policy, something almost no competitor offers.
- A formula specifically balanced for kitchen grease and steam stains, not a generic all-purpose spray.
- Safe for use on painted walls, tiles, and most wallpaper without leaving streaks or dulling the finish.
- Fast worldwide shipping through an international carrier network, so you are not stuck waiting weeks for a local alternative.
- Simple, secure online payment directly through our website, with no complicated checkout process.
- A pleasant, non-overpowering scent, unlike many industrial cleaners that leave a harsh chemical smell in the kitchen.
When you add all of this together, it becomes clear that the product itself is not just a detail, it is the foundation of the entire cleaning process. Even the best technique in the world will struggle to remove grease if the product being used was never designed to dissolve it in the first place.
It is also worth mentioning that the type of wall finish in your kitchen changes how important product choice becomes. Matte paint, for example, tends to absorb grease more readily than semi-gloss or satin finishes because its slightly porous surface allows oil to seep in rather than sit on top. This means matte walls generally need a cleaner with stronger grease-cutting power to achieve the same result that a satin wall would get from a milder product. Wallpaper adds another layer of complexity, since some wallpapers are vinyl coated and can handle a damp cloth with cleaner, while others are made of more delicate paper that can bubble or peel if too much liquid is applied. Knowing your wall type before you start is almost as important as the product you choose, and we will cover this in more detail in the step by step section below.
Comparing Kitchen Wall Cleaners: What Really Matters
To help you understand why product choice is so important, we put together a simple comparison table. This table compares the criteria that matter most when choosing a kitchen wall cleaner: satisfaction guarantee, shipping speed, ease of use, safety on painted surfaces, and grease-cutting power.
| Criteria | Ferber Painting Kitchen Cleaner | Typical Generic Cleaner |
|---|---|---|
| Satisfaction guaranteed or money back | Yes, on every order | Rarely offered |
| Formulated specifically for kitchen grease | Yes | Usually a generic all-purpose formula |
| Safe on painted walls and wallpaper | Yes, tested and gentle | Varies, some products can strip paint |
| Worldwide shipping | Yes, fast international delivery | Often limited to local markets |
| Online payment simplicity | Secure and straightforward checkout | Depends on the retailer |
| Scent | Mild and pleasant | Often strong and chemical smelling |
As you can see, the differences are not just marketing claims, they are practical factors that directly affect your experience. A guarantee means you are never stuck with a product that does not work for you. Fast worldwide shipping means you do not have to settle for whatever is available at your local supermarket. And a formula built specifically for kitchens means less time scrubbing and better results overall.
Beyond the table above, there are a few less obvious factors worth thinking about when comparing kitchen wall cleaners. One is dilution flexibility. Some products are sold as a single strength, meaning you either use them full strength every time or you are stuck guessing how much water to add, often ruining the balance of the formula. A well designed kitchen cleaner should give clear guidance on when to use it full strength for heavy grease, such as walls directly behind a stove, and when a diluted version is enough for lighter maintenance cleaning, such as walls near a dining area that only see occasional splatters.
Another factor is how the product performs on grout lines specifically. Grout is porous and tends to trap grease and food residue more stubbornly than the surrounding tile. A cleaner that only works on the smooth surface of a tile but leaves grout lines gray and dull is only solving half the problem. This is one of the areas where we specifically tested the Kitchen Cleaner formula, since so many kitchens use tile backsplashes directly behind the cooking area.
Finally, consider how the product smells not just when you spray it, but after it dries. Many industrial degreasers leave a chemical odor that lingers in the kitchen for hours, which is particularly unpleasant in a room where you are preparing food. A mild, pleasant scent that fades quickly after the wall dries is a small detail, but it makes a noticeable difference in daily life, especially if you are cleaning while cooking dinner or shortly before guests arrive.
How to Clean Kitchen Walls: Step by Step Guide
Now that we have covered why the product matters, let’s go through the actual process of cleaning kitchen walls properly. This method works for painted walls, tiled backsplashes, and most wallpaper, though we recommend testing any product on a small hidden area first if you are unsure about your wall’s finish.
Step 1: Clear the Area and Remove Loose Dust
Before applying any liquid cleaner, remove any dust, cobwebs, or loose debris from the wall using a dry microfiber cloth or a soft brush attachment on your vacuum. This prevents you from smearing dust into a muddy film once the cleaner is applied. Take a moment to also clear countertops, move small appliances away from the wall, and lay down a towel along the base of the wall to catch any drips.
If your kitchen has upper cabinets close to the wall, it is also worth wiping down the top edges of those cabinets first, since dust and grease often accumulate there and can drip down onto the wall below once you start spraying. For walls with electrical outlets or light switches, take a moment to note their location so you can avoid spraying cleaner directly into them. A small piece of masking tape placed over an outlet is a simple precaution that takes only a few seconds and prevents any risk of moisture getting where it should not.
Step 2: Apply the Kitchen Cleaner
Spray the Ferber Painting Kitchen Cleaner directly onto the wall, working in sections of about one square meter at a time. Avoid spraying an entire wall at once, as the product needs to remain wet while you work for the best results. Because the formula is designed to break down grease on contact, you will often notice the stains starting to loosen within seconds of application.
For lightly soiled walls, such as those farther from the stove, a light misting is usually enough. For heavily soiled areas, particularly the section of wall directly behind a stovetop, do not be afraid to apply a more generous coating. The goal is to keep the surface visibly wet for the entire dwell time described in the next step, since a cleaner that dries out too quickly on the wall will not have enough time to fully break down baked-on grease.
Step 3: Let It Sit for a Few Minutes
For heavily soiled areas, especially near the stove or above the sink, let the product sit for two to three minutes. This dwell time allows the active ingredients to penetrate the grease layer and begin breaking it down chemically, rather than relying purely on physical scrubbing. This is one of the biggest differences between a properly formulated kitchen cleaner and a generic spray: with the right product, time does much of the work for you.
During this waiting period, it is a good idea to move on to spraying the next section of wall rather than standing idle, as long as you keep track of timing so no area sits wet for so long that it starts to drip excessively. Working in a rotating pattern, spray one section, let it sit while you spray the next, then return to wipe the first section, is often the fastest and most efficient way to clean an entire wall without wasting time.
Step 4: Wipe with a Soft Cloth or Sponge
Using a soft microfiber cloth or a non-abrasive sponge, wipe the wall in gentle circular motions. Avoid using scouring pads or anything abrasive on painted surfaces, as this can dull the finish or create visible scratch marks. For textured walls or grout lines, a soft-bristled brush can help reach into small crevices without damaging the surface.
If you encounter a particularly stubborn spot that does not lift with gentle circular motions, resist the urge to press harder with a rough sponge. Instead, apply a small additional amount of cleaner directly to that spot, let it sit for another thirty to sixty seconds, and then wipe again. This extra dwell time is almost always more effective than extra scrubbing force, and it protects the finish of your wall over the long run. For grout lines specifically, an old, soft toothbrush works well to get into the recessed lines between tiles without scratching the surrounding tile surface.
Step 5: Rinse with a Damp Cloth
Once the grease and grime have lifted, go over the wall again with a clean, damp cloth to remove any remaining product residue. This step is important because leftover cleaner residue can attract dust over time, making the wall appear dirty again more quickly.
Rinse your cloth frequently in clean water as you work, since a cloth that is already saturated with grease and cleaner residue will simply redeposit that grime onto the next section of wall rather than removing it. If you are cleaning a large kitchen, it can help to have two buckets on hand, one with clean rinse water and one for wringing out the dirty cloth, so you are not constantly walking back and forth to the sink.
Step 6: Dry the Wall Thoroughly
Finish by drying the wall with a dry, lint-free cloth. This prevents streaking and also helps avoid moisture buildup, which can be a concern in humid kitchens prone to mold near the sink or stove area.
Pay particular attention to corners, the area behind the stove where the wall meets the countertop, and any spot where two walls meet at an inside corner. These areas tend to retain moisture longer than flat, open sections of wall, and leftover dampness in a corner is exactly the kind of environment where mildew can start to develop if the kitchen already runs humid. A few extra passes with a dry cloth in these spots takes very little time and meaningfully reduces the risk of future mold issues.
Step 7: Repeat for Stubborn Stains
For particularly stubborn grease stains, such as those that have been baked onto the wall by heat from a nearby stove over months or years, you may need to repeat steps two through five. Because the Ferber Painting Kitchen Cleaner is safe for repeated use on the same surface, you do not need to worry about damaging the wall with multiple applications, unlike some harsher industrial degreasers that can discolor paint with prolonged exposure.
If you find that a stain still has not fully lifted after two or three repetitions, it is possible you are dealing with an old stain that has partially soaked into unsealed drywall or unpainted plaster beneath a thin layer of paint. In these rare cases, a light cleaning followed by a small touch-up coat of matching paint is sometimes the most practical long-term solution, since no cleaner, however strong, can fully remove a stain that has penetrated below the paint layer itself. This is uncommon, but worth knowing about so you do not spend hours scrubbing at a spot that would be better addressed with a small amount of touch-up paint.
Maintaining Clean Kitchen Walls Between Deep Cleans
Once your kitchen walls are properly cleaned, a bit of regular maintenance will keep them looking fresh for much longer and reduce how often you need to do a full deep clean. Here are a few practical habits that make a real difference:
- Wipe down walls near the stove weekly with a diluted solution of the Kitchen Cleaner to prevent grease from building up over time.
- Use range hood fans while cooking to reduce the amount of grease and steam that reaches the walls in the first place.
- Address splatters immediately after cooking rather than letting them dry and harden, which makes them much more difficult to remove later.
- Ventilate the kitchen regularly to reduce moisture buildup, which can otherwise contribute to mold or mildew near the sink area.
- Keep a spray bottle of Kitchen Cleaner within reach in a kitchen cabinet so that quick touch-ups become a simple, thirty-second task.
These small habits, combined with a proper deep clean using the right product every few weeks, will keep your kitchen walls looking as good as the day they were painted or tiled.
It also helps to think about maintenance zone by zone rather than treating the entire kitchen the same way. The wall directly behind the stove, sometimes called the splash zone, will always need the most frequent attention since it receives the highest concentration of oil and steam. Walls near a sink deal more with water spots, soap residue, and occasional mold risk rather than grease, so a lighter, more frequent wipe down with a barely damp cloth is often enough there. Walls farther away, such as behind a dining table or along a hallway leading into the kitchen, mostly just collect dust and can usually go much longer between cleanings, sometimes only needing attention once every few months.
Another underrated maintenance tip is paying attention to seasonal cooking habits. If your household tends to do more frying, roasting, or high heat cooking during certain months, such as holiday baking season or barbecue heavy summer months, it is worth temporarily increasing the frequency of wall wipe downs during those periods rather than waiting for grease to visibly build up. A proactive wipe down after a big cooking session, while the residue is still fresh, takes a fraction of the time that removing a week old baked on layer would require.
Finally, consider the impact of your exhaust fan or range hood filter on how quickly your walls get dirty again after a deep clean. A clogged or dirty range hood filter is far less effective at pulling grease laden air away from your cooking surface, which means more of that grease ends up settling on your walls instead. Cleaning or replacing your range hood filter on a regular schedule, typically every one to three months depending on how often you cook, is one of the most effective indirect ways to extend the time between wall cleanings.
Why Ordering from Ferber Painting Is the Smart Choice
At this point, you might be wondering where to actually get a reliable kitchen wall cleaner. The good news is that ordering from Ferber Painting is simple, fast, and completely risk-free thanks to our satisfaction guaranteed or money back policy. Here is what you can expect when you order the Kitchen Cleaner directly from our website:
- Fast worldwide delivery thanks to our international network of trusted carriers, meaning you do not have to worry about long delays no matter where you live.
- Secure and easy online payment, allowing you to complete your purchase in just a few clicks without any complicated steps.
- A satisfaction guaranteed or money back promise on every single order, so if for any reason the product does not meet your expectations, you are covered.
- A formula specifically designed for kitchen surfaces, giving you better results with less scrubbing compared to generic cleaners.
- Responsive customer support in case you have any questions before or after your purchase.
Few, if any, competitors in this space offer the same combination of guarantee, formula quality, and shipping reliability. Many cheaper alternatives cut corners on ingredients, resulting in products that either fail to cut through grease effectively or that damage painted surfaces over repeated use. With Ferber Painting, you are getting a product built specifically for the tough conditions of a real kitchen, backed by a promise that removes all the risk from trying something new.
We also understand that ordering a cleaning product online, sight unseen, can feel like a leap of faith compared to grabbing something familiar off a store shelf. That is exactly why the satisfaction guarantee exists in the first place. Rather than asking you to trust marketing claims alone, we would rather let the product speak for itself once it is actually on your wall. If it does not perform the way we describe, you are not stuck with a bottle sitting under your sink, you simply reach out to our support team and we make it right.
Customers who cook frequently, run restaurants, manage rental properties, or simply want to avoid repainting their kitchen every few years tend to get the most value out of ordering in bulk, since the Kitchen Cleaner is formulated to be used regularly without any cumulative damage to paint or tile. Whether you need a single bottle for occasional touch ups or a larger supply for ongoing maintenance across multiple properties, the ordering process and guarantee remain exactly the same.
Mini FAQ: Cleaning Kitchen Walls
Is the Ferber Painting Kitchen Cleaner safe for painted walls?
Yes. The formula was specifically balanced to remove grease and grime without stripping paint or dulling the finish, unlike many harsher degreasers on the market.
How often should I clean my kitchen walls?
For walls near the stove, a light cleaning every one to two weeks is recommended, with a deeper clean once a month. Walls farther from cooking areas can typically be cleaned every few months.
Can I use this product on tiled backsplashes as well as painted walls?
Yes, the Kitchen Cleaner works well on both tile and grout as well as most painted surfaces and many types of wallpaper.
What if I am not satisfied with the product?
Every order from Ferber Painting comes with a satisfaction guaranteed or money back policy. If you are not happy with the results, simply contact our support team.
How long does shipping take?
Thanks to our international network of carriers, delivery times are generally fast no matter where in the world you are ordering from.
Will the cleaner remove old, years old grease buildup?
In most cases yes, though very old buildup may require two or three applications with a short dwell time between each pass. Patience with the dwell time matters more than scrubbing pressure for these tougher stains.
Can I use this on wallpaper without causing damage?
The formula is gentle enough for most vinyl coated wallpapers commonly used in kitchens. For delicate, non coated paper wallpaper, we recommend testing on a small hidden section first before applying more broadly.
Conclusion
Cleaning kitchen walls does not have to be a frustrating, time-consuming chore. With the right product and a simple, methodical approach, grease stains, steam residue, and everyday grime can be removed quickly and safely, without damaging your paint, tile, or wallpaper. As we mentioned throughout this guide, everything starts with choosing a cleaner that is actually formulated for the unique challenges of a kitchen environment, and this is exactly why so many customers trust our formula over generic alternatives.
From clearing the wall of loose dust, to applying the cleaner in manageable sections, to giving it time to break down grease before wiping, drying thoroughly, and repeating when necessary for stubborn spots, each step in this guide plays a role in the final result. Skipping any single step, or using a product that was not designed for kitchen conditions in the first place, is usually the reason people end up disappointed with their results and convinced that cleaning kitchen walls is simply not worth the effort. With the right approach and the right formula, it genuinely is worth it, and the difference is visible the very first time you try it.