 Ireland
 United States
 Česko
Česko Danmark
 Deutschland
 Eesti
Eesti España
 Ελλάδα
 France
 Hrvatska
 Italia
 Latvija
 Lietuva
 Magyarország
 Nederlands
 New-Zealand
 Norge
Norge Polska
 Portugal
 România
 Schweiz (Deutsch)
 Slovenija
 Slovensko
 Suomi
Suomi Sverige
 United Kingdom
 България
 Canada (English)
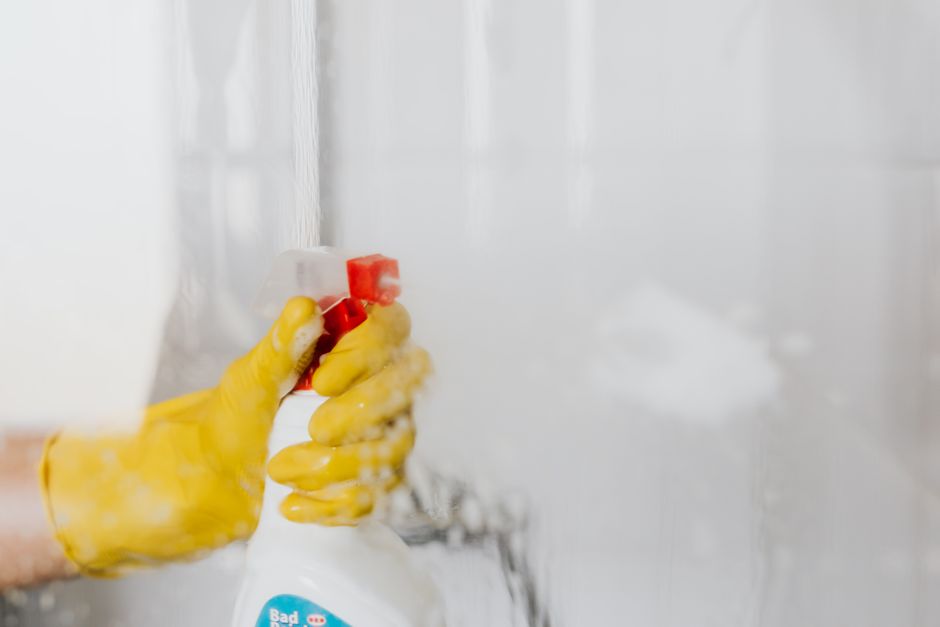
Anyone who has ever worked with metal, welded a joint, or ground down a rough surface knows the frustration that follows: those stubborn black and brown spark stains that stick to concrete, tile, wood, and even painted surfaces. These marks are notoriously difficult to remove because they are not just surface dirt. They are the result of tiny molten metal particles that fuse onto whatever surface they land on, cooling almost instantly and bonding at a microscopic level. Trying to scrub them away with water or a regular household cleaner rarely works, and often makes the problem worse by smearing the stain over a larger area.
The truth is, everything depends on choosing the right product. Using an inadequate cleaner not only wastes your time, it can also damage the surface underneath, whether that is a concrete garage floor, a hardwood workbench, or a painted wall. That is why we always recommend the Professional Stain Remover from Ferber Painting. It is formulated specifically to break down the chemical bond between metal spark residue and the surface it lands on, without harming the material beneath. And unlike almost every competing product on the market, it comes with a full satisfied or refunded guarantee, so you can try it completely risk free.
In this guide, we will walk you through everything you need to know about removing grinder spark stains, from understanding what causes them, to a step by step cleaning method, to the mistakes you absolutely need to avoid. We will also explain, with concrete arguments, why our Professional Stain Remover consistently outperforms other products on the market. Whether you are a professional contractor who grinds metal every single day, a hobbyist welder working out of a home garage, or someone who simply hired a crew that left marks behind on a driveway, this guide is meant to give you a practical, no nonsense path to a clean surface again.
We will also spend some time explaining the science behind why these marks form in the first place, because understanding the mechanism helps you make better decisions both when removing existing stains and when trying to prevent new ones from appearing in the future. Grinding work is rarely a one time event in a workshop, so the strategies described here are meant to become part of your regular routine rather than a one off emergency fix.
Why the Right Product Makes All the Difference
Spark stains from an angle grinder are a unique cleaning challenge. When you grind metal, thousands of tiny sparks fly off at extremely high temperatures, often exceeding 1500 degrees Celsius at the moment of separation from the wheel. These are actually small fragments of molten metal, and when they land on a nearby surface, they cool almost instantly, leaving behind a dark, sometimes rusty looking mark that appears baked into the material. This is fundamentally different from a simple dirt stain or an oil spill, and that is exactly why generic all purpose cleaners fail to remove it.
Many people try dish soap, vinegar, baking soda paste, or even harsh industrial degreasers before finding a solution that actually works. The problem with these approaches is twofold. First, they are often too weak to break down the metallic bond created by the heat of the spark. Second, some of the harsher chemical alternatives can damage the surface itself, discoloring concrete, stripping paint, or warping wood finishes. We have heard from countless customers who tried three or four different products before finally reaching for something formulated specifically for this purpose, wasting hours of time and sometimes money on solutions that simply were not designed for the job.
This is why the formulation of the stain remover matters so much. A well designed product needs to do three things simultaneously: penetrate the microscopic bond created by the molten metal, lift the residue without abrasive scrubbing, and protect the integrity of the underlying surface. Very few products on the market manage to do all three effectively, which is exactly the gap that the Ferber Painting Professional Stain Remover was designed to fill.
Understanding the Chemistry Behind Spark Stains
To really appreciate why generic cleaners fail, it helps to understand what actually happens at the moment a spark lands on a surface. Angle grinders work by spinning an abrasive wheel at extremely high speed against a metal surface. This friction shears off tiny fragments of the metal being worked on, and the intense heat generated instantly melts these fragments. As they fly through the air, they cool rapidly, but they are still partially molten when they strike a nearby surface.
When that molten fragment lands on concrete, for example, it can actually seep slightly into the porous surface before solidifying, creating a bond that goes beyond a simple surface stain. On painted surfaces, the heat can cause a small local reaction with the paint film itself, sometimes slightly scorching it in addition to leaving behind the metal residue. On wood, the combination of heat and metal oxidation can create a stain that looks almost like a burn mark mixed with rust.
This is also why spark stains often develop a rust colored halo around the darker central mark over time, particularly if the metal being ground contains iron. The iron particles oxidize when exposed to moisture in the air, and this oxidation process can actually make the stain appear to grow or darken over the days and weeks following the original grinding session, even if no new sparks have landed on the surface. This is one more reason why prompt treatment matters so much, since a fresh stain is almost always easier to remove than one that has had time to oxidize and set further into the material.
Why Ferber Painting’s Professional Stain Remover Stands Out
There are dozens of stain removal products advertised online, and it can be overwhelming to know which one will actually work on grinder spark marks specifically. Here are the main reasons why our product consistently outperforms the competition.
- It is specifically formulated to dissolve metallic residue left behind by high heat sparks, not just generic dirt or grease.
- It is safe to use on multiple surfaces, including concrete, sealed wood, tile, and most painted surfaces, without causing discoloration.
- It works in a matter of minutes, rather than requiring hours of soaking or repeated applications like many competitor products.
- It does not require heavy scrubbing, which protects your surface from scratches and micro abrasions.
- It is backed by a full satisfied or refunded guarantee, something that almost no other stain remover brand offers.
- It ships quickly worldwide thanks to our international network of carriers, so you are never left waiting weeks for a solution.
- Payment on our website is fast, secure, and entirely online, with no complicated checkout process.
The satisfied or refunded guarantee deserves special attention here. Most companies selling stain removers will not stand behind their product once it leaves the warehouse. If it does not work on your specific surface or stain, you are simply out of luck and out of money. Ferber Painting takes a completely different approach. We are so confident in the effectiveness of our Professional Stain Remover that if you are not satisfied with the results, we will refund your purchase. This is a rare commitment in this industry, and it reflects how much confidence we have in the formula we have developed.
Beyond the guarantee, it is worth mentioning that the formula was developed with input from contractors and metal fabrication professionals who deal with this exact problem on a daily basis. Rather than being a generic cleaner that happens to be marketed toward metal stains, the product was built from the ground up with spark residue in mind, which is a meaningful distinction when you compare it to the dozens of multipurpose cleaners crowding store shelves and online marketplaces.
Another point worth highlighting is consistency. Many customers who have used other stain removal products in the past report inconsistent results, where the product works well on one type of stain but fails completely on another, or works on a fresh stain but does nothing for an older, more set in mark. The formulation used in the Professional Stain Remover has been tested across a wide range of scenarios, from fresh spark marks noticed the same day, to stains that had been sitting untreated for weeks, to different substrate types including polished concrete, matte painted drywall, sealed hardwood, and ceramic tile. The goal was to create a single product that a workshop owner or contractor could rely on regardless of the exact combination of surface and stain age they encountered.
| Criteria | Ferber Painting Professional Stain Remover | Typical Competitor Products |
|---|---|---|
| Satisfied or refunded guarantee | Yes, full guarantee on every order | Rarely offered, or limited conditions |
| Effectiveness on metal spark stains | Specifically formulated for this purpose | Often designed for general stains only |
| Surface safety | Safe on concrete, wood, tile, and paint | Can discolor or damage certain surfaces |
| Application time | Minutes, minimal scrubbing required | Often requires long soaking or heavy scrubbing |
| Shipping speed | Fast international delivery network | Variable, often slower or limited regions |
| Payment process | Simple and secure online payment | Varies by retailer |
As you can see from this comparison, the difference is not just marketing. It comes down to concrete, measurable factors that affect your experience from the moment you place your order to the moment the stain disappears from your surface. When you factor in the time saved by not having to scrub for extended periods, the cost saved by not having to purchase multiple products before finding one that actually works, and the peace of mind that comes from a guarantee that actually means something, the value proposition becomes clear rather quickly.
Step by Step Guide: How to Remove Spark Stains from a Grinder
Now that you understand why product choice matters so much, let’s go through the actual process of removing grinder spark stains. This method works whether you are dealing with a concrete garage floor, a workbench, a tiled workshop floor, or a painted wall that got caught in the line of fire during a grinding session. We recommend reading through all the steps once before beginning, so you have a clear picture of the entire process and can gather everything you need in advance.
Before starting, take a moment to gather your supplies. You will want a bottle of Professional Stain Remover, a soft cloth or two, a soft bristle brush for tougher spots, a bucket of clean water for rinsing, and depending on the surface, possibly a pair of gloves to protect your hands during extended contact with the product. Having everything within reach before you begin means you will not be interrupting the process partway through to go searching for a missing tool or cloth, which can sometimes allow the product to sit longer than intended on delicate surfaces.
Step 1: Assess the Surface and the Stain
Before applying any product, take a moment to look closely at the stain. Spark stains typically appear as small dark spots, sometimes with a slightly rusty or brownish tint if the metal being ground contained iron. They can be scattered across a wide area if the grinding was done without proper shielding. Note the type of surface you are dealing with, since this will help you decide how much product to use and how long to let it sit.
It is also worth checking whether the stain is isolated or part of a larger pattern of damage. Sometimes what looks like a single spark stain is actually a cluster of dozens of tiny individual marks concentrated in one area, particularly directly beneath where the grinding took place. In these cases, treating the entire cluster as one zone rather than spot treating each individual mark tends to produce a more even, consistent result once the surface is clean and dry again. Take note as well of whether the surface has any existing sealant, wax, or protective coating, since this can sometimes slightly slow down how quickly the product penetrates, though it will not prevent it from working.
Step 2: Clear the Area and Remove Loose Debris
Sweep or vacuum the area to remove any loose metal filings, dust, or debris sitting on top of the stain. This step is often overlooked, but it matters because loose particles can interfere with the stain remover’s ability to penetrate directly into the actual stain.
If you are working on a workshop floor, it is a good idea to clear a slightly wider radius than just the stained area itself, since foot traffic or airflow from nearby equipment can sometimes reintroduce dust and debris back onto a freshly cleared surface before you have a chance to apply the product. For textured surfaces like unpolished concrete or certain types of tile grout, a stiff bristle broom followed by a shop vacuum tends to give the most thorough result, removing debris that has settled into small crevices where a simple sweep might miss it.
Step 3: Apply the Professional Stain Remover
Shake the bottle well before use, then apply a generous amount of Ferber Painting’s Professional Stain Remover directly onto the affected area. Unlike many other products that need to be diluted or mixed, our formula is ready to use straight out of the bottle, which saves time and eliminates the risk of an incorrect mixing ratio weakening its effectiveness.
For larger areas covered with multiple scattered spark stains, it can help to work in manageable sections rather than trying to cover the entire surface at once. This gives you better control over application and ensures the product does not dry out on one section while you are still working on another. If you are treating a vertical surface such as a painted wall, applying the product with a cloth soaked in the solution rather than pouring it directly can help prevent excessive dripping while still delivering enough product to the stained area.
Step 4: Let It Sit and Penetrate
Allow the product to sit on the stain for the recommended time indicated on the label, typically a few minutes. This gives the active ingredients time to break down the metallic bond created by the heat of the spark, loosening the residue from the surface without you needing to apply any physical force.
During this waiting period, resist the temptation to wipe the area early just to check on progress, since interrupting the process before the product has had time to fully penetrate can reduce its overall effectiveness. If you are treating multiple stains across a large surface, this is a good moment to move on to preparing your rinsing supplies or checking on the next section you plan to treat, so your workflow stays efficient rather than standing idle while waiting for the timer to run out.
Step 5: Gently Wipe or Scrub
Using a soft cloth or a non abrasive brush, gently wipe the area. You will notice the stain lifting away far more easily than with any generic cleaner, and without the risk of scratching the surface. For particularly stubborn or older stains, a slightly firmer scrub with a soft bristle brush may be needed, but excessive force is almost never necessary with our formula.
A good technique is to wipe in small circular motions rather than long straight strokes, since this helps lift the loosened residue away from the surface rather than simply smearing it across a wider area. If you notice the cloth picking up a significant amount of dark residue, switch to a clean section of the cloth or a fresh cloth entirely, so you are not reapplying the lifted stain back onto the surface you are trying to clean.
Step 6: Rinse and Dry
Rinse the area thoroughly with clean water, then dry it with a clean cloth or allow it to air dry. Inspect the surface once dry to confirm the stain is fully gone. In the rare case that a faint mark remains, you can repeat the process a second time, though most users report full removal after a single application.
For surfaces where excess moisture is a concern, such as certain types of finished wood, use a slightly damp cloth for rinsing rather than pouring water directly, and follow up promptly with a dry cloth to minimize the amount of time the surface stays wet. Once the surface has fully dried, take a moment to inspect it under good lighting, ideally natural daylight if available, since artificial lighting can sometimes make it harder to spot a faint residual mark that might benefit from a quick second treatment.
Preventing Future Spark Stains
While knowing how to remove spark stains is essential, preventing them in the first place can save you time and effort down the line. Here are a few practical tips to reduce the risk of future stains when working with an angle grinder.
- Use a spark shield or grinder guard whenever possible to redirect sparks away from surrounding surfaces.
- Lay down protective mats or tarps on floors and workbenches before beginning any grinding work.
- Avoid grinding directly above painted surfaces or finished wood whenever an alternative position is available.
- Keep a bottle of Professional Stain Remover on hand in your workshop so you can address any stains immediately after they occur, before they have time to set further into the surface.
Acting quickly after a spark stain occurs generally makes the removal process even faster and easier, since the residue has not had additional time to bond further with the surface material.
Beyond these core prevention tips, it is also worth thinking about the overall layout of your workspace. If you regularly grind metal in the same location, consider designating that specific area with more durable, stain resistant flooring or surface protection, such as heavy duty rubber mats or metal spark blankets designed specifically for welding and grinding work. These are relatively inexpensive investments compared to the cost of repeatedly repainting a wall or refinishing a floor damaged by repeated spark exposure over months or years of regular use.
Positioning is another factor many people overlook. Simply angling your grinder slightly differently, or repositioning the workpiece so that sparks fly toward an open area or a wall specifically designated for this purpose, can dramatically reduce the number of stains that land on surfaces you care about, such as painted walls, finished cabinetry, or expensive equipment stored nearby. Taking thirty seconds to think about spark trajectory before starting a grinding job can save you significant cleanup time afterward.
Ventilation and airflow in your workspace can also play a role. In workshops with strong air currents from fans or open windows, sparks can sometimes travel further than expected before landing, spreading stains across a wider area than in a still, enclosed space. If you notice this happening regularly, adjusting your ventilation setup during grinding tasks specifically, even temporarily, can help contain the spread of sparks to a more predictable and manageable area.
Common Mistakes to Avoid When Removing Spark Stains
Even with the right product, there are a few common mistakes that can make the process less effective or even damage your surface. Avoid the following pitfalls.
- Using abrasive scrubbing pads on delicate surfaces like painted walls or finished wood, which can scratch or strip the material.
- Applying diluted or watered down cleaning solutions, which weakens their ability to break the metallic bond of the stain.
- Skipping the debris removal step, which can trap dirt against the surface and interfere with the product’s penetration.
- Waiting too long to treat the stain, allowing it to set further and become more difficult to remove over time.
- Choosing a generic all purpose cleaner instead of a product specifically designed for metallic spark residue.
Avoiding these mistakes, combined with using a product formulated specifically for this type of stain, will give you the best possible results in the shortest amount of time.
Another mistake worth mentioning is applying too little product in an attempt to save on quantity. While it is understandable to want to make a bottle last as long as possible, using too small an amount often means the product does not fully saturate the stained area, leading to incomplete removal and the frustrating need to repeat the entire process. It is generally more efficient, both in terms of time and in terms of final results, to apply a generous amount the first time rather than trying to stretch a small amount across a stain that really needs more coverage.
Mixing products is another pitfall to avoid. Some people, out of habit or in an attempt to boost effectiveness, combine multiple cleaning products together, such as adding bleach or ammonia based cleaners into the mix. Not only does this fail to improve results, it can actually create harmful fumes and in some cases dangerous chemical reactions. Always use the Professional Stain Remover on its own, following the instructions on the label, rather than combining it with other household or industrial chemicals.
Finally, testing on a small inconspicuous area before treating a highly visible or delicate surface is a step that is easy to skip but genuinely worth the extra minute it takes. This is particularly relevant for surfaces with unusual finishes, antique wood pieces, or specialty tile that may react differently than the more common surfaces the product is regularly used on.
Frequently Encountered Scenarios and How to Handle Them
Not every spark stain situation looks the same, and it can help to consider a few specific scenarios that come up often among our customers.
Fresh stains on a concrete garage floor are among the most common situations we hear about. In this case, the process described above works exceptionally well, and most customers report full removal within minutes of a single application, largely because concrete, while porous, tends to hold onto surface level residue in a way that responds very well to the active ingredients in the Professional Stain Remover.
Older stains that have been sitting for weeks or months present a slightly different challenge. In these cases, the metal residue has often had time to oxidize further, deepening the color of the stain and, in some cases, allowing it to bond more firmly with the surface. For these situations, we recommend applying a slightly more generous amount of product and extending the sitting time toward the higher end of the recommended range on the label. A gentle second application, following the same steps, is also common for stains that have been neglected for an extended period.
Painted walls present a unique concern because of the risk of damaging the paint itself during the cleaning process. In these situations, working in smaller sections and using a soft cloth rather than a brush, even a soft bristle one, tends to give the best results while minimizing any risk to the paint finish. If you are dealing with a painted surface that has an unusual texture, such as a textured stucco style finish, testing on a small hidden section first is particularly important.
Wood workbenches and finished wood surfaces require a bit of extra care regarding moisture exposure. Since excess water can sometimes affect certain wood finishes over time, we recommend using a barely damp cloth for the rinsing step rather than pouring water directly onto the surface, followed promptly by thorough drying to prevent any lingering moisture from affecting the wood grain or finish.
Mini FAQ
Does the Professional Stain Remover work on all surfaces?
It is formulated to work safely on concrete, sealed wood, tile, and most painted surfaces. As with any cleaning product, we recommend testing on a small inconspicuous area first if you are working with a delicate or unusual finish.
How long does it take to remove a spark stain?
Most users see results within a few minutes of application, with a single treatment being enough for the majority of stains, even older ones that have had time to set.
What happens if the product does not work on my stain?
Every order from Ferber Painting is covered by our satisfied or refunded guarantee. If you are not happy with the results, simply reach out to our team and we will process your refund.
How quickly will I receive my order?
Thanks to our international network of carriers, Ferber Painting ships quickly to destinations around the world, so you will not be left waiting for a solution.
Is the payment process secure?
Yes, all payments are processed directly and securely through our website, making the checkout process fast and straightforward.
Conclusion
Spark stains from an angle grinder can seem impossible to remove, but with the right approach and the right product, the process becomes quick and straightforward. Remember to clear away loose debris, apply a product formulated specifically for metallic residue, let it penetrate fully, and gently wipe the stain away. Prevention through spark shields and protective mats can also save you time in the long run, and keeping a bottle of stain remover in your workshop means you can act fast whenever a new stain appears.
Whether you are dealing with a single fresh stain or an entire floor covered in months of accumulated marks from regular grinding work, the combination of a proper technique and a product genuinely designed for the task will save you time, protect your surfaces, and give you results that generic cleaners simply cannot match. Investing in the right product from the start avoids the frustration of trial and error with multiple ineffective solutions, and the satisfied or refunded guarantee means there is no real downside to trying it for yourself.