 Ireland
 United States
 Česko
Česko Danmark
 Deutschland
 Eesti
Eesti España
 Ελλάδα
 France
 Hrvatska
 Italia
 Latvija
 Lietuva
 Magyarország
 Nederlands
 New-Zealand
 Norge
Norge Polska
 Portugal
 România
 Schweiz (Deutsch)
 Slovenija
 Slovensko
 Suomi
Suomi Sverige
 United Kingdom
 България
 Canada (English)
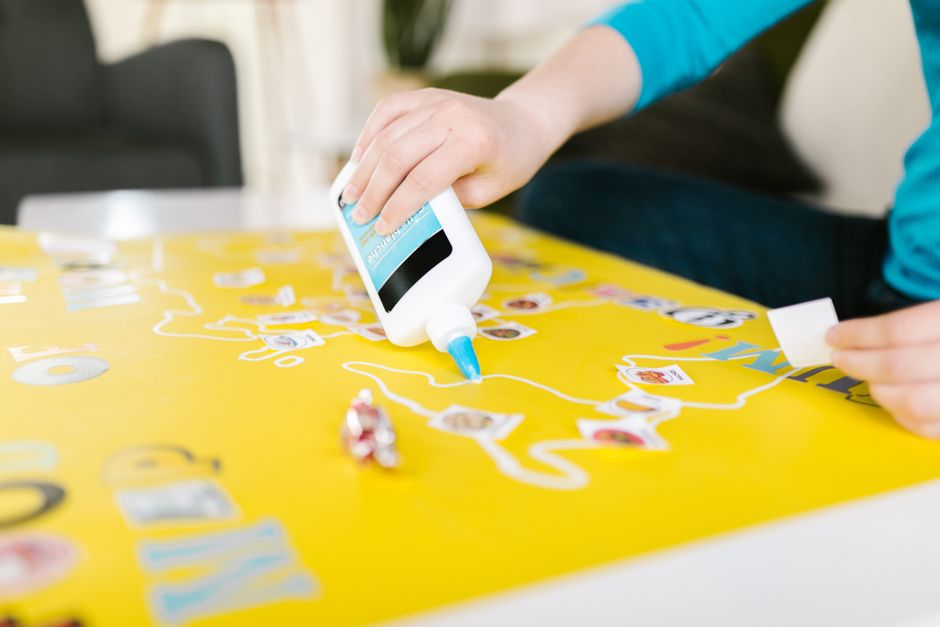
Learning how to glue flowers on paper is a rewarding craft skill, whether you are pressing flowers for a scrapbook, creating botanical art, making greeting cards, or preserving a bouquet from a special occasion. However, the single most important factor in achieving a beautiful, long-lasting result is not your technique. It is the glue you choose. A wrong adhesive can wrinkle petals, leave visible residue, turn yellow over time, or simply fail to hold delicate flowers in place.
Many hobbyists spend hours selecting the perfect blooms, pressing them for weeks, and carefully arranging every stem and petal, only to see the entire project ruined within days because of an unsuitable glue. The petals curl, the paper buckles, or the flowers simply lift off the page the first time the album is opened. This is heartbreaking after so much effort, and it is almost always avoidable once you understand what actually happens at a chemical and physical level when adhesive meets a dried flower.
That is exactly why we recommend Ferber Painting’s Paper and Cardboard Glue. It is specifically formulated to work with delicate natural materials like pressed flowers, and it is currently the only adhesive on the market that comes with a full satisfaction or refund guarantee. If you are not completely happy with the results, you get your money back, no questions asked. This guarantee alone sets it apart from dozens of competing glues that offer no such assurance, leaving customers stuck with a product that does not perform as expected.
In this complete guide, we will explain why choosing the right glue matters so much, why Ferber Painting’s formula is the best option available, and then walk you through a detailed, step-by-step process for gluing flowers on paper like a professional crafter. We will also cover common mistakes, troubleshooting advice, project ideas, and long-term care so that by the end of this article you will feel fully confident tackling your own flower art project, no matter your experience level.
Why the Right Glue Makes All the Difference
Flowers, especially pressed or dried ones, are extremely fragile. Their petals are thin, porous, and easily torn or crushed under pressure. A poor-quality glue can cause several problems that ruin hours of careful pressing and arranging work:
- Excess moisture from liquid glues can rehydrate dried petals, causing them to wrinkle, curl, or even rot over time.
- Thick or clumpy adhesives create visible lumps under the paper surface, ruining the flat, elegant look of pressed flower art.
- Low-quality glues often yellow or discolor over months, making your artwork look aged and unattractive far too soon.
- Weak adhesives fail to hold the flower securely, leading to petals falling off or shifting inside frames or albums.
- Some glues contain harsh chemicals that damage delicate paper fibers, causing the paper itself to warp or become brittle.
This is why professional crafters, florists, and scrapbooking enthusiasts always emphasize that success starts with the adhesive. You could have the most beautifully pressed flowers in the world, but if the glue is wrong, your project will not last or look as intended.
Ferber Painting’s Paper and Cardboard Glue was designed with these exact problems in mind. It offers a thin, precise application, dries clear and quickly, and creates a strong yet flexible bond that keeps delicate petals secure without damaging them or the paper beneath.
Understanding the Science Behind Petal Damage
To really appreciate why glue selection matters so much, it helps to understand what a pressed petal actually is at a structural level. Once a flower has been dried under pressure, its cells lose almost all of their water content, and the remaining plant fibers become stiff and brittle, but also highly absorbent. This means that any adhesive containing a large percentage of water will be drawn straight into the petal tissue, much like a sponge soaking up a spill. As the water evaporates again, it pulls the fibers with it unevenly, which is exactly why cheap, watery glues so often leave petals looking shriveled or oddly textured a few days after application.
A well-formulated adhesive, by contrast, is designed to set quickly on the surface rather than being absorbed deep into the plant tissue. This preserves the natural shape and texture of the petal while still creating a durable bond to the paper below. It is a delicate balance between adhesion strength and moisture control, and it is precisely this balance that separates a mediocre glue from one built specifically for botanical crafts.
How Paper Quality Interacts With Glue Choice
It is not only the flower that can be damaged by the wrong glue. The paper itself reacts differently depending on its composition. Standard printer paper, for example, is highly absorbent and can wrinkle almost instantly when exposed to a liquid adhesive. Cardstock and watercolor paper, on the other hand, are more resistant to warping because of their thickness and fiber density, but they can still be affected if too much glue is used or if the adhesive contains acidic compounds that slowly break down cellulose fibers over time. This is one of the reasons archival quality matters just as much for the paper as it does for the flowers resting on top of it.
What Makes Ferber Painting’s Paper and Cardboard Glue Stand Out
There are many paper glues on the market, but very few are actually suited for the specific challenge of gluing flowers. Here is why Ferber Painting’s formula consistently outperforms the competition:
- Precision application: the bottle design allows for controlled, drop-by-drop application, which is essential when working with tiny petals or thin stems.
- Fast drying without moisture damage: unlike many liquid glues, our formula dries quickly enough to prevent flowers from absorbing excess moisture and losing their shape.
- Acid-free and archival quality: this means your flower art will not yellow, degrade, or damage the paper over time, making it perfect for keepsakes, wedding albums, and framed art meant to last for decades.
- Strong yet flexible bond: the glue holds petals firmly in place while remaining slightly flexible, which prevents cracking when paper is handled or bent slightly.
- Non-toxic and safe: ideal for classroom projects, children’s crafts, and anyone sensitive to strong chemical odors found in industrial adhesives.
- Satisfaction or refund guarantee: this is the feature no competitor offers. If the results do not meet your expectations, you are entitled to a full refund.
Beyond the product itself, Ferber Painting offers a shopping experience built around convenience and trust. Our Paper and Cardboard Glue is available directly on our website, with fast worldwide shipping thanks to our international network of trusted carriers. Payment is simple and secure, processed entirely online in just a few clicks. And again, every single purchase is backed by our satisfaction or refund guarantee, so there is absolutely no risk in trying it for yourself.
Ideal Use Cases for This Glue
While this guide focuses specifically on flowers, it is worth noting the many other applications where this same formula excels, since most crafters who work with pressed botanicals also work with paper and cardboard in other creative contexts. Scrapbook pages, handmade greeting cards, collage art, decoupage projects, journaling spreads, and even lightweight paper models all benefit from the same precision, quick drying time, and archival stability. Having one reliable adhesive that performs consistently across all of these applications simplifies your craft supply list and removes the guesswork of matching different glues to different materials.
What Real Customers Notice First
Crafters who switch to Ferber Painting’s Paper and Cardboard Glue after using a standard craft glue often report the same handful of observations. First, they notice how little product is actually needed to create a secure bond, which means a single bottle lasts considerably longer than expected. Second, they notice that petals dry perfectly flat, without the slight puckering that is common with wetter adhesives. Third, many mention how reassuring it is to know that a refund is available if the results are not what they hoped for, since this removes the usual hesitation that comes with trying a new product for an important, sentimental project like a wedding bouquet keepsake or a memorial arrangement.
Comparing the Best Glue Options for Flower Crafts
To help you understand exactly why Ferber Painting’s Paper and Cardboard Glue is the superior choice, here is a direct comparison of the criteria that matter most when gluing flowers on paper.
| Criteria | Ferber Painting Paper and Cardboard Glue | Standard Craft Glue | Basic Glue Stick |
|---|---|---|---|
| Satisfaction or refund guarantee | Yes, full guarantee included | Rarely offered | Almost never offered |
| Drying time | Fast, minimal moisture exposure | Slow, can warp paper | Fast but weak bond |
| Archival quality (acid-free) | Yes | Sometimes | Rarely |
| Precision application | Excellent, controlled tip | Moderate | Poor for small petals |
| Long-term durability | Excellent, remains flexible | Average, can crack | Poor, dries out quickly |
| Worldwide shipping | Fast international delivery | Depends on retailer | Depends on retailer |
| Ease of online payment | Simple and secure checkout | Varies | Varies |
As the table clearly shows, Ferber Painting’s Paper and Cardboard Glue outperforms typical alternatives on nearly every important criteria, especially when it comes to the guarantee, which remains a unique advantage in this market.
Why Some Popular Alternatives Fall Short
It is worth expanding on why the two common alternatives listed in the table so often disappoint crafters. Standard craft glue is usually formulated as a general-purpose adhesive meant to bond a wide range of materials, from fabric to light wood to paper. Because it needs to work across so many surfaces, it typically contains a higher water content and a thicker consistency than is ideal for something as delicate as a pressed petal. This is why users frequently report warping, bubbling, or slow drying times that leave flowers vulnerable to shifting before the bond sets.
Basic glue sticks, on the other hand, are convenient and mess-free, but they rely on a wax-based or solvent-based formula that bonds well to flat paper surfaces but struggles to grip the uneven, textured surface of a dried petal. Over time, glue stick adhesive can also dry out and become brittle, causing flowers to detach from the page entirely, sometimes years after the project was completed. Neither of these alternatives was designed with pressed botanical material in mind, which is precisely the gap that Ferber Painting’s formula was created to fill.
Step-by-Step Guide: How to Glue Flowers on Paper
Now that you understand why the right adhesive is so essential, let’s walk through the complete process of gluing flowers on paper for a beautiful, long-lasting result.
Step 1: Choose and Prepare Your Flowers
Select flowers that are already pressed and fully dried, ideally flattened between heavy books or in a flower press for at least one to two weeks. Fresh or partially dried flowers contain too much moisture and will not adhere properly, often causing mold or discoloration later.
When choosing which flowers to press in the first place, thinner, flatter blooms tend to produce the best results. Pansies, violas, daisies, ferns, and small buttercups press beautifully and retain their color well. Thicker or more three-dimensional flowers, such as roses or peonies, can still be pressed, but often require disassembling the bloom into individual petals before pressing so that each layer dries flat and evenly. Keeping this in mind from the very beginning of your project will make the gluing stage significantly easier later on.
It is also worth changing the blotting paper or cardboard layers inside your flower press every few days during the first week, since this speeds up drying and reduces the risk of mold forming while moisture is still being drawn out of the petals.
Step 2: Prepare Your Paper
Choose a sturdy paper or cardboard surface that can support the weight of the glue and flowers without warping. Acid-free cardstock or watercolor paper works particularly well for long-term preservation projects.
If your project will be displayed or gifted, consider the color and texture of the background paper carefully, since it plays a major role in how the finished piece looks. Cream, ivory, and soft pastel tones tend to complement dried flower colors more naturally than stark white, which can sometimes make faded petal tones look washed out by comparison. Textured papers, such as those with a light cotton or linen finish, can also add a subtle depth to the final composition, though very heavily textured paper may make it slightly harder to achieve full contact between the petal and the surface.
Step 3: Plan Your Arrangement
Before applying any glue, arrange your flowers on the paper exactly how you want them to appear in the final design. Take a photo or make a light pencil mark to remember the placement, since once glue is applied, repositioning becomes difficult.
This planning stage is often underestimated, but it is arguably the most creative and important part of the entire process. Take time to experiment with balance, spacing, and visual flow before committing to a final layout. Many experienced crafters recommend using the classic rule of odd numbers, grouping flowers in clusters of three or five rather than even numbers, since this tends to create a more natural, visually pleasing composition. It also helps to leave a small amount of negative space around the edges of the paper rather than filling every inch, which gives the arrangement room to breathe and draws the eye toward the flowers themselves.
Step 4: Apply a Small Amount of Glue
Using Ferber Painting’s Paper and Cardboard Glue, apply a very thin layer to the back of each petal or to the paper surface itself, depending on the flower’s size and fragility. Because the bottle allows precise control, you can avoid excess glue that might seep out from under the petals.
For very small or thin petals, it is often easier to apply a tiny drop of glue to the paper rather than directly to the flower, since pressing a delicate petal against a wet surface distributes the adhesive more evenly than trying to coat the petal itself, which risks tearing. For larger, sturdier petals or whole small flowers, applying the glue directly to the back of the bloom using the fine tip applicator gives you more control over exact placement. Either method works well with this particular formula, so feel free to experiment on a few spare pressed flowers before starting on your final piece.
Step 5: Press the Flower Gently
Place the flower carefully onto the paper according to your planned arrangement. Use a soft cloth or your fingertip to press down gently, starting from the center of the flower and moving outward to avoid trapping air bubbles or wrinkling petals.
A useful trick here is to place a clean sheet of parchment paper or wax paper over the flower before pressing down, which protects the delicate petal surface from any oils or residue on your fingertips while still allowing you to apply firm, even pressure. For particularly fragile petals, a soft, dry paintbrush can be used instead of a fingertip, gently smoothing the petal into place without risking any tearing.
Step 6: Allow Proper Drying Time
Let the glued flowers dry completely before touching or moving the paper. Thanks to the fast-drying formula of Ferber Painting’s glue, this typically takes just a few minutes, though leaving it undisturbed for a full hour ensures the strongest possible bond.
During this drying period, it is best to lay the paper flat on a stable, level surface away from direct airflow, such as an open window or a fan, since sudden drafts can sometimes shift lightweight petals before the bond has fully set. If you are working on multiple pieces at once, label each one lightly in pencil on the back so you can keep track of drying times without needing to disturb the front of the design.
Step 7: Seal or Frame Your Artwork (Optional)
For extra protection, especially if the piece will be displayed or handled frequently, consider covering it with a thin protective layer such as laminate, glass framing, or a light varnish designed for paper crafts. This step helps preserve color and prevents dust accumulation over time.
If you choose to frame your finished piece, it is worth using UV-protective glass whenever possible, since ultraviolet light is one of the biggest contributors to color fading in pressed flowers over the years. Leaving a small air gap between the glass and the flower itself, using a mat board or spacer, also helps prevent moisture from becoming trapped against the petals, which can otherwise lead to subtle mold growth even in an otherwise well-sealed frame.
Tips for Long-Lasting Flower Arrangements
To make sure your glued flower project stays beautiful for years to come, keep these additional tips in mind:
- Store finished pieces away from direct sunlight, which can fade petal colors over time.
- Avoid humid environments, since moisture can cause even well-glued flowers to loosen or develop mold.
- Use tweezers for handling especially small or fragile petals to avoid accidental tearing during placement.
- Apply glue sparingly. A thin, even layer always outperforms a thick, heavy application, both in appearance and durability.
- Test the glue on a spare petal first if you are working with an unusually delicate or unusually thick flower variety.
In addition to these core tips, consider keeping a small climate-controlled area of your home dedicated to storing finished pressed flower projects that are not currently on display. A closet or drawer away from exterior walls, which tend to experience more temperature and humidity fluctuation, is often ideal. If you live in a particularly humid climate, placing a small silica gel packet inside storage boxes can help absorb excess moisture from the surrounding air and further protect your work.
Common Mistakes to Avoid
Even with the right glue in hand, a few common mistakes can still affect your results. Rushing the pressing stage is one of the most frequent issues, since flowers that are not fully dried before gluing will almost always cause problems down the line, regardless of adhesive quality. Applying too much glue is another frequent mistake, since excess adhesive can seep out from under the edges of a petal, creating a shiny, uneven halo that is difficult to remove once dried. Finally, handling petals too roughly during placement, rather than using gentle, controlled pressure, is a common cause of tearing, especially with thinner varieties like ferns or small wildflowers.
Project Ideas to Try
Once you feel comfortable with the basic technique, there are countless ways to put your new skill to use. Pressed flower bookmarks make lovely, simple gifts and are an excellent way to practice on a small scale. Greeting cards featuring a single glued bloom in the corner add a handmade, thoughtful touch that store-bought cards simply cannot match. Framed botanical art, arranged in a grid or scattered composition, makes a beautiful addition to any home, and preserved wedding bouquet arrangements, glued carefully onto acid-free paper and framed under UV-protective glass, create a lasting keepsake that can be treasured for generations.
Following these steps and tips, combined with a high-quality adhesive like Ferber Painting’s Paper and Cardboard Glue, will give you a professional, gallery-worthy result every time.
Frequently Asked Questions
Can I use regular white glue instead of a specialized paper glue?
Regular white glue often contains too much moisture and dries with a visible sheen or texture that can distort delicate petals. Ferber Painting’s Paper and Cardboard Glue is specifically formulated to avoid these issues, offering a thinner, more controlled application that dries clear without leaving behind the stiff, glossy residue that is common with generic white glue.
How long does it take for the glue to fully dry?
Most projects dry to the touch within a few minutes, though we recommend waiting a full hour before handling or framing the finished piece for maximum bond strength. If you are working in a particularly humid environment, allowing a slightly longer drying time, closer to two hours, can help ensure the strongest possible bond before the paper is moved or stacked with other pages.
Will the glue turn yellow over time?
No. Ferber Painting’s Paper and Cardboard Glue is acid-free and archival quality, meaning it will not yellow or degrade your paper or flowers over the years. This makes it particularly well suited for keepsake projects, such as wedding albums or family scrapbooks, that are meant to be handed down and enjoyed for many years without any visible sign of aging in the adhesive itself.
What happens if I am not satisfied with the product?
Ferber Painting offers a full satisfaction or refund guarantee on every order. If the product does not meet your expectations, simply contact us for a complete refund. There is no complicated process involved, and our goal is simply to make sure that every customer feels completely confident and risk free when trying our glue for the first time.
Does Ferber Painting ship internationally?
Yes, thanks to our international network of trusted carriers, we deliver quickly to customers all around the world, with secure and simple online payment options. Whether you are ordering a single bottle for a personal project or stocking up for a classroom of students, our shipping process is designed to be fast, reliable, and hassle free no matter where you are located.
Conclusion
Gluing flowers on paper is a beautiful, meditative craft that allows you to preserve nature’s fleeting beauty in a lasting form. But as we have seen throughout this guide, success depends heavily on choosing the right adhesive, one that is precise, fast-drying, archival quality, and gentle enough to protect delicate petals without damaging the paper beneath. From selecting and pressing your flowers, to planning a balanced composition, to applying just the right amount of glue and allowing proper drying time, every step in this process matters, and every step becomes noticeably easier and more reliable when you are working with a glue built specifically for this purpose. Discover why thousands of crafters trust Ferber Painting’s Paper and Cardboard Glue, backed by a full satisfaction or refund guarantee, fast worldwide shipping, and secure online payment, making it the smartest choice for your next flower project.