 Ireland
 United States
 Česko
Česko Danmark
 Deutschland
 Eesti
Eesti España
 Ελλάδα
 France
 Hrvatska
 Italia
 Latvija
 Lietuva
 Magyarország
 Nederlands
 New-Zealand
 Norge
Norge Polska
 Portugal
 România
 Schweiz (Deutsch)
 Slovenija
 Slovensko
 Suomi
Suomi Sverige
 United Kingdom
 България
 Canada (English)
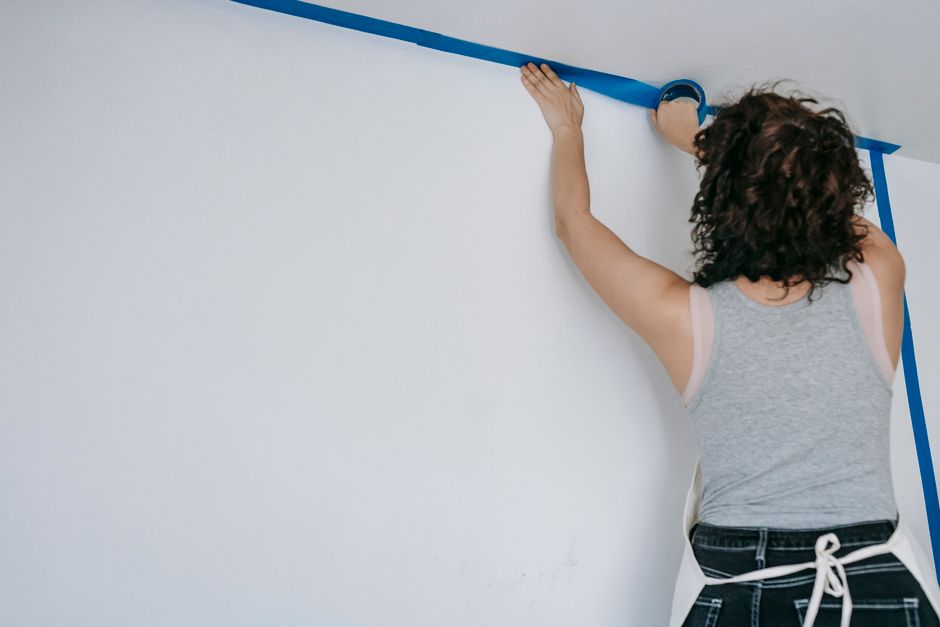
Hanging wallpaper is one of those home improvement projects that looks simple on paper but can quickly turn into a frustrating experience if you do not have the right tools and, more importantly, the right adhesive. Before we even get into the step-by-step process, it is essential to understand that everything depends on the quality of the product you choose. A beautiful wallpaper roll can be ruined by a weak or unreliable adhesive, resulting in bubbles, peeling edges, and wasted time and money. This is why choosing the right glue is the single most important decision you will make in this entire project.
At Ferber Painting, we have spent years perfecting our Wallpaper Adhesive to make sure it delivers a strong, long-lasting bond every single time. What truly sets us apart from every other brand on the market is that we are the only company offering a full satisfied or refunded guarantee on our wallpaper adhesive. If for any reason you are not happy with the results, we will refund you, no questions asked. No other manufacturer in this space is confident enough in their product to offer that kind of promise, and that alone should tell you something about the quality behind our formula.
In this complete guide, we will walk you through everything you need to know about how to hang wallpaper properly, from preparing your walls to applying the final strip, while explaining why Ferber Painting’s Wallpaper Adhesive is the best choice you can make for this project. Whether you are a first time DIYer tackling your very first roll or a seasoned decorator who has hung hundreds of rolls over the years, this guide is designed to give you a clear roadmap and help you avoid the small mistakes that often turn into big headaches later on.
Wallpaper has made a strong comeback in interior design over the last decade, with homeowners rediscovering just how much personality and texture it can bring to a room compared to plain paint. But that renewed popularity also means more people are attempting installation themselves for the first time, often without fully understanding how much the adhesive contributes to the final result. We wrote this guide to bridge that gap and give you the confidence to take on this project properly.
Why the Right Wallpaper Adhesive Makes All the Difference
Many people underestimate the role that adhesive plays in a wallpaper installation. They focus all their attention on choosing the perfect pattern, color, and texture, and then grab whatever glue is cheapest or most convenient at the hardware store. This is a mistake that often leads to disappointing results. A low quality adhesive can dry unevenly, lose its grip over time, or fail to bond properly with certain wallpaper materials such as vinyl, non-woven, or fabric-backed wallpapers.
Ferber Painting’s Wallpaper Adhesive is formulated to work with virtually every type of wallpaper on the market today. Whether you are installing traditional paper wallpaper, vinyl-coated wallpaper, non-woven wallpaper, or even delicate fabric wallcoverings, our adhesive adapts to the material and creates a bond that lasts for years. This versatility alone makes it a smarter investment than many competing products that are designed for only one or two types of wallpaper.
Another important factor is drying time. Some adhesives dry too quickly, leaving you no room to adjust the wallpaper once it is on the wall. Others take so long to dry that the wallpaper can shift or sag before it sets. Our formula strikes the perfect balance, giving you enough working time to align patterns and smooth out air bubbles, while still setting firmly within a reasonable timeframe.
Finally, there is the question of durability. Humidity, temperature changes, and everyday wear and tear can all affect how long your wallpaper stays in place. Ferber Painting’s Wallpaper Adhesive is resistant to moisture and temperature fluctuations, which means it performs well in kitchens, bathrooms, and other rooms where humidity levels can vary throughout the day. This kind of resilience is not something you find in every adhesive on the market, and it is one of the many reasons professional decorators trust our product.
It is also worth mentioning the impact adhesive quality has on the long term appearance of your walls. A subpar adhesive might look fine for the first few weeks or even months, but as seasons change and humidity levels fluctuate, seams can begin to lift and corners can start to curl. This is especially common in older homes where walls may not be perfectly flat or where insulation is less effective at regulating indoor humidity. Ferber Painting’s formula was specifically engineered to handle these kinds of environmental stresses, so you are not just paying for a good first impression but for a wallpaper job that continues to look sharp years down the line.
Another often overlooked aspect is how the adhesive interacts with different wall substrates. Drywall, plaster, and previously painted surfaces all absorb and hold adhesive differently. Some cheaper adhesives are formulated with a one-size-fits-all approach that works reasonably well on drywall but performs poorly on glossy painted surfaces or older plaster walls. Our formula has been tested extensively across these different substrates to ensure a consistent, reliable bond no matter what kind of wall you are working with.
Tools and Materials You Need Before You Start
Before you begin hanging wallpaper, it is important to gather all the tools and materials you will need. Having everything ready before you start will save you time and prevent unnecessary interruptions once you have adhesive on the wall. Here is a list of what you should have on hand:
- Wallpaper rolls (measured and cut according to your wall dimensions)
- Ferber Painting’s Wallpaper Adhesive
- A wallpaper brush or smoothing tool
- A sharp utility knife and extra blades
- A metal straight edge or ruler
- A level or plumb line
- A clean bucket and mixing stick (if your adhesive requires mixing)
- A sponge and clean water for cleaning excess glue
- A pasting table or clean flat surface
- A tape measure
- Drop cloths or old sheets to protect flooring
One of the advantages of choosing Ferber Painting’s Wallpaper Adhesive is that it comes ready to use, which eliminates the guesswork and mess associated with mixing powder-based adhesives. Many competing brands require precise mixing ratios, and getting this wrong can lead to a weak or overly thick paste that is difficult to apply evenly. Our ready-to-use formula saves you time and ensures consistent results with every application.
Let us take a closer look at a few of these tools, since the quality of your equipment can matter almost as much as the quality of your adhesive. A dull utility knife blade, for example, is one of the most common causes of ragged edges and torn seams. Blades should be changed frequently, ideally after every strip or two, since a sharp blade glides cleanly through the paper while a dull one drags and tears. Keeping a full pack of extra blades on hand is a small investment that makes a noticeable difference in the finished look of your walls.
Your smoothing tool is another piece of equipment worth choosing carefully. A wallpaper brush with soft, flexible bristles is generally gentler on delicate materials like fabric-backed wallpaper, while a plastic smoothing tool with a beveled edge works well for pushing air bubbles out of heavier vinyl coverings. Some professionals like to keep both on hand so they can switch depending on the wallpaper type they are working with on a given day.
The pasting table deserves a mention as well. While any clean flat surface can technically work, a dedicated pasting table, which is typically narrower than a standard table and slightly longer than your wallpaper roll width, makes it much easier to fold and book your strips without them slipping off the edges. If you do not own one, a piece of plywood placed across two sawhorses can serve as a reasonable substitute for the duration of your project.
Step-by-Step Guide: How to Hang Wallpaper
Now that you understand why the adhesive matters so much and you have gathered your tools, let’s walk through the actual process of hanging wallpaper from start to finish.
Step 1: Prepare the Wall Surface
The success of your wallpaper installation depends heavily on the condition of your wall. Start by removing any old wallpaper, peeling paint, or wall coverings. Fill in any cracks or holes with spackle and sand the surface until it is smooth. Wash the walls to remove dust, grease, and dirt, then let them dry completely. If your walls are particularly porous or uneven, applying a wallpaper primer can help the adhesive bond more effectively.
Take your time with this step, as it is by far the most important part of the entire process even though it involves no wallpaper at all. Any imperfection left on the wall, whether it is a small bump of dried spackle or a patch of grease left over from cleaning products, will eventually show through the finished wallpaper, especially under certain lighting conditions. Run your hand across the entire surface once it has dried to feel for any bumps or ridges that your eyes might miss. If your walls were previously painted with a high gloss or semi-gloss finish, a light sanding is recommended to help the primer and adhesive adhere properly, since glossy surfaces can be surprisingly slippery for adhesive to grip onto.
If you are working in a room prone to moisture, such as a bathroom or a kitchen, consider allowing extra drying time between cleaning the walls and applying primer, and between applying primer and hanging your wallpaper. Trapped moisture behind the wallpaper is one of the leading causes of mold growth and bubbling down the line, and a little patience at this stage can prevent a lot of frustration later.
Step 2: Measure and Cut Your Wallpaper
Measure the height of your wall and add a few extra inches to each strip to account for trimming at the top and bottom. If your wallpaper has a pattern, make sure to account for pattern matching between strips. Lay the wallpaper flat on your pasting table and cut it to size using your utility knife and straight edge.
When working with patterned wallpaper, it is a good idea to lay out several rolls side by side before cutting anything, so you can visually confirm how the pattern repeats and plan your cuts accordingly. Manufacturers typically list the pattern repeat measurement on the wallpaper packaging, which tells you how much extra length you need per strip to keep the design aligned across seams. Ignoring this measurement is one of the most common reasons DIY wallpaper jobs end up looking mismatched at the seams, so it is worth double-checking before you make your first cut.
It is also wise to number your strips lightly in pencil on the back as you cut them, in the order you plan to hang them. This might seem like an unnecessary extra step, but once you have a stack of a dozen or more strips waiting to be pasted, it becomes very easy to lose track of which piece goes where, especially with patterns that look similar from strip to strip.
Step 3: Apply Ferber Painting’s Wallpaper Adhesive
Using a brush or roller, apply an even layer of Ferber Painting’s Wallpaper Adhesive to the back of the wallpaper strip, making sure to cover the edges thoroughly since these are the areas most prone to peeling. If you are using a non-woven wallpaper, you may prefer to apply the adhesive directly to the wall instead. Our formula works well with both methods, giving you flexibility depending on your wallpaper type.
When applying adhesive with a roller, work in smooth, overlapping strokes to avoid leaving thin, unpasted lines that can lead to weak spots once the wallpaper dries. Pay special attention to the corners and edges of each strip, since these areas experience the most stress once the paper is hung and are the first places where lifting tends to occur if the adhesive coverage is uneven. A slightly heavier application along the outer inch or two of each strip can help prevent this issue without oversaturating the rest of the paper.
If you are pasting the wall rather than the paper, which is common with heavier non-woven wallcoverings, work in sections slightly wider than your wallpaper strip and apply the adhesive with a medium nap roller for even coverage. This method also has the benefit of keeping your pasting table clean, since you are not handling wet paste-covered paper as much during the hanging process.
Step 4: Book the Wallpaper
For traditional paper wallpaper, fold the pasted strip in on itself, paste side to paste side, and let it sit for a few minutes. This process, known as booking, allows the adhesive to activate and the paper to relax before hanging, reducing the risk of bubbles and stretching.
Booking times can vary depending on the thickness and material of your wallpaper, so it is worth checking the manufacturer’s recommendation for your specific product, but a general rule of thumb is between five and ten minutes. Booking for too short a time means the paper has not fully relaxed and may still stretch slightly once hung, while booking for too long can cause the adhesive to dry out before you even get the strip on the wall. Setting a timer during this stage, especially for your first few strips, can help you get a feel for the right timing before you develop an instinct for it.
It is also helpful to book multiple strips in sequence while you are hanging previous ones, effectively creating a small production line. This keeps your workflow moving steadily and prevents long pauses that can throw off your rhythm, especially on larger walls that require many strips.
Step 5: Hang the Strip
Starting from the top of the wall, align the wallpaper strip using your plumb line to ensure it is perfectly vertical. Slowly unfold the strip and press it against the wall, smoothing it out with your wallpaper brush as you go. Work from the center outward to push out any trapped air bubbles.
Establishing a true vertical line before hanging your very first strip is one of the most critical parts of the entire process, since even a slight tilt at the start will compound as you move across the wall, becoming very noticeable by the time you reach the far corner. Most walls, especially in older homes, are not perfectly straight, so relying on the corner of the room as your guide can lead to crooked results. A plumb line or a long level is a much more reliable reference point.
As you smooth the strip into place, work in gentle, sweeping motions rather than pressing too hard in one spot, which can stretch the wet paper and distort the pattern. If you notice a stubborn air bubble that will not budge with your brush, a small pin prick followed by gently pressing the area flat can often release the trapped air without leaving a visible mark once the wallpaper dries.
Step 6: Trim the Edges
Once the strip is smoothed into place, use your utility knife and straight edge to trim any excess wallpaper at the top, bottom, and edges. Wipe away any excess adhesive with a damp sponge before it dries.
For the cleanest possible cut, use a fresh blade and slice in one continuous motion rather than sawing back and forth, which can tear delicate wallpaper materials. Holding your straight edge firmly in place with one hand while cutting with the other prevents slipping, which is one of the most common causes of accidental nicks in the wallpaper surface.
When wiping away excess adhesive, use a barely damp sponge and rinse it frequently in clean water. A sponge that is too wet can actually push water into the seams and cause the paper edges to lift, while a sponge loaded with old adhesive residue can smear rather than clean. Change your rinse water often, especially after several strips, to avoid transferring grime back onto your freshly hung wallpaper.
Step 7: Repeat and Match Patterns
Continue hanging additional strips, making sure to align patterns carefully at each seam. Take your time during this step, as rushing can lead to visible mismatches that are difficult to correct later.
A useful technique for pattern matching is to slightly overlap each new strip onto the previous one before sliding it into its final position, rather than trying to butt the edges together perfectly on the first attempt. This gives you a small margin to nudge the paper left or right until the pattern lines up exactly, at which point you can smooth it fully into place. Working under good lighting, ideally with the same type of light that will be used in the finished room, also helps you catch small misalignments before the adhesive sets.
Around corners, doors, and windows, patience becomes even more important. These areas often require partial strips and careful trimming, and it is generally best to plan your pattern matching so that any unavoidable mismatches end up in the least visible spots, such as above a door frame or behind furniture, rather than at eye level in the center of a wall.
Step 8: Let It Dry
Allow the wallpaper to dry completely before touching or cleaning it. Avoid opening windows or using fans during this time, as sudden temperature changes can affect how the adhesive sets. Ferber Painting’s Wallpaper Adhesive is designed to dry evenly and reliably, minimizing the risk of bubbling or lifting during this crucial drying period.
During the drying period, it is also a good idea to keep the room at a stable, moderate temperature rather than cranking up the heat to speed things along. Rapid temperature changes can cause the paper to contract unevenly, sometimes pulling seams apart slightly before the adhesive has fully cured. If you notice a small bubble appear after the wallpaper has dried, resist the urge to immediately cut into it. Many minor bubbles settle on their own within the first day or two as the adhesive finishes curing, and premature intervention can sometimes cause more visible damage than the bubble itself.
Common Mistakes to Avoid When Hanging Wallpaper
Even experienced decorators can make mistakes when hanging wallpaper. Here are some of the most common issues and how to avoid them:
- Applying too little adhesive, which leads to peeling edges and lifting seams over time.
- Not allowing the wallpaper to book properly before hanging, resulting in stretching or wrinkling.
- Ignoring wall preparation, which causes the adhesive to bond poorly to dirty or uneven surfaces.
- Using an adhesive that is not suited to your wallpaper type, leading to inconsistent results.
- Rushing the pattern matching process, which creates visible seams and a less polished final look.
- Failing to remove excess adhesive quickly, which can leave stains once dry.
Choosing a high-quality adhesive like the one from Ferber Painting significantly reduces the risk of these problems. Its balanced consistency and strong bonding properties give you more control during application, making it easier to avoid these common pitfalls even if you are a beginner.
Beyond the mistakes listed above, there are a few additional issues worth watching for. One is working with wallpaper straight out of a cold storage area without letting it acclimate to room temperature first. Wallpaper that is too cold can become brittle and more prone to cracking along fold lines during booking. Simply leaving your rolls in the room where you will be working for a day before starting your project can make a noticeable difference in how easily the paper handles.
Another common mistake is underestimating how much wallpaper and adhesive you actually need. Running out partway through a wall and having to pause a project while waiting for more materials to arrive can lead to visible differences in dye lots between batches, since wallpaper colors can vary slightly from one production run to another. It is always better to order slightly more than your calculated minimum, both for the wallpaper itself and for the adhesive, so you never find yourself stretching a nearly empty container across the final strips of a wall.
Finally, many first time installers forget to turn off electrical outlets and remove switch plate covers before starting, which not only slows down the process but increases the risk of getting adhesive into places it should not be. Taking ten minutes at the start of the project to remove covers and cover outlets with painter’s tape can save a significant amount of cleanup time later.
Why Ferber Painting’s Wallpaper Adhesive Stands Out
There are many wallpaper adhesives available on the market, but very few offer the same combination of quality, versatility, and customer confidence that Ferber Painting provides. Here is a comparison of the key factors that matter most when choosing a wallpaper adhesive.
| Criteria | Ferber Painting’s Wallpaper Adhesive | Typical Competing Products |
|---|---|---|
| Satisfaction Guarantee | Satisfied or refunded guarantee on every order | Rarely offered, or limited to defective products only |
| Compatibility | Works with paper, vinyl, non-woven, and fabric wallpapers | Often limited to one or two wallpaper types |
| Ease of Use | Ready to use, no mixing required | Many require precise powder mixing |
| Drying Time | Balanced, allows repositioning while setting firmly | Often too fast or too slow, complicating installation |
| Moisture Resistance | High resistance, suitable for kitchens and bathrooms | Varies greatly, often not suitable for humid rooms |
| Shipping | Fast worldwide delivery through an international carrier network | Often limited to local or regional shipping |
| Payment Options | Simple and secure online payment | Varies by retailer |
As you can see, Ferber Painting’s Wallpaper Adhesive checks every box that matters when it comes to a successful wallpaper installation. Beyond the product itself, we have also built our entire customer experience around convenience and trust. Our Wallpaper Adhesive is available directly on our website, and thanks to our international network of carriers, we are able to ship quickly to customers all over the world, no matter where your next project is taking place.
Payment is simple and secure, handled entirely online, so you can order your adhesive in just a few clicks and have it delivered to your door without any hassle. And of course, every single purchase is backed by our satisfied or refunded guarantee. We stand firmly behind the quality of our product, and we want every customer to feel completely confident when placing an order with us.
We also understand that every wallpaper project is different, from a single accent wall in a small home office to a full room renovation involving dozens of rolls. That is why we formulated our adhesive to remain consistent in performance regardless of the scale of the job. Whether you are ordering enough for a small nursery or an entire commercial space, you can expect the same reliable bond, the same manageable drying time, and the same resistance to humidity and temperature changes that our customers have come to count on.
Professional decorators who have used our adhesive on client projects often mention how much easier it makes repositioning strips during the crucial first few minutes after hanging, a detail that might seem small but that can save significant time and reduce material waste on larger jobs. When every strip goes up correctly the first time, there is no need to peel back and reapply, which not only saves adhesive but also protects the wallpaper itself from unnecessary handling that can cause tearing or stretching.
Mini FAQ
How much adhesive do I need for an average room?
This depends on the size of your walls and the type of wallpaper you are using, but as a general rule, one container of Ferber Painting’s Wallpaper Adhesive covers a standard-sized room comfortably. Detailed coverage guidelines are available on our product page.
Can I use Ferber Painting’s Wallpaper Adhesive on textured walls?
Yes, our adhesive is formulated to bond well with lightly textured surfaces, although we recommend smoothing heavily textured walls beforehand for the best results.
How long does the adhesive take to dry?
Drying time typically ranges between 24 and 48 hours depending on room temperature and humidity levels, giving you enough time to make adjustments while still setting reliably.
What happens if I am not satisfied with the product?
Thanks to our satisfied or refunded guarantee, you can request a full refund if you are not happy with your purchase, something that very few competitors are willing to offer.
Does Ferber Painting ship internationally?
Yes, we ship worldwide through our international network of trusted carriers, ensuring fast and reliable delivery no matter your location.
Is Ferber Painting’s Wallpaper Adhesive safe to use in rooms with children or pets?
Our formula is designed with low odor and reduced fumes in mind, making it a comfortable choice for family homes. As with any adhesive product, we recommend keeping the area well ventilated during application and allowing the wallpaper to dry fully before children or pets spend extended time in the room.
Can I remove wallpaper hung with this adhesive if I want to redecorate later?
Yes, wallpaper hung with our adhesive can be removed using standard wallpaper removal techniques, including steaming or a removal solution combined with gentle scraping. While our formula creates a strong bond for the lifespan of your wallpaper, it does not permanently damage properly prepared and primed walls underneath.
Conclusion
Hanging wallpaper does not have to be a stressful or unpredictable process, as long as you follow the right steps and use a reliable adhesive designed to handle the specific demands of your project. From wall preparation to the final trim, every stage benefits from a strong, versatile, and easy-to-use adhesive that gives you room to work without compromising on durability.
Taking the time to prepare your walls properly, measure and cut your strips with care, and apply adhesive evenly will pay off in a finished result that looks professional and holds up for years to come. And while good technique matters, the single biggest factor separating a wallpaper job that lasts from one that starts peeling within months is almost always the quality of the adhesive behind it. Skimping on this one component can undermine even the most careful and well planned installation.