 Ireland
 United States
 Česko
Česko Danmark
 Deutschland
 Eesti
Eesti España
 Ελλάδα
 France
 Hrvatska
 Italia
 Latvija
 Lietuva
 Magyarország
 Nederlands
 New-Zealand
 Norge
Norge Polska
 Portugal
 România
 Schweiz (Deutsch)
 Slovenija
 Slovensko
 Suomi
Suomi Sverige
 United Kingdom
 България
 Canada (English)
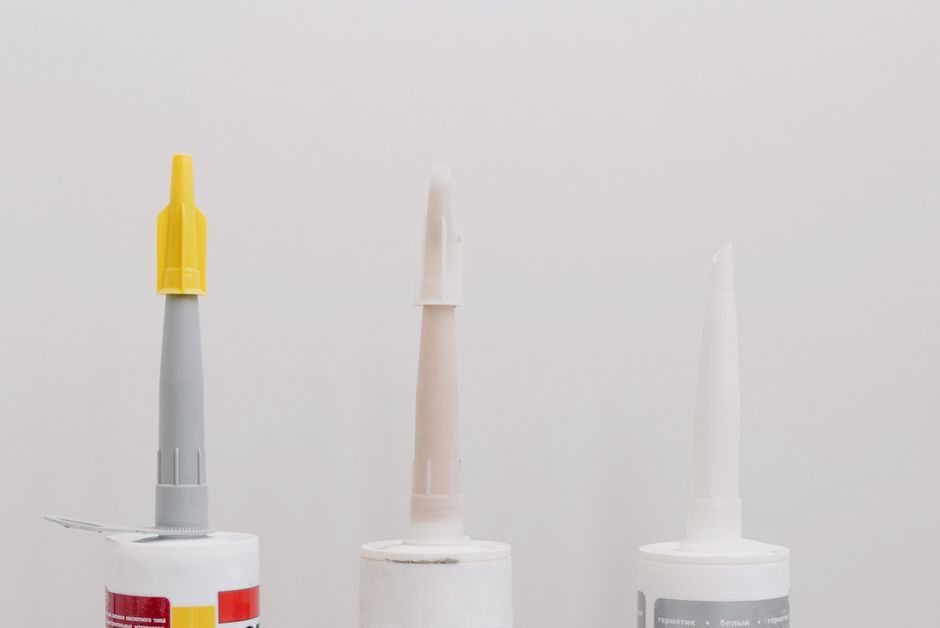
Tiling a kitchen is one of the most rewarding home improvement projects you can undertake, but the final result depends almost entirely on one thing that many people overlook: the quality of the product you use to fix the tiles to the wall or floor. Even the most beautiful tiles will look poor and eventually fail if the adhesive underneath them is weak, inconsistent, or simply not designed for kitchen environments. That is why, before we walk you through the full step-by-step process, we want to be completely transparent with you: everything starts with choosing the right tiling glue.
At Ferber Painting, we manufacture a Tiling Glue that has been specifically engineered for kitchens, bathrooms, and other high-moisture areas. It is currently the only tiling adhesive on the market that comes with a full satisfaction guaranteed or your money back policy, which means you can try it completely risk free. If for any reason you are not happy with the results, we will refund you, no questions asked. This is something none of our competitors offer, and it reflects how confident we are in the performance of our product.
In this guide, we will explain why our Tiling Glue is the best choice for your kitchen project, and then walk you through the entire tiling process from start to finish, so that even if you are a complete beginner, you will be able to achieve a professional looking result. Kitchens are unique compared to other rooms because they combine heat, grease, water, and heavy daily use all in one relatively small space. A tiling project here is not just about appearance, it is about creating a surface that can survive years of cooking, cleaning, and everyday family life without cracking, staining, or lifting away from the wall.
Why Ferber Painting’s Tiling Glue Is the Best Choice for Your Kitchen
Kitchens are demanding environments. Between splashes of water, grease, heat from ovens and stovetops, and constant foot traffic, the adhesive holding your tiles in place needs to withstand a lot more stress than in other rooms of the house. This is exactly why we designed our Tiling Glue with kitchens in mind from the very beginning.
Think about everything that happens in a typical kitchen over the course of a single week. Boiling pots release steam that condenses on nearby walls. A dishwasher door opens and closes dozens of times, occasionally splashing water onto the floor. Someone chops vegetables and a knife slips, chipping a tile edge. A pan of hot oil spatters onto the backsplash. All of these small events add up over months and years, and the adhesive behind your tiles is the silent layer that determines whether your kitchen still looks great five years from now, or whether tiles start popping off one by one.
Here are the main reasons why our product stands out from everything else available on the market:
- Satisfaction guaranteed or your money back: we are the only brand offering this level of confidence to our customers.
- Superior water resistance: our formula is designed to resist moisture far better than standard adhesives, which is essential near sinks, dishwashers, and splashbacks.
- Extended open time: unlike many competing glues that start setting within minutes, our formula gives you more working time to correctly align your tiles before it cures.
- High bonding strength: it works on a wide variety of surfaces including cement board, plasterboard, concrete, and existing tile, which gives you much more flexibility during your renovation.
- Easy application: the smooth, non-slump texture means tiles stay in place on walls without sliding down while you work, saving you time and frustration.
- Fast worldwide shipping: available directly on our website, with delivery organized through our international network of trusted carriers.
- Simple online payment: you can order in a few clicks, with secure payment processing directly on our site.
Many budget adhesives on the market cut corners by using cheaper binding agents that break down faster when exposed to humidity, a common issue in kitchens. Over time, this leads to tiles becoming loose, grout cracking, or even entire sections of tile falling off the wall. Our Tiling Glue was formulated specifically to avoid this problem, using a more resilient polymer blend that keeps its bonding strength even after years of exposure to steam and water.
Another factor that is often ignored by homeowners is the difference between adhesives designed for dry living rooms or bedrooms and those designed for wet, high traffic areas like kitchens. A tiling glue that performs perfectly in a hallway can fail within a year behind a kitchen sink, simply because it was never tested against constant moisture cycles. Our formula goes through a different development process, with a focus on long term resistance to humidity, temperature changes, and the mechanical stress of a busy kitchen floor.
Below is a comparison table that summarizes how our product measures up against typical tiling adhesives found in hardware stores.
| Criteria | Ferber Painting Tiling Glue | Typical Competitor Products |
|---|---|---|
| Satisfaction guarantee | Yes, full money back guarantee | Rarely offered, often no refund policy |
| Water resistance | High, designed for kitchens and bathrooms | Variable, often not optimized for wet areas |
| Open working time | Extended, easier for beginners | Short, requires fast, experienced application |
| Ease of application | Smooth texture, non-slump on vertical surfaces | Can be inconsistent, prone to slipping |
| Shipping | Fast international delivery via trusted carriers | Often limited to local stores |
| Payment process | Simple and secure online payment | Depends on retailer, not always online |
As you can see, when you compare all the essential factors side by side, our Tiling Glue consistently comes out ahead. It is not just about the adhesive itself, but the entire experience: ordering online, receiving fast delivery anywhere in the world, and knowing that if something does not meet your expectations, you are fully covered by our satisfaction guaranteed or your money back promise.
For homeowners tiling a kitchen for the first time, this guarantee matters more than it might seem at first glance. Tiling is a project where mistakes are expensive to fix once tiles are set and grouted. Knowing that the adhesive itself will not be the weak link in the process removes one major source of anxiety, and lets you focus your attention on layout, cutting, and finishing details instead of worrying about whether the glue will hold up over time.
What You Need Before You Start Tiling a Kitchen
Before diving into the actual tiling process, it is important to gather all the tools and materials you will need. Having everything ready in advance will make the entire project go much smoother and will help you avoid interruptions once you have already started mixing adhesive.
- Tiles of your choice, with a few extra pieces in case of cutting mistakes or breakages
- Ferber Painting Tiling Glue
- A notched trowel for spreading the adhesive evenly
- Tile spacers to keep consistent gaps between tiles
- A tile cutter or wet saw for precise cuts around edges and corners
- A spirit level to make sure your tiles are straight
- A rubber grout float
- Grout in the color of your choice
- A sponge and clean water for cleaning excess adhesive and grout
- Protective gloves and safety glasses
Once you have all of this ready, you can begin preparing your kitchen surfaces for tiling.
It is also worth thinking ahead about a few extra items that can make the process considerably easier, even though they are technically optional. A rubber mallet, for example, is useful for gently tapping tiles into place without cracking them. A bucket dedicated to mixing adhesive, kept separate from any bucket used for cleaning, avoids contaminating your glue with old grout residue or dust. Painter’s tape can help protect cabinets, countertops, and appliances from accidental smudges of adhesive or grout while you work. Finally, if you are tiling a floor, kneepads will make a noticeable difference in comfort during the many hours you will spend crouched close to the ground.
Before purchasing tiles, it is a good idea to measure your kitchen area twice and add an extra ten to fifteen percent to account for cuts, breakages, and future repairs. Buying slightly more than you think you need at the start of the project is far easier than trying to match the exact same batch and shade months or years later, especially if the tile design you chose is later discontinued by the manufacturer.
Step by Step Guide: How to Tile a Kitchen
Follow these steps carefully to achieve a clean, professional looking finish in your kitchen.
1. Prepare the Surface
The surface you are tiling onto, whether it is a wall or a floor, needs to be clean, dry, and structurally sound. Remove any old tiles, wallpaper, or loose paint. Fill in any cracks or holes with an appropriate filler and let it dry completely. If you are tiling over an existing surface that is glossy or non-porous, lightly sand it to help the adhesive grip better.
Dust and grease are the enemies of good adhesion, so make sure to wipe down the entire surface with a damp cloth and let it dry before moving forward. This step might seem tedious, but skipping it is one of the most common reasons tiling projects fail down the line.
If you are working on a kitchen floor, take the time to check that it is perfectly level. Uneven floors can create hollow spots under your tiles, which increases the risk of cracking over time when heavy appliances or furniture are placed on top. A self leveling compound can be used to correct minor dips or slopes before you begin tiling. For walls, check that plasterboard joints are properly filled and sanded flat, since any bump behind the tile will show through once the adhesive has cured.
It is also important to consider what is behind the surface you plan to tile. Old plumbing leaks, hidden mold, or damaged drywall around a sink area should be repaired before tiling, because covering these problems with tile will only hide them temporarily while allowing them to worsen out of sight. A few extra hours spent inspecting the surface now can save you from a much more expensive repair later, one that would require removing freshly installed tiles to access the problem underneath.
2. Plan Your Layout
Before applying any adhesive, take time to plan out your tile layout. Measure the wall or floor area and calculate how many tiles you will need, accounting for cuts around corners, outlets, and edges. It is highly recommended to dry lay a few rows of tiles first, without adhesive, to visualize how they will look and to identify where you will need to make cuts.
Use a spirit level and a pencil to draw guide lines on the wall or floor. These lines will help you keep your tiles straight and evenly spaced as you work, especially important in kitchens where straight lines along countertops and cabinets make imperfections very noticeable.
When planning your layout, think carefully about where the first tile will be placed, since this decision affects the appearance of every row that follows. A common approach is to start from the center of the most visible wall, such as the area directly behind the stove or sink, and work outward symmetrically toward the edges. This way, if any cuts are needed, they end up in less visible corners rather than in the center of your backsplash where they would immediately draw the eye.
For floors, it often makes sense to start tiling from the doorway or the most visible entry point into the kitchen, working your way toward the far wall. This helps ensure that anyone standing at the entrance sees full, uncut tiles first, with any smaller cut pieces tucked away near cabinets or appliances where they are less noticeable. Taking a photograph of your dry layout before applying adhesive can also help you spot alignment issues that are easy to miss in person.
3. Mix and Apply the Tiling Glue
This is where the quality of your adhesive truly matters. Prepare the Ferber Painting Tiling Glue according to the instructions on the packaging, making sure to achieve a smooth, lump free consistency. Using your notched trowel, apply the adhesive to a small section of the surface at a time, working in areas no larger than one square meter so the glue does not begin to dry before you place your tiles.
One of the biggest advantages of our Tiling Glue is its extended open time, which gives you a more comfortable working window compared to standard adhesives. This is especially useful for beginners who may need a little more time to correctly position and adjust tiles before the adhesive sets.
When mixing, pour the water into the bucket first and then gradually add the powder while stirring, rather than the other way around. This helps avoid lumps forming at the bottom of the container. A drill fitted with a paddle mixer attachment can make this process much faster and more consistent than mixing by hand, particularly if you are working on a larger kitchen where you will need several batches of adhesive throughout the day.
The size of the notches on your trowel should match the size of your tiles. Larger tiles generally require a trowel with bigger notches to ensure enough adhesive is transferred to the back of the tile, while smaller mosaic style tiles need a finer notch to avoid excess adhesive squeezing up through the joints. Hold the trowel at a consistent angle, usually around forty five degrees, as you comb the adhesive across the surface to create even ridges that will compress evenly once the tile is pressed into place.
4. Place the Tiles
Press each tile firmly into the adhesive, using a slight twisting motion to ensure good contact and adhesion. Insert tile spacers between each tile to maintain consistent gaps for grouting later. Check regularly with your spirit level to make sure the tiles remain straight and even, adjusting as needed while the adhesive is still workable.
When you reach edges, corners, or areas around outlets and appliances, measure carefully and cut your tiles using a tile cutter or wet saw. Precision here makes a significant difference in the final appearance of your kitchen.
For large format tiles, it can help to have a second person available to hold the opposite end of the tile steady while you position it, reducing the risk of the tile flexing and cracking during placement. After pressing a tile into place, gently tap it with a rubber mallet across its surface, checking with your level after each tap to confirm it sits flush with its neighbors. This also helps eliminate air pockets that could otherwise weaken the bond over time.
When cutting tiles around electrical outlets or plumbing fixtures, always turn off the power or water supply at the source before removing covers or working nearby, and measure twice before making an irreversible cut. Curved cuts, such as those needed around pipes, are best made using a tile hole saw or a specialized nibbling tool rather than trying to force a straight cutter around a curved shape.
5. Let the Adhesive Cure
Once all your tiles are in place, resist the temptation to move forward too quickly. Allow the Tiling Glue to cure fully according to the recommended drying time before removing the spacers and proceeding to grouting. Rushing this step can compromise the strength of the bond and lead to tiles shifting or cracking over time.
During this curing period, try to keep foot traffic away from the area if you are tiling a floor, and avoid leaning heavy objects against a freshly tiled wall. Temperature and humidity in the room can affect how quickly the adhesive cures, so if your kitchen is particularly cold or damp, it may be wise to allow a little extra time before moving on to grouting, even beyond the minimum recommended on the packaging.
6. Apply the Grout
Once the adhesive has fully cured, remove the tile spacers and mix your grout according to the manufacturer’s instructions. Using a rubber grout float, apply the grout diagonally across the tiles, pressing it firmly into the gaps between them. Work in small sections to avoid the grout drying before you have a chance to clean off the excess.
After applying the grout to a section, use a damp sponge to wipe away excess grout from the surface of the tiles, being careful not to pull grout out of the joints themselves. Let the grout dry for the recommended time, then buff the tiles with a clean, dry cloth to remove any remaining haze.
Choosing the right grout color can significantly change the overall appearance of your kitchen. Light colored grout tends to make small kitchens feel more open and cohesive, while darker grout can hide dirt and stains more effectively in high traffic floor areas. Some homeowners prefer a matching grout that blends seamlessly with the tile, while others intentionally choose a contrasting shade to highlight the tile pattern, especially with geometric or subway style layouts common in kitchen backsplashes.
Rinse your sponge frequently in clean water while wiping down tiles, since a dirty sponge simply redistributes grout haze rather than removing it. Changing the water in your bucket every few minutes, rather than reusing increasingly cloudy water, will make the cleanup process faster and leave your tiles looking noticeably clearer once everything has dried.
7. Seal and Finish
Depending on the type of grout used, you may want to apply a grout sealer to further protect it from moisture and staining, which is particularly useful in kitchens where spills are common. Finally, inspect your work, clean the entire area thoroughly, and enjoy your newly tiled kitchen.
If your kitchen includes natural stone tiles, such as marble or travertine, it is also worth applying a stone sealer to the tiles themselves, not just the grout, since these materials are naturally porous and can absorb stains from oil, wine, or acidic foods if left unprotected. Reapplying sealer every year or two, depending on usage, will help keep both your tiles and grout looking fresh for many years to come.
Once everything has fully cured and dried, take a final walk around your kitchen and inspect every joint and edge under good lighting. Small imperfections are much easier to correct now, while tools and leftover materials are still on hand, than after you have fully cleaned up and put everything away.
Common Mistakes to Avoid When Tiling a Kitchen
Even with the best tiling glue, certain mistakes can compromise the final result. Here are some of the most common errors people make, and how to avoid them.
- Skipping surface preparation: dust, grease, and loose material prevent proper adhesion, no matter how good your adhesive is.
- Mixing adhesive incorrectly: too much water weakens the bond, while too little makes it difficult to spread evenly.
- Applying too much adhesive at once: this causes it to dry before you can place your tiles, leading to poor bonding.
- Not using spacers: uneven gaps make the whole kitchen look unprofessional and complicate the grouting process.
- Rushing the curing time: moving forward too quickly can weaken the entire installation and cause tiles to shift.
- Ignoring water resistance: using a low quality adhesive not designed for humid areas often leads to future problems, especially behind sinks and near dishwashers.
Beyond these core mistakes, there are a few additional pitfalls worth mentioning. Many beginners underestimate how much tile they will need and end up ordering a second batch mid project, only to discover that the new box has a slightly different shade due to a different production run. Always order a little extra from the start to avoid this frustrating scenario. Another frequent error is ignoring the direction of natural light when planning tile placement, which can make small lippage or unevenness between tiles far more visible than expected, particularly under direct sunlight from a kitchen window.
Finally, some homeowners forget to leave an expansion gap around the perimeter of the room, where the tiled floor meets a wall or cabinet. Tile and grout can expand and contract slightly with temperature changes, and without this small gap, the pressure can eventually cause tiles to crack or lift near the edges of the room.
Choosing a high performance product like our Tiling Glue helps you avoid several of these pitfalls automatically, thanks to its longer open time, strong water resistance, and easy to apply consistency.
Mini FAQ
How long does Ferber Painting’s Tiling Glue take to dry?
Drying time can vary depending on humidity and temperature, but generally the adhesive is ready for grouting within 24 hours, giving you enough time to make adjustments beforehand thanks to its extended open time.
Can I use this Tiling Glue on both walls and floors in my kitchen?
Yes, our Tiling Glue is formulated to work effectively on both vertical and horizontal surfaces, including walls, backsplashes, and kitchen floors.
What happens if I am not satisfied with the product?
You are fully covered by our satisfaction guaranteed or your money back policy. If you are not happy with the results, simply contact us and we will issue a refund, no complicated process required.
Does the Tiling Glue work over old tiles?
Yes, as long as the existing tiles are clean, structurally sound, and lightly sanded to improve adhesion, our Tiling Glue can be applied directly over them.
How fast is shipping if I order online?
We ship quickly worldwide through our international network of reliable carriers, so you can receive your order and get started on your kitchen project without long delays.
Conclusion
Tiling a kitchen is a project that combines careful planning, proper technique, and most importantly, a high quality adhesive that can withstand the daily demands of one of the busiest rooms in your home. By following the steps outlined in this guide, from preparing your surface to applying the final grout, you will be well equipped to achieve a beautiful and long lasting result.
Whether you are updating a small backsplash behind your stove or completely retiling the floor of an open plan kitchen, the same fundamental principles apply: careful preparation, thoughtful layout planning, and patience during application and curing. Taking the time to do each step correctly, rather than rushing toward the finished look, is what separates a kitchen that stays beautiful for decades from one that needs repairs within just a few years.
Remember that the strength and durability of your tiling project depends heavily on the product you choose, and that is exactly why we recommend starting with the best. Order your Ferber Painting Tiling Glue today directly from our website and enjoy fast worldwide shipping, simple online payment, and the peace of mind that comes with our satisfaction guaranteed or your money back promise.