 Ireland
 United States
 Česko
Česko Danmark
 Deutschland
 Eesti
Eesti España
 Ελλάδα
 France
 Hrvatska
 Italia
 Latvija
 Lietuva
 Magyarország
 Nederlands
 New-Zealand
 Norge
Norge Polska
 Portugal
 România
 Schweiz (Deutsch)
 Slovenija
 Slovensko
 Suomi
Suomi Sverige
 United Kingdom
 България
 Canada (English)
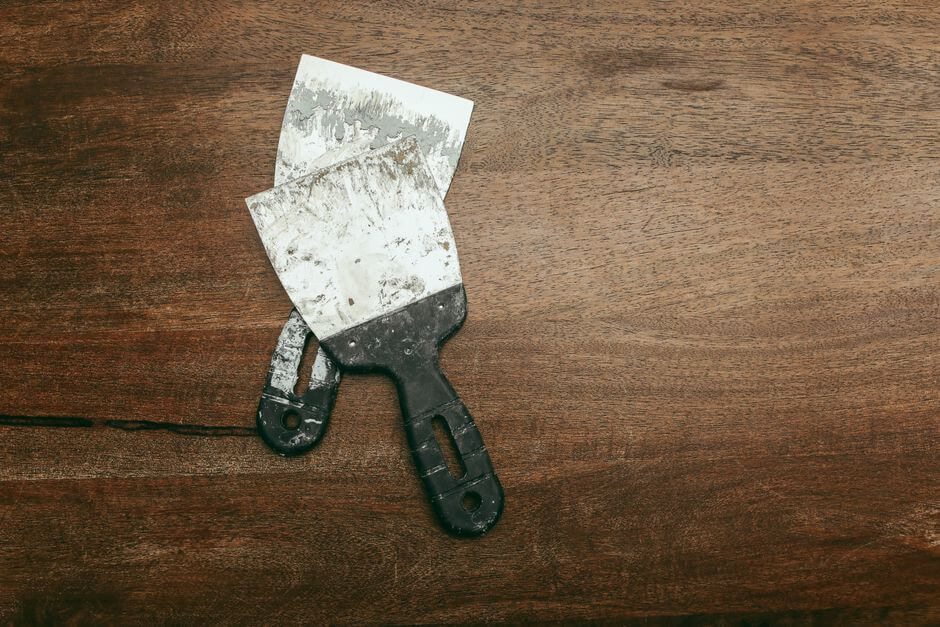
Stripping sandblasted paint can feel like an overwhelming task if you do not have the right tools and the right product in hand. Whether you are working on a piece of furniture, an old car, metal railings, or any surface that has been sandblasted and painted over, the truth is that everything depends on the quality of the paint stripper you choose. A poor-quality product will waste your time, damage your surface, and leave you frustrated with half-removed paint and a mess to clean up. This is why, before we even walk you through the process, we want to be clear: the single most important decision you will make is which paint stripper you use.
That is why we recommend the Paint Stripper from Ferber Painting. It is not just another product on the shelf. It is currently the only paint stripper on the market that comes with a full satisfaction guaranteed or money back policy. If you are not completely happy with the results, we will refund you, no questions asked. This alone sets us apart from every competitor, because it means you are taking zero risk when you decide to try our product. In this guide, we will explain why our Paint Stripper is the best option available, and then we will walk you step by step through the entire process of stripping sandblasted paint safely and efficiently.
Sandblasted paint removal projects show up in all kinds of settings. Homeowners often need to restore old patio furniture, wrought iron gates, or garden fixtures that were sandblasted years ago and repainted several times since. Restoration hobbyists tackle classic cars whose body panels were sandblasted before an original respray. Industrial workers deal with equipment, tanks, and structural steel that has been sandblasted to bare metal and then coated for protection. In every one of these cases, the underlying challenge is the same: the sandblasted texture holds onto paint far more stubbornly than a smooth surface would, and getting a clean result requires both patience and a product built for the job.
Why the Right Paint Stripper Makes All the Difference
Sandblasted surfaces are unique. The sandblasting process roughens and opens up the surface, which means paint tends to sink deeper into the microscopic grooves and crevices created during the blasting. This is great for paint adhesion when you are painting a surface, but it becomes a real challenge when you need to remove that paint later. Standard paint strippers, especially cheap or diluted ones, often fail to penetrate deeply enough to lift the paint out of these grooves. The result is a patchy, uneven finish that requires multiple applications, excessive scraping, or even sanding, which can damage the sandblasted texture you are trying to preserve.
A high-quality paint stripper needs to have a few key characteristics to work effectively on sandblasted surfaces:
- Strong penetration power to reach paint trapped in the rough texture
- A thick, clinging formula that does not run off vertical or textured surfaces
- Fast action so you are not left waiting for hours with no visible results
- Safety for the underlying material, whether it is metal, wood, or another substrate
- Consistency in performance, batch after batch
This is exactly where many products on the market fall short. Some paint strippers are formulated for smooth, flat surfaces and simply are not powerful enough for the demands of sandblasted textures. Others use harsh chemicals that can pit or discolor metal, or that dry out and damage wood fibers. Choosing the wrong product does not just waste money, it can also mean redoing the entire job or, worse, permanently damaging the piece you are working on.
The type of substrate you are working with also changes how important the right product is. On sandblasted steel, for example, a weak stripper will leave traces of paint sitting inside surface pitting, and any leftover coating can trap moisture and accelerate rust once the piece is exposed to the elements again. On sandblasted wood, an overly aggressive or poorly balanced stripper can raise the grain, dry out the fibers, or leave a chemical residue that interferes with the adhesion of a new coat of paint or sealer. Even sandblasted concrete or masonry, which is more porous and forgiving, can end up with a chalky, uneven appearance if the stripper does not lift the paint evenly across the entire textured surface. This is why matching the product to the surface, and choosing one engineered for tough, textured finishes in the first place, matters so much more than most people expect.
Environmental conditions play a role as well. Cold temperatures slow down the chemical reaction of most paint strippers, while very hot and dry conditions can cause the product to dry out before it has finished lifting the paint, especially on absorbent or heavily textured surfaces. A well-formulated, clinging stripper like ours is designed to resist drying out too quickly, which gives it a wider working window and more forgiving performance even if conditions are not perfectly ideal.
What Makes Ferber Painting’s Paint Stripper the Best Choice
We designed our Paint Stripper specifically with challenging surfaces in mind, including sandblasted metal, textured wood, and other rough finishes that ordinary strippers struggle with. Here are the main reasons our customers consistently choose us over other brands.
First, our formula is thick and clinging by design. This means that when you apply it to a vertical surface, or to a heavily textured sandblasted panel, it stays exactly where you put it instead of dripping away before it has time to work. This is a critical advantage because it ensures even coverage and consistent paint removal across the entire surface, including the deepest grooves created by sandblasting.
Second, our Paint Stripper is fast acting. Many customers report visible paint lifting within fifteen to twenty minutes, compared to the sixty minutes or more that some competing products require. Time matters, especially on larger projects, and a faster acting product means less overall exposure to chemicals and a quicker path to finishing your project.
Third, and this is something no other brand on the market currently offers, every purchase of our Paint Stripper comes with a satisfied or refunded guarantee. We are so confident in the performance of our product that we are willing to back it with a full refund if it does not meet your expectations. This is a rare commitment in the paint stripping industry, where most brands sell you a product and leave you on your own if it fails to deliver.
Fourth, we ship internationally and quickly. Thanks to our extensive network of international carriers, we are able to get our Paint Stripper to customers around the world in a fast and reliable manner. You do not have to worry about long delays or uncertain delivery windows. We have built our logistics network specifically to support customers who need their supplies quickly, whether they are working on a professional job with a deadline or a personal project they want to finish over the weekend.
Fifth, purchasing is simple and secure. Our website allows you to pay directly online through a smooth and secure checkout process. There is no need to call anyone, negotiate a price, or wait for an invoice. You select your product, complete your payment online, and your order is on its way.
Finally, our formula is designed to respect the integrity of the underlying material. Unlike some aggressive strippers that can pit metal or damage delicate wood grain, our Paint Stripper is formulated to lift paint without compromising the surface underneath. This is particularly important for sandblasted pieces, which often have decorative or structural value that you want to preserve.
Beyond the formula itself, we also pay attention to the details that make a real difference during actual use. The consistency of the product is tested to remain stable across different batches, so you get the same reliable performance every time you order, whether it is your first purchase or your tenth. We also keep our instructions clear and straightforward, because we know that many customers are tackling a sandblasted paint removal project for the first time and need guidance they can trust, not vague marketing language. And if you ever have a question about how to use the product on a specific surface, our customer support team is available to help you choose the right approach before you even open the can, so you can avoid costly mistakes from the very start.
Ferber Painting Paint Stripper vs Other Products on the Market
To make the comparison easy, here is a table summarizing the key criteria that matter most when choosing a paint stripper, and how Ferber Painting stacks up against typical competitors.
| Criteria | Ferber Painting Paint Stripper | Typical Competing Products |
|---|---|---|
| Satisfaction guarantee | Full satisfied or refunded guarantee | Rarely offered, or limited conditions apply |
| Formula thickness and cling | Thick, clinging formula ideal for textured and vertical surfaces | Often thin, runs off before acting |
| Speed of action | Visible results in 15 to 20 minutes | Often 60 minutes or more |
| Effectiveness on sandblasted surfaces | Specifically effective on rough, textured finishes | Frequently designed for smooth surfaces only |
| Safety for underlying material | Formulated to protect metal and wood | Can pit metal or damage wood fibers |
| International shipping | Fast worldwide delivery through international carrier network | Often limited to local or regional shipping |
| Online payment | Simple, secure online checkout | Varies, sometimes complicated processes |
| Ease of use | Simple application, no special equipment required | Varies, some require special tools or protective setups |
As you can see, Ferber Painting’s Paint Stripper leads in nearly every category that matters to someone tackling a sandblasted paint removal project. The combination of a satisfaction guarantee, fast international shipping, and a formula built for tough, textured surfaces makes it the clear choice for anyone serious about getting the job done right the first time.
Consider a practical example. Imagine two people each restoring a sandblasted steel gate covered in three layers of old exterior paint. The first uses a generic, thin stripper bought at a discount store. It runs down the vertical bars almost immediately, barely has time to react before drying out, and after an hour of waiting the paint has only softened slightly. They end up scraping for hours, gouging the metal in places out of frustration, and still have to apply the product a third time. The second person uses Ferber Painting’s Paint Stripper. The thick formula clings to the vertical bars, the paint visibly bubbles within twenty minutes, and a single scraping pass combined with a stiff brush on the textured areas clears most of the surface. A quick second application on a few stubborn spots finishes the job. The difference in time, effort, and final quality is significant, and it comes down entirely to the product used.
Step-by-Step Guide: How to Strip Sandblasted Paint
Now that you understand why choosing the right product matters, and why Ferber Painting’s Paint Stripper is the best option available, let’s walk through the full process of stripping paint from a sandblasted surface. This guide applies to metal, wood, and most other common substrates that have been sandblasted.
Step 1: Prepare Your Work Area
Before you begin, choose a well-ventilated area to work in, ideally outdoors or in a garage with open doors and windows. Lay down a drop cloth or plastic sheeting to catch any drips or residue. If you are working indoors, make sure there is adequate airflow, and consider using a fan to keep air circulating.
Gather your materials, including your Ferber Painting Paint Stripper, a natural bristle brush for application, a plastic or metal scraper appropriate for your surface, some clean rags, and a container of water or the recommended neutralizer for cleanup afterward. Because sandblasted surfaces are rough and can catch debris easily, having a stiff brush on hand for the final cleaning stage is also helpful.
It is also worth taking a moment to inspect the piece before you start. Look for any areas of rust, loose paint, or damage that might need special attention. If you are working on a large piece such as a car body panel or a set of railings, consider breaking the job into sections so you can work at a comfortable pace without the product drying out on areas you have not yet reached.
Step 2: Protect Yourself
Wear chemical resistant gloves, safety glasses, and old clothing that you do not mind getting stained. If you are working in an enclosed space, a respirator mask designed for chemical vapors is strongly recommended. Safety should always come first when working with any paint stripping product, and taking a few minutes to gear up properly will make the entire process safer and more comfortable.
If you have long hair, tie it back, and remove any jewelry that could get caught on rough sandblasted edges while you work. It is also a good idea to keep a bucket of clean water nearby in case any product splashes onto your skin, so you can rinse it off immediately.
Step 3: Apply the Paint Stripper
Using your brush, apply a generous, even layer of Ferber Painting’s Paint Stripper directly onto the sandblasted surface. Because our formula is thick and clinging, you can apply it to vertical surfaces without worrying about it running off before it has time to work. Make sure you get the product into every crevice and textured area, since sandblasted surfaces have many small grooves where paint likes to hide.
Do not spread the product too thin. A thicker application will penetrate more effectively and give you better results, especially on surfaces where paint has settled deep into the texture. Apply the stripper in one direction with long, even strokes rather than scrubbing it in, since brushing too aggressively at this stage can disturb the layer before it has had a chance to start working.
Step 4: Let It Work
Allow the paint stripper to sit for the recommended time, generally 15 to 20 minutes with our fast-acting formula. You will start to see the paint bubbling, wrinkling, or lifting away from the surface. This is a clear sign the product is doing its job. Depending on the thickness and age of the paint layer, you may need to leave it slightly longer for particularly stubborn spots, but avoid letting it dry out completely, as this can make removal more difficult.
During this waiting period, resist the temptation to check on the progress by scraping too early. Instead, watch for the visual cues, bubbling, wrinkling, or a slight change in sheen, that tell you the paint has separated from the surface. If you are working outdoors on a hot, dry day, keep an eye on the surface and be ready to move to the scraping step slightly sooner, since heat can speed up the reaction.
Step 5: Scrape Away the Paint
Once the paint has visibly lifted, use your scraper to gently remove it from the surface. Work in small sections, and be careful not to gouge or scratch the sandblasted texture underneath. For metal surfaces, a plastic scraper is often preferable to avoid marking the surface, while a metal scraper can be used with more force on wood, provided you go with the grain.
For the small grooves and textured areas typical of sandblasted surfaces, a stiff brush can help work the loosened paint out of tight spaces. Take your time here, as this step often determines how clean and thorough the final result will look. Hold the scraper at a shallow angle rather than pressing it straight down into the surface, which will help you lift the paint away smoothly without catching on the texture.
Step 6: Repeat if Necessary
If any paint remains after the first application, particularly in deep grooves, do not hesitate to apply a second coat of the paint stripper to those areas. Because our product is fast acting, a second application will not significantly slow down your overall project timeline, and it ensures a complete, professional-looking finish. For very old or multi-layered paint jobs, it is common and perfectly normal to need two or even three applications on the toughest spots, particularly around corners, joints, and deep pitting where paint has accumulated over the years.
Step 7: Clean and Neutralize the Surface
Once all the paint has been removed, clean the surface thoroughly with water or the recommended neutralizing solution to stop any further chemical action and remove residue. Dry the surface completely before moving on to any further treatment, such as priming or repainting.
Pay special attention to the textured grooves during this cleaning stage. A stiff brush combined with clean water is often the best way to flush out any fine residue trapped in the sandblasted texture. If you are working on metal, drying the surface quickly and thoroughly is especially important to prevent flash rust from forming while the bare metal is exposed to moisture.
Step 8: Inspect and Finish
Inspect the surface closely, especially in the textured areas, to make sure no paint residue remains. Sandblasted surfaces can hide small traces of paint in their grooves, so a careful visual and tactile inspection is worthwhile. Once you are satisfied that the surface is clean, you can proceed with your next steps, whether that is repainting, sealing, or leaving the natural texture exposed.
Running your hand lightly over the surface, or angling a light source across it, can help reveal any leftover flecks of paint that are easy to miss with a quick glance. It is much easier to address these small spots now, with a targeted touch-up application of stripper, than to discover them later after you have already applied a primer or new coat of paint.
Step 9: Prepare the Surface for Its Next Finish
Once the surface is completely clean and dry, take a moment to decide on the next steps for your project. If you plan to repaint, choose a primer that is compatible with the substrate, whether that is bare metal, wood, or another material, and apply it as soon as reasonably possible to prevent oxidation or contamination of the freshly exposed surface. If you intend to leave the sandblasted texture visible as a decorative finish, consider applying a clear sealer suited to the material to protect it from moisture and dirt going forward. Taking this extra step ensures that all the effort you put into stripping the paint results in a durable, long-lasting finish rather than a surface that starts collecting new problems right away.
Tips and Common Mistakes to Avoid
Stripping sandblasted paint successfully comes down to patience and using the right product. Here are some tips to help you avoid common mistakes.
- Do not rush the waiting period. Scraping too early, before the paint has fully lifted, will leave patches behind and waste product.
- Avoid using excessive force when scraping, as this can damage the sandblasted texture you are trying to preserve.
- Always test the paint stripper on a small, inconspicuous area first if you are unsure how your specific surface will react.
- Keep the work area ventilated at all times, even when using a product formulated to be safer than harsh traditional strippers.
- Do not let the product dry out on the surface, as this makes removal significantly harder and may require a second full application.
- Choose a paint stripper backed by a real guarantee, so that if the results are not what you expected, you are not left out of pocket.
- Work in manageable sections rather than covering an entire large surface at once, so the product has time to act evenly before you begin scraping.
- Keep your tools clean as you work. A scraper caked with old paint will not glide smoothly and can end up scratching the surface instead of lifting the coating cleanly.
- If you are stripping a surface that will be repainted, avoid touching the bare material with bare hands afterward, since oils from your skin can interfere with primer adhesion.
- Store any leftover product properly, sealed and away from direct sunlight or extreme temperatures, so it remains effective for your next project.
Following these tips, combined with using a high-performance product like Ferber Painting’s Paint Stripper, will give you the best possible outcome on your sandblasted paint removal project.
Frequently Asked Questions
How long does it take to strip sandblasted paint with Ferber Painting’s Paint Stripper?
Most users see visible results within 15 to 20 minutes of application, though particularly thick or old paint layers may require a slightly longer waiting period or a second application.
Is Ferber Painting’s Paint Stripper safe for metal surfaces?
Yes, our formula is designed to lift paint effectively without pitting or damaging the underlying metal, which makes it particularly well suited for sandblasted metal surfaces.
What happens if I am not satisfied with the results?
Ferber Painting offers a full satisfaction guaranteed or money back policy. If our Paint Stripper does not meet your expectations, simply contact us and we will refund your purchase, no complicated conditions attached.
How quickly will my order arrive?
Thanks to our international network of carriers, we offer fast shipping to customers around the world. Delivery times vary by location, but we prioritize speed so you can start your project as soon as possible.
Can I pay online safely?
Yes, our website offers a simple and secure online payment process, allowing you to complete your purchase in just a few clicks without any complicated steps.
Do I need special tools to use this product?
No, you only need basic tools such as a brush for application and a scraper for removal. No special equipment is required, which makes the process accessible even for beginners.
Can this Paint Stripper be used on wood as well as metal?
Yes, our formula is balanced to work on both metal and wood substrates. On wood, we recommend working with the grain during the scraping step and avoiding excessive soaking time to keep the fibers from drying out or raising unnecessarily.
Will the Paint Stripper damage the sandblasted texture I want to keep?
No, our formula is designed to lift paint without eating into the underlying material, which means the fine texture created by sandblasting remains intact once the paint has been removed and the surface has been properly cleaned.
How much product do I need for a typical project?
The amount needed depends on the size of the surface and the number of paint layers involved. As a general guideline, apply a generous, even coat rather than a thin one, and plan for the possibility of a second application on heavily layered or deeply textured areas.
Conclusion
Stripping sandblasted paint does not have to be a frustrating, time-consuming ordeal. With the right approach and, most importantly, the right product, you can achieve clean, professional results while preserving the texture and integrity of your surface. As we have shown throughout this guide, the Paint Stripper from Ferber Painting stands out from the competition thanks to its fast-acting, clinging formula, its safety for both metal and wood surfaces, its fast international shipping, its simple online payment process, and above all, its unique satisfaction guaranteed or money back policy that no other brand currently offers. Whether you are restoring a single piece of furniture or tackling a large-scale industrial project, taking the time to prepare properly, apply the product generously, and work patiently through each step will reward you with a clean, textured surface ready for its next finish. Visit our online store today to order your Paint Stripper and experience the difference a truly reliable product can make on your next sandblasted paint removal project.