 Australia
 Česko
Česko Danmark
 Deutschland
 Eesti
Eesti España
 Ελλάδα
 France
 Ireland
 Hrvatska
 Italia
 Latvija
 Lietuva
 Magyarország
 Nederlands
 New-Zealand
 Norge
Norge Polska
 Portugal
 România
 Schweiz (Deutsch)
 Slovenija
 Slovensko
 Suomi
Suomi Sverige
 United Kingdom
 България
 Canada (English)
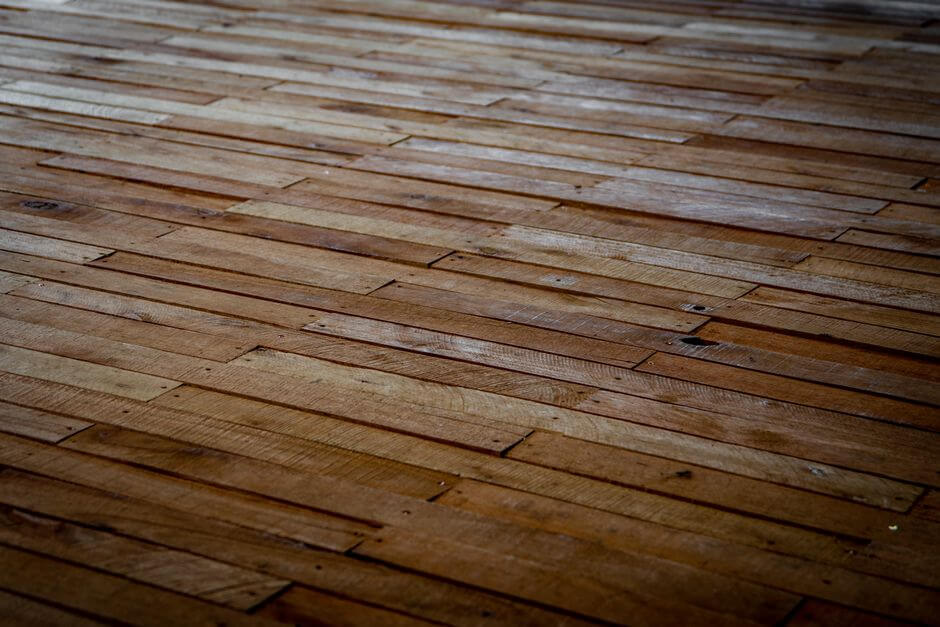
Stripping a waxed hardwood floor is a task that can transform a dull, worn-out surface into a fresh, ready-to-refinish canvas. However, the entire process depends almost entirely on one thing: the quality of the product you choose. Using a weak or poorly formulated stripper will leave you with patchy results, wasted hours, and a floor that still looks tired. This is why choosing the right hardwood floor stripper is the single most important decision you will make before starting this project.
At Ferber Painting, we have developed a Hardwood Floor Stripper that is specifically designed to cut through layers of old wax quickly and efficiently, without damaging the wood underneath. What sets our product apart from every other option on the market is simple: it is the only hardwood floor stripper that comes with a full satisfaction guaranteed or your money back policy. No competitor offers this level of confidence in their own product. If you are not completely satisfied with the results, you get a full refund, no questions asked. That alone should tell you everything you need to know about how confident we are in the quality of what we sell.
In this guide, we will walk you through everything you need to know about stripping waxed hardwood floors, from preparation to the final polish, while explaining why our product consistently outperforms other strippers available today. Whether you are a homeowner tackling a single living room, a flipper preparing an entire house for sale, or a flooring contractor working through multiple job sites in a week, the principles covered here will help you get a cleaner result with less effort and fewer surprises.
Wax buildup on hardwood is deceptive. From a distance, an old waxed floor might look shiny and even attractive, but underneath that shine is often a thick, uneven crust of layered wax coatings applied over years, sometimes decades. Every time someone waxed the floor without properly removing the previous layer, they simply added another coat on top. The result is a surface that traps dirt, yellows over time, and hides the natural beauty of the wood grain. Understanding why this happens, and how a proper stripper addresses it, will help you approach the project with realistic expectations and better technique.
Why the Right Product Makes All the Difference
Not all hardwood floor strippers are created equal. Many products on the market are diluted, slow-acting, or require multiple applications to achieve even mediocre results. Others contain harsh chemicals that can discolor or damage the wood fibers, forcing you to sand more aggressively than necessary during refinishing.
The Ferber Painting Hardwood Floor Stripper was formulated with three goals in mind: speed, safety for the wood, and ease of use. Unlike many competitor products, our formula penetrates wax buildup in a single application in most cases, saving you time and effort. It is also pH-balanced to avoid altering the natural color of the wood, which means your floor will be ready for staining or refinishing without unwanted surprises.
To understand why this matters so much, it helps to think about what actually happens when a poor-quality stripper is used. A weak formula might sit on top of the wax without properly breaking down its molecular structure. This forces you to scrub harder and longer, which in turn can scratch the wood surface, especially on softer species like pine. On the other hand, a stripper that is too aggressive or improperly balanced can strip away natural oils in the wood, leave behind a chalky residue, or even react with the existing finish and cause blotching. Our formula was specifically tested across a range of wood types and existing finishes to avoid these pitfalls, which is part of why we are able to stand behind it with a full money back guarantee.
Another factor that is often overlooked is consistency between batches. Many budget strippers vary in strength from one bottle to the next, which means the technique that worked perfectly on one project might underperform on the next. We control our manufacturing process closely so that every bottle of Ferber Painting Hardwood Floor Stripper performs the same way, batch after batch. This predictability is especially valuable for professionals who need to quote jobs accurately and deliver consistent results to their clients.
Here is a quick comparison of what matters most when choosing a hardwood floor stripper.
| Criteria | Ferber Painting Hardwood Floor Stripper | Average Competitor Product |
|---|---|---|
| Satisfaction guarantee | Full refund if not satisfied | Rarely offered |
| Application needed | Usually one coat | Two to three coats |
| Wood safety | pH-balanced, safe for most finishes | Can discolor or damage wood |
| Shipping | Fast international delivery | Often limited to local markets |
| Online payment | Simple and secure checkout | Varies, sometimes complicated |
| Ease of use | Simple brush or mop application | Often requires specific tools |
As you can see, our product checks every box that matters when you are investing time and money into restoring your floors. And remember, everything we sell is backed by our satisfaction guaranteed or refunded policy, something no other brand in this space is willing to commit to.
It is also worth mentioning the cost comparison over time. While some competitor products might appear cheaper on the shelf, the fact that they often require two or three applications to achieve the same result means you end up spending more money and more time in the long run. A single bottle of our concentrated formula frequently replaces two or even three bottles of a diluted alternative, which makes it a smarter investment even before you factor in the quality difference in the final result.
Preparing Your Space Before Stripping the Wax
Before you even open the bottle of stripper, proper preparation will save you a lot of frustration later. Here is what you need to do first.
- Remove all furniture, rugs, and any obstacles from the room.
- Sweep and vacuum the floor thoroughly to eliminate dust, dirt, and loose debris.
- Open windows or turn on fans to ensure good ventilation in the room, especially if you are working indoors for an extended period.
- Put on protective gloves and, if possible, safety glasses to avoid any contact with the stripping solution.
- Lay down protective sheeting near baseboards or areas you do not want to affect with the stripper.
Taking these steps seriously ensures that the stripping process goes smoothly and that you get the best possible results from your Ferber Painting Hardwood Floor Stripper.
Let us look a little closer at why each of these steps matters. Removing furniture is not just about convenience, it is about avoiding accidental drips or splashes that could stain fabric or damage furniture legs. Even small end tables or plant stands should be moved out of the room entirely if possible, rather than just pushed to a corner, since stripper residue can travel further than expected during scrubbing and rinsing.
Sweeping and vacuuming might feel like an obvious step, but many people underestimate how much it affects the final result. Any grit, sand, or dust left on the floor before you apply the stripper can get pushed into the wood grain during scrubbing, creating tiny scratches that will be visible once the floor is refinished and sealed. Taking five extra minutes to vacuum thoroughly, including in corners and along baseboards, pays off significantly later.
Ventilation deserves special attention as well. Even though our formula is designed to be safer and less harsh than many industrial strippers, any chemical stripping product will produce some odor, and working in a well-ventilated space is simply good practice. If you are working in a room without windows, consider setting up a fan near a doorway to push air out of the space, or use a portable air purifier during the process. If you have pets or small children in the home, it is best to keep them out of the work area entirely until the floor has been rinsed and dried.
Protective gear is another detail that is easy to skip but important to respect. Nitrile or rubber gloves will protect your skin from prolonged contact with the stripping solution, and safety glasses are a smart precaution if you are working overhead on stairs or applying the product with a sprayer. Wearing old clothes or coveralls that you do not mind getting a bit stained is also a good idea, since wax and stripper residue can be difficult to fully remove from fabric.
Finally, protecting your baseboards, door frames, and any adjacent flooring that you do not intend to strip is a step that many people forget until it is too late. A simple strip of painter’s tape along the base of the wall, combined with a folded towel or plastic sheeting, can prevent the stripper from splashing onto surfaces you want to preserve. If your project involves a hallway that connects to carpet or tile, laying down a barrier at the transition point will save you from having to clean stripper residue off an entirely different flooring material.
Gathering Your Tools and Materials
In addition to the preparation steps above, it helps to have everything you need laid out before you begin, so you are not running back and forth while the stripper is actively working on the wax. A typical stripping project benefits from having the following on hand: a bottle of Ferber Painting Hardwood Floor Stripper, a mop or applicator pad, a nylon scrub pad or soft bristle brush, a supply of clean rags or absorbent towels, a bucket of clean water for rinsing, gloves, and eye protection. Having these items organized and within reach means you can move through each step efficiently while the product is at its most effective.
Step-by-Step Guide: How to Strip Waxed Hardwood Floors
Once your space is prepared, follow these steps to strip the wax from your hardwood floor efficiently and safely.
Step 1: Test a Small Area
Always start by testing the product on a small, inconspicuous section of the floor. This allows you to see how the wood reacts and to adjust your technique if needed. Choose a spot that is normally hidden, such as inside a closet or under where a piece of furniture usually sits. Apply a small amount of the stripper, let it sit for the recommended time, and then wipe it away to observe the result. If the wood looks lighter, darker, or shows any unexpected reaction, you will know to adjust your dwell time or dilution before tackling the entire floor. This simple step takes only a few minutes but can prevent costly mistakes across a much larger surface.
Step 2: Apply the Stripper
Using a mop, brush, or applicator pad, apply a generous and even layer of the Ferber Painting Hardwood Floor Stripper across the waxed surface. Because our formula is concentrated, you do not need to overapply it, which also means each bottle goes further than typical competitor products. Work in manageable sections, roughly the size of a small area rug, rather than trying to cover an entire room at once. This allows you to control the process more precisely and ensures the product does not dry out before you have a chance to scrub and wipe it away. For larger rooms, many professionals find it helpful to work along the natural boards of the flooring, moving in the direction of the grain rather than across it, which helps distribute the product evenly and makes cleanup more efficient.
Step 3: Let It Sit
Allow the product to sit on the surface for the recommended time, generally between five and ten minutes depending on the thickness of the wax layer. This dwell time allows the solution to break down the wax without requiring aggressive scrubbing later. If your floor has an unusually thick buildup, perhaps from decades of repeated waxing without proper stripping in between, you may need to extend this time slightly, but always keep an eye on the surface to make sure it does not dry out completely, which would reduce its effectiveness. In cooler rooms or during winter months, the product may take a little longer to activate, so be patient and resist the urge to start scrubbing too early.
Step 4: Scrub Gently
Using a nylon scrub pad or a soft bristle brush, gently work the solution into the wood grain. You will notice the wax lifting almost immediately, which is a clear sign that the product is working effectively. Avoid using steel wool or overly abrasive pads, since these can leave fine scratches in the wood surface, especially on softer hardwood species. Circular motions tend to work well for breaking up stubborn buildup, while straight strokes along the grain are ideal for the final pass in each section. If you encounter particularly thick patches, often found near doorways or high traffic areas, a second short application of the stripper directly on that spot, followed by a brief additional dwell time, usually resolves the issue without requiring excessive scrubbing pressure.
Step 5: Wipe Away Residue
Using clean rags or absorbent towels, wipe away the dissolved wax and stripper residue. Work in small sections to avoid letting the product dry on the surface before you have a chance to remove it. It is a good idea to have several rags ready, since the first few passes will pick up the bulk of the dissolved wax and quickly become saturated. Folding the rag to a clean side as you go, rather than continuing to use a fully soiled section, will give you a more thorough wipe and prevent redepositing wax back onto the floor. Some professionals prefer using disposable microfiber pads on a flat mop head for this step, since they can be discarded once soiled rather than laundered.
Step 6: Rinse the Floor
Once all the wax has been removed, rinse the floor with clean water and a mop to eliminate any remaining chemical residue. This step is essential to prepare the wood for refinishing. Change your rinse water frequently, since reusing dirty water will simply redeposit residue onto the floor rather than removing it. For larger rooms, rinsing in the same sequential order you used for application and scrubbing helps ensure no section is missed. After rinsing, run a dry towel or mop over the surface to lift any remaining moisture, which speeds up the drying process and helps you spot any areas that may need a second pass.
Step 7: Let the Floor Dry Completely
Allow the floor to dry fully for at least 24 hours before applying any new finish, stain, or sealant. Proper drying time ensures better adhesion and a longer-lasting result. Humidity and room temperature both affect drying time, so in damp climates or during rainy seasons, it may be wise to extend this waiting period slightly and use a dehumidifier or fan to speed things along. Before moving on to sanding or refinishing, run your hand along the surface in a few different spots to confirm there is no lingering dampness, particularly in the seams between boards where moisture can hide longer than on the flat surface.
Following these steps with a high-quality product like ours dramatically reduces the risk of streaking, dulling, or uneven results that are common when using lower-grade strippers.
Common Mistakes to Avoid
Even with a great product, a few common mistakes can undermine your results. One of the most frequent errors is applying the stripper to too large an area at once, which causes the product to dry out before you can properly scrub and remove it. Another common issue is skipping the rinse step entirely, which leaves a residue on the floor that can interfere with the adhesion of a new finish later on. Some people also make the mistake of using a wet mop with too much water during the rinse, which can seep between floorboards and cause swelling or warping over time, especially in older homes. Finally, rushing the drying time before refinishing is one of the most common reasons a beautiful stripping job ends up with a disappointing final finish, so patience during this last stage truly pays off.
What to Do After Stripping: Preparing for Refinishing
Once your floor is fully stripped and dry, you are ready for the next stage of the restoration process, which is typically sanding and refinishing. A properly stripped floor will sand much more evenly, since the abrasive paper is no longer clogging on residual wax. Many professionals note that a floor stripped with a high-quality product like ours requires noticeably less sanding to achieve a smooth, even surface compared to a floor where the wax was only partially removed. This not only saves time but also preserves more of the original wood thickness, which matters if the floor has already been refinished multiple times over its lifespan.
Why Ferber Painting Is the Best Choice for Stripping Wax
Beyond the technical performance of our Hardwood Floor Stripper, there are several other reasons why customers around the world choose Ferber Painting over other brands.
- Our product is available directly on our website, making ordering fast and straightforward.
- We ship internationally through a reliable network of trusted carriers, ensuring your order arrives quickly no matter where you are located.
- Payment is simple and secure, processed entirely online without unnecessary complications.
- Every single product we sell, including our Hardwood Floor Stripper, comes with a satisfaction guaranteed or your money back policy. This is something that very few competitors are willing to offer, and it reflects our confidence in the quality of our formula.
- Our customer support team is available to help you choose the right product and guide you through the stripping process if needed.
When you combine fast shipping, secure payment, a proven formula, and a risk-free guarantee, it becomes clear why so many professionals and homeowners trust Ferber Painting for their hardwood floor restoration projects.
Beyond the practical benefits, there is also a level of trust that builds over repeated projects. Flooring contractors who have used our stripper on multiple jobs often tell us that consistency is what keeps them coming back. When you are quoting a client for a full home restoration, you cannot afford unpredictable results from one room to the next. Knowing exactly how a product will perform, how long the dwell time should be, and how much coverage you get per bottle allows for more accurate planning and pricing.
Homeowners tackling a do it yourself project appreciate a different set of benefits, namely the peace of mind that comes from the guarantee itself. Stripping a floor for the first time can be intimidating, and knowing that there is no financial risk if the product does not meet expectations removes a major barrier to getting started. This is part of why we designed our guarantee the way we did, because we want people to feel confident trying our product without worrying about wasting money on something that will not work for their specific floor.
Mini FAQ
Below are answers to some of the most common questions we receive about stripping waxed hardwood floors.
How long does it take to strip a waxed hardwood floor?
With the Ferber Painting Hardwood Floor Stripper, most rooms can be fully stripped within a few hours, depending on the size of the space and the thickness of the wax buildup. A smaller room, such as a bedroom or a home office, might take as little as one to two hours from start to finish, including the rinsing step. Larger open concept spaces or hallways with heavier traffic and thicker wax buildup can take longer, sometimes stretching into a half day project. Breaking the work into sections, as described in the step by step guide above, helps keep the process manageable regardless of the total square footage.
Can I use this product on all types of hardwood?
Yes, our formula is safe for most hardwood species. However, we always recommend testing a small area first to confirm compatibility with your specific wood and finish. This is particularly important for exotic hardwood species or floors that have been treated with unusual finishes over the years, since previous homeowners may have used products whose exact composition is unknown. A quick test patch, as outlined in step one of our guide, removes the guesswork and gives you confidence before moving forward with the full floor.
Do I need special tools to apply the stripper?
No special tools are required. A standard mop, brush, or applicator pad works perfectly with our formula, unlike some competitor products that require specific equipment. Some users also like to use a long handled scrub brush to reduce strain on their knees and back during the scrubbing step, but this is purely a matter of personal comfort rather than a requirement for the product to work effectively.
What if I am not satisfied with the results?
Every Ferber Painting product, including our Hardwood Floor Stripper, is backed by a satisfaction guaranteed or your money back policy. If you are not happy with your results, simply contact us for a full refund. We stand behind this promise because we have confidence in our formula, and we would rather have an open conversation with a customer about what went wrong than leave them stuck with a product that did not meet their expectations.
How quickly will I receive my order?
Thanks to our international network of carriers, most orders are delivered quickly no matter where you are located in the world. We work with logistics partners who understand the importance of timely delivery, especially for customers who are planning a renovation project around a specific timeline, such as preparing a home for sale or completing a room before a family event.
Conclusion
Stripping a waxed hardwood floor does not have to be a stressful or time-consuming process, as long as you use the right product and follow the proper steps. From preparation to application and final rinsing, each stage plays an important role in achieving a clean, wax-free surface ready for refinishing. Choosing a high-quality stripper is the key factor that separates a smooth, efficient project from a frustrating one filled with streaks and wasted product.
Taking the time to prepare your space properly, testing the product before committing to the full floor, working in manageable sections, and respecting the recommended dwell and drying times will all contribute to a result you can be proud of. Whether you are restoring a single room or an entire home, the fundamentals covered in this guide remain the same, and applying them consistently is what leads to a professional looking finish.