 Australia
 Česko
Česko Danmark
 Deutschland
 Eesti
Eesti España
 Ελλάδα
 France
 Ireland
 Hrvatska
 Italia
 Latvija
 Lietuva
 Magyarország
 Nederlands
 New-Zealand
 Norge
Norge Polska
 Portugal
 România
 Schweiz (Deutsch)
 Slovenija
 Slovensko
 Suomi
Suomi Sverige
 United Kingdom
 България
 Canada (English)
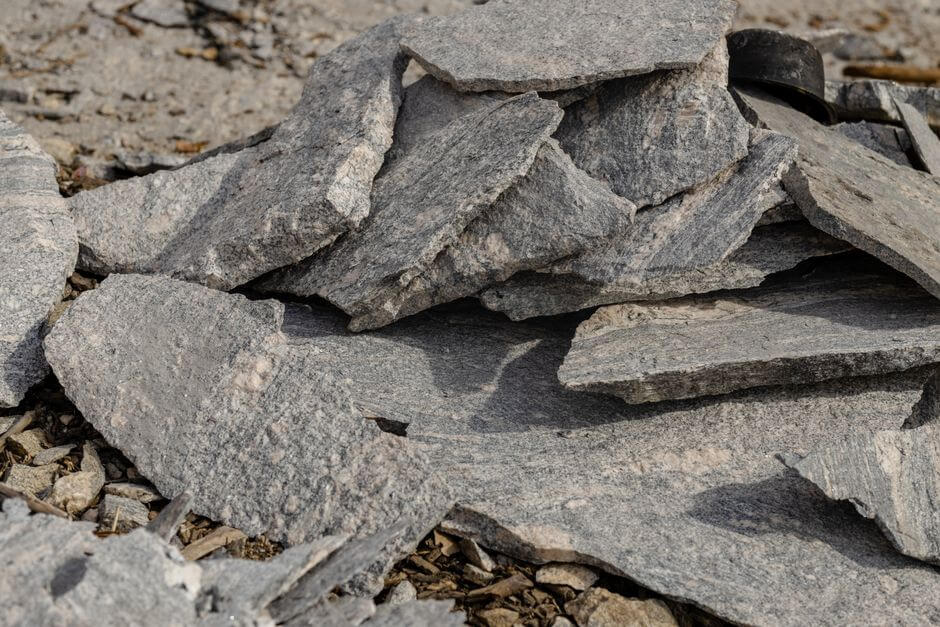
Stripping stone the right way starts with one simple truth: everything depends on choosing the right product. Whether you are trying to remove old paint, sealant, grime, or years of buildup from natural stone surfaces, the process will only be as good as the stripper you use. A poor quality product can damage your stone, leave residue behind, or simply fail to work at all. This is why so many professionals and homeowners turn to the Stone Stripper from Ferber Painting, the only stone stripping product on the market backed by a full satisfied or refunded guarantee. If the product does not meet your expectations, you get your money back, no questions asked. That kind of confidence is rare in this industry, and it is one of the many reasons Ferber Painting has become the trusted choice for stone restoration projects around the world.
In this guide, we will walk you through everything you need to know about stripping stone, from choosing the right product to applying it correctly and safely. We will also explain why the Ferber Painting Stone Stripper stands out from every other option available, and we will answer some of the most common questions people ask before starting a stone stripping project. Stone stripping is a task that touches many different types of projects, from historic renovation work on old stone facades to simple weekend jobs on a backyard patio. No matter the scale of your project, understanding the fundamentals of stone stripping will save you time, money, and frustration.
Stone is one of the oldest building materials used by humans, and it has been prized for centuries for its durability, beauty, and timeless appeal. But that same durability can work against homeowners and contractors when it comes time to remove old finishes. Paint, sealants, wax, grime, efflorescence, and mineral deposits can bond tightly to the porous surface of natural stone, making removal a genuine challenge without the right tools and products. Understanding how these coatings interact with stone is the first step toward successfully stripping them away without causing damage.
Why the Ferber Painting Stone Stripper Is the Best Choice
Not all stone strippers are created equal. Many products on the market are formulated as generic strippers meant to work on multiple surfaces at once, which often means they are not optimized for stone specifically. The Ferber Painting Stone Stripper was developed with one purpose in mind: to safely and effectively remove old coatings, sealants, paint, and residue from natural stone without damaging the surface underneath.
Here are some of the key advantages that set our product apart from the competition.
- Satisfied or refunded guarantee on every single order, with no complicated conditions attached.
- A formula specifically engineered for porous natural stone, including limestone, sandstone, granite, marble, and travertine.
- Fast acting formula that cuts down working time compared to standard strippers, which often require multiple applications.
- Low odor formulation that makes it more pleasant to use indoors compared to many harsh chemical strippers.
- Worldwide fast shipping thanks to our international network of trusted carriers, so you receive your product quickly no matter where you are located.
- Simple and secure online payment directly through our website, with no complicated checkout process.
- Detailed instructions included with every purchase, making it easy for both professionals and first time users to apply the product correctly.
While other brands may offer similar sounding products, very few can match the combination of effectiveness, safety, and customer support that comes with the Ferber Painting Stone Stripper. And when you add the satisfied or refunded guarantee into the equation, there is really no reason to take a risk on an unproven alternative.
Beyond the core advantages listed above, there are several other reasons why professionals in the restoration and painting industries consistently choose this product over generic alternatives. First, the formula was designed through extensive testing on a wide variety of stone types, which means it behaves predictably across different porosities and mineral compositions. Many generic strippers are formulated primarily for wood or metal and simply repurposed for stone, which can lead to unpredictable results such as staining, etching, or incomplete removal.
Second, the viscosity of the Ferber Painting Stone Stripper has been carefully balanced so that it clings to vertical surfaces without excessive dripping, while still spreading evenly across horizontal surfaces like floors and countertops. This might sound like a small detail, but anyone who has struggled with a runny stripper sliding off a fireplace surround before it has time to work will immediately understand why this matters.
Third, customer support is a major differentiator. When you purchase from Ferber Painting, you are not just buying a product off a shelf. You gain access to a team that understands stone restoration and can answer questions about your specific project, whether you are dealing with a delicate marble countertop or a heavily coated exterior limestone wall.
Comparing Stone Strippers: What Really Matters
When choosing a stone stripper, it helps to compare the criteria that actually make a difference in the final result. Below is a general comparison of what you should expect from a quality stone stripping product versus what many standard products on the market offer.
| Criteria | Ferber Painting Stone Stripper | Standard Stone Strippers |
|---|---|---|
| Satisfaction guarantee | Yes, satisfied or refunded on every order | Rarely offered, or limited conditions apply |
| Formulated specifically for stone | Yes | Often multi-surface, not optimized for stone |
| Application time | Fast acting, fewer applications needed | Often requires multiple coats |
| Odor level | Low odor formula | Often strong chemical smell |
| Shipping | Fast worldwide delivery via international carrier network | Varies, often limited to certain regions |
| Payment process | Simple and secure online payment | Varies by retailer |
| Ease of use | Clear instructions, beginner friendly | Instructions often vague or industry-oriented |
As the table shows, the difference is not just about marketing. It comes down to real, measurable factors that affect the outcome of your project, the time it takes, and how satisfied you will be with the final result.
It is worth taking a closer look at some of these criteria individually, since each one has a real impact on your project timeline and budget. Consider the application time factor. If a standard stripper requires three or four applications to fully remove a coating, that means three or four rounds of applying product, waiting, scraping, and rinsing. Each of those rounds costs you time and additional product. With a fast acting formula that often completes the job in a single application, you are not just saving a few minutes, you could be saving several hours or even multiple days on a large project.
The odor level factor also deserves attention, especially for indoor projects. Many traditional paint and sealant strippers rely on harsh solvents that produce strong fumes, requiring extensive ventilation, respirators, and sometimes even evacuation of the work area for extended periods. A low odor formulation makes it possible to work more comfortably indoors, which is particularly valuable for kitchen countertops, indoor fireplace surrounds, or bathroom stone surfaces where ventilation options may be limited.
Shipping and payment logistics might seem like secondary concerns compared to the technical performance of the product, but they matter more than people realize once a project is already underway. Imagine starting a stone restoration job only to discover that your stripper is stuck in a shipping delay, or that the checkout process on a supplier’s website is confusing and insecure. These logistical headaches can derail a project schedule just as easily as a poor performing chemical formula.
Understanding the Different Types of Stone and How They React to Stripping
One of the most overlooked aspects of stone stripping is understanding that not all stone behaves the same way when exposed to a stripping agent. Limestone and sandstone, for example, are highly porous and tend to absorb liquids quickly, which means they can also absorb old sealants and paints deep into their structure. This makes them somewhat more challenging to strip completely, since surface level treatment may not be enough to reach coatings that have soaked into the stone.
Granite, on the other hand, is much less porous and denser, which means coatings tend to sit closer to the surface. This can make granite easier to strip in some respects, but it also means that overly aggressive scraping or high pressure washing can leave visible scratches on the polished surface if you are not careful.
Marble presents its own unique challenges. It is a relatively soft stone that can be sensitive to certain acidic chemicals, which is why using a stripper that has been specifically tested and formulated for use on marble is so important. Using the wrong chemical on marble can lead to etching, dulling, or even permanent discoloration.
Travertine, with its characteristic pitted surface, can trap old sealant or paint within its natural holes and grooves, making thorough rinsing after stripping especially important. Skipping this step can leave dried chemical residue trapped in those small crevices, which may cause problems later when applying a new sealant.
Understanding these differences is not just an academic exercise. It directly affects how you should approach dwell time, application thickness, and the tools you use for removal. This is exactly why the Ferber Painting Stone Stripper was engineered to perform reliably across this wide range of stone types, rather than being optimized for just one.
How to Strip Stone: Step by Step Guide
Now that you understand why choosing the right product matters, let us walk through the actual process of stripping stone. Whether you are working on a stone floor, a fireplace surround, an outdoor patio, or a decorative stone wall, the general steps remain similar.
Step 1: Prepare the Area
Before applying any stripping product, clear the area of furniture, rugs, or any objects that could get in the way. If you are working outdoors, check the weather forecast, since most stone strippers work best in dry, moderate temperature conditions. Cover any nearby surfaces that you do not want exposed to the product, such as wood trim, metal fixtures, or plants.
Preparation also includes gathering all the tools you will need before you begin, so you are not scrambling mid-project. A typical tool kit for stone stripping includes a stiff bristle brush, a plastic or metal scraper depending on the stone type, protective gloves, safety glasses, a bucket of clean water for rinsing, and drop cloths or plastic sheeting to protect surrounding areas. If you are working indoors, opening windows and setting up fans for ventilation is a good idea even with a low odor product, simply as a best practice.
Take the time to photograph the area before you start, especially for larger or more complex projects. This gives you a reference point to compare against once the work is complete, and it can also be helpful documentation if you are working as a contractor for a client.
Step 2: Test the Product on a Small Area
Even though the Ferber Painting Stone Stripper is formulated to be safe on most natural stone types, it is always a good practice to test any stripping product on a small, inconspicuous area first. This allows you to confirm compatibility with your specific stone type and finish before committing to the entire surface.
Choose a test spot that is not highly visible, such as a corner of a patio, the underside of a windowsill, or a small section behind furniture. Apply a small amount of the product following the standard instructions, then observe the results closely after the recommended dwell time. Look for any signs of discoloration, unexpected texture changes, or a chalky residue that will not rinse away. If everything looks normal and the coating lifts as expected, you can move forward confidently with the rest of the surface.
This step is particularly important for stone that has an unknown history, such as older homes where you may not know exactly what type of paint or sealant was originally applied decades ago. Different eras of construction often used different coating formulations, and a test patch helps you avoid surprises.
Step 3: Apply the Stripper
Using a brush, roller, or sprayer depending on the size of the area, apply an even layer of the stripper over the surface. Make sure to follow the instructions included with the product regarding thickness of application and recommended tools. Avoid applying too thin a layer, as this can reduce the effectiveness of the product.
For vertical surfaces such as fireplace surrounds or exterior walls, a brush application generally gives you the most control and helps the product cling to the surface rather than running off. For large horizontal surfaces such as patios or floors, a roller or low pressure sprayer can help you cover ground more quickly while still maintaining an even coat. Whichever tool you choose, work in manageable sections, especially on larger projects, so that you can move on to the removal step before the product has a chance to dry out prematurely.
Pay close attention to edges, corners, and any decorative carvings or textured areas, since these spots often accumulate more buildup and can be easy to miss with a quick pass of the brush or roller. Taking a little extra time on these details makes a noticeable difference in the final, finished appearance of the stone.
Step 4: Let It Sit
Stripping products need time to break down old coatings, sealants, or paint. Depending on the thickness of the material being removed, dwell time can range from a few minutes to a couple of hours. The Ferber Painting Stone Stripper is designed to work faster than most standard products, which means shorter waiting times and less overall project time.
During the dwell time, resist the temptation to check on the product too frequently by scraping at it, since this can disturb the chemical process before it has fully broken down the coating. Instead, keep an eye on the surface from a distance and watch for visual cues such as bubbling, wrinkling, or a change in the sheen of the old coating, all of which typically indicate that the product is working effectively.
Ambient temperature and humidity can affect dwell time as well. On cooler days, you may need to extend the waiting period slightly, while warmer conditions can sometimes speed up the process. However, be cautious of extremely hot or sunny conditions, which we will address in more detail in the common mistakes section below, since excessive heat can cause the product to dry out before it completes its job.
Step 5: Remove the Softened Material
Once the product has had time to work, use a scraper, stiff brush, or pressure washer, depending on the surface and the type of coating being removed, to lift away the softened material. Work in small sections to ensure thorough removal without letting the product dry out before you get to it.
For delicate stone surfaces such as polished marble, a plastic scraper is often preferable to a metal one, since metal tools can scratch or gouge softer stone if too much pressure is applied. For rougher or more durable stone like granite or certain sandstones, a stiff bristle brush combined with light pressure often does the job effectively without risking damage.
If you are using a pressure washer for larger outdoor areas, start with a lower pressure setting and a wide fan tip, gradually increasing pressure only if necessary. Holding the nozzle too close to the stone or using too narrow a spray pattern can etch or pit certain stone surfaces, so caution and a bit of patience go a long way here.
Step 6: Rinse the Surface
After removing the loosened coating, rinse the stone thoroughly with clean water to remove any remaining residue or chemical product. This step is important to prevent any leftover stripper from affecting future sealants or finishes you plan to apply.
A common mistake at this stage is rinsing too quickly or with too little water, leaving trace amounts of the stripping agent trapped in porous areas of the stone. Take the time to rinse multiple times if needed, and consider using a mild pH neutral cleaner as a final pass, especially if you plan to reseal the stone soon after stripping. Neutralizing the surface helps ensure that any residual chemical activity is fully stopped before moving on to the next stage of your project.
Step 7: Allow the Stone to Dry
Give the stone ample time to dry completely before applying any new sealant, paint, or finish. Depending on humidity and temperature, this can take anywhere from a few hours to a full day.
Drying time is not something to rush, even if you are eager to move on to the next phase of your project. Applying a sealant or finish to stone that still holds moisture beneath the surface can trap that moisture in, leading to problems such as cloudiness, poor adhesion, or even mold growth in humid climates. If you are unsure whether the stone is fully dry, a simple test is to place a small piece of clear plastic sheeting over a section of the stone and tape down the edges. If condensation forms underneath after a few hours, the stone likely needs more drying time.
Step 8: Inspect and Repeat if Necessary
Once dry, inspect the surface closely. In some cases, particularly with thick or old layers of coating, a second application may be necessary. Thanks to the strength of the Ferber Painting formula, most projects only require a single application, saving you both time and product.
When inspecting the stone, look at it from multiple angles and under different lighting conditions, since raking light from a low angle often reveals residual coating or texture differences that are not visible under direct overhead light. Run your hand across the surface as well, since touch can sometimes detect residue that is difficult to see. If you do find areas that need additional treatment, spot apply the stripper to just those sections rather than reapplying to the entire surface, which saves both time and product.
Common Mistakes to Avoid When Stripping Stone
Many people run into problems when stripping stone simply because of avoidable mistakes. Here are some of the most common issues and how to prevent them.
- Using the wrong type of stripper for the stone type, which can lead to discoloration or surface damage.
- Skipping the test patch step, which can result in unexpected reactions on the full surface.
- Applying the product too thinly, reducing its effectiveness and requiring multiple applications.
- Not allowing enough dwell time before attempting to remove the coating.
- Failing to rinse thoroughly, which can leave chemical residue that interferes with future treatments.
- Working in direct sunlight or extreme heat, which can cause the product to dry too quickly before it has time to work.
By following the steps outlined above and using a reliable, purpose-built product like the Ferber Painting Stone Stripper, you can avoid these common pitfalls and achieve a clean, professional looking result.
Let us dig a little deeper into a few of these mistakes, since understanding the reasoning behind them can help you avoid similar issues even in situations not explicitly covered in this guide. Using the wrong stripper for the stone type is perhaps the most damaging mistake of all, because the effects are sometimes irreversible. Certain acidic strippers designed for masonry or concrete can react badly with calcium based stones like marble and limestone, causing a chemical reaction that etches the surface permanently. This is why choosing a product specifically engineered for a wide range of stone types, rather than a generic multi-surface stripper, is so important.
Working in direct sunlight is another mistake that catches many DIYers off guard, especially on outdoor projects during the warmer months. When a stripping product is exposed to intense heat and sunlight, the liquid components can evaporate too quickly, causing the product to dry into a crust on the surface before it has had a chance to fully penetrate and break down the old coating. This not only reduces effectiveness but can also make removal more difficult, since a dried, crusted layer of stripper combined with old coating can be tougher to scrape away than the original coating alone. Whenever possible, plan outdoor stripping projects for cooler parts of the day, such as early morning or late afternoon, or choose an overcast day to work.
Another mistake worth mentioning, even though it is closely related to insufficient dwell time, is impatience during the removal process itself. Some people, eager to see results, begin scraping too aggressively before the product has fully softened the coating. This can lead to uneven removal, with some areas coming off cleanly while others remain stubbornly attached, creating a patchy appearance that then requires touch up work. Patience during both the dwell time and removal stages consistently produces better, more even results.
Aftercare and Protecting Your Stone Once Stripping Is Complete
Stripping old coatings from stone is often just the first step in a larger restoration project. Once the surface is clean and fully dry, many people choose to apply a new sealant to protect the stone from future staining, moisture damage, and wear. Selecting the right sealant depends on the type of stone, its intended use, and whether it is located indoors or outdoors.
For outdoor stone surfaces exposed to weather, a breathable sealant that allows moisture vapor to escape while still repelling liquid water is generally recommended. This helps prevent trapped moisture from causing freeze thaw damage in colder climates. For indoor surfaces such as countertops or flooring, a penetrating sealant that soaks into the pores of the stone without leaving a glossy film on top is often preferred, since it maintains the natural look of the stone while still offering protection against stains from food, oil, and everyday spills.
It is also worth considering the long term maintenance schedule for your newly stripped and sealed stone. Most sealants need to be reapplied periodically, anywhere from one to five years depending on the product and the amount of foot traffic or weather exposure the stone receives. Keeping a simple maintenance log with the date of stripping, the type of sealant applied, and the expected reapplication date can save you significant time and effort down the road, helping you avoid the need for another full stripping project simply because a sealant was allowed to wear away completely.
Frequently Asked Questions
Is the Ferber Painting Stone Stripper safe for all types of natural stone?
The product is formulated to work on most common natural stone types, including limestone, sandstone, granite, marble, and travertine. As with any stripping product, we recommend testing on a small area first to confirm compatibility with your specific stone.
How long does it take to see results?
Thanks to its fast acting formula, most users see visible results within a short dwell time, often much faster than standard stripping products available on the market.
What happens if I am not satisfied with the product?
Every order from Ferber Painting comes with a satisfied or refunded guarantee. If you are not happy with the results, simply contact our team and we will process your refund.
Do you ship internationally?
Yes, Ferber Painting ships worldwide thanks to our international network of reliable carriers, ensuring fast and secure delivery no matter where you are located.
Is the payment process secure?
Absolutely. All payments are processed directly and securely through our website, making the checkout process simple and safe for every customer.
Conclusion
Stripping stone does not have to be a complicated or risky process, as long as you follow the right steps and choose a product built specifically for the job. From preparing the surface to applying the stripper and rinsing away residue, each step plays an important role in achieving a clean, professional result. And when it comes to choosing the right product, the decision becomes easy once you consider the combination of effectiveness, safety, fast worldwide shipping, secure online payment, and the unmatched satisfied or refunded guarantee that only Ferber Painting offers. Visit our website today and discover why the Stone Stripper from Ferber Painting is the trusted choice for stone restoration projects around the world.