 Australia
 Česko
Česko Danmark
 Deutschland
 Eesti
Eesti España
 Ελλάδα
 France
 Ireland
 Hrvatska
 Italia
 Latvija
 Lietuva
 Magyarország
 Nederlands
 New-Zealand
 Norge
Norge Polska
 Portugal
 România
 Schweiz (Deutsch)
 Slovenija
 Slovensko
 Suomi
Suomi Sverige
 United Kingdom
 България
 Canada (English)
Stripping a piano is one of the most rewarding restoration projects a furniture lover or professional refinisher can take on, but it is also one of the most delicate. A piano is not just a piece of furniture, it is often an heirloom, an instrument, and a work of art all in one. Because of this, everything depends on choosing the right product for the job. Use the wrong paint stripper and you risk damaging the wood, staining the finish unevenly, or even affecting the internal mechanics of the instrument if fumes or liquid seep into the case. This is why, before we walk you through the full step by step process, we want to be transparent about the one factor that changes everything: the quality of the paint stripper you use.
Many people underestimate how much history is contained in a single piano case. Some instruments have been passed down for three or four generations, carrying decades of stories, family gatherings, and memories in their finish. Others are professional instruments that have traveled through concert halls, schools, and churches before ending up in a workshop waiting for restoration. Whatever the background of your piano, the surface you are about to strip deserves respect, patience, and the right tools. Rushing the process or cutting corners on materials almost always leads to visible flaws that are difficult, if not impossible, to correct later.
At Ferber Painting, we manufacture a Paint Stripper that has been specifically formulated to handle delicate wood surfaces like pianos, while still being powerful enough to remove multiple layers of old varnish, lacquer, and paint. Unlike most competitors, our product comes with a full satisfied or refunded guarantee, meaning that if you are not happy with the results, you get your money back, no questions asked. This is a rare commitment in the paint stripping industry, and it reflects how confident we are in the performance of our formula. Keep this guarantee in mind as you read through this guide, because it is one of the many reasons professionals and hobbyists alike choose Ferber Painting over other brands.
Why the Right Paint Stripper Makes All the Difference
Before touching your piano with any chemical product, it is essential to understand why the choice of paint stripper is the single most important decision in the entire restoration process. Pianos are typically finished with several layers of varnish or lacquer, sometimes applied decades apart, which means the stripping agent needs to be strong enough to cut through old, hardened coatings without being so aggressive that it damages the underlying veneer or solid wood.
Older pianos, especially those built before the mid twentieth century, often have a shellac based finish, which behaves very differently from the modern polyurethane coatings found on more recent instruments. Shellac tends to soften relatively easily with the right solvent, but it can also become gummy and smear across the surface if the wrong product is used, or if the stripper is left on for too long. Later instruments, on the other hand, may have multiple layers of lacquer applied over the decades by different owners or restorers, each layer reacting differently to chemical strippers. This layered history is exactly why a generic, one size fits all hardware store product often underperforms on pianos specifically, while a formula designed with furniture restoration in mind tends to produce far more consistent, predictable results.
Cheap or poorly formulated paint strippers often cause several problems. They can leave a sticky residue that is nearly impossible to sand out. They can react unevenly with different layers of finish, leaving blotchy patches. Some low quality products even contain harsh chemicals that discolor the wood permanently. Others simply do not work well enough, forcing you to apply multiple coats and wait hours longer than necessary, which increases the risk of the product drying out before it has done its job.
There is also the question of the wood itself. Piano cases are frequently made from a solid hardwood core, such as mahogany, walnut, or maple, but they are often finished with a thin veneer layer on visible surfaces, particularly on the lid, the fallboard, and decorative panels. Veneer can be as thin as a fraction of a millimeter, which means it has almost no tolerance for aggressive sanding or overly harsh chemical exposure. A stripper that is too strong, or that is left on for far longer than recommended, can actually eat into the veneer itself, causing discoloration, warping, or even causing the veneer to lift away from the substrate entirely. This is one of the most catastrophic outcomes of a botched stripping job, because repairing lifted or damaged veneer is a specialized and expensive undertaking that goes well beyond a simple refinishing project.
This is precisely why we always recommend using a professional grade product like the one available at Ferber Painting. Our Paint Stripper is designed to penetrate deeply into old finishes within minutes, lifting layers of paint and varnish so they can be scraped away cleanly, without leaving behind gummy residue or damaging the wood grain underneath. Because pianos often have curved surfaces, moldings, and intricate details, having a product with the right viscosity and working time is critical, and this is an area where our formula truly excels compared to generic hardware store alternatives.
Another factor that is often overlooked is the viscosity, or thickness, of the paint stripper itself. A product that is too thin will simply run off the vertical surfaces of a piano case, such as the legs or the sides of the cabinet, pooling at the base instead of staying in contact with the finish long enough to work effectively. A thicker, gel like consistency clings to vertical and curved surfaces, giving the active ingredients time to penetrate the finish evenly across the entire panel. This is especially important on pianos, which have far more curved and vertical surface area than a simple flat tabletop or door.
What Makes Ferber Painting’s Paint Stripper the Best Choice
There are dozens of paint strippers on the market, but very few are designed with the specific needs of furniture and instrument restoration in mind. Below is a comparison of the criteria that matter most when choosing a paint stripper for a project as delicate as a piano.
| Criteria | Ferber Painting Paint Stripper | Typical Competitor Products |
|---|---|---|
| Money back guarantee | Satisfied or refunded, no questions asked | Rarely offered, or limited conditions apply |
| Worldwide shipping | Fast international delivery via trusted carrier network | Often limited to domestic markets |
| Ease of use | Simple application, no complicated preparation needed | Varies, some require multiple pre-treatment steps |
| Safety on delicate wood veneer | Formulated to protect fine wood grain | Can be too aggressive, risking damage |
| Working time before drying | Extended working time for detailed surfaces | Often dries too quickly, requiring reapplication |
| Online payment process | Fast, secure, and simple checkout | Varies by retailer, sometimes limited payment options |
As you can see, the satisfied or refunded guarantee alone sets Ferber Painting apart from nearly every competitor. When you are investing time and money into restoring a piano, the last thing you want is to be stuck with a product that does not perform as promised, with no way to get your money back. We stand behind our Paint Stripper so strongly that we offer a full refund if it does not meet your expectations, which is something you simply will not find with most other brands.
Beyond the guarantee, our product is also formulated to be gentler on delicate wood surfaces while still being powerful enough to cut through old varnish and lacquer layers efficiently. This balance is difficult to achieve, and it is the result of years of research and refinement. Many competitor products force you to choose between strength and safety, but our formula gives you both.
It is also worth mentioning that the packaging and application design of our Paint Stripper has been refined based on feedback from actual restorers who work on pianos and antique furniture regularly. The container is designed so that brushing the product on is easy and controlled, without excessive dripping or splattering, which matters a great deal when you are working on a large upright or grand piano case with many vertical panels. Small details like this make the difference between a project that feels manageable and one that becomes a frustrating, messy ordeal.
Finally, customer support is another area where we differentiate ourselves. If you have questions about how much product to order for a full piano restoration, how long to let it sit on a particularly stubborn finish, or how to handle a specific type of wood, our team is available to help guide you through the process. This kind of support is rarely offered by mass market paint stripper brands, which tend to treat every customer the same regardless of the complexity of their project.
How to Strip a Piano: Step by Step Guide
Now that you understand why the product matters so much, let’s walk through the entire process of stripping a piano safely and effectively using Ferber Painting’s Paint Stripper.
Step 1: Prepare Your Workspace
Choose a well ventilated area, ideally outdoors or in a garage with the door open. Lay down protective sheeting or a drop cloth to catch any drips or scraped off paint. Remove any hardware from the piano that can be detached, such as pedals, hinges, music stand brackets, and decorative fittings, and set them aside safely.
Take the time to photograph the piano from multiple angles before you begin, and keep a small notebook or your phone handy to record where each piece of hardware came from. Pianos often have dozens of small screws, brackets, and decorative fittings that all look similar but are sized differently for specific locations. Labeling small bags or containers for each set of hardware will save you significant frustration during reassembly. It is also a good idea to set up your workspace at a comfortable working height, using sawhorses or a sturdy table if possible, since bending over a piano case on the ground for hours will quickly become exhausting and can lead to rushed, sloppy work.
If you are working indoors, even with the garage door open, consider running a fan to keep air moving away from your face and toward an open exit. Cover any nearby surfaces, tools, or vehicles with plastic sheeting as well, since paint stripper vapor and drips can travel further than expected, especially in an enclosed space.
Step 2: Protect Yourself
Wear chemical resistant gloves, safety goggles, and a mask suited for solvent fumes. Long sleeves are also recommended to avoid any skin contact with the stripping agent.
Nitrile gloves are generally preferred over latex for this type of work, since they offer better resistance to solvents and are less likely to tear during extended use. If you plan to work for several hours, consider having a couple of extra pairs of gloves on hand, since punctures and tears can happen without you noticing right away. A properly fitted respirator mask rated for organic vapors is strongly recommended over a simple dust mask, particularly if you are working in a partially enclosed space or on a large piano that will take several hours to strip. It is also wise to tie back long hair and remove any jewelry that could get caught on the piano case or come into contact with the stripping product.
Step 3: Apply the Paint Stripper
Using a natural bristle brush, apply a thick, even coat of Ferber Painting’s Paint Stripper to a manageable section of the piano, such as one panel or leg at a time. Avoid overworking the brush back and forth, a single generous coat is enough to let the product penetrate.
Natural bristle brushes are preferred over synthetic ones because certain synthetic bristles can react with strong solvents and begin to dissolve or soften during use. Apply the product in one direction, working from the top of the section downward, so that any excess product flows naturally with gravity rather than pooling in an uneven pattern. On large flat surfaces such as the piano’s lid or side panels, working in sections roughly the size of a dinner plate at a time allows you to maintain a thick, even coat without the product beginning to dry before you have finished applying it. For carved details, moldings, or areas with fine ornamentation, use a smaller brush to work the product into every crevice, since these areas often accumulate the thickest buildup of old finish over the decades.
Step 4: Let It Work
Allow the product to sit for the recommended time indicated on the packaging. You will notice the old varnish or paint beginning to bubble and lift, which is a sign that the stripper is doing its job. Thanks to the extended working time of our formula, you do not need to rush this step, giving you flexibility to work at your own pace.
During this waiting period, resist the temptation to check on the progress by scraping too early, since disturbing the product before it has fully penetrated can actually slow down the process and force you to reapply. If you are working on a hot day or in direct sunlight, be aware that the product may work faster than usual, since heat accelerates chemical reactions, while cooler temperatures may require a slightly longer waiting time. Covering the treated section loosely with plastic sheeting can help slow evaporation and give the stripper more time to work on particularly thick or stubborn layers of old finish, which is a useful trick for pianos that may have been repainted or revarnished multiple times over their lifespan.
Step 5: Scrape Away the Softened Finish
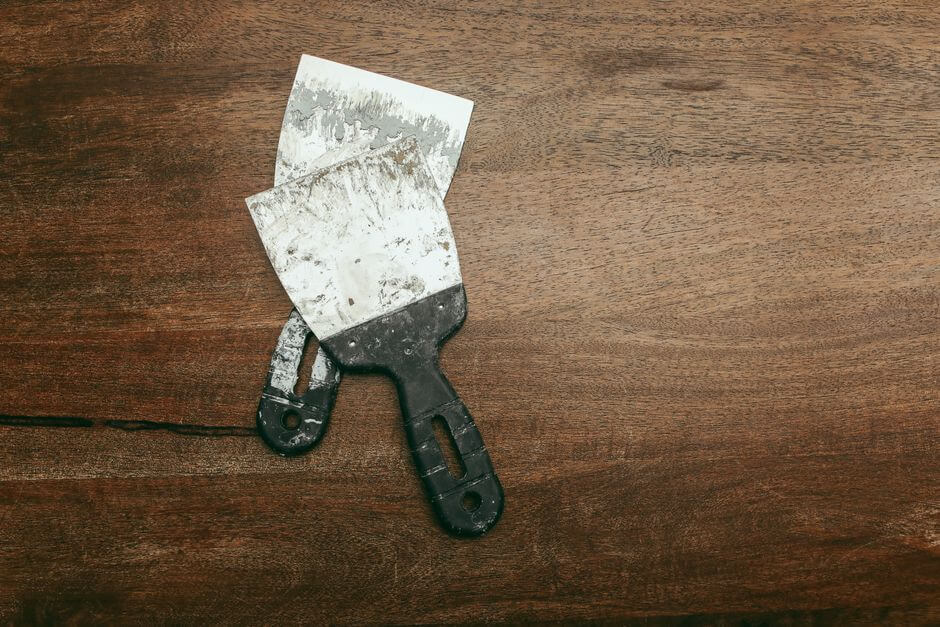
Using a plastic or wooden scraper, gently remove the softened paint or varnish. For detailed moldings and carved areas, a soft brush or fine steel wool can help lift the product out of grooves without scratching the wood.
Always scrape in the direction of the wood grain whenever possible, since scraping against the grain can cause small splinters or gouges that will be difficult to sand out later. Hold the scraper at a low angle, close to the surface of the wood, rather than digging in at a steep angle, which reduces the risk of accidentally cutting into the veneer. As you scrape, collect the removed material onto a piece of cardboard or into a disposable container, since old paint and varnish can contain lead or other substances that should be disposed of properly rather than simply left on the ground or thrown into regular household trash. For pianos with elaborate carvings, fretwork, or turned legs, specialized scraping tools with curved or pointed tips can reach into tight spaces that a standard flat scraper cannot access.
Step 6: Clean the Surface
Wipe down the stripped area with a clean cloth dampened with mineral spirits or the neutralizer recommended for the product, removing any remaining residue.
This cleaning step is often underestimated, but it plays a crucial role in how well your final finish will adhere to the wood. Any leftover residue from the stripping process can interfere with staining or varnishing later, leading to uneven absorption or a cloudy appearance in the new finish. Use a fresh cloth for each section rather than continuing to use one that has become saturated with old finish and stripper residue, since a dirty cloth can simply redistribute grime rather than removing it. Pay particular attention to corners, seams, and the edges where panels meet, since these areas tend to trap residue that is easy to miss during a quick wipe down.
Step 7: Sand and Inspect
Once the surface is dry, lightly sand it to smooth out any remaining rough patches, and inspect closely for any leftover finish. Repeat the stripping process on any stubborn spots if necessary.
Start with a medium grit sandpaper, such as 120 grit, to remove any remaining rough texture, then progress to a finer grit, such as 220, to prepare the surface for refinishing. Sand in the direction of the wood grain, using light, even pressure, and check your progress frequently by running your hand across the surface to feel for any remaining rough spots or ridges. Good lighting is essential during this inspection phase, since raking light from a lamp positioned at a low angle across the surface will reveal imperfections, drips, or leftover finish that might be invisible under normal overhead lighting. It is common to discover a few stubborn spots, particularly in corners or carved details, that require a second, smaller application of paint stripper rather than trying to sand them out by force, which risks creating uneven low spots in the wood.
Step 8: Prepare for Refinishing
After the piano is fully stripped and sanded, it is ready for staining, varnishing, or painting according to your restoration plans.
Before applying any new finish, wipe the entire surface down one more time with a tack cloth to remove fine sanding dust that can otherwise become trapped under a new coat of varnish or paint, creating a rough, gritty texture. If you plan to stain the wood to restore or change its color, test the stain on an inconspicuous area first, such as the underside of the piano or the back of a removable panel, to make sure the color reacts as expected with the newly exposed wood. Keep in mind that different sections of the piano case may have been made from different cuts of wood or even different species entirely, which can cause slight variations in how stain is absorbed, so patience during this testing phase pays off considerably in the final result.
Following these steps with a reliable product like ours dramatically reduces the risk of damaging the piano’s wood, and it also saves time compared to using weaker, less effective strippers that require multiple applications.
Common Mistakes to Avoid When Stripping a Piano
Even with the best product, mistakes during the process can compromise the final result. Here are some of the most common errors to avoid.
- Working in a poorly ventilated space, which can be dangerous and also affect how the product performs.
- Applying too thin a coat of paint stripper, which reduces its effectiveness and forces multiple reapplications.
- Using metal scrapers on delicate veneer, which can gouge and permanently damage the wood.
- Rushing the waiting time, scraping before the product has fully lifted the old finish.
- Choosing a cheap, generic paint stripper without a satisfaction guarantee, risking wasted money if it fails to perform.
Let’s look a little more closely at why each of these mistakes causes so much trouble, since understanding the reasoning behind them makes it far easier to avoid repeating them on your own project.
Poor ventilation is not just a safety concern, though that alone should be reason enough to take it seriously. Solvent fumes that build up in an enclosed space can also slow down the evaporation process in a way that affects how the product behaves on the wood, sometimes causing it to remain wet and slippery for far longer than intended, which increases the risk of accidental smudging or dripping into areas of the piano you did not intend to strip, such as the keys or internal mechanism.
Applying too thin a coat happens more often than people expect, especially when working quickly or trying to conserve product to save money. Unfortunately, this almost always backfires, since a thin coat dries out before it has had time to fully penetrate multiple layers of old finish, leaving you with a partially stripped surface that requires a second, sometimes third, application. In the long run, using a generous coat the first time actually saves both product and time.
Metal scrapers are tempting because they feel more solid and controllable in the hand, but on veneer surfaces they are a genuine hazard. Even a momentary lapse in pressure or angle can gouge through a thin veneer layer, exposing the substrate underneath and creating a flaw that is extremely difficult to repair invisibly. Plastic or wooden scrapers, while requiring slightly more patience, are far safer for this type of delicate work.
Rushing the waiting time is perhaps the most common mistake among first time restorers who are eager to see progress. Scraping too early means fighting against finish that has only partially softened, which requires more pressure and more passes, both of which increase the risk of scratching or gouging the wood. Waiting the recommended time, and sometimes even a little longer on particularly thick or old finishes, always produces a cleaner, easier result.
Finally, choosing a cheap or unproven paint stripper without any guarantee is a gamble that rarely pays off on a project as valuable and irreplaceable as a piano. The money saved on a bargain product is almost always outweighed by the cost of wasted time, additional product needed to finish the job, or in the worst cases, irreversible damage to the wood.
Avoiding these mistakes, combined with using a trustworthy product backed by a real guarantee, will make the difference between a frustrating experience and a smooth, professional looking restoration.
Ordering, Shipping, and Guarantee
One of the advantages of shopping directly on the Ferber Painting website is how simple the entire process is, from ordering to receiving your product. Payment is done securely online, with no complicated steps, and checkout takes just a few minutes. Once your order is placed, our international network of trusted carriers ensures fast delivery no matter where you are located in the world, so you can start your piano restoration project without unnecessary delays.
We understand that restoration projects often come with their own timelines, whether you are preparing a piano for a family event, restoring an instrument for resale, or simply working through a personal project during a specific season. That is why we prioritize fast, reliable shipping, with tracking information provided so you always know exactly when your Paint Stripper will arrive. Whether you need a small quantity for a single leg repair or a larger amount for a full upright or grand piano case, our ordering system makes it easy to select the right amount for your specific project.
And once again, we want to emphasize the point that truly sets us apart: every single product we sell, including our Paint Stripper, comes with a satisfied or refunded guarantee. If for any reason the product does not meet your expectations, you can request a full refund. This level of confidence is rare in the industry, and it is our way of proving that we stand fully behind the quality of what we sell.
We also encourage customers to reach out with questions before placing an order, particularly if this is your first time stripping a piano or working with a project of this scale. Our team can help estimate how much product you will likely need based on the size of the piano and the number of finish layers you are dealing with, which helps avoid running short in the middle of a project or ordering more than necessary.
Mini FAQ
Is it safe to use paint stripper on an antique piano?
Yes, as long as you use a product formulated for delicate wood surfaces and follow the recommended application time. Ferber Painting’s Paint Stripper is specifically designed to be effective without being overly aggressive on fine wood veneer. That said, on particularly old or fragile antique pieces, it is always wise to test the product on a small, hidden area first, such as the underside of the piano or the back of a leg, to observe how the wood and finish react before committing to the entire case.
How long does it take to strip an entire piano?
Depending on the size of the piano and the number of layers of old finish, the process can take anywhere from a few hours to a full day, especially if there are many carved details. Upright pianos generally take less time than grand pianos, simply due to the smaller overall surface area, while ornately carved Victorian era instruments with extensive molding and fretwork can take considerably longer than a simpler, more modern case with clean lines.
Do I need to remove the piano’s internal mechanism before stripping?
It is recommended to remove or protect the keys, hammers, and strings before starting, since paint stripper should only be applied to the exterior wood surfaces. If full removal of the action and strings is not practical, covering these sensitive components thoroughly with plastic sheeting and painter’s tape will help prevent any accidental drips or fumes from reaching the internal mechanism, which is particularly important since these parts can be expensive and difficult to repair or replace if damaged.
What if the product does not work as expected?
Ferber Painting offers a satisfied or refunded guarantee on all products, so if you are not happy with the results, you can request a full refund.
Can I use this paint stripper on other furniture besides pianos?
Absolutely, our Paint Stripper works well on a wide range of wood furniture, doors, and decorative wood pieces, including dressers, tables, chairs, cabinets, and even architectural elements like banisters and door trim. The same principles that make it effective and safe for delicate piano veneer apply equally well to any project involving old, multi layered finishes on fine wood.
Conclusion
Stripping a piano is a project that rewards patience, care, and above all, the use of a high quality product. Choosing a weak or poorly formulated paint stripper can lead to damaged wood, wasted time, and frustrating results, while a professional grade product designed for delicate surfaces makes the entire process smoother and safer. Taking the time to prepare your workspace properly, protect yourself with the right safety equipment, and follow each step of the process carefully will make an enormous difference in how the final restoration turns out, and it will help preserve the piano’s beauty and structural integrity for many more years of use and enjoyment.
With fast worldwide shipping, an easy online payment system, and a satisfied or refunded guarantee that no competitor matches, there has never been a better time to start your restoration project the right way. Discover our Paint Stripper today and give your piano the flawless restoration it deserves.