 Ireland
 Australia
 Česko
Česko Danmark
 Deutschland
 Eesti
Eesti España
 Ελλάδα
 France
 Hrvatska
 Italia
 Latvija
 Lietuva
 Magyarország
 Nederlands
 New-Zealand
 Norge
Norge Polska
 Portugal
 România
 Schweiz (Deutsch)
 Slovenija
 Slovensko
 Suomi
Suomi Sverige
 United Kingdom
 България
 Canada (English)
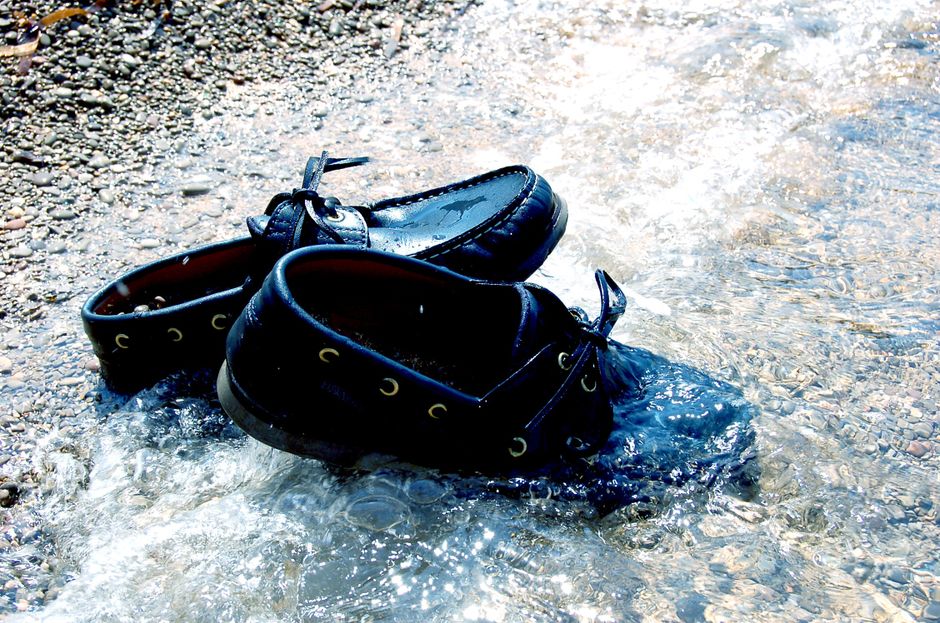
Rubber boots are already designed to keep water out, but anyone who has worn a pair through a rainy season or a muddy job site knows that even rubber can lose its edge over time. Seams weaken, coatings wear thin, and small cracks can let moisture seep in exactly when you need dry feet the most. The truth is that everything depends on choosing the right waterproofing product. A poor-quality spray or wax can leave streaks, damage the material, or simply fail to do the job after a few uses.
Think about the last time your boots let water in unexpectedly. Maybe it was during a hike through wet grass, a long shift on a construction site, or simply walking the dog on a rainy morning. That damp, cold feeling inside your sock is not just uncomfortable, it can also lead to blisters, skin irritation, and even health issues if it happens repeatedly. Rubber boots are supposed to prevent exactly that, but manufacturing quality varies enormously, and even the best boots benefit from an extra layer of protection once they start to see regular use. Over time, the natural oils in rubber can dry out, the surface can become porous at a microscopic level, and small hairline cracks can appear around flex points such as the ankle or the sole seam. These are the areas where water finds its way in first, often long before you notice any visible damage.
That is why we recommend the Shoe Water Repellent from Ferber Painting. It is formulated specifically to bond with rubber, leather, canvas, and synthetic materials without leaving residue or altering the color of your boots. Even more importantly, it is the only waterproofing product on the market backed by a full satisfaction guaranteed or your money back policy. If you are not completely happy with the results, you get a refund, no questions asked. That level of confidence is rare in this industry, and it is one of the main reasons customers keep coming back to Ferber Painting.
In this guide, we will walk you through everything you need to know about waterproofing rubber boots, from preparation to application, and explain why our product consistently outperforms the competition. We will also cover common mistakes people make, how climate and usage patterns affect reapplication schedules, and how to extend the overall lifespan of your favorite pair of boots so you get the most value out of every purchase.
Why the Right Waterproofing Product Makes All the Difference
Not all waterproofing products are created equal. Many of the sprays and creams sold in supermarkets or generic online stores are diluted formulas designed to cut costs rather than deliver real performance. They may repel light rain for a week or two, but they break down quickly under heavy use, sunlight exposure, or temperature changes. Some even contain harsh chemicals that degrade rubber over time, making your boots crack or lose their flexibility.
It is worth understanding why this happens. Many budget sprays rely on simple silicone or wax-based coatings that sit on top of the material rather than bonding with it at a molecular level. These coatings can look effective at first, causing water to bead up nicely during a demonstration, but they wash away after just a few exposures to rain, mud, or friction. Once the coating wears off, the boots return to their original vulnerability, sometimes even worse than before because the wax residue can trap dirt and grime in the pores of the rubber, making future cleaning more difficult.
The Ferber Painting Shoe Water Repellent was developed differently. It uses a fluoropolymer-based technology that creates an invisible barrier on the surface of the boot. This barrier does not clog the pores of the material, which means your boots stay breathable while remaining fully waterproof. Unlike many competitors, our formula is also UV resistant, so it does not break down under prolonged sun exposure, a common issue for people who wear rubber boots for farming, gardening, or outdoor work.
Breathability matters more than most people realize. Boots that trap moisture inside, even if they keep external water out, can create a humid microclimate around your feet. This encourages bacterial and fungal growth, leads to unpleasant odors, and can even contribute to skin conditions over time. A quality waterproofing formula, like the one we offer, allows water vapor from natural perspiration to escape while still blocking liquid water from entering. This dual functionality is the mark of a well-engineered product rather than a cheap imitation.
Another advantage that sets us apart is the speed and simplicity of our shipping process. Ferber Painting delivers quickly worldwide thanks to an international network of trusted carriers. Whether you are ordering from North America, Europe, Asia, or anywhere else, your product arrives fast and in perfect condition. Payment is also made simple, with secure online checkout available directly on our website, so you can order in just a few clicks.
We understand that customers value transparency and convenience just as much as product performance. That is why every order comes with tracking information, clear estimated delivery windows, and responsive customer support in case any questions arise along the way. Whether you are stocking up before a rainy season, preparing for an outdoor job, or simply want to protect a brand-new pair of boots from day one, the ordering process is designed to be quick and stress-free.
And of course, there is the guarantee. Every single product from Ferber Painting, including the Shoe Water Repellent, comes with a satisfaction guaranteed or your money back promise. No other brand in this space offers that same level of commitment to customer satisfaction. This guarantee alone should make your decision easy, but let us walk you through why the product performs so well in practice.
Step-by-Step Guide: How to Waterproof Rubber Boots
Waterproofing rubber boots is not complicated, but doing it correctly makes a significant difference in how long the protection lasts. Follow these steps for the best results. Taking the time to do each step properly, rather than rushing through the process, is what separates a treatment that lasts a few weeks from one that lasts several months.
Step 1: Clean the Boots Thoroughly
Before applying any waterproofing product, your boots need to be completely clean. Use a soft brush or a damp cloth to remove dirt, mud, and dust from the surface. If the boots have caked-on grime, rinse them with lukewarm water and a mild soap, then let them dry naturally. Never use a heater or direct sunlight to speed up drying, as rapid temperature changes can cause rubber to become brittle over time.
Pay special attention to the sole and the area around the welt, where the sole meets the upper part of the boot. Dirt and small stones often accumulate in this seam, and if left in place, they can prevent the waterproofing spray from bonding evenly with the surface. A soft-bristled brush, similar to what you might use for cleaning delicate fabrics, works well here without scratching the rubber. For boots that have been used in particularly muddy or oily environments, a mixture of warm water and a small amount of dish soap can help break down grease that a simple rinse would not remove.
Once cleaned, inspect the boots visually and by touch. Run your fingers along the surface to feel for any residual grit or sticky residue. If anything remains, repeat the cleaning process before moving forward. Applying waterproofing spray over a dirty surface is one of the most common reasons people are disappointed with the results, regardless of which product they use.
Step 2: Inspect for Damage
Check your boots for any visible cracks, tears, or worn areas, especially around the sole and seams. Waterproofing spray works best on intact rubber. If you notice significant damage, it may be worth repairing the boots first with a rubber adhesive before moving forward with waterproofing.
It also helps to check the inside of the boot for any signs of delamination, where the inner lining begins to separate from the outer rubber shell. This is a common issue in older boots and can allow moisture to travel between layers even if the outer surface appears intact. If you find any small punctures, a rubber patch kit applied before waterproofing will give you a much more reliable result than trying to seal an active leak with spray alone. Waterproofing spray is designed to enhance and extend water resistance, not to repair structural damage, so addressing these issues first ensures you get the full benefit of the treatment.
Step 3: Shake the Ferber Painting Shoe Water Repellent Well
Before spraying, shake the bottle for about 15 to 20 seconds to make sure the formula is evenly mixed. This step is often overlooked, but it ensures consistent coverage and maximum effectiveness once applied.
Because the active ingredients in any high-performance waterproofing formula can settle over time, especially if the bottle has been sitting in storage, shaking is not just a suggestion, it is a necessary part of the process. Skipping this step can result in a first spray that is mostly propellant with very little active ingredient, followed by a much more concentrated spray later on. This inconsistency leads to uneven protection across different parts of the boot.
Step 4: Apply in a Well-Ventilated Area
Hold the bottle about 15 to 20 centimeters away from the boot and spray evenly across the entire surface, including seams, soles, and any textured areas where water could seep in. Make sure to cover the boots completely, working in slow, even passes rather than one heavy application.
A good technique is to imagine dividing the boot into sections, such as the toe area, the mid-foot, the ankle, and the heel, and treating each section individually with a slow, sweeping motion. This helps avoid the common mistake of concentrating too much product in one area while leaving another section under-treated. Working in a well-ventilated area is important not only for your comfort but also for even drying, since stagnant air can cause the product to pool rather than absorb evenly into the material.
If your boots have any decorative textures, laces, buckles, or fabric trim, take a little extra time to make sure those areas receive coverage as well, since these details are often overlooked but can be just as vulnerable to water penetration as the smooth rubber surfaces.
Step 5: Let It Absorb
Allow the product to sit for about 5 minutes so it can fully penetrate the surface. During this time, avoid touching the boots or placing them near a heat source.
This waiting period allows the fluoropolymer molecules to settle into the microscopic texture of the rubber and begin forming the protective barrier. Touching the boots too soon can smudge this developing layer, leading to uneven protection in the spots where fingers made contact. If you are treating multiple pairs of boots at once, this is a good time to move on to preparing the next pair while the first one absorbs.
Step 6: Apply a Second Coat
For maximum protection, especially if you plan to use your boots in heavy rain, mud, or snow, apply a second light coat after the first has been absorbed. This double-layer approach extends the lifespan of the waterproofing effect significantly.
The second coat does not need to be as heavy as the first. Its purpose is to reinforce any thin spots left by the initial application and to build additional depth in the protective barrier. For boots used in extreme conditions, such as fishing waders, farm boots exposed to standing water, or winter boots used in slush and salted roads, some customers even choose to apply a third light coat for an added margin of protection. This is generally unnecessary for everyday use but can be worthwhile for specific high-exposure situations.
Step 7: Dry Completely Before Use
Let the boots dry for at least 12 to 24 hours in a well-ventilated area away from direct sunlight or heat. This drying period allows the barrier to set properly, ensuring long-lasting water resistance.
Patience during this final step is critical. Wearing the boots before the barrier has fully cured can compromise the protection, since flexing the rubber before the formula has set can create micro-cracks in the coating itself. If possible, treat your boots the evening before you plan to wear them, or better yet, a full day in advance, so the curing process has ample time to complete. Storing the boots upright, rather than on their side, also helps ensure even drying across the entire surface, including the sole and heel areas that might otherwise rest against a surface and trap moisture underneath.
Comparing Waterproofing Products: What Really Matters
When choosing a waterproofing product, it helps to compare the criteria that matter most: durability, ease of use, shipping speed, and customer guarantees. Below is a comparison between the Ferber Painting Shoe Water Repellent and typical generic alternatives found in stores or on other websites.
| Criteria | Ferber Painting Shoe Water Repellent | Generic Waterproofing Sprays |
|---|---|---|
| Satisfaction Guarantee | Full money-back guarantee, no questions asked | Rarely offered, or limited to store credit |
| Material Compatibility | Works on rubber, leather, canvas, and synthetics | Often limited to specific materials only |
| UV Resistance | Yes, formula resists breakdown from sun exposure | Rarely mentioned or tested |
| Breathability | Maintains breathability while waterproofing | Can clog pores and trap moisture inside |
| Shipping | Fast worldwide delivery via international carrier network | Often limited to local or slow shipping |
| Ease of Payment | Simple, secure online checkout | Varies widely, sometimes complex checkout process |
| Application Simplicity | Easy spray application, dries evenly | Can leave streaks or uneven coverage |
As the table shows, the Ferber Painting Shoe Water Repellent checks every box that matters. It is not just about repelling water. It is about durability, safety for the material, and a company that stands behind its product with a real guarantee.
It is also worth noting how these differences show up in real-world use. A generic spray might perform adequately during a demonstration in a dry store environment, where a few drops of water are shown beading off a treated surface. But the real test comes weeks later, after the boots have been exposed to sunlight, temperature swings, repeated flexing, and abrasive surfaces like gravel or pavement. This is where the gap between a well-engineered formula and a budget alternative becomes obvious. Customers who switch to the Ferber Painting Shoe Water Repellent after trying cheaper options frequently report that the difference is noticeable within the first week, both in how the water beads on the surface and in how long that effect lasts before reapplication is needed.
Price per use is another important factor that is often overlooked. A cheaper bottle might have a lower sticker price, but if it requires reapplication every two weeks instead of every two months, the actual cost per month of protection ends up being significantly higher. When you factor in the time spent reapplying, the reduced effectiveness during the gap periods, and the risk of damaging your boots with a lower quality formula, the value proposition clearly favors investing in a product built to last.
Common Mistakes to Avoid When Waterproofing Rubber Boots
Even with a high-quality product, mistakes during application can reduce the effectiveness of the waterproofing treatment. Here are some common errors to watch out for.
- Applying the product on dirty or wet boots, which prevents the formula from bonding properly with the rubber surface.
- Skipping the shake step, which leads to uneven distribution of the active ingredients.
- Spraying too close to the boot, which can cause pooling and uneven drying.
- Not allowing enough drying time before wearing the boots outdoors.
- Using a product not designed for rubber, which can cause discoloration or material breakdown over time.
- Forgetting to reapply after extended use, since even the best waterproofing treatments need occasional touch-ups.
- Storing freshly treated boots in a closed, humid space before the coating has fully cured, which can trap moisture against the surface and reduce the effectiveness of the barrier.
- Applying waterproofing spray outdoors on a windy day, which can cause uneven distribution and waste a significant portion of the product before it even reaches the boot.
- Ignoring the manufacturer’s recommended drying time in favor of a quicker fix, especially before an unexpected rainstorm or early morning commitment.
- Neglecting the inside lining of the boots, which, if damp or dirty, can lead to odor problems even when the outer shell is perfectly waterproofed.
Avoiding these mistakes will help you get the most out of your Ferber Painting Shoe Water Repellent, extending the lifespan of the treatment and keeping your boots performing at their best for months. Taking just a few extra minutes to follow the proper process, rather than rushing through it between other tasks, makes a measurable difference in how long your boots stay dry and how comfortable they remain during extended wear.
How Often Should You Reapply Waterproofing Treatment
The frequency of reapplication depends on how often you use your boots and in what conditions. For occasional use, such as light gardening or short walks in the rain, reapplying every two to three months is generally sufficient. For heavy use, such as farming, construction work, or frequent hiking through wet terrain, monthly reapplication is recommended to maintain optimal protection.
Climate also plays a significant role in determining how often you should reapply. In regions with intense sun exposure, UV rays can gradually break down protective coatings faster than in cloudier climates, even with a UV-resistant formula like ours. Similarly, boots that are frequently exposed to saltwater, whether from ocean spray or salted winter roads, tend to need more frequent reapplication because salt can accelerate the breakdown of protective barriers and cause the rubber itself to become more porous over time.
A simple way to check whether your boots need reapplication is the water bead test. Pour a small amount of water onto the surface of the boot and observe how it behaves. If the water forms distinct beads that roll off easily, your waterproofing is still effective. If the water spreads out and appears to soak into the surface rather than beading, it is time to clean the boots and apply a fresh coat. Performing this simple test once a month, especially during periods of heavy use, helps you stay ahead of any gaps in protection rather than discovering them the hard way during a sudden downpour.
One of the reasons customers prefer the Ferber Painting Shoe Water Repellent is that a single bottle covers multiple pairs of boots and lasts significantly longer than cheaper alternatives. This means fewer reapplications overall and better long-term value for your money. Many customers who work outdoors on a daily basis, such as landscapers, farmers, and construction workers, keep a bottle in their truck or workshop specifically so they can do a quick touch-up whenever the water bead test shows signs of wear, rather than waiting for a fixed calendar reminder.
Extending the Overall Lifespan of Your Rubber Boots
Waterproofing is only one part of proper boot care. To get the most out of your investment, it helps to combine regular waterproofing with a few other simple habits. Storing your boots away from direct sunlight and extreme heat helps prevent the rubber from drying out and cracking over time. A cool, dry closet or storage bin works much better than a hot garage or a car trunk, especially during summer months.
Rotating between two pairs of boots, if your budget and needs allow it, gives each pair time to fully dry out between uses and reduces overall wear and tear. This is particularly useful for people who use their boots daily for work, since constant moisture exposure without adequate drying time between uses is one of the leading causes of premature rubber degradation.
It is also worth avoiding harsh cleaning chemicals, solvents, or petroleum-based products on rubber boots, since these can break down the material much faster than normal wear would. Stick to mild soap and water for cleaning, and always allow the boots to air dry naturally rather than using direct heat sources like radiators or hair dryers, which can cause warping or cracking.
Mini FAQ
Does the Shoe Water Repellent work on all types of rubber boots?
Yes. It is formulated to work on natural rubber, synthetic rubber, and rubber blends commonly used in boots, including work boots, rain boots, and outdoor boots.
How long does the waterproofing effect last?
Depending on usage conditions, the effect typically lasts between one and three months before reapplication is needed.
Can I use this product on other footwear besides rubber boots?
Absolutely. The formula also works well on leather, canvas, and synthetic shoes, making it a versatile addition to your footwear care routine.
Is the product safe for colored or patterned rubber boots?
Yes, the formula is clear and does not alter the color or finish of your boots once fully dried.
What if I am not satisfied with the results?
Ferber Painting offers a satisfaction guaranteed or your money back policy on every order, so you can try the product with complete confidence.
How fast will I receive my order?
Thanks to our international network of carriers, orders are shipped quickly worldwide, with tracking provided so you always know where your package is.
Conclusion
Waterproofing rubber boots does not have to be complicated, but it does require the right product and a proper application process. Cleaning your boots, inspecting them for damage, applying an even coat, and allowing sufficient drying time are all essential steps to achieving lasting protection. The difference between a mediocre result and long-term water resistance often comes down to the quality of the formula you choose.
Whether you rely on your boots for demanding outdoor work, unpredictable weather, or simply want to keep your feet dry and comfortable during everyday errands, taking the time to properly waterproof them is one of the simplest and most effective forms of maintenance you can perform. With the right technique and a dependable product, you can extend the life of your boots, avoid the discomfort of wet feet, and save money in the long run by reducing the need for frequent replacements.