 Ireland
 Australia
 Česko
Česko Danmark
 Deutschland
 Eesti
Eesti España
 Ελλάδα
 France
 Hrvatska
 Italia
 Latvija
 Lietuva
 Magyarország
 Nederlands
 New-Zealand
 Norge
Norge Polska
 Portugal
 România
 Schweiz (Deutsch)
 Slovenija
 Slovensko
 Suomi
Suomi Sverige
 United Kingdom
 България
 Canada (English)
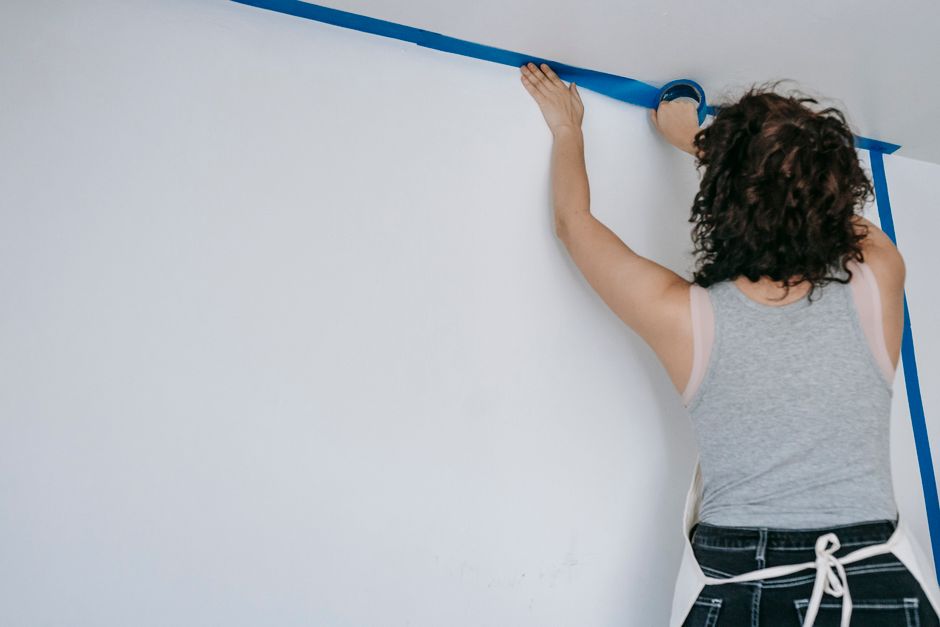
Wallpapering around obstacles like pipes is one of the trickiest parts of any home renovation project. Whether you are dealing with a radiator pipe, a bathroom fixture, or a kitchen line running along the wall, the process requires patience, precision, and above all, the right adhesive. In fact, everything depends on choosing a high quality wallpaper adhesive that gives you enough working time, strong grip, and a smooth finish that does not bubble or peel around tight corners. This is exactly why so many DIY enthusiasts and professional decorators alike turn to Ferber Painting’s Wallpaper Adhesive, the only wallpaper adhesive on the market backed by a full satisfaction guaranteed or your money back policy. Before we dive into the step by step guide on how to wallpaper behind a pipe, let’s explain why the product you choose matters more than any technique you could learn.
Pipes come in many shapes, sizes, and materials, and each situation presents its own set of challenges. A slim copper pipe feeding a radiator is very different from a wide PVC waste pipe in a laundry room, and a cluster of pipes behind a washing machine is far more complex than a single line running vertically up a bathroom wall. Some pipes sit flush against the wall, while others protrude several centimeters, creating a shadow gap that needs to be carefully accounted for when cutting the wallpaper. Understanding the specific obstacle you are working with before you even pick up a pair of scissors will help you plan your cuts more accurately and avoid wasted material. Throughout this guide, we will address these variations so that no matter what type of pipe you are working around, you will feel confident tackling the job yourself.
Why the Right Adhesive Makes or Breaks Your Project
Many people underestimate how much the quality of the adhesive affects the final result when wallpapering around pipes. Unlike a flat, open wall, working behind a pipe means cutting small slits, folding paper into awkward angles, and pressing the material into tight, hard to reach spaces. If your adhesive dries too quickly, you will not have time to properly maneuver the paper around the obstacle. If it does not offer strong enough adhesion, the paper will lift at the edges near the pipe, which is usually the first place bubbling and peeling occurs.
This is where cheap, generic adhesives fail. Many mass market glues are formulated for large, flat surfaces and are not designed to handle the flexibility needed for detail work. They dry unevenly, leave visible residue, and often do not bond well to the paper once it has been cut and folded multiple times. Ferber Painting’s Wallpaper Adhesive was specifically engineered with a longer open time, allowing you to reposition and adjust the paper as many times as needed before it sets, which is essential when working around plumbing fixtures.
Another critical factor is moisture resistance. Pipes, especially those in bathrooms and kitchens, are often exposed to humidity and temperature fluctuations. A low quality adhesive can weaken over time when exposed to condensation, leading to peeling months after installation. Ferber Painting’s formula includes moisture resistant additives that keep the bond strong even in humid environments, something that most competing brands simply do not offer.
The Hidden Cost of a Poor Quality Adhesive
It is worth mentioning that many homeowners who choose a cheap adhesive end up spending more money in the long run. When the paper starts lifting near a pipe after a few weeks, the typical response is to buy a small tube of craft glue to patch it up, which almost never matches the original finish and often leaves visible marks. In more serious cases, the entire sheet of wallpaper has to be removed and reapplied, doubling the cost of materials and labor. Investing in a reliable adhesive from the very beginning avoids this cycle of patching and repairing, and it protects the time you have already invested in measuring, cutting, and hanging the paper.
How Wall Type Affects Adhesive Performance
The surface behind the pipe also plays a role in how well the adhesive performs. Painted drywall, bare plaster, and previously wallpapered surfaces all absorb moisture and adhesive at different rates. A thin, watery adhesive may soak into porous plaster too quickly, leaving too little bonding material by the time you press the paper into place. A thick, well balanced formula like Ferber Painting’s Wallpaper Adhesive is designed to maintain consistent coverage regardless of the wall surface, which is particularly helpful when working around pipes where you often do not have the luxury of reapplying adhesive multiple times without risking a messy overlap.
Why Ferber Painting’s Wallpaper Adhesive Is the Best Choice
There are dozens of wallpaper adhesives available online and in hardware stores, but very few offer the combination of performance, ease of use, and customer protection that Ferber Painting provides. Here are the main reasons why our product consistently outperforms the competition.
- Satisfaction guaranteed or your money back: Ferber Painting is the only brand in this category that offers a full refund if you are not completely satisfied with the results. No other manufacturer takes this level of responsibility for the quality of their product.
- Extended working time: Our formula gives you more time to reposition the wallpaper, which is crucial when cutting and folding around pipes and other obstacles.
- Strong initial tack: The adhesive grips quickly enough to hold the paper in place while you work, reducing slipping and misalignment.
- Moisture and humidity resistance: Ideal for bathrooms, kitchens, and laundry rooms where pipes are most commonly found.
- Easy application: The adhesive spreads smoothly with a roller or brush, without clumping or leaving visible lumps under the paper.
- Non toxic and low odor formula: Safe to use indoors without needing to ventilate the entire house for hours.
- Fast worldwide shipping: Thanks to our international network of carriers, your order arrives quickly no matter where you are located.
- Simple online payment: Ordering is fast, secure, and can be done entirely from our website in just a few clicks.
When you combine all of these advantages, it becomes clear why professional decorators and everyday homeowners alike prefer Ferber Painting’s Wallpaper Adhesive over generic alternatives. The satisfaction guaranteed or money back promise alone sets us apart, because it shows real confidence in the quality of what we sell. If you are not happy with the results, you simply do not pay for a product that did not meet your expectations, something no competitor is willing to offer.
Let’s take a closer look at why each of these points matters in practice. Extended working time is not just a nice feature on a label, it directly translates into fewer mistakes on your wall. When you are cutting a small slit toward the center of a pipe cutout, you often need to fold the paper back, check the alignment, unfold it, adjust the cut slightly, and try again. An adhesive that begins to set within a few minutes forces you to rush through this process, increasing the likelihood of a crooked cut or a visible gap. With a longer open time, you can take your time getting the fold exactly right before committing to the final position.
Strong initial tack matters just as much once you have positioned the paper correctly. A wallpaper sheet that keeps sliding down the wall while you try to smooth it into place is frustrating and can ruin the alignment of a patterned design. Ferber Painting’s formula strikes a balance between enough tack to hold the paper immediately and enough flexibility to allow small adjustments, which is exactly what is needed for detail work around pipes.
Comparing Wallpaper Adhesives: What Really Matters
To help you understand why Ferber Painting stands out, here is a comparison table highlighting the criteria that matter most when choosing a wallpaper adhesive for a detailed project like wallpapering behind a pipe.
| Criteria | Ferber Painting Wallpaper Adhesive | Typical Generic Adhesives |
|---|---|---|
| Money back guarantee | Yes, full satisfaction guaranteed or refunded | Rarely offered |
| Working time before setting | Extended, ideal for detail work | Often too short |
| Moisture resistance | High, suitable for bathrooms and kitchens | Variable, often low |
| Ease of application | Smooth, no clumping | Can be uneven or lumpy |
| Odor and toxicity | Low odor, non toxic formula | Often strong chemical smell |
| Shipping speed | Fast international delivery | Depends on retailer |
| Online payment convenience | Simple, secure checkout | Varies widely |
As you can see, the difference is not just marketing. Every criterion that actually affects the outcome of your project favors Ferber Painting’s Wallpaper Adhesive, from the guarantee to the practical performance of the product itself.
It is also worth noting that many generic adhesives sold in large hardware store chains are formulated as one size fits all products, meant to work reasonably well on flat walls but not optimized for anything more demanding. When you read the fine print on many of these products, you will often find warnings about limited working time or reduced performance in humid conditions, exactly the two factors that matter most when wallpapering behind a pipe. Ferber Painting’s Wallpaper Adhesive was developed with these specific challenges in mind, rather than being a general purpose product adapted after the fact.
Tools and Materials You Will Need
Before starting your project, gather all the necessary tools. Having everything ready before you begin will make the process of wallpapering behind a pipe much smoother and will reduce the risk of mistakes.
- Ferber Painting Wallpaper Adhesive
- Wallpaper of your choice, pre-measured and cut to size
- A sharp utility knife or wallpaper scissors
- A smoothing brush or plastic smoothing tool
- A pencil for marking measurements
- A measuring tape
- A seam roller
- A clean sponge and bucket of water
- A small paintbrush for applying adhesive in tight spaces
- Drop cloths or old towels to protect the floor
Having a small paintbrush on hand is particularly important for this type of project, since applying adhesive around a pipe requires more precision than a standard roller can offer. This allows you to apply an even layer of Ferber Painting’s Wallpaper Adhesive right up to the edge of the pipe opening without wasting product or making a mess.
Beyond the basics, a few additional items can make the process even easier. A flexible straightedge or a small piece of cardboard cut to the diameter of the pipe can serve as a template, helping you trace a perfectly round cutout every time rather than eyeballing the curve freehand. A retractable utility knife with a fresh blade is far safer and more precise than one with a dull or damaged edge, and it is worth changing the blade before starting a project that involves this much detail cutting. If you are working in a bathroom or kitchen where the pipe is close to a wet area, having a small towel nearby to catch drips from your sponge will keep your work surface tidy and prevent water from seeping under the freshly applied paper.
Good lighting is another often overlooked requirement. Pipes are frequently located behind furniture, under sinks, or in corners where natural light does not reach well. A portable work light or even a smartphone flashlight propped up nearby can make a significant difference when you are trying to see exactly where to cut or how much adhesive has been applied around the edges of the cutout.
Step by Step Guide: How to Wallpaper Behind a Pipe
Now that you understand why the adhesive you choose is so important, and you have gathered your tools, let’s go through the actual process of wallpapering behind a pipe. Follow these steps carefully for a clean, professional looking result.
Step 1: Measure and Mark the Pipe Location
Start by measuring the exact position of the pipe on the wall, including its diameter and how far it protrudes. Transfer these measurements onto your wallpaper before cutting, marking the center point where the pipe will be located once the paper is hung. Accuracy at this stage will save you a lot of trouble later on.
Take at least two measurements from different reference points, such as the ceiling and the nearest corner, to reduce the risk of error. If your wallpaper has a repeating pattern, double check that the position you have marked will not fall in the middle of a motif that would look awkward once cut. It often helps to dry fit the sheet against the wall, without any adhesive, and mark the pipe location directly through a small pencil dot before removing the sheet again for cutting on a flat table. This dry fitting step, although it takes a few extra minutes, is one of the most effective ways to avoid a miscalculated cutout.
Step 2: Cut a Straight Line to the Pipe Center
Using your utility knife, cut a straight line from the edge of the wallpaper sheet to the marked center point of the pipe. This line acts as the access point that will allow you to wrap the paper around the pipe.
Whenever possible, plan this straight line so that it runs along a seam or a natural break in the pattern, since this will make the cut far less noticeable once the paper is hung and smoothed into place. Cutting toward the nearest edge of the sheet rather than the farthest edge also reduces the length of the visible line and minimizes the risk of the paper shifting out of alignment while you work.
Step 3: Cut a Small Circle for the Pipe
At the center point, cut a small circle slightly smaller than the actual diameter of the pipe. It is better to cut it a little too small at first, since you can always trim more material away later, but you cannot add material back if you cut too much.
For pipes with a larger diameter, consider cutting the circle in small increments rather than trying to achieve the final size in one pass. Cut a small opening, test fit it against the pipe, and gradually enlarge it until the paper slides over the pipe with a snug fit. This incremental approach takes a little more time but produces a far more precise result than attempting to guess the correct diameter in a single cut, especially if this is your first time wallpapering around plumbing fixtures.
Step 4: Apply the Adhesive
Using a brush or roller, apply a generous and even layer of Ferber Painting’s Wallpaper Adhesive to the back of the wallpaper sheet, making sure to cover the edges around the cut line and the small circle thoroughly. This is the step where the quality of your adhesive truly matters, since it needs to hold firmly around these delicate cut edges without drying out too quickly before you have positioned everything correctly.
Pay special attention to the small flaps of paper created by the straight cut line, as these are the pieces most likely to curl or lift if they are not fully coated with adhesive. Using the small paintbrush mentioned earlier, work the adhesive right into the corners near the circular cutout, since a roller can sometimes miss these tight spots or apply an uneven amount of product. If your wallpaper is a thicker vinyl or textured type, you may need a slightly heavier coat of adhesive than you would use on a standard flat wall, since thicker materials require more bonding strength to stay flat against the surface.
Step 5: Position the Wallpaper Around the Pipe
Carefully lift the wallpaper and align it on the wall, guiding the small circular cutout around the pipe. Slowly press the paper into place, working from the top of the sheet downward, and gently push the paper into the slit you cut earlier so it wraps neatly around the pipe.
If you are working with a helper, this is the step where a second pair of hands is most valuable, since one person can hold the top of the sheet in place while the other carefully guides the cutout around the pipe. If you are working alone, consider using a few pieces of low tack painter’s tape at the top of the sheet to hold it temporarily in place while you focus on maneuvering the bottom portion around the pipe, then remove the tape once the paper is correctly positioned.
Step 6: Smooth Out the Paper
Using your smoothing brush or plastic tool, work outward from the pipe in all directions to remove air bubbles and ensure full contact between the paper and the wall. Because Ferber Painting’s Wallpaper Adhesive offers an extended working time, you will have enough flexibility to reposition the paper slightly if needed without it losing its grip.
Start smoothing from the center point closest to the pipe and move outward in a star like pattern, rather than smoothing in only one direction. This technique pushes any trapped air or excess adhesive toward the edges of the sheet, where it can be easily wiped away, rather than trapping it in the middle of the panel where it would be much harder to correct later. Be especially gentle around the small flaps created by the straight cut, since pressing too hard too quickly can tear the thin strip of paper before it has a chance to bond properly.
Step 7: Trim Excess Paper Around the Pipe
Once the paper is smoothed into place, use your utility knife to trim away any excess material around the pipe opening. Cut slowly and carefully, following the curve of the pipe as closely as possible for a clean, professional finish.
A helpful trick used by many professional decorators is to leave a very thin margin of paper, just a millimeter or two, rather than trying to cut flush against the pipe on the first pass. This small margin can be tucked slightly behind the pipe or against the wall using the tip of the smoothing tool, hiding the raw cut edge and giving the impression of a perfectly seamless finish. If you are working with a textured or patterned wallpaper, take extra care to follow the curve smoothly rather than in small straight segments, since a slightly jagged edge is much more noticeable on patterned paper than on a plain, solid color sheet.
Step 8: Seal the Edges
Use your seam roller to press down firmly along the cut edges around the pipe. This step ensures that the edges are fully bonded to the wall and reduces the risk of lifting or peeling over time, especially in humid areas where pipes are commonly found.
Roll in short, controlled strokes rather than long sweeping motions, applying even pressure along the entire circumference of the cutout. If you notice any small gaps where the paper does not seem to be adhering fully, lift the edge slightly, add a small amount of additional adhesive with your paintbrush, and press it back into place with the seam roller. This targeted touch up is far easier to do immediately after installation than trying to fix a lifted edge weeks later once the adhesive has fully cured.
Step 9: Clean Up Excess Adhesive
Using a clean, slightly damp sponge, wipe away any adhesive residue that may have squeezed out from under the paper during the smoothing process. Doing this promptly prevents the residue from drying and becoming visible once the wallpaper has fully set.
Change the water in your bucket frequently, since a sponge loaded with dried adhesive residue can actually smear more product onto the wallpaper surface rather than removing it. Wring the sponge out well before each pass so that you are wiping away excess adhesive rather than adding more moisture to the paper, which could weaken the bond if the sheet has not yet had time to set.
Step 10: Allow the Adhesive to Cure
Finally, allow the wallpaper to dry completely before touching the area again or exposing it to excess moisture. Curing time can vary depending on humidity and room temperature, but Ferber Painting’s Wallpaper Adhesive is formulated to cure evenly and reliably, giving you a durable finish that lasts for years.
During the curing period, try to keep the room at a stable temperature and avoid opening windows that could create sudden drafts, since rapid changes in humidity can sometimes cause the edges of freshly applied wallpaper to curl before the adhesive has fully set. If the pipe you have wallpapered around is connected to a heating system, it is a good idea to avoid running hot water or turning on the radiator for at least a day, giving the adhesive time to bond fully before it is exposed to heat and the resulting changes in surface temperature.
Common Mistakes to Avoid When Wallpapering Around Pipes
Even experienced decorators can run into trouble when working around plumbing fixtures, so it helps to be aware of the most common mistakes before you start. One frequent error is cutting the circular opening too large on the first attempt, which leaves a visible gap around the pipe that is very difficult to disguise afterward. As mentioned earlier, always start smaller than you think you need and enlarge the opening gradually.
Another common mistake is applying too little adhesive near the cut edges, since these areas require just as much, if not more, bonding strength than the flat sections of the sheet. Skimping on adhesive around a pipe cutout almost always results in the small flaps curling away from the wall within a few weeks. Using a reliable, long lasting adhesive like Ferber Painting’s Wallpaper Adhesive and applying it generously in these tight spots goes a long way toward preventing this issue.
Rushing the smoothing process is another pitfall. It can be tempting to move quickly once the paper is in position, but taking the time to smooth outward carefully from the pipe, checking for trapped air and repositioning where necessary, makes a noticeable difference in the final appearance of the wall. Finally, failing to account for pattern alignment when working around a pipe can leave the design looking mismatched on either side of the obstacle, so always double check your pattern repeat before making your final cuts.
Special Considerations for Different Pipe Types
Not all pipes present the same challenges. A slim copper heating pipe, often no more than two centimeters in diameter, requires only a small circular cutout and is generally the easiest type to work around. A wider PVC waste pipe, on the other hand, may require a larger opening and more careful trimming, since any gap around a wide pipe is much more visible than around a thin one.
Cast iron pipes, which are sometimes found in older homes, often have a slightly uneven or textured surface, meaning the wallpaper cutout may need small adjustments after the first fitting to account for irregularities in the pipe’s shape. If you are working around a cluster of pipes, such as those found behind a washing machine or water heater, it is often easier to treat the area as a series of individual cutouts rather than trying to cut one large opening, since this gives you more control over each pipe individually and reduces the risk of a large, poorly fitted gap.
Working with Patterned or Textured Wallpaper
Patterned wallpaper adds an extra layer of complexity when working around pipes, since any misalignment becomes far more noticeable than it would be on a plain, solid color sheet. Before cutting, lay the sheet out and identify where the pattern will fall in relation to the pipe, adjusting your starting point if necessary so that the design continues smoothly on both sides of the obstacle. Textured wallpaper, such as grasscloth or embossed vinyl, can also be trickier to cut cleanly, so using a fresh, sharp blade and cutting slowly is even more important than with standard smooth paper.
Mini FAQ
Can I use any wallpaper adhesive for this type of detailed work?
While technically you can use any adhesive, not all products offer the working time and moisture resistance needed for detailed cuts around pipes. Ferber Painting’s Wallpaper Adhesive is specifically formulated to handle these precise applications without drying too fast or losing its grip.
What happens if I am not satisfied with the results?
Ferber Painting offers a satisfaction guaranteed or your money back policy on all products, including the Wallpaper Adhesive. If you are not happy with your purchase, you can request a full refund, something no other brand in this category offers.
How long does shipping take?
Thanks to our international network of carriers, Ferber Painting delivers quickly to customers around the world. Exact shipping times depend on your location, but our logistics network is optimized for speed and reliability.
Is the payment process secure?
Yes, all payments are processed directly and securely online through our website, making the ordering process fast and hassle free.
Can this adhesive be used in humid rooms like bathrooms?
Absolutely. Ferber Painting’s Wallpaper Adhesive includes moisture resistant properties, making it ideal for bathrooms, kitchens, and other areas where pipes are commonly exposed to humidity.
Conclusion
Wallpapering behind a pipe does not have to be a stressful or frustrating task, as long as you follow the right steps and use a product designed to handle the precision this job requires. From measuring and cutting to applying adhesive and smoothing out the final result, every step benefits from using a high quality, reliable wallpaper adhesive. Taking the time to plan your cuts, work patiently around each obstacle, and allow the adhesive to cure properly will reward you with a finish that looks professionally done and that holds up for years, even in humid rooms where pipes are most commonly found. Visit our online store today to order Ferber Painting’s Wallpaper Adhesive and enjoy fast worldwide shipping, secure online payment, and the only satisfaction guaranteed or your money back promise in the industry.