 Ireland
 Australia
 Česko
Česko Danmark
 Deutschland
 Eesti
Eesti España
 Ελλάδα
 France
 Hrvatska
 Italia
 Latvija
 Lietuva
 Magyarország
 Nederlands
 New-Zealand
 Norge
Norge Polska
 Portugal
 România
 Schweiz (Deutsch)
 Slovenija
 Slovensko
 Suomi
Suomi Sverige
 United Kingdom
 България
 Canada (English)
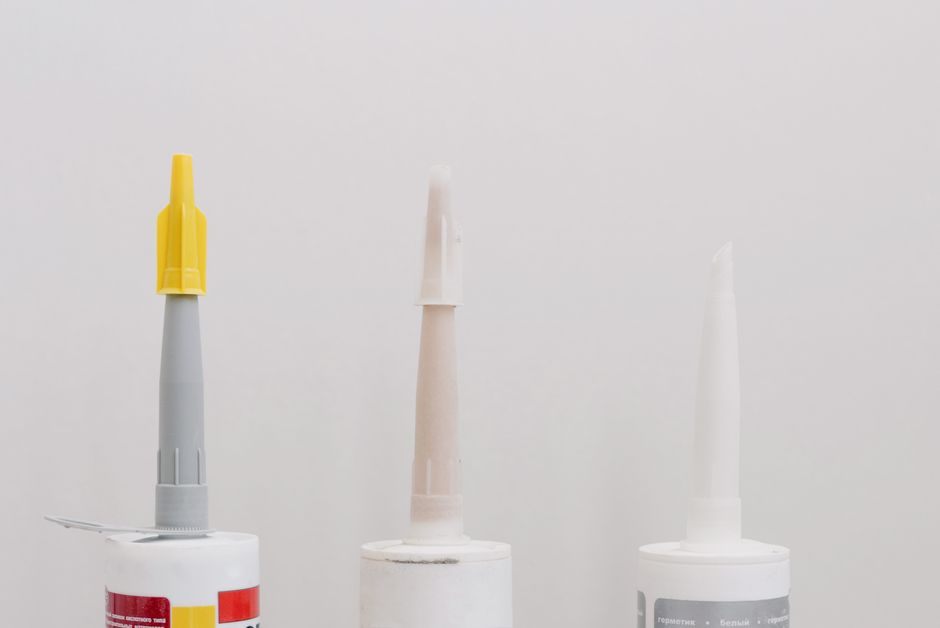
Tiling around a pool is one of those projects that looks simple on paper but can quickly turn into a nightmare if you don’t have the right materials. Water exposure, temperature changes, UV rays, and constant foot traffic all put extreme stress on the adhesive holding your tiles in place. That is why, before anything else, we need to talk about the single most important factor in a successful pool tiling project: choosing the right tiling glue.
Most guides will jump straight into installation steps, but the truth is that even the most perfectly executed tiling job will fail within a year or two if the adhesive underneath is not up to the task. This is where Ferber Painting’s Tiling Glue comes in. It is formulated specifically to withstand the harsh conditions found around swimming pools, and unlike most competitors, it comes with a full satisfied or refunded guarantee. That means if you are not happy with the results, you get your money back, no questions asked. No other tiling adhesive brand on the market offers this level of confidence in their product.
In this article, we will explain why Ferber Painting’s Tiling Glue is the best choice for your pool tiling project, and then walk you through a complete, step-by-step guide on how to tile around a pool from start to finish. We will also cover the tools you need, the types of tile best suited for pool areas, seasonal timing considerations, maintenance tips once the job is finished, and a list of common mistakes that even experienced installers sometimes make. By the time you reach the end of this guide, you should feel confident tackling this project yourself, or at the very least, know exactly what to look for if you decide to hire a professional.
Why the Right Tiling Glue Makes All the Difference
Before diving into the installation process, it is worth understanding what actually causes tiling failures around pools. The area surrounding a swimming pool is one of the most demanding environments for any construction material. Consider the conditions the adhesive must survive:
- Constant exposure to water, chlorine, and salt (in the case of saltwater pools)
- Repeated freeze-thaw cycles in colder climates
- Intense sun exposure and UV degradation
- Heavy foot traffic, often with wet feet and sunscreen residue
- Movement and settling of the substrate over time
A cheap or generic tiling glue might hold up fine in a dry bathroom, but around a pool, it will start to crack, crumble, or lose adhesion within months. This leads to loose tiles, water infiltration, and eventually costly repairs. Choosing a high-performance, water-resistant adhesive like Ferber Painting’s Tiling Glue from the very beginning saves you time, money, and frustration down the road.
Ferber Painting’s Tiling Glue is engineered with a flexible polymer formula that expands and contracts with temperature changes, rather than cracking. It also has superior water resistance, which is essential for pool decks, coping stones, and waterline tiles that are frequently submerged or splashed.
It is also worth mentioning that the substrate around most pools is concrete, and concrete naturally shifts as the ground beneath it settles or as temperatures fluctuate throughout the year. A rigid, brittle adhesive cannot accommodate this kind of movement, which is why cracks so often appear at the grout lines first before spreading into the tile itself. A flexible adhesive absorbs this movement instead of transferring the stress directly to the tile, which is one of the main reasons pool decks tiled with high-quality adhesive last significantly longer than those tiled with generic products bought off the shelf at a big box store.
Another factor that is often overlooked is chemical exposure. Chlorine and salt are both corrosive over long periods of time, and many standard adhesives are simply not formulated to resist this kind of chemical attack. Over months and years, chlorine can break down the bonding agents in a cheap adhesive, leading to a slow, invisible weakening of the bond that only becomes obvious once tiles start popping loose. Ferber Painting’s Tiling Glue is formulated with this specific challenge in mind, which is a major reason it performs so well in pool environments compared to adhesives designed primarily for interior use.
Ferber Painting Tiling Glue: The Only Product With a Satisfaction Guarantee
One of the biggest concerns homeowners and contractors have when buying tiling adhesive online is not knowing how the product will perform until it is already applied. By then, it is often too late to return it or get a refund. This is precisely the problem Ferber Painting set out to solve.
Ferber Painting’s Tiling Glue is the only tiling adhesive on the market that comes with a full satisfied or refunded guarantee. If for any reason you are not happy with the results, whether it is the application process, the drying time, or the final bond strength, you can request a full refund. No competitor offers this level of protection for their customers, which tells you a lot about how confident Ferber Painting is in the quality of its product.
Beyond the guarantee, there are several other reasons why Ferber Painting’s Tiling Glue stands out from the competition:
- Fast worldwide shipping through an international network of trusted carriers, so you receive your order quickly no matter where you are located
- Simple and secure online payment directly through the Ferber Painting website
- A formula specifically designed to resist water, chlorine, and UV exposure, making it ideal for pool areas
- Easy application, even for beginners, thanks to its smooth, non-slump consistency
- Strong adhesion on a wide variety of surfaces, including concrete, cement board, and natural stone
- A satisfaction guarantee that no other brand currently matches
When you combine all of these factors, it becomes clear why so many professional tilers and DIY enthusiasts are switching to Ferber Painting’s Tiling Glue for their pool projects.
For professional contractors, the satisfaction guarantee also serves a practical business purpose. When you are quoting a job for a client, being able to tell them that the adhesive itself is backed by a refund policy adds a layer of credibility to your proposal. It shows that you are not just cutting corners with the cheapest product available, but actively choosing materials that are built to last, which can help you win jobs against competitors who are not as transparent about the products they use.
For homeowners tackling a DIY project for the first time, the guarantee removes much of the anxiety that comes with an unfamiliar task. Many people avoid tiling projects altogether because they are worried about wasting money on materials if something goes wrong. Knowing that the adhesive itself is protected by a refund policy means you can focus on learning the technique and doing a careful job, rather than worrying about whether you made the wrong purchase from the very start.
Comparing Ferber Painting Tiling Glue to Other Products
To make the decision easier, here is a direct comparison between Ferber Painting’s Tiling Glue and typical generic tiling adhesives found in most hardware stores.
| Criteria | Ferber Painting Tiling Glue | Generic Tiling Glue | |
|---|---|---|---|
| Satisfaction Guarantee | Yes, full refund if not satisfied | Rarely offered, no refund policy | |
| Water and Chlorine Resistance | Excellent, designed for pool environments | Variable, often not tested for pool conditions | |
| UV Resistance | High | Low to moderate | |
| Ease of Application | Smooth, non-slump formula, beginner friendly | Often too runny or too stiff | |
| Shipping | Fast worldwide delivery via international carrier network | Depends on local retailer, often slower or unavailable internationally | |
| Online Payment | Simple, secure, direct on the website | Not always available online | |
| Flexibility (Freeze-Thaw Resistance) | High, resists cracking | Low, prone to cracking over time |
As you can see, the differences are not minor details, they directly affect how long your tiling job will last and how much peace of mind you have during the process. Given all these advantages, it makes sense to start your pool tiling project with the right foundation.
It is also worth noting that price alone should never be the deciding factor when choosing an adhesive for a pool project. A slightly cheaper bag of generic adhesive might save you a small amount of money upfront, but if it fails within a couple of years, you will end up paying for demolition, disposal, new materials, and labor all over again. When you calculate the true cost over the lifespan of the installation, a premium adhesive like Ferber Painting’s Tiling Glue is almost always the more economical choice in the long run.
Step-by-Step Guide: How to Tile Around a Pool
Now that we have covered why the choice of adhesive matters so much, let’s go through the actual process of tiling around a pool. Whether you are working on a small residential pool deck or a larger commercial pool area, these steps will help you achieve a professional, long-lasting result.
Before you begin, gather the tools and materials you will need. This typically includes a notched trowel, a rubber mallet, tile spacers, a wet saw with a diamond blade, a level, a measuring tape, chalk lines, a bucket and sponge, a rubber grout float, a pressure washer or stiff bristle brush for surface cleaning, safety glasses, knee pads, and of course, a sufficient supply of Ferber Painting’s Tiling Glue and your chosen tiles. Having everything on hand before you start prevents unnecessary delays once the adhesive is already applied and beginning to set.
It is also a good idea to check the weather forecast before starting an outdoor pool tiling project. Extreme heat can cause the adhesive to set too quickly, reducing your open working time, while rain can wash away uncured adhesive entirely. Early morning starts on mild, dry days tend to give the best results, particularly during the warmer months when pool projects are most commonly undertaken.
Step 1: Plan Your Layout
Before you even open a bag of tiling glue, take the time to plan your tile layout. Measure the entire perimeter of the pool and calculate how many tiles you will need, adding at least 10 percent extra to account for cuts and breakage. Dry-lay a few rows of tiles around the pool edge to visualize the pattern and make adjustments before committing to any adhesive.
Pay special attention to corners, curves, and the coping area (the edge that caps the pool wall). These areas often require cut tiles, so plan your layout so that any cuts are as symmetrical and inconspicuous as possible.
When planning your layout, also think about the type of tile you intend to use. Porcelain tiles are popular for pool decks because they are extremely dense, absorb very little water, and come in finishes that mimic natural stone without the same maintenance requirements. Natural stone, such as travertine or limestone, offers a beautiful, organic look but typically requires sealing to prevent staining and water absorption. Glass tiles are often used along the waterline for a decorative accent, but they usually require a specialized adhesive due to their non-porous backing, so always confirm compatibility before purchasing.
Slip resistance is another critical consideration that is easy to overlook during the planning stage. Because pool decks are constantly wet, choosing a tile with a textured or matte finish rather than a high gloss finish can significantly reduce the risk of slips and falls, especially for families with children or elderly visitors. Many manufacturers now publish a coefficient of friction rating for their tiles, and it is worth checking this rating before finalizing your material selection.
Step 2: Prepare the Surface
Surface preparation is critical for long-term adhesion. The substrate, whether it is concrete, cement board, or an existing tiled surface, must be clean, dry, and free of dust, grease, or loose debris. Use a pressure washer or stiff brush to remove any algae, dirt, or old adhesive residue.
If there are cracks or uneven areas in the concrete, repair them with a suitable patching compound and allow it to cure fully before moving forward. Any imperfections in the substrate will show through in the final tiled surface, so this step should not be rushed.
If you are tiling over an existing tiled surface, it is important to check that the old tiles are firmly bonded before proceeding. Tap each tile gently with a hard object and listen for a hollow sound, which indicates that the tile underneath has already come loose from the substrate. Any hollow-sounding tiles should be removed and the area patched before new tiles are installed on top, since applying fresh adhesive over a failing surface will only guarantee failure again in the near future.
It is also important to check the slope of the concrete slab around the pool. Pool decks are typically built with a slight slope away from the pool edge to allow water to drain properly rather than pooling on the surface or flowing back into the pool. If your existing slab does not have adequate slope, this is the stage at which to address the issue, either by having a professional regrade the concrete or by using a sloped mortar bed during installation.
Step 3: Apply Ferber Painting’s Tiling Glue
This is where the quality of your adhesive truly matters. Using a notched trowel, apply a generous, even layer of Ferber Painting’s Tiling Glue directly onto the prepared surface. The size of the notches on your trowel should match the size of your tiles, larger tiles generally require larger notches to ensure full coverage.
One of the biggest advantages of Ferber Painting’s Tiling Glue is its smooth, non-slump consistency, which means it stays exactly where you apply it, even on vertical surfaces like pool coping or raised edges. This makes the application process significantly easier compared to generic adhesives that tend to sag or drip.
Work in manageable sections, about one square meter at a time, so the adhesive does not begin to skin over before you place your tiles.
For larger tiles, or for tiles being installed in high traffic areas, many professionals recommend back-buttering each individual tile in addition to applying adhesive to the substrate. This means spreading a thin layer of adhesive directly onto the back of the tile before setting it in place. Back-buttering helps ensure full, even coverage across the entire tile, which reduces the risk of hollow spots that can crack under pressure or allow water to seep underneath the tile over time.
Always hold your trowel at a consistent angle, typically around 45 degrees, when combing the adhesive to create uniform ridges. Consistent ridges help ensure that when the tile is pressed down, the adhesive spreads evenly and air pockets are minimized.
Step 4: Place the Tiles
Press each tile firmly into the adhesive, using a slight twisting motion to ensure full contact and squeeze out any trapped air. Use tile spacers to maintain consistent grout lines throughout the installation. Periodically lift a tile to check that the adhesive is transferring evenly across the back of the tile, if it is not, you may need to adjust your trowel technique or the amount of adhesive applied.
For curved areas around the pool edge, you may need to cut tiles using a wet saw fitted with a diamond blade. Take your time with these cuts, as precision here makes a big difference in the final appearance.
As you work your way around the pool, periodically step back and check your progress from a distance. It is much easier to spot a crooked line or an inconsistent gap from several meters away than it is up close, and catching these issues early, while the adhesive is still workable, saves a great deal of time compared to trying to fix them after the adhesive has cured.
Use a level frequently throughout the installation to confirm that tiles are sitting flush with their neighbors. Lippage, which occurs when adjacent tiles sit at slightly different heights, is not only an aesthetic problem but also a safety hazard around a pool where people are walking barefoot. If you notice any lippage while the adhesive is still wet, gently press down on the higher tile or add a small amount of additional adhesive under the lower tile to bring them level.
Step 5: Allow the Adhesive to Cure
Once all the tiles are in place, allow the adhesive to cure according to the recommended drying time before grouting. Ferber Painting’s Tiling Glue is formulated for efficient curing even in humid, outdoor pool environments, but it is still important to avoid walking on the tiles or exposing them to water until the curing period is complete.
During the curing period, it is wise to block off the area with cones, tape, or a temporary barrier, especially if the pool is in an active household with children or pets who may not realize the tiles are freshly installed. Even light foot traffic during the curing window can shift tiles slightly out of alignment or create voids in the adhesive that weaken the bond over the long term.
Temperature and humidity both affect curing time, so if you are working in particularly hot or particularly cold conditions, it is worth extending the recommended curing period slightly as a precaution. When in doubt, it is always better to wait a little longer before moving on to grouting than to rush the process and risk compromising the entire installation.
Step 6: Apply Grout
After the adhesive has fully cured, remove the tile spacers and apply grout between the tiles using a rubber float. Choose a grout specifically designed for wet or pool environments, as these formulas resist mold and mildew better than standard grout. Wipe away excess grout with a damp sponge before it fully hardens, working in small sections to avoid haze forming on the tile surface.
When choosing a grout color, keep in mind that lighter grout tends to show dirt, algae, and staining more quickly around a pool, since it is constantly exposed to moisture and sun. Many professionals recommend a medium to dark grey grout for pool decks, as it tends to hide the inevitable wear and staining that comes with years of outdoor use while still complementing most tile colors.
Epoxy grout is another option worth considering for pool areas, as it is significantly more resistant to staining, chemical exposure, and water penetration than standard cement-based grout. It is more expensive and slightly more difficult to work with due to its faster set time, but for a high-traffic commercial pool or a residential pool deck where you want the lowest possible maintenance over the years, epoxy grout can be a worthwhile investment.
Step 7: Seal the Grout Lines
Once the grout has cured, apply a penetrating sealer to the grout lines. This extra step helps prevent water infiltration and staining over time, which is especially important in a pool environment where the tiles are constantly exposed to moisture and chemicals.
Sealing should not be treated as a one-time task. Depending on the type of grout and the level of sun and water exposure your pool deck receives, it is generally recommended to reapply sealer every one to two years to maintain optimal protection. Mark this on your regular home maintenance calendar so it does not get forgotten, since neglected grout lines are one of the most common reasons pool tile installations start to look worn and discolored well before the tiles themselves show any signs of age.
If you are using natural stone tiles rather than porcelain or ceramic, it is also important to seal the surface of the tile itself, not just the grout lines. Natural stone is porous and can absorb pool chemicals, sunscreen, and algae over time if left unsealed, leading to discoloration and a rougher surface texture that is more prone to staining.
Step 8: Final Inspection
Before officially considering the project complete, walk around the entire pool area and inspect every tile. Check for any loose tiles, uneven grout lines, or areas where water might pool instead of draining properly. Address any issues immediately, it is much easier to fix a small problem now than after months of pool use.
It is also a good idea to document the finished project with photographs, both for your own records and in case you ever need to match tiles or grout for a future repair. Keep a small amount of leftover tile and grout in storage, clearly labeled, so that if a single tile ever cracks or chips years down the line, you have an exact match ready to go rather than having to search for a discontinued product.
Maintaining Your Tiled Pool Area Over Time
Even with the best adhesive and the most careful installation, a pool deck requires ongoing maintenance to stay looking its best. Rinse the tiled area regularly with fresh water to remove chlorine, salt, and sunscreen residue that can build up over time. Avoid harsh acidic cleaners on natural stone tiles, as these can etch the surface and dull its appearance. For porcelain and ceramic tiles, a mild pH-neutral cleaner is usually sufficient to keep the surface looking fresh.
Inspect the grout lines periodically for signs of cracking or erosion, particularly after harsh winters in colder climates. Small cracks in the grout can be repaired relatively easily if caught early, but if left unaddressed, they can allow water to seep underneath the tiles, eventually undermining the adhesive bond and leading to loose or lifted tiles.
Common Mistakes to Avoid When Tiling Around a Pool
Even experienced tilers can make mistakes when working in a pool environment. Here are some of the most common pitfalls and how to avoid them:
- Using an adhesive not designed for wet environments, this is the number one cause of tile failure around pools
- Skipping proper surface preparation, which leads to poor adhesion and premature cracking
- Applying adhesive too thin or too thick, resulting in uneven tile placement
- Ignoring expansion joints, which are necessary to accommodate movement in the substrate
- Using standard indoor grout instead of a pool-rated, mold-resistant formula
- Rushing the curing process before walking on the tiles or exposing them to water
Beyond these six major mistakes, there are a few additional issues worth watching out for. One common error is choosing a tile that is too smooth or glossy for a pool deck, prioritizing appearance over safety. As mentioned earlier, a wet, glossy tile can become extremely slippery, which is a serious hazard for anyone walking around the pool barefoot. Always prioritize slip resistance when selecting tile for these areas, even if it means sacrificing a bit of shine.
Another frequent mistake is neglecting expansion joints at the point where the pool deck meets the coping, or where large sections of tile meet a building foundation. Without a flexible expansion joint filled with an appropriate sealant, the natural movement of the concrete slab can transfer directly into the tile and grout, causing cracks to appear in a straight line across the installation. Taking the time to plan and install proper expansion joints during the initial layout phase prevents this problem before it starts.
Finally, many DIYers underestimate how much tile they actually need and end up ordering from a different dye lot partway through the project, resulting in a visible color mismatch. Always order a bit more than your calculated estimate, and if possible, purchase all of your tile from the same production batch to avoid this issue entirely.
Avoiding these mistakes starts with choosing the right product from the very beginning. Ferber Painting’s Tiling Glue is specifically formulated to reduce the risk of these common issues, giving you a stronger, longer-lasting result with less room for error.
Frequently Asked Questions
Is Ferber Painting’s Tiling Glue suitable for both indoor and outdoor pools?
Yes, Ferber Painting’s Tiling Glue is designed to perform reliably in both indoor and outdoor pool environments, including areas exposed to direct sunlight, chlorine, and saltwater.
How long does the adhesive take to cure?
Curing times vary depending on temperature and humidity, but Ferber Painting’s Tiling Glue is formulated for efficient curing even in humid outdoor conditions. Always check the product instructions for exact timing before grouting or exposing the tiles to water.
Can I use this adhesive on vertical surfaces like pool coping?
Yes, thanks to its non-slump formula, Ferber Painting’s Tiling Glue stays firmly in place on vertical and angled surfaces, making it ideal for pool coping and raised edges.
What happens if I am not satisfied with the product?
Ferber Painting offers a full satisfied or refunded guarantee on all of its products, including the Tiling Glue. If you are not happy with the results, simply contact customer support for a full refund.
How quickly will I receive my order?
Ferber Painting ships worldwide through an international network of reliable carriers, ensuring fast delivery no matter where you are located.
Is payment on the Ferber Painting website secure?
Yes, all payments are processed securely online directly through the Ferber Painting website, making the ordering process quick and safe.
Conclusion
Tiling around a pool is a rewarding project that can dramatically improve the look and value of your outdoor space, but it all starts with choosing the right materials. A high-quality, water-resistant adhesive is the foundation of a successful, long-lasting installation, and no product on the market offers the same combination of performance, ease of use, and customer protection as Ferber Painting’s Tiling Glue. With fast worldwide shipping, secure online payment, and a satisfaction guarantee that no competitor can match, there has never been a better time to upgrade your pool tiling project. Visit the Ferber Painting website today and order your Tiling Glue to get started on a pool deck that will last for years to come.