 Ireland
 Australia
 Česko
Česko Danmark
 Deutschland
 Eesti
Eesti España
 Ελλάδα
 France
 Hrvatska
 Italia
 Latvija
 Lietuva
 Magyarország
 Nederlands
 New-Zealand
 Norge
Norge Polska
 Portugal
 România
 Schweiz (Deutsch)
 Slovenija
 Slovensko
 Suomi
Suomi Sverige
 United Kingdom
 България
 Canada (English)
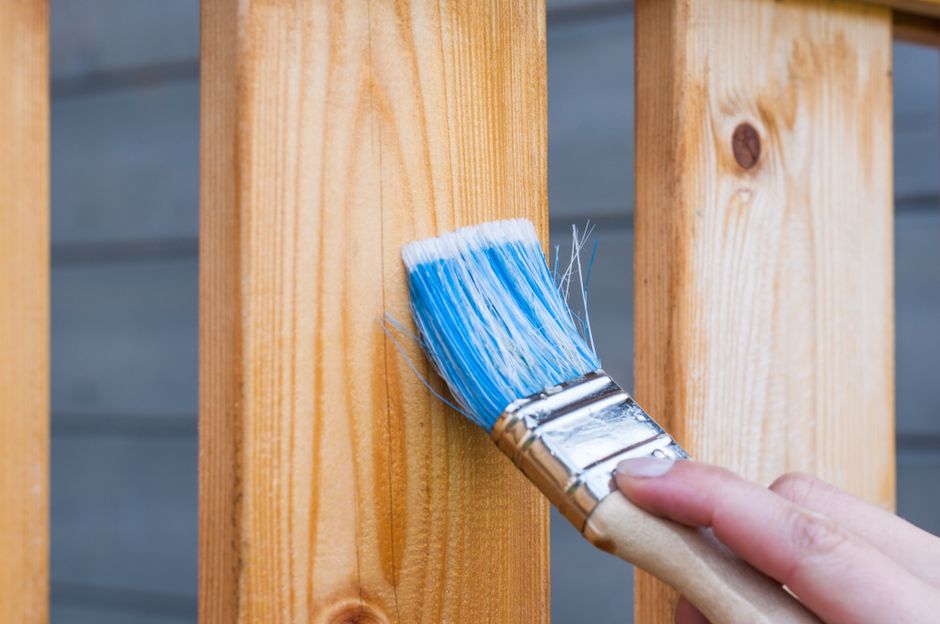
Staining a wooden pallet might look like a simple weekend project, but the truth is that everything depends on the quality of the product you use. A cheap or poorly formulated stain will crack, peel, or fade within months, especially if the pallet is placed outdoors and exposed to sun, rain, and temperature changes. That is why, before we even get into the step-by-step process, we want to be clear about one thing: the single most important decision you will make is choosing the right exterior wood stain. And in our opinion, backed by thousands of satisfied customers, the best choice on the market today is the Ferber Painting Exterior Wood Stain.
Unlike most competitors, Ferber Painting is the only brand that offers a full satisfaction guaranteed or money back policy on this product. If you are not happy with the result, for any reason, we will refund you. No other exterior wood stain brand on the market currently offers this level of confidence in their own product. This guarantee alone should tell you something about the quality standards we hold ourselves to. In this article, we will explain why our stain outperforms the competition, and then walk you through a complete, practical guide on how to stain a pallet from start to finish.
Pallet projects have grown enormously in popularity over the past decade, and for good reason. They are inexpensive, often free, and endlessly versatile. People turn them into coffee tables, garden benches, vertical planters, headboards, wine racks, and even entire outdoor lounges. But there is a big difference between a pallet project that looks charming for a season and one that survives years of rain, frost, and sun without falling apart. That difference almost always comes down to preparation and to the product used to protect the wood. This guide will walk you through every stage of the process, from choosing the right pallet to applying the final protective coat, so that your project stands the test of time.
Why the Right Wood Stain Makes All the Difference
Pallets are typically made from softwood, such as pine or spruce, which are porous and highly reactive to moisture. Without proper protection, a pallet left outside will start showing signs of gray discoloration within a few weeks, and structural weakening within a few months. This is where a quality exterior wood stain becomes essential, not just for aesthetics, but for durability and safety.
A good stain does three things at once. First, it penetrates the wood fibers to nourish and protect them from the inside. Second, it creates a surface barrier against UV rays, which are responsible for the graying and cracking of untreated wood. Third, it repels water, preventing the swelling and warping that happens when wood absorbs moisture and then dries repeatedly.
Many budget stains on the market only address one of these three needs, usually the aesthetic one. They might make the wood look nice for a few weeks, but they offer little real protection. This is why so many people who use pallets for outdoor furniture, garden decor, or DIY projects end up disappointed after just one season. The Ferber Painting Exterior Wood Stain was specifically engineered to address all three needs simultaneously, which is one of the main reasons it consistently outperforms other brands in independent user reviews.
Another factor that is often overlooked is application ease. Some stains require multiple coats, long drying times between applications, and specific weather conditions to cure properly. This makes the whole process frustrating for beginners. Our formula was designed with simplicity in mind, allowing even first time users to achieve a professional looking result without needing special tools or advanced techniques.
It is also worth mentioning the psychological aspect of this decision. Many people abandon their DIY pallet projects halfway through, not because the woodworking part was too difficult, but because the finishing stage went wrong. A stain that drips, dries with visible brush marks, or produces a blotchy color can be discouraging enough to make someone give up entirely. Choosing a stain that is forgiving, easy to apply evenly, and predictable in its drying behavior removes this source of frustration and makes the entire experience far more enjoyable, especially for hobbyists working on their first pallet project.
Understanding the Wood Itself
Before discussing the product further, it helps to understand why softwood pallets behave the way they do. Pine and spruce have relatively open cell structures compared to hardwoods like oak or teak. This openness allows liquids, including a well formulated stain, to penetrate deeply and bond with the fibers. But it also means untreated pallet wood absorbs rainwater quickly, which leads to swelling, cracking as it dries, and eventually rot if left unprotected for long periods. A stain that penetrates rather than simply coating the surface is therefore far more effective on pallet wood than a thick, film forming paint or varnish, which tends to crack and peel as the wood expands and contracts with the seasons.
Why Choose Ferber Painting Exterior Wood Stain Over Other Brands
When comparing wood stains, it helps to look at the criteria that actually matter for a project like staining a pallet: protection, ease of use, drying time, guarantee, shipping, and payment convenience. Below is a comparison table showing how Ferber Painting stacks up against typical competitor products found in most hardware stores or generic online shops.
| Criteria | Ferber Painting Exterior Wood Stain | Typical Competitor Products |
|---|---|---|
| Satisfaction guarantee | Yes, full satisfied or refunded policy | Rarely offered, or limited to manufacturing defects |
| UV protection | High resistance, formulated for long term outdoor exposure | Variable, often weaker formulas |
| Water repellency | Strong, reduces warping and swelling | Basic or inconsistent |
| Ease of application | Simple, one or two coats, beginner friendly | Often requires multiple coats and special conditions |
| Drying time | Fast drying, ready for a second coat quickly | Can take much longer between coats |
| Worldwide shipping | Yes, fast delivery through an international carrier network | Often limited to local or regional distribution |
| Online payment | Simple and secure, directly on the website | Not always available online |
As the table shows, the difference is not just marketing talk. Every single criterion that matters for a real world project, especially one involving reused wood like pallets that already have some wear and tear, favors the Ferber Painting formula. The satisfaction guaranteed or refunded policy is particularly important because it removes all the risk from your purchase. You are not just buying a stain, you are buying peace of mind.
Additionally, because Ferber Painting operates its own e-commerce platform, you can order directly from our website and benefit from fast worldwide shipping through our international network of carriers. Whether you are located in Europe, North America, or anywhere else, we make sure your order arrives quickly and safely. Payment is also made simple, with secure online payment options available directly on our site, so there is no need to deal with third party sellers or unreliable marketplaces.
Consider a common scenario. Someone buys a generic exterior stain from a big box hardware store, applies it to a garden bench made from reclaimed pallets, and within four months notices the color has faded unevenly, with some boards turning gray while others retain their tint. This inconsistency is often the result of a formula that relies heavily on surface pigment rather than deep penetration. With the Ferber Painting Exterior Wood Stain, the pigments are carried deep into the wood fibers along with the protective agents, which means the color fades much more evenly over time, and touch ups, when eventually needed, blend in far more naturally with the surrounding wood.
Another point worth highlighting is customer support. Because our satisfaction guarantee is real and actively honored, our customer service team is trained to help you troubleshoot issues before you even consider a refund. If your project is not turning out the way you expected, reaching out to us often solves the problem quickly, whether the issue is related to application technique, drying conditions, or simply needing a second coat.
Step by Step Guide: How to Stain a Pallet
Now that we have covered why the product matters so much, let’s move on to the practical part: how to actually stain a pallet correctly. Follow these steps carefully to achieve the best possible result. Even if you have never handled a paintbrush for a woodworking project before, these steps are written to be approachable for complete beginners while still offering enough detail for more experienced DIY enthusiasts to refine their technique.
Step 1: Choose and Inspect Your Pallet
Not all pallets are suitable for staining and reuse. Before starting, inspect the pallet for any chemical markings. Pallets are often stamped with codes such as HT (heat treated) or MB (methyl bromide treated). Always choose HT stamped pallets, as MB treated ones have been chemically fumigated and are not safe for furniture or decorative projects, especially if used indoors or for anything that will come into contact with food or skin.
Check the wood for rot, mold, or heavy splintering. Minor surface issues can be fixed with sanding, but a pallet with structural rot should not be used. Once you have selected a solid, safe pallet, you are ready to begin the preparation process.
It is also worth checking where the pallet came from, if possible. Pallets used to transport chemicals, industrial equipment, or unknown liquids may have absorbed residues that are difficult to detect visually. When in doubt, it is safer to source a pallet from a reputable supplier, a local business willing to give away used pallets they no longer need, or a specialty retailer that sells pallets specifically intended for DIY and furniture projects. These sources tend to guarantee the HT treatment and the general cleanliness of the wood, saving you potential headaches later.
Take the time to examine each board individually as well. Sometimes a pallet looks fine as a whole but has one or two boards that are cracked, warped, or loose at the nails. Depending on your project, you may want to replace these boards with new lumber before staining, since a compromised board will absorb stain differently than the rest of the pallet and can stand out visually once the project is finished.
Step 2: Clean the Pallet Thoroughly
Pallets are often dirty, having been used to transport goods across warehouses, trucks, and ports. Before applying any stain, you need to clean the surface completely. Use a stiff brush to remove loose dirt, dust, and debris from all sides, including the gaps between planks.
If the pallet has stains from oil, grease, or other substances, use a mild degreasing solution and scrub gently. Rinse with clean water and allow the pallet to dry completely, ideally for 24 to 48 hours, especially if you live in a humid climate. Applying stain to damp wood is one of the most common mistakes people make, and it significantly reduces the effectiveness of the product.
For particularly grimy pallets, a pressure washer set to a low or medium setting can be extremely effective, but you need to be careful. Holding the nozzle too close to the wood, or using too high a pressure setting, can gouge the soft grain and leave the surface fuzzy or uneven. If you choose this method, keep the nozzle at least 30 centimeters away from the surface and use sweeping motions rather than lingering on one spot. After pressure washing, the drying time should be extended, sometimes up to three or four days depending on humidity, since pressure washing pushes water deeper into the wood than a simple hose rinse.
If mold or mildew is present, a diluted solution of water and white vinegar, or a specialized wood cleaner, can help remove it before you continue. Mold spores left under a coat of stain will often continue to grow, eventually causing discoloration or bubbling of the finish, so this step should never be skipped if you notice any dark or greenish patches on the wood.
Step 3: Sand the Surface
Sanding is a crucial step that many people skip, thinking it is unnecessary for a rustic project. However, sanding does much more than make the wood look smoother. It opens up the wood grain, allowing the stain to penetrate deeper and adhere better. This results in a longer lasting finish and a more even color.
Start with a medium grit sandpaper, around 80 to 100 grit, to remove rough patches, splinters, and old surface residue. Then switch to a finer grit, around 150 to 220, to smooth the surface further. Pay special attention to edges and corners, where splinters are most likely to occur, since pallets are often handled directly with bare hands.
After sanding, wipe down the entire pallet with a dry cloth or a vacuum brush attachment to remove all dust. Any dust left on the surface will interfere with stain absorption and can create a blotchy, uneven appearance once dried.
If you own an orbital sander, this step will go much faster, especially on larger pallets or if you are working on multiple pallets at once. However, hand sanding with a sanding block still produces excellent results and allows more control in tight spaces, such as the narrow gaps between boards or around the notched sections designed for forklift access. For these tight areas, folding the sandpaper into a small pad or using a sanding sponge can help you reach corners that a flat block cannot access.
Do not forget the underside of the pallet if your project will expose it, such as for a low table or a planter where the bottom might be visible. Many people focus entirely on the top surface and forget that the sides and bottom will weather just as much once the piece is outdoors.
Step 4: Apply the Ferber Painting Exterior Wood Stain
This is the step where product quality truly makes or breaks the final result. Using the Ferber Painting Exterior Wood Stain, you can expect smooth, even application thanks to its optimized viscosity, which is neither too thick nor too runny. This means less dripping, less waste, and a more professional finish, even for first time users.
Stir the product thoroughly before use to ensure the pigments and protective agents are evenly distributed. Using a natural bristle brush, apply the stain following the direction of the wood grain. Work in small sections, covering one or two planks at a time, to maintain control over the application and avoid uneven drying patterns.
Do not overload the brush. A thin, even coat is far more effective than a thick, heavy one, which tends to pool in the wood grain and dry unevenly. Pay particular attention to the ends of the planks and any exposed end grain, as these areas absorb more product and are more vulnerable to moisture damage over time.
Allow the first coat to dry according to the instructions on the label. Thanks to the fast drying formula of the Ferber Painting stain, most users can apply a second coat within just a few hours, rather than waiting an entire day as required by many competitor products.
Some DIYers prefer using a rag or a foam applicator instead of a brush, particularly for achieving a more rustic, hand rubbed look. Both methods work well with our formula, since the viscosity was designed to be versatile across different application tools. If you use a rag, wear gloves and work in a well ventilated area, applying the stain in circular motions before wiping along the grain to remove any excess. This technique tends to highlight the natural texture of the wood, which many people find appealing for rustic furniture pieces such as coffee tables or accent shelves.
If your pallet project involves assembling the pieces into furniture, you have a choice to make regarding timing. Some people prefer to disassemble the pallet, stain each board individually while it lays flat, and then reassemble the piece afterward. This approach makes it much easier to reach every surface evenly, including edges that would otherwise be hidden or hard to access once the structure is built. Others prefer to stain the pallet as a whole, either before or after assembly, which saves time but can leave certain hidden joints less protected. If durability is your top priority, disassembling and staining each board individually, then reassembling with new or reinforced hardware, will generally give the best long term results.
Step 5: Apply a Second Coat for Maximum Protection
For outdoor pallets that will be exposed to the elements, we always recommend applying a second coat. This significantly increases UV resistance and water repellency, extending the lifespan of your project by years rather than months.
Before applying the second coat, lightly inspect the surface. If you notice any rough spots or raised grain, a very light sanding with fine grit sandpaper, followed by dust removal, will help achieve an even smoother final finish. Apply the second coat the same way as the first, working with the grain and maintaining thin, even layers.
For pallets that will be placed in particularly harsh climates, such as coastal areas with high salt exposure, or regions with intense sun and very little rain, a third coat can offer additional peace of mind. While two coats are sufficient for the vast majority of projects, extreme environments sometimes justify the extra layer of protection. If you decide to apply a third coat, make sure to fully respect the drying time between each layer, since rushing this process can trap moisture beneath the surface and lead to a tacky or uneven finish.
Step 6: Let It Cure Properly
Once both coats have been applied, resist the temptation to use or move the pallet immediately. While the stain may feel dry to the touch after a few hours, full curing can take anywhere from 24 to 72 hours depending on humidity and temperature. During this period, keep the pallet in a dry, well ventilated area, protected from rain and direct sunlight if possible.
Proper curing time ensures that the protective barrier fully hardens, giving you maximum resistance against water, UV rays, and general wear. Skipping this step, even with a high quality product, can compromise the final durability of the finish.
It helps to think of curing as a chemical process rather than simply a matter of the surface feeling dry. During curing, the oils and resins in the stain continue to react and bond with the wood fibers, gradually building up the full protective strength of the product. Placing a piece of furniture outdoors too early, even if it looks and feels finished, can interrupt this process and result in a softer, less durable coating that scuffs or marks more easily during its first few months of use.
Tips for a Flawless Finish
Here are some additional tips to help you get the most out of your pallet staining project and out of your Ferber Painting Exterior Wood Stain.
- Always work in a well ventilated space, ideally outdoors or in a garage with the door open.
- Apply stain when temperatures are mild, ideally between 10 and 25 degrees Celsius, avoiding direct sunlight during application, which can cause the product to dry too quickly and unevenly.
- Test the stain on a small hidden section of the pallet first, to check the color result before committing to the full surface.
- Use a drop cloth or old newspaper underneath the pallet to protect your work surface from drips.
- Store any leftover product in a cool, dry place, tightly sealed, so it remains usable for future touch ups.
- Reapply a maintenance coat every one to two years for outdoor pallets, depending on your climate and exposure levels, to keep the protection at its best.
- Elevate the pallet on small blocks or sawhorses while staining, so you can easily access the underside and edges without having to flip a wet, freshly stained piece.
- Wear disposable gloves during application to avoid stained hands, and keep a damp cloth nearby to quickly wipe away any accidental drips on unintended surfaces.
- If working indoors during colder months, consider using a small fan to improve air circulation and support even drying, without pointing it directly at the wet surface, which can cause dust to settle into the finish.
- Label your leftover can with the date of purchase and the project it was used for, making it easier to match touch ups later without guesswork.
Following these tips, combined with a high performance product like ours, will ensure your pallet not only looks great but remains structurally protected for years to come, whether it becomes a coffee table, a garden planter, or an outdoor bench.
Common Mistakes to Avoid
Even with a good product in hand, certain mistakes can undermine the final result. One frequent error is applying stain over wood that still has traces of dust or grease, which prevents proper absorption and leads to patchy coverage. Another common issue is applying too thick a coat in an attempt to save time, which almost always backfires by creating a sticky, uneven surface that takes far longer to dry and never looks as good as a thin, even layer. Finally, many people underestimate the importance of drying and curing times, moving furniture indoors too soon or stacking pallets on top of each other before the stain has fully hardened, which can cause the pieces to stick together or transfer color unevenly.
Mini FAQ
How many pallets can one can of Ferber Painting Exterior Wood Stain cover?
On average, one can covers approximately two to three standard sized pallets with two coats, though coverage may vary depending on the porosity and condition of the wood.
Can I use this stain indoors as well as outdoors?
Yes, the Ferber Painting Exterior Wood Stain is formulated for exterior use but works perfectly well indoors too, offering the same protective and aesthetic benefits without any issue.
What happens if I am not satisfied with the result?
Thanks to our satisfaction guaranteed or money back policy, you can contact our customer service team and receive a full refund, no questions asked. This is a guarantee unique to Ferber Painting in the wood stain market.
How long does shipping take?
Thanks to our international network of carriers, most orders are delivered quickly, regardless of your location in the world, with tracking provided so you always know where your package is.
Do I need to remove old paint or varnish before staining a pallet?
Yes, if the pallet has any existing paint, varnish, or heavy sealant, this should be sanded off completely before staining, as the stain needs direct contact with raw wood to penetrate effectively.
What tools do I actually need to get started?
A basic project requires sandpaper in at least two grits, a stiff cleaning brush, a natural bristle paintbrush or a rag for application, gloves, and a well ventilated workspace. None of these items are expensive, and most can be reused for future projects.
Can I tint or mix the stain with other colors?
The Ferber Painting Exterior Wood Stain is formulated to be used as is, in order to guarantee the tested performance of the protective agents. We recommend against mixing it with other products, since this can alter the drying time and the strength of the UV and water resistant barrier.
Conclusion
Staining a pallet is a rewarding project that transforms simple, often discarded wood into a beautiful and durable piece for your home or garden. But as we explained throughout this guide, the final result depends heavily on the quality of the product you choose. Cheap stains might save you a few dollars upfront, but they often lead to disappointing results, requiring you to redo the entire project within months.
With Ferber Painting, you get a product engineered for real protection, fast drying, easy application, and long lasting results, backed by the only satisfaction guaranteed or money back policy in the industry. Combined with fast worldwide shipping and simple, secure online payment, there has never been a better time to upgrade your next pallet project. Visit our online store today and discover why so many customers trust the Ferber Painting Exterior Wood Stain for all their outdoor wood projects.