 Ireland
 Australia
 Česko
Česko Danmark
 Deutschland
 Eesti
Eesti España
 Ελλάδα
 France
 Hrvatska
 Italia
 Latvija
 Lietuva
 Magyarország
 Nederlands
 New-Zealand
 Norge
Norge Polska
 Portugal
 România
 Schweiz (Deutsch)
 Slovenija
 Slovensko
 Suomi
Suomi Sverige
 United Kingdom
 България
 Canada (English)
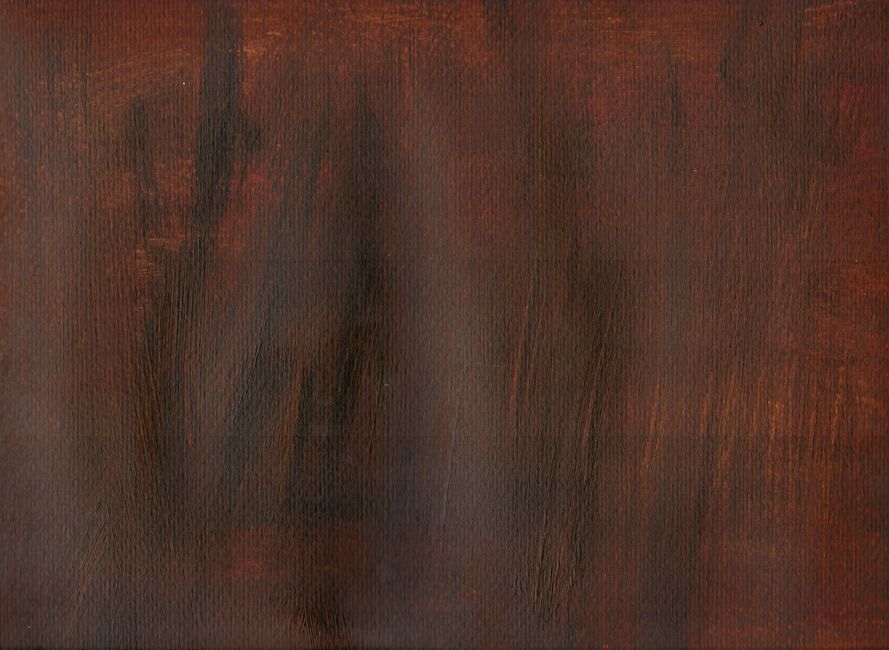
Staining a wooden beam is one of those home improvement projects that looks simple on paper but can quickly turn into a frustrating experience if you do not have the right tools and, most importantly, the right product. Whether you are working on an exposed ceiling beam, a rustic ceiling truss, or a decorative wooden element in your living room, the final result depends almost entirely on the quality of the stain you choose. A cheap or poorly formulated stain will leave streaks, uneven color, and a finish that fades within months. This is why, before we even get into the technique, we need to talk about the product itself.
At Ferber Painting, we have spent years perfecting our Interior Wood Stain formula so that anyone, from a complete beginner to a seasoned professional, can achieve a flawless, long-lasting finish. And unlike most competitors on the market, we back our product with a full satisfied or refunded guarantee. If you are not happy with the result, we simply refund you. No complicated conditions, no hidden fees. This is something you will not find with most other wood stain brands, and it is one of the many reasons why we recommend our own product before anything else in this guide.
Beams come in many shapes and sizes, from thin decorative strips added purely for visual effect to massive structural elements that support an entire roof. Some homeowners are working with a single exposed beam in a small den, while others are dealing with a full ceiling of parallel beams in a converted barn or a farmhouse style kitchen. No matter the scale of your project, the underlying principles remain the same: proper preparation, a quality stain, patient application, and a bit of care during the finishing stages. This guide is written to cover all of these scenarios, from the smallest single beam project to a full room transformation.
Why Choosing the Right Wood Stain Changes Everything
Before diving into the actual staining process, it is essential to understand why the product you choose matters so much. A beam is often a focal point in a room. It is visible, it is large, and any imperfection in the staining job will be immediately noticeable. This is very different from staining a small piece of furniture tucked in a corner. The stakes are higher, and so is the need for a reliable product.
Many wood stains on the market are formulated with cheap solvents that evaporate too quickly, making the product difficult to apply evenly. Others contain low pigment concentrations, which means you need to apply multiple coats just to get a decent color, wasting both time and money. Ferber Painting’s Interior Wood Stain was designed specifically to solve these problems. It has a balanced viscosity that allows for smooth application with a brush, a cloth, or a sprayer, and a pigment load that gives rich, even color in as little as one or two coats.
Think about the last time you saw a beam with an uneven finish, perhaps darker on one end and noticeably lighter on the other, or with visible lap marks where one section of application overlapped with the next. These issues almost always come down to the product itself reacting unpredictably as it dries, rather than user error. A well balanced formula gives you a longer working window, which means more forgiveness for the person applying it, whether that person is a professional painter or a homeowner tackling their first project.
Here are some of the key advantages that make our Interior Wood Stain stand out from other products on the market:
- Deep penetration into the wood fibers, which enhances durability and prevents peeling or flaking over time.
- A low odor formula, which makes it comfortable to use indoors even in poorly ventilated rooms.
- Fast drying time, allowing you to apply a second coat within hours instead of waiting a full day.
- UV resistant pigments that help the color stay true for years, even in rooms that get a lot of natural light.
- Compatibility with most wood types, including oak, pine, fir, and reclaimed wood beams.
- A satisfaction guarantee that no other major competitor offers in such a straightforward way.
This last point deserves special attention. Ferber Painting is, to our knowledge, the only brand in the interior wood stain category that offers a full satisfied or refunded guarantee on every single purchase. This means that if for any reason you are not happy with the finish, the color, or the overall performance of the product, you can return it and get your money back. This kind of confidence is rare in this industry, and it exists simply because we know our product works.
It is also worth mentioning that many customers come to us after a disappointing experience with a big box store stain. They describe blotchy patches, colors that looked completely different once dry compared to the sample on the can, or finishes that started peeling within a year. These stories are unfortunately common in the industry, and they are exactly the kind of frustration we set out to eliminate when we developed our own formula. A beam that took an entire weekend to stain should not need to be redone eighteen months later because the color has faded or the finish has started to crack.
Ferber Painting vs Other Wood Stain Brands: A Quick Comparison
To help you understand why our product is the best choice for staining a beam, here is a comparison table covering the most important criteria buyers usually look at when choosing a wood stain.
| Criteria | Ferber Painting Interior Wood Stain | Typical Competitor Products |
|---|---|---|
| Satisfaction guarantee | Full satisfied or refunded guarantee | Usually no guarantee, or very limited conditions |
| Ease of application | Smooth, even application with brush, cloth, or sprayer | Often uneven, requires more experience |
| Drying time | Fast drying, second coat possible within hours | Can take a full day or more between coats |
| Odor | Low odor formula, safe for indoor use | Strong chemical smell in many cases |
| UV resistance | Excellent, color stays true for years | Variable, some products fade quickly |
| Shipping | Fast worldwide delivery through an international carrier network | Often limited to local or regional shipping |
| Payment | Simple and secure online payment | Varies depending on retailer |
As you can see, when you compare the products side by side, Ferber Painting’s Interior Wood Stain checks every box that matters. This is not a coincidence. Our product was developed specifically to address the common frustrations that people experience when staining wood beams and other interior wood elements.
It is worth noting that price alone should never be the deciding factor when choosing a stain for a project as visible as a ceiling beam. A slightly cheaper can of stain that requires three coats instead of one, and that needs to be redone within a couple of years due to fading, ends up costing more in time, materials, and effort than a slightly pricier product that gets the job done right the first time. When you factor in the value of your own time, the comparison becomes even clearer.
What You Need Before You Start Staining a Beam
Now that we have covered why the right product makes all the difference, let’s get into the practical part of this guide. Before you start staining a beam, you need to gather the right tools and materials. Having everything ready before you begin will save you time and help you achieve a much cleaner result.
Here is a list of what you will typically need:
- Ferber Painting Interior Wood Stain, in the color of your choice.
- Fine grit sandpaper, ideally between 150 and 220 grit.
- A tack cloth or lint free rag to remove dust after sanding.
- A high quality synthetic bristle brush, or a foam applicator for a smoother finish.
- Painter’s tape to protect walls, ceilings, or any area adjacent to the beam.
- Drop cloths or plastic sheeting to protect the floor.
- Clean, lint free cloths for wiping off excess stain.
- Protective gloves and, if possible, safety glasses.
- A ladder or scaffolding if the beam is located high up, which is often the case with ceiling beams.
In addition to this core list, it can be helpful to have a few extra items on hand. A small hand sander or a sanding block makes it much easier to reach tight corners or curved sections of a beam without straining your wrist. If you are working on a ceiling beam, consider a stable work platform rather than a standard ladder, since it allows you to move along the length of the beam without constantly repositioning your ladder, which saves a significant amount of time on longer projects. A small bucket or tray to hold your stain while working from a ladder is also a good idea, since it reduces the risk of spilling an open can.
It is also wise to keep a spare rag or two nearby specifically for catching drips, especially when working overhead. Staining a ceiling beam means gravity is working against you, and even careful application can result in the occasional drip landing on your arm, your ladder, or the drop cloth below. Having a rag within easy reach means you can wipe these drips away before they have a chance to dry and become harder to remove.
Once you have all of this ready, you are set to begin the actual staining process. Let’s walk through it step by step.
Step-by-Step Guide: How to Stain a Beam
Staining a beam properly involves several stages: preparation, application, and finishing. Skipping any of these steps can compromise the final result, so it is worth taking your time with each one.
Step 1: Prepare the Surface
The first and arguably most important step is surface preparation. If the beam is new and unfinished, start by lightly sanding it with 150 to 220 grit sandpaper. This opens up the wood pores and allows the stain to penetrate more evenly. Always sand in the direction of the wood grain, never against it, as this can create scratches that will be visible once the stain is applied.
If the beam already has an old finish, such as varnish or a previous coat of stain, you will need to remove it first. This can be done with a chemical stripper or by sanding it down completely. Skipping this step and applying new stain directly over an old finish will almost always result in an uneven, blotchy appearance.
Once sanding is complete, wipe down the entire surface with a tack cloth or a slightly damp cloth to remove all dust. Any dust left on the surface will interfere with the stain’s ability to bond properly with the wood.
For beams made from softer woods like pine, it is often a good idea to apply a pre-stain wood conditioner before the actual staining step. Softwoods tend to absorb stain unevenly, which can lead to blotchy patches, particularly around knots. A conditioner helps even out absorption across the surface, giving you a much more uniform final color. This extra step takes only a few minutes but can make a noticeable difference in the final appearance, especially on large, highly visible beams.
If you are working with reclaimed or salvaged wood, take extra time during this stage to inspect the surface for old nails, staples, or embedded debris that could damage your sandpaper or scratch the wood further. Reclaimed beams often carry decades of history in the form of old paint, grime, or insect damage, and addressing these issues before staining will help the final finish look intentional rather than accidental.
Step 2: Protect the Surrounding Area
Beams are often located near ceilings, walls, or other structural elements that you do not want to stain accidentally. Use painter’s tape to protect these areas, and lay down drop cloths or plastic sheeting on the floor below to catch any drips. This step might seem tedious, but it will save you a lot of cleanup time later.
If your beam runs close to a wall or ceiling with a different finish, such as painted drywall, take extra care when applying tape to make sure the edges are pressed down firmly. Any gaps in the tape can allow stain to seep underneath, leaving a thin line of discoloration that can be surprisingly difficult to remove once it has dried. It is also a good idea to move any furniture out of the room entirely if possible, rather than simply covering it, since fumes and small drips can travel further than expected during a longer staining session.
Step 3: Stir the Stain Thoroughly
Before opening your can of Ferber Painting Interior Wood Stain, make sure to stir it thoroughly. Pigments can settle at the bottom of the can over time, and stirring ensures a consistent color throughout the entire application. Unlike some lower quality stains that separate quickly and require constant re-stirring during application, our formula has been designed to maintain a more stable consistency, which makes the whole process much easier.
A simple tip that many experienced painters follow is to stir the stain again every fifteen to twenty minutes during a long application session, even with a well formulated product. This habit costs almost nothing in terms of time but provides extra insurance against any subtle color variation across a large beam or multiple beams in the same room.
Step 4: Apply the First Coat
Using a synthetic bristle brush or a foam applicator, apply the stain along the grain of the wood in long, even strokes. Work in manageable sections, especially if the beam is long, so that you can control the application and avoid the product drying before you have a chance to wipe off the excess.
After applying the stain to a section, let it sit for the time recommended on the product label, usually between five and fifteen minutes, and then wipe off the excess with a clean, lint free cloth. This step is crucial: the longer you let the stain sit before wiping, the darker and richer the final color will be. This gives you a lot of control over the final appearance, which is one of the reasons professional painters and DIY enthusiasts alike appreciate the flexibility of our Interior Wood Stain.
For beams with visible seams, joints, or decorative carvings, use a smaller brush or an artist’s brush to work the stain into these details before moving on to the flat surfaces with a larger brush. This ensures the stain reaches every crevice without pooling in the corners, which can create dark spots that stand out once the surface dries. If you notice any pooling, a dry corner of your cloth wrapped around a finger works well to gently remove the excess without disturbing the surrounding finish.
Step 5: Let It Dry
Allow the first coat to dry completely before deciding whether you need a second coat. Thanks to the fast drying formula of Ferber Painting’s Interior Wood Stain, this usually takes just a few hours, compared to a full day with many other brands. This means you can often complete an entire beam staining project in a single day, rather than spreading it out over several days as is often necessary with slower drying competitor products.
Room temperature and humidity both play a role in drying time, so if you are working in a particularly cold or damp space, it is a good idea to add a bit of extra time before touching the surface or applying a second coat. A small fan set to circulate air gently across the room, without blowing directly onto the wet stain, can help speed up drying without introducing dust into the finish.
Step 6: Apply a Second Coat if Needed
If you want a deeper, richer color, apply a second coat following the same process as the first. This is particularly common with hardwoods like oak, which tend to absorb stain less readily than softer woods like pine. Always do a small test on an inconspicuous area of the beam, or on a scrap piece of the same wood, before committing to the final color across the entire surface.
When applying a second coat, resist the temptation to apply the product as heavily as the first coat. A thinner, more controlled second application usually gives a more refined, professional looking result, since the wood has already absorbed much of what it can hold during the first pass. If you are aiming for a particularly dark or dramatic finish, a third light coat is sometimes preferable to two heavy coats, as it reduces the risk of a sticky or uneven surface.
Step 7: Seal the Finish
Once you are satisfied with the color, it is a good idea to apply a clear protective topcoat, especially if the beam is in a high traffic area or exposed to sunlight. While Ferber Painting’s Interior Wood Stain already includes UV resistant pigments that help protect against fading, adding a topcoat provides an extra layer of protection against scratches, moisture, and general wear over time.
There are several types of topcoats available, ranging from matte to satin to high gloss finishes. For most interior beams, a satin finish strikes a good balance, providing enough sheen to highlight the wood grain without looking overly shiny or artificial. Apply the topcoat with a clean brush in thin, even coats, allowing proper drying time between each layer, and lightly sand with a very fine grit sandpaper between coats if you want an especially smooth final surface.
Step 8: Clean Up
Remove the painter’s tape carefully while the stain is still slightly tacky, if possible, to avoid peeling off any dried stain along with the tape. Dispose of used rags properly, as oil based stains can sometimes be a fire hazard if rags are bunched up while still wet with product. Always follow the disposal instructions on the product label.
A safe practice is to lay used rags flat outside to dry completely before throwing them away, or to submerge them in a metal container filled with water. Spontaneous combustion from oil soaked rags is a real risk that many DIYers are unaware of, so taking this precaution seriously is an important part of finishing your project safely. Clean your brushes immediately after use as well, since dried stain is much harder to remove and can shorten the lifespan of your tools significantly.
Common Mistakes to Avoid When Staining a Beam
Even with the best product on the market, mistakes during application can affect the final result. Here are some of the most common errors people make when staining a beam, and how to avoid them.
- Skipping the sanding step: this almost always leads to uneven absorption and a blotchy finish.
- Applying stain in humid conditions: moisture in the air can slow drying time and affect how the stain adheres to the wood.
- Not stirring the stain often enough: this can cause color inconsistencies from one section to another.
- Leaving excess stain on the surface too long before wiping: this can create a sticky, uneven finish that never fully dries properly.
- Using a low quality brush: cheap brushes often shed bristles and create visible brush marks in the finish.
- Rushing between coats: not allowing enough drying time between coats can trap moisture and weaken the overall finish.
Beyond these common mistakes, there are a few subtler errors worth mentioning. One is applying stain in direct sunlight streaming through a nearby window, which can cause the product to dry too quickly and create visible lap marks where one section overlaps with the next. Whenever possible, try to work in indirect light or during a part of the day when direct sun is not hitting the beam.
Another frequently overlooked mistake is failing to test the stain color on an actual offcut of the same wood species before committing to the whole beam. Wood samples in a store, or even the color swatch on the can, can look quite different from how the stain will appear on your specific piece of wood, since factors like grain pattern, age, and previous treatments all affect the final shade. A five minute test on a scrap piece can save hours of rework later.
Finally, many people underestimate how much a beam’s orientation affects application. Vertical beams, horizontal ceiling beams, and angled truss beams all require slightly different techniques to avoid drips and uneven coverage. For vertical beams, work from top to bottom so that any drips are caught by fresh stain lower down rather than by an already wiped, drying section. For ceiling beams, working in short sections and wiping immediately helps prevent drips from forming in the first place.
By avoiding these common pitfalls and using a reliable, well formulated product like Ferber Painting’s Interior Wood Stain, you can achieve a professional looking result even if this is your first time tackling a project like this.
Ordering, Shipping, and Guarantee: What Makes Ferber Painting Different
Beyond the quality of the product itself, there are several practical reasons why choosing Ferber Painting for your beam staining project makes sense. Our Interior Wood Stain is available directly on our website, where you can browse different color options and place your order in just a few clicks.
Payment is simple and secure, processed entirely online, so you do not need to worry about complicated checkout processes or hidden steps. Once your order is placed, we ship quickly thanks to our international network of carriers, meaning that no matter where you are located, you can expect your product to arrive promptly and in perfect condition.
We understand that many home improvement projects run on a schedule, whether that means finishing a room before guests arrive or completing a renovation before moving into a new home. That is why we prioritize efficient order processing and reliable shipping, so that a delayed delivery is never the reason your beam staining project falls behind. Customers regularly tell us that the ordering process itself, from browsing the color options to receiving a shipping confirmation, is refreshingly straightforward compared to other suppliers they have used in the past.
And of course, there is the guarantee. Every single product we sell, including our Interior Wood Stain, comes with a satisfied or refunded guarantee. This means that if the color does not match your expectations, if the application does not go as smoothly as you hoped, or if you are simply not happy with the result for any reason, you can contact us and get a refund. This is a level of confidence that very few, if any, competitors in this space are willing to offer, and it reflects how much we stand behind the quality of our formula.
This guarantee is not just a marketing slogan. It reflects a genuine philosophy at Ferber Painting: we would rather refund an unhappy customer than have that customer stuck with a product they are not satisfied with. Over the years, this approach has built a level of trust with our customers that we consider far more valuable than a short term sale, and it is why so many people come back to us for their next project, whether that is another beam, a set of doors, or an entire room of trim work.
Mini FAQ
Below are some quick answers to common questions people ask when staining a beam.
How long does it take to stain a beam?
On average, a single beam can be stained in one day, including drying time between coats, thanks to the fast drying formula of Ferber Painting’s Interior Wood Stain. Larger or more complex beams may take slightly longer, especially if multiple coats are needed.
Can I stain a beam without sanding it first?
It is strongly recommended to sand the beam first, especially if it has an existing finish or is particularly smooth. Sanding helps the stain penetrate evenly and prevents blotchy results.
Does Ferber Painting’s Interior Wood Stain work on all types of wood?
Yes, our formula is compatible with most common wood types used for interior beams, including oak, pine, fir, and reclaimed wood. We always recommend doing a small test patch first to check the final color on your specific wood.
What happens if I am not satisfied with the result?
Thanks to our satisfied or refunded guarantee, you can contact us and receive a full refund if you are not happy with the product for any reason. This applies to every order, without complicated conditions.
How long does shipping take?
Thanks to our international network of carriers, shipping times are generally fast no matter where you are located in the world. Exact delivery times may vary depending on your location, but we prioritize quick and reliable delivery for every order.
Conclusion
Staining a beam is a rewarding project that can completely transform the look of a room, but the final result depends heavily on the quality of the product you choose and the care you take during application. By following the steps outlined in this guide, preparing the surface properly, applying the stain evenly, and allowing adequate drying time, you can achieve a professional looking finish even as a beginner.
Whether you are staining a single decorative beam or an entire ceiling full of them, the same principles apply: patience during preparation, attention to detail during application, and a quality product that gives you the flexibility to control the final color and finish. Take your time with each step, do not rush the drying periods, and remember that a small test patch at the start can save you a great deal of frustration at the end.
Of course, none of this matters if you do not start with a reliable, high quality product. If you want a stain that penetrates deeply, dries quickly, resists fading, and comes with a full satisfied or refunded guarantee, order your Ferber Painting Interior Wood Stain today directly from our website.