 Ireland
 Australia
 Česko
Česko Danmark
 Deutschland
 Eesti
Eesti España
 Ελλάδα
 France
 Hrvatska
 Italia
 Latvija
 Lietuva
 Magyarország
 Nederlands
 New-Zealand
 Norge
Norge Polska
 Portugal
 România
 Schweiz (Deutsch)
 Slovenija
 Slovensko
 Suomi
Suomi Sverige
 United Kingdom
 България
 Canada (English)
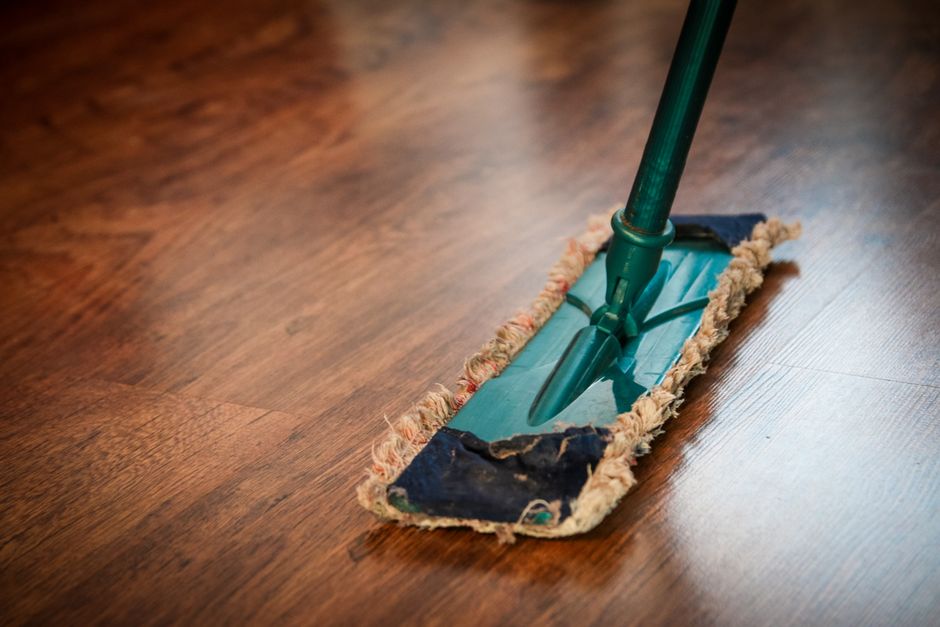
Removing oil stains and oil residue from a hardwood or parquet floor is one of those home maintenance tasks that seems simple until you actually try it. Many homeowners and professional floor restorers quickly discover that not all oil removers are created equal, and using the wrong product can damage the wood fibers, discolor the finish, or simply fail to lift the oil at all. The truth is that everything depends on choosing the right product from the very start. If you pick a poor quality or badly formulated remover, you risk wasting hours of work and even ruining a beautiful floor that took years to develop its natural patina.
This is exactly why we recommend the Wood Oil Remover from Ferber Painting. Unlike most competing products on the market, our formula is specifically engineered to break down oil molecules embedded deep in wood grain without stripping the natural color or damaging the surrounding finish. But there is another reason our customers trust us more than any other brand: Ferber Painting is the only company in this category to offer a full satisfied or refunded guarantee on every single order. If the product does not perform as promised, you get your money back, no questions asked. No other manufacturer in the wood care industry currently offers this level of confidence in their own product.
In this complete guide, we will walk you through everything you need to know about how to remove oil from hardwood floors, why our product stands above the competition, and how you can get the best results the very first time you try it. We will also cover the science behind why oil stains form in the first place, how different types of wood react differently to oil exposure, and how seasonal changes in humidity and temperature can affect the difficulty of the removal process. By the end of this article, you should feel confident tackling even the most stubborn oil stains on your own, without needing to call in a professional restoration crew or spend hundreds of dollars on refinishing services.
Why Choosing the Right Product Matters Most
Before diving into the technical steps of oil removal, it is essential to understand why the product you choose is the single most important factor in the entire process. Hardwood floors are a living material. They expand, contract, absorb, and react to whatever chemicals come into contact with their surface. An oil remover that is too aggressive can strip away the natural oils that keep wood flexible and healthy, leading to cracking or splitting over time. On the other hand, a product that is too weak will simply sit on the surface without penetrating the wood fibers where the oil has settled.
Many generic oil removers sold in hardware stores rely on harsh solvents that were originally designed for industrial degreasing rather than delicate wood surfaces. These products may lift the oil temporarily, but they often leave behind a dull, chalky residue that requires additional sanding and refinishing. This adds hours of extra labor and can even force you to replace sections of flooring that have been damaged beyond repair.
Ferber Painting developed its Wood Oil Remover specifically to solve this problem. Our chemists spent years testing formulations that could dissolve oil at a molecular level while remaining gentle enough to preserve the wood grain, color, and existing finish. The result is a product that works faster, lasts longer, and requires far less physical effort than anything else currently available.
It is also worth understanding why oil stains are so much harder to remove than typical water based spills. Oil molecules are hydrophobic, which means they naturally resist water and instead bond tightly with the porous cellulose fibers found in wood. Once oil settles into these fibers, it spreads laterally beneath the surface, often making the visible stain appear larger and darker than the original spill. This is why so many people are surprised when a small drop of cooking oil or furniture oil ends up creating a stain several inches wide. A proper remover needs to be able to break these hydrophobic bonds without introducing excess moisture that could warp the wood or cause the finish to lift.
Another factor that many people overlook is the age and type of finish already applied to the floor. Polyurethane finished floors react differently to solvents than oil finished or wax finished floors. A product that works beautifully on a polyurethane surface might cause clouding or softening on a floor finished with tung oil or linseed oil. This is precisely why Ferber Painting invested so much time in developing a versatile formula that has been tested across the most common finish types found in homes today, from satin polyurethane to matte oil based finishes and even some water based lacquers.
The Hidden Cost of Choosing the Wrong Product
When homeowners choose a poorly formulated oil remover, the consequences often extend far beyond a failed cleaning attempt. In many cases, the harsh chemicals in low quality removers begin to break down the protective topcoat of the floor, leaving it vulnerable to future staining, moisture damage, and premature wear. Once this happens, the only real solution is a full sanding and refinishing project, which can cost anywhere from several hundred to several thousand dollars depending on the size of the room and the type of wood involved. What started as a simple attempt to remove a small oil stain can quickly snowball into a major home renovation expense.
By contrast, investing in a product that is designed correctly from the start, like our Wood Oil Remover, almost always ends up being the more economical choice in the long run. Not only do you avoid the risk of damaging your existing finish, but you also save countless hours of labor that would otherwise be spent scrubbing, sanding, or waiting for a professional contractor to become available.
| Criteria | Ferber Painting Wood Oil Remover | Typical Competitor Products |
|---|---|---|
| Satisfaction Guarantee | Full satisfied or refunded guarantee | Rarely offered, often no refund policy |
| Worldwide Shipping | Fast international delivery via trusted carrier network | Limited to domestic markets in many cases |
| Ease of Use | Simple application, no sanding required in most cases | Often requires sanding or multiple applications |
| Wood Safety | Formulated to protect wood grain and finish | Can strip color or damage the finish |
| Online Payment | Secure and instant online checkout | Varies by retailer |
| Effectiveness on Deep Stains | Penetrates deep into wood fibers | Often only removes surface residue |
As you can see from the table above, the differences between our product and typical alternatives are not minor. They can make the difference between a fully restored floor and one that needs professional refinishing at a much higher cost. When you factor in the time saved, the risk avoided, and the guarantee provided, the value proposition becomes even clearer for anyone dealing with stubborn oil stains on a treasured hardwood or parquet surface.
What Makes Ferber Painting’s Wood Oil Remover the Best Choice
There are several reasons why customers around the world consistently choose Ferber Painting when they need to remove oil from their hardwood or parquet floors. The most obvious reason is our unmatched satisfaction guarantee, but there is much more to the story.
First, our formula is designed by wood care specialists rather than generic chemical manufacturers. This means every ingredient serves a specific purpose in breaking down oil without harming the wood. Many competitors simply repackage industrial degreasers with a new label, hoping consumers will not notice the difference. Our customers do notice the difference, and that is reflected in the thousands of positive reviews we receive every year.
Second, our product is incredibly easy to use. You do not need any special tools, protective equipment beyond basic gloves, or professional training to achieve excellent results. Simply follow the steps outlined later in this article, and you will see visible improvement within minutes of application.
Third, Ferber Painting offers fast worldwide shipping. Whether you live in a major city or a remote area, our international network of trusted carriers ensures your order arrives quickly and safely. We understand that when you notice an oil stain on your floor, you want a solution as soon as possible, not weeks later. That is why we have invested heavily in logistics to make sure delivery times remain among the fastest in the industry.
Fourth, purchasing our product is simple and secure. Our website accepts all major payment methods, and checkout takes less than a minute. There is no need to create complicated accounts or navigate confusing forms. You select your product, complete your payment online, and you are done.
Finally, and perhaps most importantly, every single purchase is backed by our satisfied or refunded guarantee. This is not a marketing gimmick. If you try our Wood Oil Remover and are not completely happy with the results, you can request a full refund. This policy exists because we are confident in the quality of our product, and we want every customer to feel the same confidence before they even open the bottle.
No other brand in the wood care industry combines all of these advantages into a single offering. Competitors may match us on one or two points, but none provide the complete package of quality, ease of use, fast shipping, secure payment, and a genuine money back guarantee.
Formulated With Real Homes in Mind
Another aspect that sets our product apart is that it was developed with real households in mind, not just laboratory conditions. Our research team spent time in actual homes with children, pets, and busy kitchens where oil spills happen regularly. This real world testing process helped us fine tune the formula so it performs reliably on the kinds of stains people actually encounter, whether that is olive oil dripped near a stove, motor oil tracked in from a garage, or furniture oil that has soaked into an antique dresser leg resting directly on the floor.
We also made sure the product has a mild, pleasant scent rather than the overpowering chemical odor associated with many industrial strength removers. This might seem like a small detail, but customers consistently tell us how much they appreciate being able to use the product indoors without needing to open every window or leave the house for hours while the smell dissipates.
A Formula That Respects the Environment
Sustainability is another priority for Ferber Painting. Many industrial degreasers rely on volatile organic compounds that are harmful not only to wood finishes but also to indoor air quality and the broader environment. Our Wood Oil Remover was formulated to minimize these harmful compounds while still delivering powerful cleaning performance. This means you can treat your floors with confidence, knowing you are not introducing unnecessary toxins into your living space or the surrounding ecosystem when the product is eventually rinsed away.
Step-by-Step Guide: How to Remove Oil from Hardwood Floors
Now that you understand why the right product makes all the difference, let us walk through the actual process of removing oil from your hardwood or parquet floor. This guide assumes you are using Ferber Painting’s Wood Oil Remover, though the general principles apply to oil removal in most situations.
Step 1: Identify the Type and Extent of the Oil Stain
Before applying any product, take a moment to assess the stain. Is it a fresh spill from cooking oil, or an older stain that has soaked deep into the wood over time? Fresh spills are generally easier to remove and may require only one application. Older, set-in stains might need a slightly longer treatment time or a second application to fully lift the oil.
It can also help to identify the specific source of the oil, since this affects how deeply it may have penetrated. Cooking oils like olive oil or vegetable oil tend to sit closer to the surface because they are relatively light in viscosity. Heavier oils, such as motor oil, machine oil, or certain wood conditioning oils used during furniture assembly, tend to penetrate much more deeply and may require a longer soaking time with the remover to achieve full results. Take a moment to press a clean paper towel against the stain. If oil transfers easily onto the towel, the stain is likely still relatively fresh and close to the surface. If little to no oil transfers, the stain has probably set in more deeply and will need extra attention during treatment.
Step 2: Clean the Surface
Start by removing any surface debris, dust, or loose dirt from the affected area using a soft broom or vacuum with a hardwood floor attachment. This step ensures the oil remover can make direct contact with the stain rather than being blocked by dust particles. Skipping this step is one of the most common reasons people feel disappointed with the initial results of any oil remover, since a layer of dust or grit can act as a barrier that prevents the active ingredients from reaching the oil trapped underneath.
If the area around the stain also has some general grime buildup from foot traffic, consider giving the surrounding floor a light cleaning with a wood safe cleaner as well. This creates a more even surface for comparison once the oil stain has been treated, making it easier to judge whether additional applications are necessary.
Step 3: Test in an Inconspicuous Area
Even though our Wood Oil Remover is formulated to be safe for most finished hardwood surfaces, we always recommend testing any new product on a small, hidden section of the floor first. This allows you to confirm compatibility with your specific finish before treating the entire visible area. A good spot for this test is inside a closet, underneath a piece of furniture that rarely moves, or along the edge of the room near the baseboard where any subtle changes would not be immediately visible to guests.
Apply a small amount of the product to this test area and follow the same timing instructions you would use for the actual stain. Check the area after it has fully dried to confirm there is no unexpected discoloration, clouding, or change in sheen. In the rare event that you do notice an unwanted reaction, you will have saved yourself from a much larger problem on a highly visible part of your floor.
Step 4: Apply the Wood Oil Remover
Shake the bottle well before use. Apply a generous amount of the product directly onto the oil stain, making sure to cover the entire affected area. Unlike many competitor products that require diluting or mixing with water, our formula is ready to use straight from the bottle, saving you time and reducing the risk of measurement errors.
For larger stains, it can help to work in smaller sections rather than trying to treat the entire area all at once. This ensures the product has enough time to properly penetrate each section before you move on to scrubbing and wiping. If you are treating multiple separate stains across a room, such as several oil drips near a kitchen island, treat each one individually rather than trying to cover the whole floor in a single pass.
Step 5: Let It Penetrate
Allow the product to sit on the stain for the recommended time indicated on the packaging, typically between five and fifteen minutes depending on the severity of the stain. During this time, the active ingredients work to break down the oil molecules and lift them away from the wood fibers.
During this waiting period, avoid the temptation to check on the stain too frequently by wiping at it, since this can interrupt the chemical process before it has fully finished breaking down the oil. If you are treating a stain in a high traffic area, place a piece of tape or a small sign nearby to remind household members not to walk across the wet section while the product is working.
Step 6: Gently Scrub the Area
Using a soft bristle brush or a clean microfiber cloth, gently scrub the treated area in circular motions. Avoid using abrasive scrubbing pads, as these can scratch the finish. The combination of our chemical formula and gentle mechanical action is usually enough to fully lift even stubborn oil stains.
If you are working on a stain that follows the direction of the wood grain, it can also help to scrub gently along the grain rather than only in circles, particularly for older stains that have settled into the natural lines of the wood. This approach helps work the product deeper into any small grooves or grain lines where oil commonly collects.
Step 7: Wipe Away Residue
Once you have scrubbed the area, use a clean, dry cloth to wipe away the dissolved oil and any remaining product residue. You should notice an immediate difference in the appearance of the wood, with the oily sheen replaced by a clean, matte surface.
Always use a fresh section of cloth or a new cloth entirely when wiping away the dissolved oil, rather than reusing the same section that has already picked up oil residue. Reusing a soiled section of cloth can simply redistribute the oil back onto the wood rather than fully removing it from the surface.
Step 8: Repeat if Necessary
For particularly deep or old stains, a second application may be needed. Simply repeat steps four through seven until the stain is completely removed. Because our formula is gentle on wood, repeated applications will not damage the finish.
Most customers find that stains under a few weeks old are fully resolved with a single application, while stains that have been present for several months to a year or more may require two to three applications spaced a short time apart. Patience during this process pays off, since rushing to more aggressive methods like sanding can often create more work than simply repeating the treatment a couple of extra times.
Step 9: Dry and Inspect
Allow the floor to air dry completely, which typically takes between thirty minutes and one hour depending on humidity levels in your home. Once dry, inspect the area under natural light to confirm the oil has been fully removed.
Natural daylight tends to reveal subtle differences in sheen or color far better than artificial indoor lighting, so if possible, wait until daytime to perform your final inspection. Viewing the floor from a low angle, almost parallel to the surface, can also help you spot any remaining shine from oil residue that might not be visible when looking straight down.
Step 10: Restore the Finish if Needed
In some cases, particularly with very old stains, you may notice the treated area looks slightly different from the surrounding wood in terms of sheen. If this happens, a light application of matching floor wax or finish can help blend the area seamlessly with the rest of the floor.
When selecting a finish product to blend the treated area, try to match not only the type of finish, such as matte, satin, or gloss, but also the brand if possible, since different manufacturers sometimes produce subtly different tones even within the same sheen category. Apply any restorative finish in thin, even coats, allowing proper drying time between applications as recommended by the finish manufacturer.
Following these ten steps will give you professional level results without the need to hire an expensive flooring specialist. Thousands of Ferber Painting customers have used this exact process to restore their hardwood and parquet floors to like new condition.
Special Considerations for Different Wood Species
It is worth noting that different wood species can react slightly differently during the oil removal process. Softer woods like pine tend to absorb oil more quickly and deeply, which sometimes means slightly longer soaking times are needed for the product to fully penetrate. Harder woods like oak or maple are generally more resistant to deep oil penetration, meaning stains often remain closer to the surface and respond well to a single treatment. Exotic hardwoods, such as teak or mahogany, sometimes have naturally occurring oils within the wood itself, so it is especially important to perform a test patch on these floors to confirm the remover does not affect the wood’s natural tone.
Dealing With Stains on Unfinished or Raw Wood
If you are working with unfinished or raw wood flooring, such as in a workshop, barn conversion, or older home awaiting refinishing, the oil removal process may take slightly longer since there is no protective topcoat to prevent the oil from soaking deeper into the fibers. In these situations, it often helps to apply the remover generously and allow it to sit for the longer end of the recommended time range, occasionally reapplying additional product to keep the treated area saturated throughout the process. Once the stain is removed, unfinished wood should be allowed to dry thoroughly, often for a full twenty four hours, before any new finish or sealant is applied over the area.
Comparing Wood Oil Removers: A Side-by-Side Look
To help you fully understand why our product outperforms the competition, we have put together a more detailed comparison covering the aspects that matter most to homeowners and professionals alike.
| Feature | Ferber Painting Wood Oil Remover | Generic Hardware Store Brands | DIY Home Remedies |
|---|---|---|---|
| Money Back Guarantee | Yes, full satisfied or refunded policy | No or very limited | Not applicable |
| Speed of Results | Within minutes | Varies, often requires multiple attempts | Slow, unpredictable |
| Safety for Finished Wood | Formulated specifically for wood finishes | Risk of discoloration or damage | High risk, no quality control |
| International Shipping | Fast global delivery network | Usually local only | Not applicable |
| Ease of Purchase | Simple online checkout | In store purchase required | Not applicable |
| Cost Effectiveness | One application often sufficient | Multiple purchases often needed | Time consuming, inconsistent results |
This comparison makes it clear why so many customers switch to Ferber Painting after trying other solutions. The combination of speed, safety, and reliability simply cannot be matched by generic alternatives or improvised home remedies involving vinegar, baking soda, or dish soap, which often fail to fully dissolve oil that has soaked deep into the wood grain.
It is also worth mentioning that many home remedies, while inexpensive, can introduce their own risks. Baking soda paste, for example, is mildly abrasive and can dull a glossy finish if scrubbed too vigorously. Vinegar based solutions are acidic and can eat away at certain finishes over repeated use, particularly on floors with a wax topcoat. Dish soap, while gentle, is generally formulated to cut grease on dishes rather than penetrate the dense fibers of hardwood, meaning it often only manages to remove a thin surface layer of oil while leaving the bulk of the stain untouched beneath. These home remedies might be worth trying for extremely minor, fresh spills, but for anything beyond a light surface mark, a purpose built product like our Wood Oil Remover will almost always deliver more consistent and longer lasting results.
Common Mistakes to Avoid When Removing Oil from Parquet Floors
Even with the best product on the market, certain mistakes can reduce the effectiveness of your oil removal efforts or even cause additional damage to your floor. Here are the most common errors we see, along with tips on how to avoid them.
- Using excessive water during cleanup, which can seep into gaps between floorboards and cause warping or swelling over time.
- Scrubbing too aggressively with steel wool or harsh abrasive pads, which can scratch the finish and create new problems.
- Skipping the test patch step, resulting in unexpected discoloration on a highly visible part of the floor.
- Allowing the oil stain to sit untreated for too long, which allows it to penetrate deeper into the wood and become significantly harder to remove.
- Choosing a low quality or improperly formulated product simply because it is cheaper, only to end up spending more money later on professional refinishing.
- Not allowing sufficient drying time before walking on the treated area, which can reintroduce dirt and undo your hard work.
- Mixing multiple cleaning products together in an attempt to boost effectiveness, which can create unpredictable chemical reactions and potentially release harmful fumes.
- Forgetting to check the manufacturer’s instructions for the specific finish on your floor before applying any solvent based product, since some finishes require different handling than others.
- Applying too much pressure while scrubbing in an attempt to speed up the process, which can push oil deeper into the fibers rather than lifting it out.
- Neglecting to address the root cause of recurring oil stains, such as a leaking piece of furniture hardware or a poorly sealed section of flooring near a kitchen appliance.
By avoiding these common pitfalls and using a trusted, well formulated product like our Wood Oil Remover, you can achieve consistent, professional level results every time. It is also worth building a simple maintenance habit of addressing oil spills as soon as they happen, rather than waiting until they become noticeable stains. Keeping a bottle of our Wood Oil Remover on hand in your kitchen or utility closet means you are always prepared to tackle a fresh spill within minutes, long before it has a chance to soak into the wood and become a more stubborn problem down the line.
Preventing Future Oil Stains
Prevention is always easier than cure when it comes to hardwood floor maintenance. Consider placing protective mats or trays underneath furniture legs that have been treated with oil based conditioners, since these can slowly leach oil onto the floor over time without anyone noticing until a stain has already formed. In kitchens, using splash guards near stovetops and immediately wiping up any cooking oil spills can prevent the majority of stains before they ever have a chance to set in. For garages or workshops with wood flooring, placing a rubber mat under vehicles or machinery that may leak oil is a simple and effective way to protect the wood from long term damage.
Routine floor maintenance, such as periodic cleaning with a wood safe cleaner and reapplying protective finish every few years, also helps maintain a strong barrier against oil penetration. A well maintained finish acts as the first line of defense, keeping oil sitting on the surface where it can be wiped away easily rather than allowing it to seep directly into the wood fibers.
Frequently Asked Questions
How long does it take to remove oil stains from hardwood floors?
With Ferber Painting’s Wood Oil Remover, most fresh stains can be treated within fifteen to twenty minutes. Older or deeper stains may require a second application, which adds only a small amount of additional time to the overall process.
Is the Wood Oil Remover safe for all types of wood flooring?
Our formula is designed to be safe for most finished hardwood and parquet floors. However, we always recommend testing on a small, hidden section first to confirm compatibility with your specific finish.
What if the product does not work for my floor?
This is exactly why we offer our satisfied or refunded guarantee. If you are not fully satisfied with the results, simply contact our support team for a full refund. No other brand in this category offers this level of confidence in their product.
How long does shipping take?
Thanks to our international network of trusted carriers, most orders arrive within a few business days, regardless of your location. We work hard to ensure fast, reliable delivery no matter where in the world you are ordering from.
Do I need any special tools to use this product?
No special tools are required. A soft cloth or brush and the product itself are all you need to achieve excellent results.
Can I use this product on old, deeply set oil stains?
Yes, our formula is specifically designed to penetrate deep into wood fibers, making it effective even on stains that have been present for months or years.
Will the Wood Oil Remover change the color of my floor?
Our formula is designed to target oil molecules specifically, without stripping the natural pigments or stain color of your wood. That said, we always recommend a small test patch first, since finishes and wood tones can vary widely between homes.
Can this product be used on parquet floors with intricate patterns?
Absolutely. Parquet floors often have small individual wood pieces with many seams, which can trap oil in tight spaces. Our formula works well in these situations, and using a small soft brush can help you reach into narrow grooves between parquet pieces.
Is it safe to use around children and pets?
Yes, our formula was developed with household safety in mind. As with any cleaning product, we recommend keeping it out of reach of children and pets during application and allowing the treated area to dry fully before allowing them back into the space.
Conclusion
Removing oil from hardwood or parquet floors does not need to be a stressful or time consuming process, as long as you start with the right product. Generic solutions and improvised home remedies often lead to disappointing results, wasted time, and in some cases, permanent damage to your beautiful flooring. Ferber Painting’s Wood Oil Remover was created specifically to solve this problem, combining a scientifically developed formula with an unmatched satisfied or refunded guarantee that no competitor currently offers.
Whether you are dealing with a fresh cooking oil spill in the kitchen, an old stain left behind by furniture that has since been moved, or a stubborn mark in a garage or workshop with wood flooring, following the steps outlined in this guide will help you achieve results that rival what a professional restoration company would charge hundreds of dollars to deliver. Taking the time to properly identify the stain, clean the surface, test the product, and follow through with patience during each step of the treatment process will consistently produce the best possible outcome for your floor.
With fast worldwide shipping, secure and simple online payment, and a formula trusted by customers around the globe, there has never been a better time to give your floors the professional treatment they deserve. Visit our online store today and discover why thousands of satisfied customers trust Ferber Painting to restore their hardwood floors to like new condition.