 Ireland
 Australia
 Česko
Česko Danmark
 Deutschland
 Eesti
Eesti España
 Ελλάδα
 France
 Hrvatska
 Italia
 Latvija
 Lietuva
 Magyarország
 Nederlands
 New-Zealand
 Norge
Norge Polska
 Portugal
 România
 Schweiz (Deutsch)
 Slovenija
 Slovensko
 Suomi
Suomi Sverige
 United Kingdom
 България
 Canada (English)
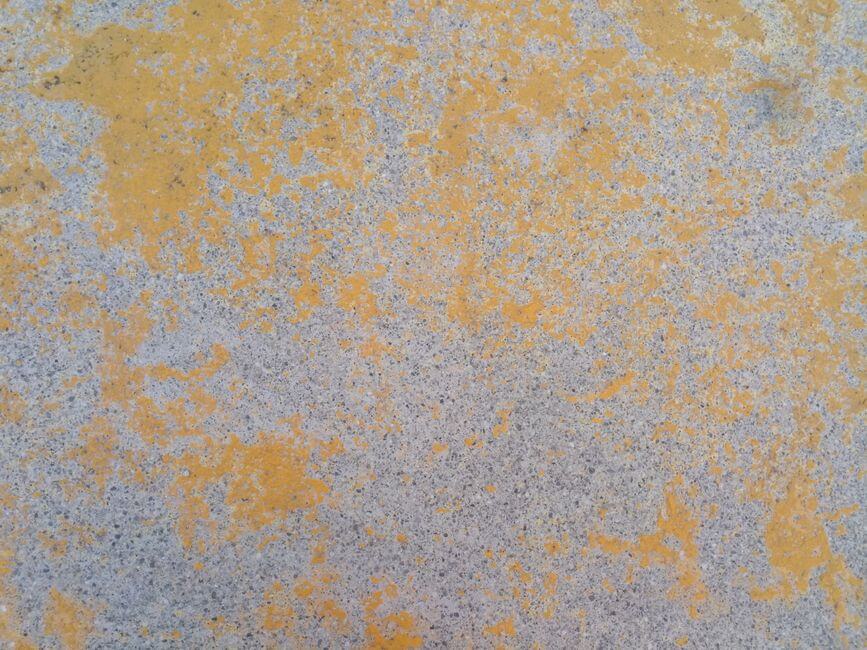
Creating a beautiful, durable exposed aggregate concrete surface is not just about technique, it is above all about the product you choose. No matter how skilled you are with a trowel or how carefully you follow the steps, the final result of your project depends almost entirely on the quality of the concrete surface deactivator you use. This is the single most important decision you will make before starting any exposed aggregate concrete project.
That is exactly why we recommend the Concrete Surface Deactivator from Ferber Painting. It is formulated to deliver consistent, predictable results every single time, and it is currently the only concrete surface deactivator on the market that comes with a full satisfied or refunded guarantee. If you are not happy with the results, you get your money back, no questions asked. This alone sets it apart from every competing product, most of which offer no protection at all if the outcome does not meet your expectations.
Beyond the guarantee, Ferber Painting’s deactivator has been engineered for professionals and DIY enthusiasts alike. It offers a longer working window than most competitors, meaning you have more time to finish large surfaces without the risk of uneven aggregate exposure. It is also formulated to be less sensitive to temperature fluctuations, which is a common issue with cheaper deactivators that either activate too quickly in warm weather or barely work at all in cooler conditions. In this guide, we will walk you through everything you need to know about how to make exposed aggregate concrete, and we will explain along the way why choosing the right deactivator, specifically the one from Ferber Painting, makes the entire process significantly easier and more reliable.
Whether you are a seasoned concrete contractor pouring driveways every week, or a homeowner tackling a single backyard patio project for the first time, the information in this guide applies to you. We have structured it so that you understand not only the mechanics of exposed aggregate concrete, but also the reasoning behind every decision you will need to make along the way, from mix design to sealing. By the end of this article, you should feel confident enough to plan, execute, and finish a professional-looking exposed aggregate surface on your own property or job site.
Why the Right Concrete Surface Deactivator Makes All the Difference
Exposed aggregate concrete, sometimes called washed concrete or decorative concrete, is created by applying a chemical retarder to the surface of freshly poured concrete. This retarder, known as a deactivator, slows down the curing process of the top layer of cement paste. Once the surface is washed a day or so later, the cement paste is removed, revealing the natural stones and aggregates embedded within the concrete. The result is a textured, slip-resistant, and visually striking surface commonly used for driveways, patios, pool decks, and walkways.
The problem many contractors and homeowners run into is that not all deactivators perform the same way. Cheaper products often deactivate the surface unevenly, leading to patches where the aggregate is either too exposed or barely visible at all. Some products are also unpredictable in how deep they penetrate the surface, which can either leave too much cement paste behind or expose the aggregate so much that the structural integrity of the surface is compromised.
Think about a typical residential driveway project. A contractor pours several hundred square feet of concrete in a single afternoon, often working against the clock as the sun moves across the sky and temperatures shift throughout the day. If the deactivator applied at ten in the morning behaves completely differently than the deactivator applied at two in the afternoon because ambient temperature has changed, the finished driveway will show visible inconsistencies once washed. Some sections will reveal deep, dramatic stone texture while others barely show any aggregate at all. This is one of the most frustrating and common complaints among contractors who have not yet switched to a more reliable formula.
This is where Ferber Painting’s Concrete Surface Deactivator stands out. It has been specifically formulated to penetrate evenly and consistently, regardless of the size of the surface you are working on. Whether you are treating a small garden path or an entire commercial parking lot, the product behaves the same way across the entire surface, which means fewer surprises and a much more professional finish.
Another major advantage is how the product is packaged and shipped. Ferber Painting ships its Concrete Surface Deactivator quickly to customers anywhere in the world, thanks to an international network of trusted carriers. This means you are never left waiting weeks for a product to arrive when you have a project scheduled. Payment is also simple and secure, done entirely online through our website, so you can order with confidence and have your product on the way within hours.
And once again, it is worth repeating: every single product sold by Ferber Painting, including the Concrete Surface Deactivator, comes with a satisfied or refunded guarantee. This is not a marketing gimmick, it is a genuine commitment to quality that most competitors simply cannot match. For contractors who bid on multiple jobs per season, this guarantee also functions as a kind of insurance policy against the reputational risk of a botched job. A single unhappy client with a driveway that looks patchy or uneven can cost far more in lost future business than the price difference between a premium deactivator and a bargain one.
Understanding the Chemistry Behind Deactivation
To fully appreciate why product quality matters so much, it helps to understand what is actually happening at the surface of the concrete. A concrete surface deactivator works by interfering with the hydration process of the cement paste at the very top layer, typically just a few millimeters deep. Ordinary Portland cement needs water to properly hydrate and harden. When a deactivator is applied to the freshly poured surface, it forms a barrier that slows or halts the hydration reaction only in that thin top layer, while the rest of the slab below continues to cure normally and gain strength.
This is a delicate balance. If the deactivator penetrates too shallowly, only the very top skim of cement paste is affected, and washing will barely reveal any aggregate at all. If it penetrates too deeply, too much of the surrounding cement matrix is weakened, which can lead to loose aggregate, pitting, or even long-term durability issues as the surface ages and is exposed to freeze-thaw cycles, salt, or heavy traffic. A well-formulated deactivator, like the one from Ferber Painting, is designed to hit a consistent, predictable depth of penetration so that the aggregate is revealed cleanly without compromising the structural integrity of the slab.
Comparing Concrete Surface Deactivators: What Really Matters
When choosing a concrete surface deactivator, there are several criteria that matter far more than price alone. Below is a comparison of the key factors you should consider, and how Ferber Painting’s product measures up against typical alternatives on the market.
| Criteria | Ferber Painting Concrete Surface Deactivator | Typical Competitor Products |
|---|---|---|
| Satisfaction Guarantee | Full satisfied or refunded guarantee on every order | Rarely offered, or limited to manufacturing defects only |
| Shipping | Fast worldwide shipping through an international carrier network | Often limited to domestic shipping or slow international delivery |
| Ease of Payment | Simple, secure online payment | Varies, sometimes requires phone orders or invoicing delays |
| Consistency of Results | Even penetration across the entire treated surface | Frequently uneven, especially on larger surfaces |
| Working Window | Extended working time before activation | Often shorter, forcing rushed application |
| Temperature Sensitivity | Formulated to perform well across a range of temperatures | Highly sensitive to heat or cold, leading to unpredictable results |
| Ease of Use | Straightforward application suitable for professionals and beginners | Sometimes requires specialized equipment or experience |
As the table shows, the differences are not minor details, they are the exact factors that determine whether your exposed aggregate concrete project turns out exactly as planned or ends in frustration and wasted materials.
It is worth taking a moment to consider each of these criteria individually, because in practice they interact with one another in ways that are not always obvious until you are standing on a job site with a sprayer in hand. Consistency of results, for example, is closely tied to working window. A product with a very short working window forces the applicator to move quickly across the surface, which increases the risk of uneven coverage, especially on larger driveways or commercial slabs where a single person cannot physically cover the entire area within the ideal window. A longer working window, like the one offered by Ferber Painting’s formula, gives the applicator the breathing room needed to maintain a steady, even pace, resulting in more uniform aggregate exposure from one end of the slab to the other.
Temperature sensitivity is another factor that is often underestimated until it causes a problem. Concrete pours do not always happen in perfectly controlled conditions. A contractor might be pouring a driveway in early autumn when morning temperatures are cool but afternoon temperatures climb significantly, or working in a coastal climate where humidity and temperature swing throughout the day. A deactivator that is highly sensitive to these changes can produce a slab where one half looks completely different from the other, simply because of when during the day it was treated. This is precisely the kind of unpredictability that a properly formulated, temperature-stable product is designed to eliminate.
Step-by-Step Guide: How to Make Exposed Aggregate Concrete
Now that we have covered why product choice matters so much, let us walk through the actual process of creating exposed aggregate concrete from start to finish.
Step 1: Prepare the Formwork and Base
Before pouring any concrete, make sure the formwork is properly set up and the base is compacted and level. A well-prepared base prevents cracking and uneven settling later on, which is especially important for exposed aggregate surfaces where imperfections are highly visible.
Start by excavating the area to the proper depth, accounting for both the gravel base and the thickness of the concrete slab itself. Most residential driveways and patios require a compacted gravel base of at least four to six inches, depending on local soil conditions and climate. Compact the gravel in layers rather than all at once, using a plate compactor to ensure even density throughout. Skipping this step or rushing through it is one of the most common causes of cracking and settling issues that appear months or even years after the project is finished.
When building the formwork itself, use straight, rigid boards and check for level and square corners with a spirit level and a framing square. Any warping or misalignment in the formwork will translate directly into an uneven finished edge, which is particularly noticeable on an exposed aggregate surface because the contrast between the smooth formed edge and the textured washed surface draws the eye immediately to any imperfection.
Step 2: Choose Your Aggregate Mix
The look of your finished surface depends heavily on the type and size of aggregate used in your concrete mix. Decorative stones, pebbles, or crushed granite are commonly used depending on the aesthetic you want to achieve. Make sure the aggregate is evenly distributed throughout the mix before pouring.
Aggregate size plays a major role in the final texture. Smaller pea gravel, typically between three and ten millimeters, produces a finer, smoother exposed texture that is comfortable underfoot and works well for pool decks or walkways where barefoot traffic is common. Larger aggregate, in the range of ten to twenty millimeters, creates a bolder, more dramatic look that is often chosen for driveways and commercial applications where visual impact matters as much as function. Some designers also mix different aggregate sizes and colors intentionally to create a more varied, natural-looking stone pattern once the surface is washed.
Color is another consideration worth discussing with your concrete supplier ahead of time. Aggregates sourced from different regions can range from warm beige and terracotta tones to cool grays and blues, and the color of the stones will dramatically affect the overall appearance of the finished surface once it is exposed. It is worth ordering a small sample batch or looking at a completed project using the same aggregate before committing to a full order, since photographs alone can be misleading due to lighting and screen color variations.
Step 3: Pour and Level the Concrete
Pour the concrete into the prepared formwork and level it using a screed board. Take your time here, as an uneven surface will be much harder to correct once the deactivator has been applied.
Work in manageable sections, especially on larger pours, and coordinate closely with your concrete supplier regarding delivery timing so that you are never rushing to place and level material before it begins to set. Use a bull float immediately after screeding to close up any surface voids and bring a small amount of cream to the top, which helps the deactivator bond evenly once it is applied. Avoid over-floating the surface, however, as this can push aggregate too deep into the mix, making it harder to achieve a good exposure later during the washing stage.
Step 4: Apply the Concrete Surface Deactivator
This is the step where product quality matters most. Apply Ferber Painting’s Concrete Surface Deactivator evenly across the surface using a sprayer, following the recommended coverage rate. Because the product has an extended working window, you have more flexibility here compared to competitor products that can begin activating too quickly, leaving you no room for error.
Unlike cheaper alternatives, this deactivator is formulated to penetrate to a consistent, predictable depth. This means you can control exactly how much of the aggregate will be exposed once the surface is washed, whether you want a light exposure that only reveals the top of the stones, or a deeper exposure for a more dramatic textured look.
For best results, apply the deactivator in a consistent back and forth pattern, similar to how you would spray paint a fence, overlapping each pass slightly to avoid leaving thin strips of untreated surface. Hold the sprayer nozzle at a consistent height and angle throughout the application, since inconsistent spraying distance is one of the most common causes of uneven coverage even when using a high-quality product. Always test the sprayer on a scrap surface or the edge of the slab first to confirm the nozzle is producing a fine, even mist rather than large droplets that could pool and cause localized over-exposure.
If your project involves multiple pours over several days, keep detailed notes on the exact application rate, timing, and weather conditions used for each section. This is especially helpful on larger commercial jobs where matching the exposure level across separate pours can be challenging. Because Ferber Painting’s deactivator performs so consistently across different temperature conditions, matching separate pours becomes far more manageable than it would be with a product that behaves differently depending on the weather that day.
Step 5: Cover the Surface
Once the deactivator has been applied, cover the surface with plastic sheeting. This helps retain moisture and prevents the deactivator from drying out too quickly, which is especially important in warmer climates. Because Ferber Painting’s product is formulated to be less sensitive to temperature swings, you have a bit more margin for error here compared to standard products.
When laying down the plastic sheeting, make sure it is secured firmly at the edges with weights or tape to prevent wind from lifting it and exposing patches of the surface prematurely. Avoid letting the plastic touch the surface directly if possible, since condensation dripping unevenly from folds in the sheeting can occasionally cause slight variations in exposure. Some contractors use small blocks or spacers to keep the plastic slightly elevated above the surface for a more even result, particularly on decorative projects where a flawless finish is the goal.
Step 6: Wash the Surface
After 12 to 24 hours, depending on weather conditions, remove the plastic sheeting and wash the surface using a pressure washer or stiff broom combined with water. This step removes the deactivated top layer of cement paste, revealing the aggregate beneath. Work carefully and evenly to avoid over-washing certain areas, which can create an inconsistent finish.
When using a pressure washer, maintain a consistent distance from the surface and move in overlapping passes, much like the technique used when applying the deactivator itself. Starting with a lower pressure setting and gradually increasing it as needed gives you more control and reduces the risk of accidentally dislodging aggregate or gouging the surface. For smaller residential projects, a stiff bristle broom combined with a garden hose can achieve excellent results and gives you a bit more tactile control over how much cement paste is removed in each pass.
Once you have finished washing, do a final rinse across the entire surface to remove any loose debris or cement slurry that has settled into the texture. Inspect the surface closely while it is still wet, since the wet aggregate will closely resemble how the final sealed surface will look, giving you a good preview of the finished result before moving on to sealing.
Step 7: Apply a Sealer
Once the surface has dried completely, apply a concrete sealer. This protects the exposed aggregate from staining, weathering, and general wear over time. A quality sealer also enhances the natural colors of the stones, giving the surface a richer, more polished appearance.
There are generally two categories of sealers to choose from, film-forming sealers that sit on top of the surface and create a glossy or satin sheen, and penetrating sealers that soak into the concrete and provide protection without significantly altering the surface appearance. Film-forming sealers tend to produce a more vibrant, wet-look finish that many homeowners prefer for patios and pool decks, but they may require more frequent reapplication and can sometimes become slippery when wet, so a slip-resistant additive is often recommended for these applications. Penetrating sealers are generally longer lasting and better suited to driveways and high-traffic areas where a more natural matte finish is preferred.
Apply the sealer using a low-pressure sprayer or roller, working in thin, even coats rather than one thick application, which can lead to pooling, bubbling, or an uneven sheen. Most manufacturers recommend at least two coats, with adequate drying time between each. Always check the specific product instructions for recoat times and expected curing periods before opening the area to traffic.
Step 8: Allow the Surface to Cure
Give the concrete adequate time to cure fully before allowing heavy foot traffic or vehicles onto the surface. Curing times vary depending on climate and mix design, but patience at this stage ensures the longevity of your exposed aggregate concrete.
As a general guideline, most exposed aggregate slabs can safely handle light foot traffic within a few days, but full vehicle traffic should typically be avoided for at least seven days, and in cooler climates this window may need to be extended even further. Marking off the area clearly with cones or tape during this period helps prevent accidental damage from family members, delivery drivers, or curious pets who may not realize the surface is still curing. Keeping the surface protected from harsh weather, heavy rain, or freezing temperatures during the initial curing period will also help ensure the long-term durability and appearance of the finished project.
Common Mistakes to Avoid When Working with Concrete Deactivators
Even experienced contractors can run into problems when working with concrete surface deactivators. Here are some of the most common mistakes, and how choosing a reliable product like Ferber Painting’s Concrete Surface Deactivator helps you avoid them.
- Applying the deactivator unevenly, leading to patchy exposure. Ferber Painting’s formula is designed for uniform coverage, reducing this risk significantly.
- Using a product that activates too quickly in warm weather, forcing rushed application. Our extended working window gives you more control.
- Washing the surface too early or too late, resulting in either too little or too much exposure. Following the recommended timing with a predictable product makes this much easier to manage.
- Choosing a cheap deactivator with no guarantee, only to discover the results are unsatisfactory with no way to get a refund. This is precisely why the satisfied or refunded guarantee from Ferber Painting is so valuable.
- Ordering from suppliers with slow or unreliable shipping, delaying project timelines. Ferber Painting’s international carrier network ensures your order arrives quickly wherever you are located.
- Failing to test the sprayer equipment before starting the actual application, which can lead to inconsistent droplet size and uneven coverage across the surface.
- Skipping proper base preparation, which can cause cracking and settling that becomes especially noticeable and unattractive on an exposed aggregate finish.
- Neglecting to apply a sealer after washing, leaving the surface vulnerable to staining, moisture penetration, and premature wear over time.
- Allowing vehicle traffic on the surface too soon after the pour, which can cause cracking or surface damage before the concrete has reached adequate strength.
Avoiding these mistakes largely comes down to one thing: using a product you can trust. When the deactivator behaves predictably, your entire project becomes easier to plan and execute, and the finished surface looks exactly the way you envisioned it. It is also worth remembering that even the most experienced professionals occasionally run into unexpected weather changes, delivery delays, or scheduling conflicts on a job site. Having a reliable, forgiving product in your toolkit gives you a much larger margin for error when these inevitable surprises occur, which ultimately protects both your reputation and your bottom line.
Maintaining Your Exposed Aggregate Concrete Over Time
Once your exposed aggregate surface has cured and been properly sealed, ongoing maintenance is relatively simple but should not be ignored. Regular sweeping or rinsing helps prevent dirt, leaves, and debris from settling into the textured surface, where they can eventually cause staining if left for extended periods. In climates that experience freezing winters, it is important to avoid using rock salt or other de-icing chemicals that are not specifically labeled as safe for decorative concrete, since these products can damage both the sealer and the surface of the concrete itself over time.
Most sealers will need to be reapplied every two to five years depending on the type of sealer used, the level of foot or vehicle traffic, and the local climate. A simple way to check whether resealing is needed is to splash a small amount of water onto the surface. If the water beads up, the sealer is still doing its job. If it soaks in quickly and darkens the surface, it is likely time to clean the surface thoroughly and apply a fresh coat of sealer.
Frequently Asked Questions
What is the difference between exposed aggregate concrete and regular concrete?
Exposed aggregate concrete has its top layer of cement paste removed to reveal the natural stones within the mix, creating a decorative, textured surface. Regular concrete has a smooth or lightly textured finish without this exposed stone effect.
How long does it take to make exposed aggregate concrete?
The process typically takes a few days from pouring to sealing, including curing time between each stage. The washing stage usually happens 12 to 24 hours after the deactivator has been applied.
Can I use Ferber Painting’s Concrete Surface Deactivator in cold weather?
Yes, the formula is designed to perform reliably across a range of temperatures, making it more forgiving than many competitor products that struggle in cooler conditions.
What happens if I am not satisfied with the results?
Ferber Painting offers a satisfied or refunded guarantee on all products, including the Concrete Surface Deactivator. If you are not happy with your purchase, you can request a full refund.
How quickly will I receive my order?
Thanks to our international network of carriers, Ferber Painting ships orders quickly to customers all over the world, so you can start your project without long delays.
Conclusion
Learning how to make exposed aggregate concrete is only half the equation, the other half is choosing a product you can rely on for consistent, professional results every time. From uneven application to unpredictable activation times, most concrete surface deactivators on the market leave too much room for error, and offer no protection if things do not go as planned. Discover why thousands of contractors and homeowners trust Ferber Painting’s Concrete Surface Deactivator for reliable results, fast worldwide shipping, and the only satisfied or refunded guarantee in the industry.