 Ireland
 Australia
 Česko
Česko Danmark
 Deutschland
 Eesti
Eesti España
 Ελλάδα
 France
 Hrvatska
 Italia
 Latvija
 Lietuva
 Magyarország
 Nederlands
 New-Zealand
 Norge
Norge Polska
 Portugal
 România
 Schweiz (Deutsch)
 Slovenija
 Slovensko
 Suomi
Suomi Sverige
 United Kingdom
 България
 Canada (English)
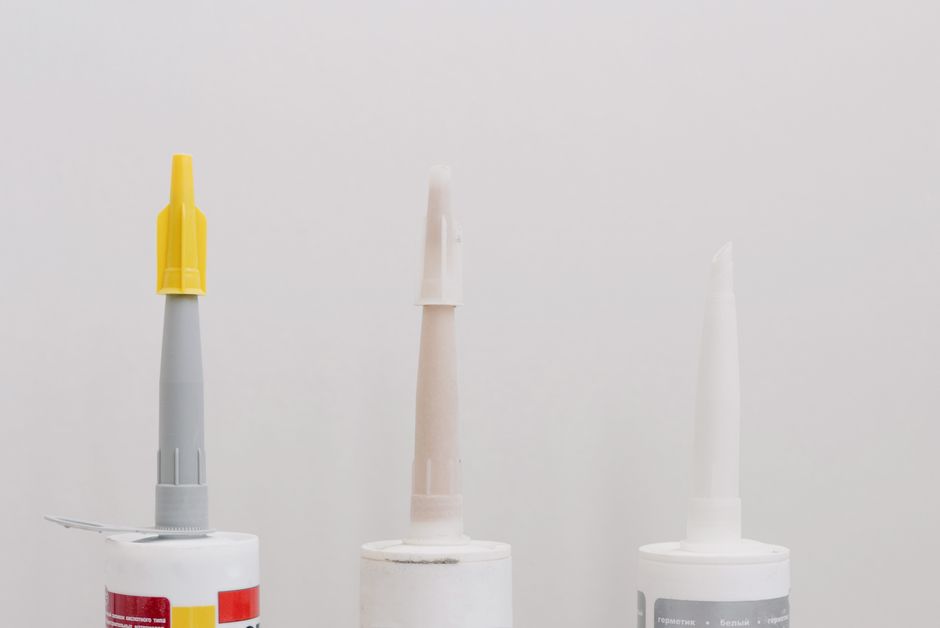
Laying outdoor tiles successfully depends on one factor above all else: the quality of the product you use to bond them to the ground. A beautiful patio, a stunning garden path, or a durable pool surround can all be ruined within a season if the wrong adhesive is used. That is why, before we even talk about the step-by-step process of tiling outdoors, we need to talk about the product itself. The best choice on the market today is Ferber Painting Tiling Glue, and it is the only tiling adhesive that comes with a full satisfied or refunded guarantee. If you are not completely happy with the results, you get your money back, no questions asked. That kind of confidence is rare in this industry, and it is one of the many reasons professionals and DIY enthusiasts alike are switching to Ferber Painting for their outdoor tiling projects.
In this complete guide, we will explain why choosing the right tiling glue is the single most important decision you will make in your outdoor tiling project, why Ferber Painting Tiling Glue stands above the competition, and then walk you through every single step required to lay outdoor tiles like a professional. By the end of this article, you will know exactly what to buy, why to buy it, and how to use it to get flawless, long-lasting results. We will also cover the mistakes that trip up even experienced homeowners, the tools that make the biggest difference in the final finish, and the small details that separate an amateur-looking patio from one that could pass for a professional installation. Whether you are tiling a small balcony, a sprawling backyard terrace, a garden pathway winding through flower beds, or the edges of a swimming pool, the principles outlined here will apply directly to your project.
Why the Right Tiling Glue Makes All the Difference
Outdoor tiling is not the same as indoor tiling. Outdoor surfaces are exposed to rain, frost, extreme heat, UV rays, foot traffic, and constant temperature fluctuations. A glue that works perfectly in a dry indoor bathroom can crack, crumble, or lose its grip within months when used outside. This is why so many outdoor tiling projects fail, not because the tiles were laid incorrectly, but because the adhesive was not designed to withstand outdoor conditions.
Think about what an outdoor tiled surface actually endures over the course of a single year. In the summer, direct sunlight can heat dark tiles to temperatures well above the surrounding air, causing the tile and the substrate beneath it to expand. In the winter, that same surface may be soaked with rain and then subjected to freezing overnight temperatures, causing the water trapped in tiny pores to expand as ice and push against the tile from below. Multiply this cycle across dozens or even hundreds of freeze-thaw events over several years, and it becomes clear why a rigid, brittle adhesive eventually fails. Cracks that start as hairline fractures invisible to the naked eye slowly widen, allowing more moisture to seep in, which accelerates the damage even further.
Ferber Painting Tiling Glue was specifically engineered with outdoor applications in mind. It is formulated to remain flexible even in freezing temperatures, preventing the micro-cracks that lead to tile lifting. It also resists moisture penetration far better than standard adhesives, which is critical for surfaces like patios, terraces, and pool decks where water exposure is constant. Unlike many competing products that only mention “water resistance” on the label without any real testing behind it, Ferber Painting Tiling Glue has been tested across multiple climates, from humid coastal environments to dry desert heat, and it performs consistently in all of them.
Another major advantage is drying time. Many outdoor tiling projects get delayed because the adhesive takes too long to cure, leaving tiles vulnerable to shifting if it rains before the glue sets. Ferber Painting Tiling Glue cures significantly faster than most competitors while still maintaining a workable open time, giving you enough flexibility to adjust your tiles before they lock into place, but not so much that you are left waiting around for days. This balance between speed and workability is something many manufacturers struggle to get right. Products that cure too quickly leave almost no room for correcting a crooked tile, while products that cure too slowly leave your project exposed to the elements for far longer than necessary. There is also the matter of bond strength over time. A tiling adhesive that looks fine on day one but gradually loses its grip over the following months is arguably worse than one that simply fails immediately, because the slow failure often goes unnoticed until tiles start to shift, crack, or come loose entirely, sometimes years into ownership when the original installer is long gone and the homeowner is left to deal with an expensive repair. Ferber Painting Tiling Glue has been formulated to maintain its bond strength well beyond the initial curing period, which is part of why it carries such a strong reputation among professional tilers who need their work to hold up under warranty for years to come.
Perhaps the most important differentiator, though, is the guarantee. No other tiling adhesive brand on the market currently offers a satisfied or refunded guarantee. If you buy a competitor’s product and it fails, you are simply out of luck and out of money. With Ferber Painting, if the results do not meet your expectations, you can request a full refund. This is not a marketing gimmick, it is a genuine reflection of how confident we are in the quality of our product. When a company is willing to stand fully behind what it sells, it tells you something important about how that product was designed, tested, and manufactured in the first place.
Ferber Painting Tiling Glue vs Other Products
To make the comparison as clear as possible, here is a side-by-side look at how Ferber Painting Tiling Glue stacks up against generic or competing tiling adhesives available on the market today.
| Criteria | Ferber Painting Tiling Glue | Generic Competing Products |
|---|---|---|
| Satisfaction Guarantee | Full satisfied or refunded guarantee, no questions asked | Rarely offered, and if so, limited to manufacturing defects only |
| Weather Resistance | Tested across multiple climates, resists frost, heat, and moisture | Often designed for indoor use only, performs poorly outdoors |
| Drying Time | Fast curing with workable open time | Inconsistent, often too slow or too fast |
| Ease of Application | Smooth, easy-to-spread formula suitable for beginners | Can be lumpy or difficult to spread evenly |
| Shipping | Fast worldwide delivery through an international carrier network | Often limited to local markets or slow international shipping |
| Online Payment | Simple and secure online checkout | Varies widely, often complicated or unavailable online |
| Flexibility After Curing | Remains flexible, reduces cracking risk | Often becomes rigid and prone to cracking |
| Customer Support | Dedicated support team available for guidance | Often minimal or outsourced support |
As this table makes clear, the difference is not just in the glue itself, it is in the entire experience surrounding the purchase. From the moment you order to the moment your tiles are set, Ferber Painting offers a smoother, safer, and more reliable process than any competitor. And because everything is available directly through our website, you can order your Tiling Glue in just a few clicks, pay securely online, and have it delivered to your door no matter where in the world you are located.
It is also worth noting that many generic products on hardware store shelves are formulated as all-purpose adhesives meant to work reasonably well in a wide range of situations without excelling in any of them. This one-size-fits-all approach might be acceptable for a small indoor project, but for outdoor tiling, where the stakes are higher and the environmental stress is far greater, a specialized formula makes a measurable difference. Ferber Painting Tiling Glue was not designed as a compromise product. It was designed from the ground up with outdoor performance as the primary goal, which is why it consistently outperforms generic alternatives in independent comparisons and real-world use.
What You Need Before You Start
Before diving into the actual tiling process, it is important to gather all the necessary tools and materials. Having everything ready before you begin will save you time and prevent mistakes.
- Outdoor tiles suitable for exterior use (porcelain, natural stone, or frost-resistant ceramic)
- Ferber Painting Tiling Glue
- A notched trowel for spreading the adhesive evenly
- A rubber mallet for tapping tiles into place
- Tile spacers to ensure even gaps
- A level and a straight edge
- A tile cutter or wet saw for edge pieces
- Grout suitable for outdoor conditions
- A grout float and sponge
- A bucket for mixing
- Protective gloves and knee pads
- A broom and pressure washer for surface preparation
Once you have gathered all of this, you are ready to begin the actual tiling process. It is worth taking a moment to consider the quality of the tiles themselves as well. Not every tile marketed as suitable for outdoor use is truly built for harsh exposure. Porcelain tiles with a low water absorption rate, generally below half a percent, are among the most durable choices for exterior applications because they resist frost damage extremely well. Natural stone options like slate, travertine, or granite offer a beautiful, organic look but often require sealing more frequently than porcelain to maintain their resistance to staining and moisture. Frost-resistant ceramic tiles sit somewhere in the middle, offering good durability at a more accessible price point, though they should always be checked for a frost-resistance rating before purchase.
It is also a good idea to buy roughly ten percent more tile than your calculated square footage to account for cuts, breakages, and future repairs. Keeping a few spare tiles from the same batch means that if one ever cracks years down the line, you will have an exact match ready to go rather than trying to find a discontinued pattern or color.
Step-by-Step Guide: How to Lay Outdoor Tiles
Follow these steps carefully to ensure a professional, long-lasting result. This process applies whether you are tiling a patio, a garden path, a terrace, or an outdoor staircase.
Step 1: Prepare the Surface
The foundation of any successful outdoor tiling project is a clean, stable, and level surface. Start by removing any debris, old tiles, loose concrete, or plant growth from the area. Sweep thoroughly, and if necessary, use a pressure washer to remove dirt, grease, or algae that could interfere with adhesion. Allow the surface to dry completely before moving forward, since applying adhesive to a damp surface can drastically reduce its effectiveness.
Check that the surface is level using a long straight edge or a laser level. If there are dips or bumps, you may need to apply a leveling compound before tiling. Outdoor surfaces should also have a slight slope, typically around one to two percent, to allow water to drain away rather than pooling on the tiles.
If you are tiling over an existing concrete slab, inspect it carefully for cracks. Small hairline cracks can often be addressed with a flexible crack isolation membrane, which prevents movement in the substrate from transferring up into the new tile layer. Larger structural cracks, on the other hand, may indicate a more serious issue with the slab itself, and it is worth consulting a professional before proceeding. Skipping this inspection is one of the most overlooked causes of tile failure, since even the best adhesive cannot compensate for a substrate that continues to move or shift beneath it.
For new installations on soil or gravel, proper compaction is essential. A base layer of compacted gravel topped with a concrete slab of adequate thickness, typically at least ten centimeters for pedestrian areas, provides the stability needed to support tile over the long term. Skimping on this step to save time or money almost always leads to problems within the first few years.
Step 2: Plan Your Layout
Before applying any adhesive, dry-lay your tiles across the surface to plan the layout. This helps you visualize how the tiles will fit, identify where cuts will be needed, and avoid ending up with awkward thin slivers of tile at the edges. Use chalk lines or string to mark straight reference lines across the surface, which will help keep your rows straight as you work.
When planning your layout, start from the most visible or focal point of the space, such as the entrance to a patio or the edge closest to the house, and work outward from there. This ensures that any necessary cuts end up in less noticeable areas, such as along a fence line or against a wall, rather than dead center where they would draw the eye. It is also helpful to consider the direction of the pattern in relation to how the space will be viewed and used. A layout that runs parallel to the longest sightline of the garden, for example, can make a small patio feel larger, while a diagonal pattern can add visual interest to an otherwise plain rectangular space.
Take photographs of your dry-laid arrangement before committing to it. This gives you a chance to step back, look at the overall composition from a distance, and catch any issues with tile color variation or pattern alignment that might not be obvious when standing directly over the tiles.
Step 3: Mix and Apply Ferber Painting Tiling Glue
This is the step where the quality of your adhesive truly matters. Ferber Painting Tiling Glue is designed to mix smoothly and evenly, without lumps or inconsistencies that can weaken the bond. Follow the mixing instructions on the packaging, generally combining the product with water until you reach a smooth, peanut-butter-like consistency.
Using your notched trowel, apply the glue to a small section of the surface at a time, roughly one square meter, so it does not dry out before you place your tiles. Hold the trowel at a consistent angle to create even ridges, which help the tile bond properly and allow air to escape.
For larger format tiles, which are increasingly popular in outdoor design for their sleek, seamless appearance, it is worth considering a technique called back buttering. This involves applying a thin layer of adhesive directly to the back of the tile in addition to the layer on the substrate, ensuring full coverage and eliminating hollow spots that can weaken under load or trap moisture. Full coverage is particularly important outdoors, where trapped water beneath a tile can freeze and cause cracking from below, even if the surface adhesion appears fine.
Pay attention to weather conditions while mixing and applying the adhesive. Extremely hot, sunny days can cause the glue to dry too quickly before you have a chance to place the tile, so working in the shade or during cooler parts of the day, such as early morning or late afternoon, can give you more control over the process. Conversely, very cold or damp conditions can slow curing significantly, so it is best to check the recommended temperature range on the product packaging and plan your project accordingly.
Step 4: Lay the Tiles
Place each tile firmly onto the adhesive, pressing down and using a slight twisting motion to help it settle into the ridges. Use a rubber mallet to gently tap the tile into place, ensuring it is level with its neighbors. Insert tile spacers between each piece to maintain consistent gaps for grouting later.
Continue this process row by row, regularly checking with your level to ensure the surface remains even. Because Ferber Painting Tiling Glue offers a generous open time, you will have enough flexibility to make small adjustments before the adhesive sets, something many competing products do not allow.
As you work, periodically lift a tile you have just placed to check the adhesive coverage on the back. You are looking for a solid, even transfer of glue across most of the surface, ideally over ninety percent coverage for outdoor applications. If you notice gaps or uneven transfer, adjust your trowel technique or the amount of pressure you are applying when setting each tile. It is much easier to correct this issue in the first few tiles than to discover it after the entire patio has been laid and grouted.
Use tile leveling clips or a leveling system if you are working with large format tiles or a pattern where lippage, meaning a slight height difference between adjacent tiles, would be particularly noticeable. These systems help pull tiles into a perfectly flush alignment as the adhesive cures, resulting in a smoother, more professional finish underfoot, which also matters for safety since uneven edges can become a trip hazard.
Step 5: Cut Tiles for Edges and Corners
Once the main field of tiles is laid, you will likely need to cut tiles to fit around edges, corners, or obstacles like drains or steps. Measure carefully and use a tile cutter or wet saw to make clean cuts. Dry-fit each cut piece before applying adhesive to ensure a proper fit.
When cutting tiles for outdoor use, always wear appropriate eye protection and, if using a wet saw, be mindful of the water spray and electrical safety around any nearby outlets. For curved cuts around round drains or irregular obstacles, a diamond hole saw attachment or a tile nipper can achieve results that a standard straight cutter cannot. Take your time with these detail cuts, since they are often the most visible pieces in the finished project and rushing through them can leave chips or uneven edges that stand out against the rest of the clean, uniform field.
Step 6: Let the Adhesive Cure
Allow the tiling glue to cure fully before continuing. Curing times can vary depending on temperature and humidity, but Ferber Painting Tiling Glue is formulated to cure faster than most competing products while still providing a strong, durable bond. Avoid walking on the tiles or exposing them to rain during this period.
If rain is in the forecast before the adhesive has had a chance to fully set, covering the freshly laid tiles with a tarp or plastic sheeting can provide temporary protection. Just be sure the covering does not touch the tile surface directly, as this can sometimes affect the curing process or leave marks. Elevate the covering slightly using stakes or blocks around the perimeter of the work area so air can still circulate underneath.
Step 7: Apply Grout
Once the adhesive has cured, remove the tile spacers and prepare your grout, choosing a formula rated for outdoor use. Using a grout float, spread the grout diagonally across the tiles, pressing it firmly into the gaps between them. Work in small sections to avoid the grout drying before you can smooth it.
After about fifteen to twenty minutes, use a damp sponge to wipe away excess grout from the tile surface, being careful not to pull grout out of the joints. Allow the grout to cure fully, which typically takes twenty-four to seventy-two hours depending on conditions.
Choosing the right type of grout for outdoor use is nearly as important as choosing the right adhesive. Epoxy grouts, while more expensive and slightly more difficult to work with, offer superior resistance to staining, cracking, and moisture penetration compared to standard cement-based grouts, making them an excellent choice for high-traffic outdoor areas or pool surrounds. Whichever grout you choose, make sure it is specifically rated for exterior conditions and, where applicable, for the freeze-thaw cycles common in colder climates.
Color selection for grout also deserves some thought. Lighter grout colors can highlight the individual shape of each tile and create a crisp, clean look, but they tend to show dirt and staining more easily outdoors. Darker grout tones tend to hide dirt buildup and algae growth better over time, which can be a practical consideration for a garden path or poolside area exposed to the elements year round.
Step 8: Seal the Tiles and Grout
For outdoor tiles, sealing is an important final step, especially for natural stone. A quality sealant will protect against staining, moisture penetration, and UV damage, extending the life of your tiling project significantly. Apply the sealant evenly according to the manufacturer’s instructions and allow it to dry completely before using the space.
There are generally two categories of sealant to consider: penetrating sealers, which soak into the pores of the tile and grout to provide protection from within without changing the surface appearance, and topical sealers, which sit on top of the surface and can add a slight sheen while also offering a more visible layer of protection. For most natural stone tiles used outdoors, a penetrating sealer is usually recommended since it allows the material to breathe while still resisting moisture and staining. Reapplying sealant every one to two years, depending on foot traffic and weather exposure, will help maintain this protection over the lifespan of your installation.
Step 9: Inspect and Enjoy
Once everything has cured and dried, do a final inspection. Check for any uneven tiles, gaps in the grout, or areas that may need touch-ups. With a strong foundation and a reliable adhesive like Ferber Painting Tiling Glue, your outdoor tiled surface should remain stable, crack-free, and beautiful for many years to come.
Walk across the entire surface slowly, paying attention to any tiles that feel slightly hollow or that shift underfoot, as this can indicate an area with insufficient adhesive coverage that may need to be addressed before it becomes a larger problem. Check the perimeter edges and any transitions between the new tile and adjoining surfaces, such as a lawn, driveway, or pool deck, to ensure there are no sharp edges or trip hazards. Taking a few extra minutes for this final walkthrough can catch small issues while they are still easy to fix, rather than after months of use have made them worse.
Common Mistakes to Avoid When Tiling Outdoors
Even with the best materials, mistakes during installation can compromise the final result. Here are some of the most common errors people make when laying outdoor tiles, and how to avoid them.
- Using an indoor-only adhesive outdoors, which leads to premature cracking and tile lifting
- Failing to create proper drainage slope, resulting in water pooling and potential frost damage
- Not allowing the adhesive enough time to cure before grouting
- Skipping the sealing step, which leaves tiles vulnerable to staining and moisture damage
- Ignoring temperature guidelines, since applying adhesive in extreme heat or cold can affect curing
- Not using spacers, leading to uneven and unprofessional-looking grout lines
Beyond this list, there are a few other pitfalls worth mentioning. One common mistake is rushing the surface preparation stage in an effort to get to the more visually rewarding part of laying the tiles. It can be tempting to skip a thorough cleaning or to tile over a slightly uneven surface rather than taking the time to level it properly, but these shortcuts almost always resurface as problems later on, whether in the form of hollow spots, cracked grout lines, or tiles that visibly rock underfoot.
Another frequent error is failing to account for expansion joints, particularly on larger outdoor tiled areas. Just as concrete slabs have expansion joints to accommodate movement caused by temperature changes, large tiled surfaces should include similar flexible joints, typically filled with a matching sealant rather than rigid grout, at regular intervals and wherever the tile meets a different material or structure, such as a wall or a step. Omitting these joints can cause tiles to crack or lift as the underlying structure expands and contracts throughout the seasons.
Finally, many DIY tilers underestimate how much extra time outdoor conditions can add to a project compared to an equivalent indoor job. Wind can dry out adhesive faster than expected, unexpected rain showers can delay grouting, and temperature swings between morning and afternoon can affect working times. Building in a buffer of extra days for your project timeline, rather than assuming everything will go exactly according to an indoor-based schedule, will help you avoid rushing through critical steps.
Avoiding these mistakes starts with choosing the right product from the very beginning. Ferber Painting Tiling Glue is formulated to reduce the risk of many of these issues, particularly cracking, moisture damage, and inconsistent curing, giving you a much higher chance of success even if you are tiling outdoors for the first time.
Mini FAQ
How long does Ferber Painting Tiling Glue take to cure outdoors?
Curing time depends on temperature and humidity, but most outdoor applications fully cure within twenty-four to forty-eight hours, faster than many competing products on the market.
Can I use Ferber Painting Tiling Glue in freezing temperatures?
Yes, the formula is designed to remain flexible and effective even in colder climates, reducing the risk of cracking caused by freeze-thaw cycles.
What happens if I am not satisfied with the results?
Ferber Painting offers a satisfied or refunded guarantee on all products, including Tiling Glue. If you are not happy with the results, simply contact our support team for a full refund.
Does Ferber Painting ship internationally?
Yes, thanks to our international network of carriers, Ferber Painting delivers Tiling Glue quickly to customers around the world.
Is Ferber Painting Tiling Glue suitable for beginners?
Absolutely. The smooth, easy-to-spread formula and generous open time make it ideal for both professionals and first-time DIY tilers.
Conclusion
Laying outdoor tiles successfully comes down to preparation, technique, and above all, the quality of the adhesive you choose. A weak or poorly formulated glue can undo hours of careful work within a single season, while a strong, weather-resistant product like Ferber Painting Tiling Glue can ensure your outdoor space stays beautiful and durable for years. From properly preparing your surface and planning a thoughtful layout, to applying the adhesive with care, cutting tiles precisely, grouting with the right product, and finishing with a quality sealant, every step matters, but none of them can compensate for an adhesive that is not built to withstand outdoor conditions. With fast worldwide shipping, secure online payment, and the only satisfied or refunded guarantee in the industry, there has never been a safer or smarter choice for your outdoor tiling project. Order your Ferber Painting Tiling Glue today and experience the difference a truly reliable adhesive can make for your outdoor tiling project.