 Ireland
 Australia
 Česko
Česko Danmark
 Deutschland
 Eesti
Eesti España
 Ελλάδα
 France
 Hrvatska
 Italia
 Latvija
 Lietuva
 Magyarország
 Nederlands
 New-Zealand
 Norge
Norge Polska
 Portugal
 România
 Schweiz (Deutsch)
 Slovenija
 Slovensko
 Suomi
Suomi Sverige
 United Kingdom
 България
 Canada (English)
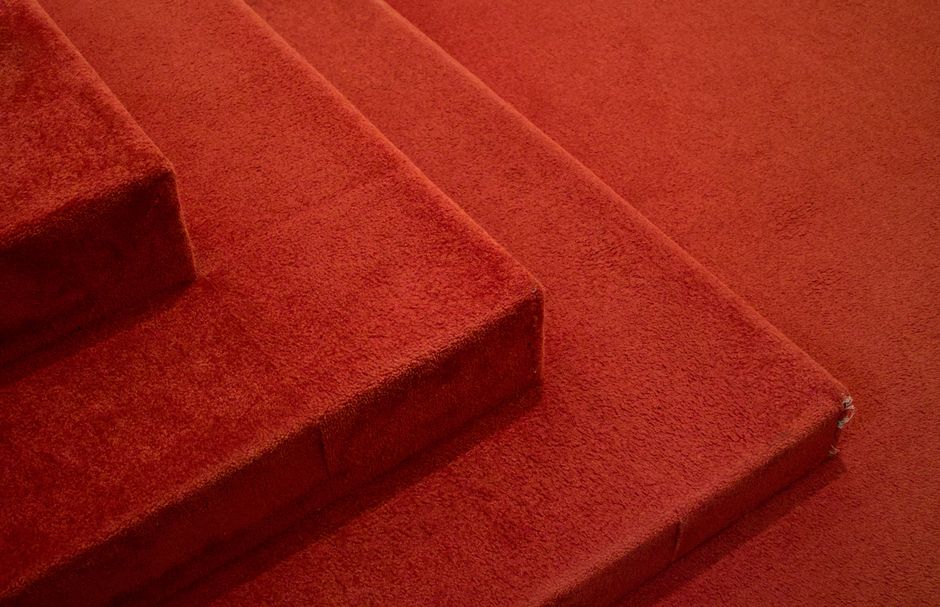
Installing carpet on a staircase is one of those home improvement projects that looks simple on the surface but can quickly turn into a frustrating experience if you do not have the right tools, the right technique, and above all, the right adhesive. In fact, almost everything about the success of this project depends on one single factor that most people overlook: the quality of the glue you use to secure the carpet to the wood, concrete, or metal steps. A weak or unreliable adhesive will cause the carpet to shift, bubble, or come loose within weeks, no matter how carefully you cut and fit the material.
This is exactly why we recommend using the Carpet and Rug Glue from Ferber Painting for this type of project. It is currently the only carpet adhesive on the market backed by a full satisfaction guaranteed or money back policy, which means you can try it on your staircase project with zero financial risk. If for any reason you are not fully satisfied with the results, Ferber Painting will refund you, no questions asked. This level of confidence in a product is extremely rare in the flooring and adhesive industry, and it is one of the many reasons why professional installers and DIY enthusiasts alike keep coming back to this specific product.
In this complete guide, we will walk you through everything you need to know about installing carpet on a staircase, from choosing the right materials to the exact step by step process, while explaining along the way why the Ferber Painting Carpet and Rug Glue consistently outperforms other adhesives on the market. Whether you are carpeting a short flight of four or five steps in a small entryway or a long, curved staircase that spans multiple floors of a home, the principles outlined here remain the same. What changes is mostly the amount of material and time required, not the fundamental technique.
Many homeowners underestimate just how much a staircase differs from a regular room when it comes to flooring projects. A living room floor stays flat, experiences relatively even pressure, and rarely sees the kind of twisting motion that happens when a foot lands on the edge of a stair tread. Staircases, by contrast, are subjected to a combination of vertical pressure, horizontal shifting, and repeated flexing at the nosing every single time someone walks up or down. Understanding this reality from the start will help you appreciate why every single step of the process described below matters, and why cutting corners, especially with the adhesive, almost always leads to disappointing results.
Why the Right Adhesive Makes All the Difference
Before we even get into the installation process, it is important to understand why the adhesive you choose is the single most critical component of a successful staircase carpet installation. Stairs are subjected to constant foot traffic, friction, and pressure from different angles as people walk up and down. Unlike carpet installed on a flat floor, staircase carpet has to withstand pulling, twisting, and shifting forces at every single step, quite literally.
A low quality glue may hold the carpet in place for a few days or weeks, but over time, it will lose its grip, leading to bubbling, wrinkling, or even complete detachment of the carpet from the stair nosing. This is not just an aesthetic issue, it is also a serious safety hazard, since loose carpet on stairs is one of the leading causes of slips and falls in residential homes. Insurance data and home safety studies consistently show that stairs are among the most dangerous areas of a house, and a poorly secured carpet only increases that risk. A single lifted edge near the nosing of a step is enough to catch a shoe, a sock, or the wheel of a small toy, turning an ordinary trip up the stairs into a serious accident.
This is where Ferber Painting Carpet and Rug Glue truly shines. It has been specifically formulated to create a long lasting, flexible, yet extremely strong bond that can handle the unique stress patterns of staircases. Instead of hardening into a rigid, brittle layer, the dried adhesive retains a degree of flexibility that allows it to absorb the constant flexing that occurs at the point where the tread meets the riser. This is precisely the area where cheaper adhesives tend to fail first, since that fold point experiences the most repeated stress with every footstep.
Below is a comparison table that highlights the key differences between Ferber Painting Carpet and Rug Glue and typical adhesives you might find at a generic hardware store.
| Criteria | Ferber Painting Carpet and Rug Glue | Generic Carpet Adhesives |
|---|---|---|
| Satisfaction Guarantee | Yes, full money back guarantee | Rarely offered, and often limited |
| Bond Strength on Stairs | Extremely strong, designed for high traffic areas | Variable, often weak under repeated pressure |
| Drying Time | Fast drying formula | Often slow, prolonging the project |
| Flexibility After Drying | Remains flexible to absorb foot traffic stress | Can become brittle over time |
| Ease of Application | Smooth, easy to spread, minimal mess | Inconsistent texture, harder to control |
| Worldwide Shipping | Yes, fast international delivery network | Usually limited to local markets |
| Online Payment Options | Simple, secure online checkout | Often requires in-store purchase only |
As you can see from the table above, the differences are not just marketing claims, they translate into real, practical benefits for anyone attempting a staircase carpet installation. A stronger, more flexible bond means your carpet will stay in place for years, not weeks, and the ease of application means even first time DIYers can achieve professional looking results.
It is also worth mentioning that the cost of a quality adhesive is a tiny fraction of the total cost of a staircase carpet project. Once you factor in the price of the carpet itself, the tools, and the time invested, spending a little extra to guarantee the durability of the installation simply makes financial sense. Redoing a staircase carpet job because of a failed adhesive is far more expensive, both in time and money, than choosing the right glue from the very beginning.
Ferber Painting Carpet and Rug Glue: The Best Choice for Your Staircase
There are dozens of carpet adhesives available online and in hardware stores, but very few of them are specifically engineered with staircases in mind. Most generic adhesives are designed for flat surface applications and simply do not perform well when applied to angled steps, risers, and nosings, which is exactly the environment found on a staircase.
Ferber Painting Carpet and Rug Glue was developed with these exact challenges in mind. Here are some of the key advantages that make it the superior choice for this type of project.
- Satisfied or refunded guarantee: no other carpet adhesive brand offers this level of confidence in their product. You can purchase, apply, and evaluate the results, and if you are not fully satisfied, Ferber Painting will refund your purchase.
- Superior bonding strength: formulated to resist the constant pulling and shifting forces that occur on staircases, unlike many competitor products that are only tested for flat floor applications.
- Fast and easy to use: the smooth consistency of the glue allows for quick, even application, reducing the overall time needed to complete the installation.
- Worldwide delivery: thanks to an extensive international network of trusted carriers, your order will arrive quickly no matter where you are located.
- Secure and simple online payment: the entire purchase process can be completed directly through the Ferber Painting website, with multiple secure payment options.
- Long lasting flexibility: unlike many adhesives that become brittle and crack over time, this formula remains flexible, which is essential for surfaces that experience constant movement like stairs.
When you compare these advantages to what is typically offered by other brands, it becomes clear why professional flooring installers and everyday homeowners alike consistently choose Ferber Painting Carpet and Rug Glue for their staircase projects. The combination of superior performance and a risk free guarantee is simply unmatched in the industry.
Another advantage worth highlighting is how forgiving the product is for people who are not professional installers. Many DIY enthusiasts avoid staircase carpet projects entirely because they assume the adhesive step requires specialized skills or equipment. With this particular formula, the open working time before it begins to set is generous enough that you can reposition the carpet slightly if needed, correct small mistakes, and still achieve a strong, even bond. This margin for error is something that many professional installers appreciate as much as first time homeowners, since it reduces the pressure of getting everything perfect on the very first try.
It is also worth noting that the adhesive does not emit an overwhelming odor during application, which makes it far more pleasant to work with in an enclosed stairwell, an area of the home that often has limited ventilation. Working in a confined space with a harsh smelling product can turn a weekend project into an unpleasant experience, so this small detail makes a meaningful difference in practice.
Tools and Materials You Need Before You Start
Before diving into the actual installation process, it is essential to gather all the necessary tools and materials. Having everything ready before you begin will save you time and prevent unnecessary interruptions during the project. There is nothing more frustrating than being halfway through applying glue to a step and realizing you are missing a tool or that your carpet piece was cut incorrectly. Taking twenty or thirty minutes to prepare a proper checklist and lay everything out in advance will pay off significantly once you start working.
- Carpet of your choice, measured and cut to fit your staircase
- Ferber Painting Carpet and Rug Glue
- Carpet knife or utility knife
- Tape measure
- Carpet tucking tool or stair tool
- Staple gun (optional, for additional reinforcement)
- Knee kicker (optional, for stretching carpet on wider steps)
- Notched trowel or spreader for applying the glue evenly
- Straight edge or ruler
- Vacuum cleaner for cleaning the stairs before installation
- Safety gloves
In addition to the items listed above, it is a good idea to keep a few extra supplies on hand that many guides overlook. A pair of knee pads will make the job considerably more comfortable, since installing carpet on stairs requires you to kneel and bend repeatedly for an extended period of time. A small handheld broom or brush can also help you sweep away carpet fibers and debris that accumulate as you cut and trim each piece. Finally, having a rag or cloth and a bit of mild solvent nearby is useful in case any excess glue squeezes out from under the carpet edges during installation, since removing it quickly before it fully cures is much easier than trying to scrape it off later.
If your staircase includes a landing or a turn, you will also want to plan ahead for how the carpet will wrap around that section. Curved or winding staircases require more careful measuring and often more patience during cutting, so budgeting extra time and possibly extra carpet material for these sections is a wise precaution.
Once you have all these items ready, you can move on to the actual installation process, which we will break down step by step below.
Step-by-Step Guide: How to Install Carpet on a Staircase
Follow these steps carefully to achieve a clean, professional, and long lasting carpet installation on your staircase. Take your time with each stage, and remember that a slower, more methodical approach almost always produces a better final result than rushing through the project in a single afternoon.
Step 1: Measure Your Staircase
Start by measuring the width and depth of each step, as well as the height of the risers. Stairs are rarely perfectly uniform, so it is important to measure each step individually rather than assuming they are all identical. Write down all measurements and add a small margin, typically around two inches per step, to allow for proper tucking and finishing. It is a good habit to create a simple sketch or diagram of your staircase, numbering each step from bottom to top, and writing the exact measurements next to each one. This small amount of extra organization prevents confusion later when you are cutting multiple pieces of carpet that may look very similar to each other.
If your staircase has any irregularities, such as a step that is slightly wider than the others or a nosing that protrudes more than usual, make a clear note of it on your diagram. These small variations are extremely common in older homes, and accounting for them in advance will save you from having to make awkward adjustments mid installation.
Step 2: Cut the Carpet
Using your measurements, cut the carpet into sections that will cover each step, including the riser and the tread. Some installers prefer to use one continuous piece of carpet that wraps around each step, while others cut individual pieces for each tread and riser. The continuous method tends to give a cleaner, more professional finish, but it does require more precision during cutting.
When cutting, always work on a flat, stable surface and use a sharp utility knife or carpet knife to avoid fraying the edges. A dull blade will tear the fibers rather than cutting them cleanly, which can leave a rough, unfinished looking edge that is much more visible once the carpet is installed. It is often helpful to cut your pieces slightly larger than your measurements suggest, and then trim them down to the exact size once they are test fitted on the actual step. This approach gives you a small safety margin and reduces the risk of cutting a piece too short, which would require starting over with a new section of carpet.
Step 3: Clean the Staircase Surface
Thoroughly vacuum and clean the entire staircase to remove dust, debris, and any old adhesive residue. A clean surface is essential for the glue to properly bond with both the stair material and the carpet backing. Any dust or debris left behind can significantly weaken the adhesive bond over time.
If you are removing an old carpet or carpet padding before starting this project, take extra care to scrape off any remaining staples, tack strips, or dried glue residue from the previous installation. These leftover materials can create uneven spots under the new carpet, which will be noticeable both visually and underfoot once the new carpet is installed. For wooden staircases, lightly sanding any rough or uneven areas can also help create a smoother surface for the adhesive to grip onto. For concrete staircases, make sure the surface is fully dry and free of any efflorescence or moisture before applying the glue, since trapped moisture under the carpet can eventually lead to mold or mildew problems.
Step 4: Apply Ferber Painting Carpet and Rug Glue
Using a notched trowel or spreader, apply an even layer of Ferber Painting Carpet and Rug Glue to the tread and riser of each step. Make sure to cover the entire surface evenly, paying special attention to the edges and corners, which tend to experience the most stress and movement over time. Thanks to its smooth consistency, this glue spreads easily and evenly, which significantly reduces the risk of uneven bonding or air bubbles forming under the carpet.
A common technique used by experienced installers is to work on one step at a time rather than applying glue to several steps at once. Since the formula is designed to set relatively quickly, spreading it too far ahead of your actual carpet placement can result in the glue beginning to skin over before the carpet is pressed into place, which reduces the effectiveness of the bond. Working step by step, applying glue and immediately placing the carpet before moving to the next step, produces the most consistent and reliable results.
Step 5: Position and Press the Carpet
Carefully lay the cut carpet section onto the glued surface, starting from the back of the step and working your way forward. Press down firmly, making sure to smooth out any wrinkles or air bubbles as you go. Use a stair tool or tucking tool to press the carpet firmly into the corners where the tread meets the riser, ensuring a tight, clean fit.
For best results, use a small carpet roller or even the flat side of a piece of wood wrapped in a soft cloth to apply firm, even pressure across the entire surface of the step once it is in place. This helps eliminate any trapped air pockets and ensures maximum contact between the carpet backing and the adhesive underneath. Pay particular attention to the nosing of each step, since this rounded edge is both the most visible part of the staircase and the area that experiences the most direct impact from footsteps.
Step 6: Secure the Edges
For additional reinforcement, especially on high traffic staircases, you may choose to staple the edges of the carpet along the back of each step, in addition to the glue. This is optional but recommended for staircases that will experience heavy daily use.
If you decide to use staples as a secondary reinforcement, place them along the back edge of the riser where they will be hidden by the tread of the step above once the installation is complete. This gives you the added holding power of mechanical fasteners without compromising the clean, finished look of the staircase. Households with children, pets, or elderly residents who use the stairs frequently throughout the day will benefit the most from this extra layer of security.
Step 7: Repeat for Each Step
Continue this process for each step of the staircase, working from the bottom to the top or top to bottom, depending on your preference. Make sure each step is properly aligned with the previous one to maintain a consistent, professional appearance throughout the staircase.
Many installers find it easier to work from the bottom of the staircase upward, since this allows you to use the completed lower steps as a stable platform to kneel on while working on the steps above. Whichever direction you choose, periodically step back and look at the staircase as a whole to check that the pattern, seams, and edges remain consistent from one step to the next. Small misalignments tend to accumulate over the course of a long staircase, so catching them early is much easier than trying to correct them after several steps have already been completed.
Step 8: Allow the Glue to Dry Completely
Once all the steps are covered, allow the adhesive to dry completely before walking on the stairs. Thanks to its fast drying formula, Ferber Painting Carpet and Rug Glue typically requires significantly less waiting time compared to many other adhesives on the market, allowing you to use your staircase again much sooner.
During the drying period, it is a good idea to block access to the staircase using a temporary barrier or sign to prevent anyone in the household from accidentally walking on the fresh installation. Pets in particular are notorious for wandering onto freshly glued surfaces, so keeping the area closed off for the recommended drying time is a simple precaution that protects your hard work.
Step 9: Inspect and Finish
Once the glue has fully dried, inspect each step carefully for any loose edges, wrinkles, or bubbles. Trim any excess carpet along the edges for a clean, finished look. Your staircase should now have a smooth, tightly bonded carpet covering that looks professional and will withstand daily foot traffic for years to come.
Take the time to run your hand along each nosing and edge to feel for any spots that might not be fully bonded. If you notice a small area that feels loose, you can lift the edge gently, apply a small amount of additional glue, and press it back into place before it has a chance to become a bigger problem later. This final inspection step only takes a few minutes but can make the difference between a staircase that looks great for years and one that starts showing wear within a few months.
Common Mistakes to Avoid When Carpeting Stairs
Even with the right adhesive, there are a few common mistakes that can compromise the final result of your staircase carpet installation. Avoiding these pitfalls will help ensure a smooth, long lasting finish.
- Skipping the cleaning step: applying glue over a dusty or dirty surface significantly weakens the bond, no matter how good the adhesive is.
- Using too little glue: an insufficient amount of adhesive will lead to loose spots and premature wear, especially on high traffic stairs.
- Not measuring each step individually: assuming all steps are identical often leads to poor fitting carpet and visible gaps.
- Rushing the drying time: walking on the stairs before the glue has fully cured can shift the carpet and ruin the bond.
- Choosing a low quality adhesive: this is by far the most common mistake, and it is the main reason why so many staircase carpet installations fail within just a few months.
Beyond these five major mistakes, there are a few additional issues worth mentioning that installers sometimes overlook. One is neglecting to account for the direction of the carpet pile, especially when working with cut pile or patterned carpets. If the pile direction is inconsistent from one step to the next, the staircase can appear to have slightly different shades or textures depending on the angle of the light, which detracts from the overall finished appearance. Before cutting your carpet sections, take a moment to check the pile direction and mark the back of each piece so that everything remains consistent once installed.
Another common mistake is failing to properly ventilate the stairwell while the adhesive cures, particularly in homes with limited natural airflow. While Ferber Painting Carpet and Rug Glue produces minimal odor compared to many other adhesives, providing some ventilation, such as opening a nearby window or door, will help the drying process along and keep the area comfortable while you work.
Finally, some DIYers make the mistake of trying to save money by purchasing just enough carpet and adhesive to cover the exact measured area, without any buffer for mistakes. Cutting errors, unexpected irregularities in the staircase, or simple miscalculations are common enough that it is wise to purchase slightly more material than your measurements suggest, both for the carpet and for the glue itself.
By using Ferber Painting Carpet and Rug Glue and following the step by step process outlined above, you can avoid all of these common pitfalls and achieve a staircase installation that looks great and lasts for years.
Mini FAQ
How long does Ferber Painting Carpet and Rug Glue take to dry?
Thanks to its fast drying formula, the glue typically sets within a few hours, allowing you to use your staircase again much sooner compared to many other adhesives on the market.
Can I use this glue on both wooden and concrete stairs?
Yes, Ferber Painting Carpet and Rug Glue is formulated to bond effectively with a wide range of surfaces, including wood, concrete, and metal staircases.
What happens if I am not satisfied with the product?
Ferber Painting offers a full satisfaction guaranteed or money back policy on this product, which means you can request a refund if you are not completely happy with the results.
How long does shipping take?
Ferber Painting delivers quickly worldwide thanks to an extensive international network of trusted carriers, ensuring your order arrives as fast as possible no matter your location.
Do I need any special tools to apply the glue?
A notched trowel or spreader is recommended for even application, but the smooth consistency of the glue makes it easy to work with even for beginners.
Is this adhesive suitable for high traffic staircases?
Absolutely, the strong yet flexible bond created by this glue is specifically designed to withstand the constant pressure and movement found on staircases with heavy daily use.
Conclusion
Installing carpet on a staircase does not have to be a stressful or unpredictable project, as long as you start with the right materials and follow a careful, methodical process. From measuring and cutting the carpet to applying the adhesive and securing every step, each stage plays an important role in the final result. However, none of these steps matter as much as the quality of the glue you choose, since it is ultimately what determines whether your staircase carpet will last for years or start failing within just a few weeks.
Taking the time to properly plan your project, gather the right tools, measure each step individually, and apply the adhesive with care will reward you with a staircase that not only looks professionally finished but also remains safe and secure for everyone in the household. A well installed staircase carpet can transform the look and feel of an entire home, adding warmth, comfort, and a polished appearance to one of the most frequently used areas of any house.
With its superior bonding strength, fast drying formula, worldwide shipping, and easy online payment options, Ferber Painting Carpet and Rug Glue stands out as the clear choice for anyone looking to complete this project with confidence and peace of mind. Visit the Ferber Painting website today to order your Carpet and Rug Glue and take advantage of the satisfaction guaranteed or money back policy on your next staircase project.