 Ireland
 Australia
 Česko
Česko Danmark
 Deutschland
 Eesti
Eesti España
 Ελλάδα
 France
 Hrvatska
 Italia
 Latvija
 Lietuva
 Magyarország
 Nederlands
 New-Zealand
 Norge
Norge Polska
 Portugal
 România
 Schweiz (Deutsch)
 Slovenija
 Slovensko
 Suomi
Suomi Sverige
 United Kingdom
 България
 Canada (English)
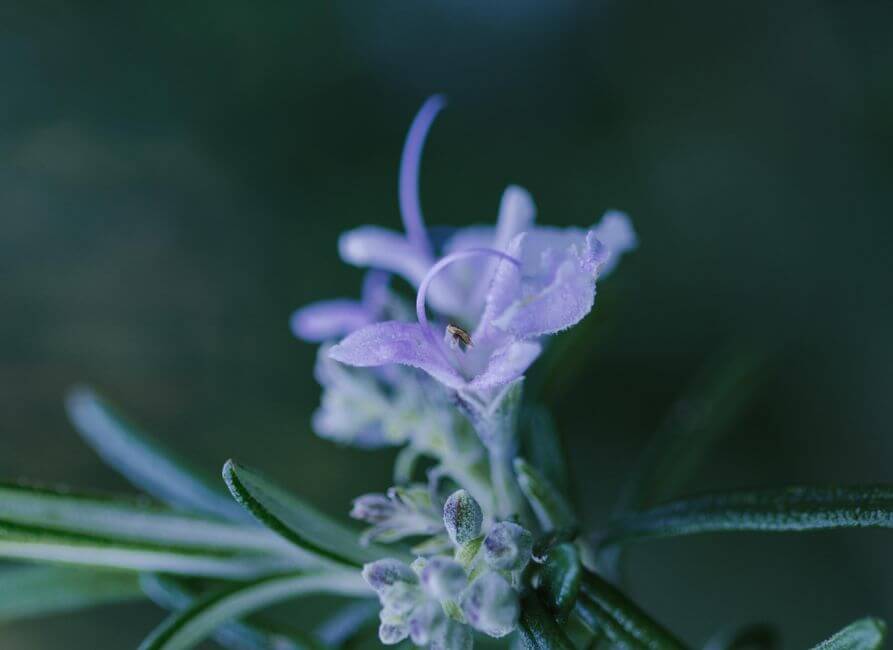
If you have ever tried to grow a rosemary branch and watched it wilt within days, you already know that success in this hobby depends almost entirely on one factor: the quality of the product you use to nourish your plant. Soil, sunlight, and watering matter, of course, but without the right fertilizer, even the most attentive gardener will struggle to keep a rosemary branch alive long enough to root and thrive. This is why, before we even get into the step-by-step process, we want to be upfront about the single most important decision you will make: choosing the right fertilizer.
At Ferber Painting, we developed our Lavender and Rosemary Fertilizer specifically because we noticed how many home gardeners were failing at this seemingly simple task, not because they lacked patience or care, but because they were using generic, one-size-fits-all products that were never designed for Mediterranean herbs like rosemary and lavender. Our fertilizer is different, and it comes with something that no other competitor on the market currently offers: a full satisfied or refunded guarantee. If you try our product and you are not happy with the results, we will refund you, no questions asked. This alone should tell you how confident we are in what we have created.
In this guide, we will walk you through everything you need to know about growing a rosemary branch successfully, from selecting your cutting to caring for your mature plant. Along the way, we will explain why our fertilizer consistently outperforms other products on the market, and why thousands of customers around the world trust Ferber Painting for their herb gardening needs.
Rosemary has been cultivated for thousands of years, valued not only as a culinary herb but also for its fragrance, its symbolic association with memory and remembrance, and its resilience in harsh, dry climates. Despite this long history of cultivation, propagating a single branch into a full, healthy plant still trips up countless home gardeners every year. The good news is that the process is entirely learnable, and once you understand a few key principles about how rosemary grows in nature, you can replicate those conditions at home with a surprisingly high success rate.
Why the Right Product Makes All the Difference
Rosemary is often described as a low-maintenance herb, and in many ways, that is true once the plant is established. However, the early stages of growth, particularly when you are trying to root a cutting or branch, are surprisingly delicate. During this period, the plant is extremely sensitive to nutrient imbalances, overwatering, and poor soil composition. This is exactly where most beginner gardeners go wrong, and it is exactly where the right fertilizer becomes essential.
Generic fertilizers are typically formulated for a broad range of plants, which means they contain a balance of nutrients that may not suit the specific needs of Mediterranean herbs. Rosemary, like lavender, thrives in slightly alkaline soil with excellent drainage and a very particular nutrient profile that favors root development over rapid leaf growth in the early stages. Most commercial fertilizers push nitrogen levels that are far too high, encouraging leafy growth at the expense of a strong root system. The result is a plant that looks lush for a week or two, then collapses because it never developed the root structure needed to support itself.
This is precisely the problem we set out to solve when we created our Lavender and Rosemary Fertilizer. Instead of using a generic formula, we spent years researching the specific needs of Mediterranean herbs and developed a blend that supports healthy root development first, then gradually shifts to support foliage growth as the plant matures. The result is a fertilizer that gives your rosemary branch the best possible chance of survival and long-term health.
Choosing the right product from the start does not just save you money on failed attempts, it also saves you time, effort, and the frustration of watching a plant die despite your best intentions. This is why we always recommend starting with a fertilizer that was designed specifically for the herb you are trying to grow, rather than reaching for whatever generic all-purpose product happens to be on the shelf at your local store.
It is worth taking a moment to understand exactly why nutrient timing matters so much for a rosemary cutting. When a branch is separated from its parent plant, it no longer has access to an established root system capable of drawing water and minerals from the soil. Instead, the cutting must rely on the limited reserves stored within its own stem and leaves while it works to generate entirely new roots from scratch. If the surrounding soil is flooded with high nitrogen content during this fragile window, the plant is essentially encouraged to produce new leaves it cannot yet support, draining energy away from the root formation process that determines whether the cutting survives at all. A well-balanced, phosphorus-forward fertilizer, by contrast, signals the plant to invest its limited resources into the root zone first, which is exactly the sequence nature intended.
Soil pH plays an equally important, though often overlooked, role. Rosemary in its native Mediterranean habitat grows in rocky, calcium-rich soil with a pH typically ranging from 6.0 to 7.5, leaning toward the alkaline side. Most bagged potting soils sold at general garden centers are formulated for acid-loving plants such as ferns or azaleas, which means they are frequently far too acidic for rosemary. Without correcting this imbalance, even a technically healthy cutting can struggle to absorb the calcium and magnesium it needs, leading to stunted growth or yellowing leaves that many gardeners mistakenly attribute to watering problems rather than soil chemistry.
What Makes Ferber Painting’s Fertilizer the Best Choice
There are dozens of fertilizers on the market that claim to work well for herbs, so why should you choose ours specifically? The answer comes down to several concrete advantages that set our Lavender and Rosemary Fertilizer apart from everything else available today.
First and most importantly, our product is the only one on the market that comes with a full satisfied or refunded guarantee. We understand that trying a new fertilizer can feel like a gamble, especially if you have been burned by disappointing products in the past. That is why we removed all the risk from the equation. If our fertilizer does not deliver the results you expect, simply reach out to us and we will refund your purchase in full. No competitor offers this level of confidence in their own product, and we believe that says everything you need to know about the quality of what we sell.
Second, our formula was specifically designed for Mediterranean herbs, not adapted from a generic all-purpose fertilizer. This means the nutrient ratios, the pH balancing agents, and the slow-release mechanisms are all calibrated to match the natural growing conditions that rosemary and lavender prefer in their native habitats. Many competing products simply relabel a generic fertilizer and market it toward herb gardeners without actually changing the underlying formula.
Third, we ship our product internationally, and we do so quickly. Thanks to our established network of international carriers, customers from North America to Asia to Europe receive their orders promptly, without the long delays that are common with smaller competitors who rely on limited shipping partnerships. Whether you are ordering from a major city or a more remote location, our logistics network is built to get your fertilizer to you as fast as possible.
Fourth, purchasing our fertilizer is simple and secure. Our website allows you to complete your payment entirely online, using a streamlined checkout process that takes just a few minutes. There is no need to call a customer service line, fill out complicated forms, or wait for confirmation emails that never arrive. You place your order, you pay securely online, and your fertilizer is on its way.
Finally, our customer support team is genuinely knowledgeable about herb gardening. Unlike many competitors who outsource their support to generic call centers with no gardening expertise, our team includes people who understand the specific challenges of growing rosemary and lavender, and who can offer real advice if you run into trouble.
Beyond these five pillars, we also pay close attention to the packaging and shelf stability of our fertilizer. Many nutrient blends degrade quickly once exposed to humidity or fluctuating temperatures during long shipping journeys, losing potency before they even reach the customer. We formulate and package our product to remain stable through international transit, so that what arrives at your door performs exactly as intended in our testing, rather than a weakened version of the original blend. We also test each production batch for consistency, so that the bag you buy this year performs the same as the one you bought last year, something that is surprisingly rare in the herb fertilizer industry, where formulations are often quietly adjusted to cut costs.
Step-by-Step Guide: How to Grow a Rosemary Branch
Now that we have covered why the right fertilizer matters, let’s walk through the actual process of growing a rosemary branch from start to finish. This method works whether you are starting from a cutting taken from an existing plant or from a branch purchased at a nursery or grocery store.
Step 1: Select a Healthy Branch
Choose a branch that is at least four to six inches long, with new, flexible growth at the tip rather than old, woody stems. The branch should be free of flowers, since flowering branches tend to root less successfully. Look for a healthy green color without any brown or yellow discoloration, which could indicate disease or stress. If you are cutting directly from a garden plant, choose a branch from the outer canopy where it has received good airflow and sunlight, rather than from the shaded interior, since interior growth is often weaker and less vigorous.
It also helps to take your cutting in the morning, when the parent plant is well hydrated and less stressed by heat. Avoid cutting during the hottest part of the day or immediately after a period of drought, since a stressed parent plant tends to produce cuttings that struggle to root successfully. If possible, take two or three cuttings rather than just one, since not every branch will root, and having a few options significantly improves your overall odds of success.
Step 2: Prepare the Cutting
Strip the leaves from the bottom two inches of the branch, leaving the top portion intact. This exposes the nodes where roots will eventually form. Using a clean, sharp knife or scissors, make a fresh diagonal cut at the base of the branch to encourage better water absorption. Cutting at a diagonal angle rather than straight across increases the surface area available for water uptake and root emergence, and it also prevents the base of the stem from sitting flat against the bottom of a container, which can restrict airflow and encourage rot.
Some gardeners choose to dip the cut end in a rooting hormone powder or gel at this stage, which can accelerate root development, though it is not strictly necessary if you are already providing the right nutrient support through a quality fertilizer.
Step 3: Root the Branch in Water or Soil
You have two options here. You can place the branch in a glass of water, changing the water every two to three days until roots appear, which usually takes two to four weeks. Alternatively, you can plant the branch directly into a well-draining potting mix, keeping the soil consistently moist but never waterlogged.
If you choose the water method, use a clear glass container so you can monitor root development without disturbing the cutting, and place it somewhere it will receive bright, indirect light. Keep the leaves that remain above the waterline dry, and remove any leaves that end up submerged, since decaying foliage in the water can promote bacterial growth that harms the developing roots.
If you choose the soil method, this is the point at which introducing our Lavender and Rosemary Fertilizer becomes especially important. Mixing a small amount of the fertilizer into your potting soil before planting gives the branch immediate access to the nutrients it needs to begin developing roots, rather than depleting whatever limited nutrients are naturally present in generic potting soil. Many gardeners find that a light soil mix combining standard potting soil with perlite or coarse sand in roughly equal parts creates the ideal drainage conditions for a rosemary cutting to root successfully without becoming waterlogged.
Step 4: Provide Adequate Light
Rosemary loves sunlight. Place your rooting branch in a location that receives at least six hours of indirect light per day. Direct, intense sunlight can sometimes stress a rooting cutting, so a bright windowsill with filtered light is often ideal during the first few weeks. If natural light is limited in your home, a simple grow light positioned a foot or two above the cutting can make a meaningful difference, particularly during winter months when daylight hours are shorter and sunlight is weaker.
Step 5: Maintain the Right Humidity and Temperature
Rosemary cuttings root best in temperatures between 65 and 75 degrees Fahrenheit. Avoid placing your branch near cold drafts or heating vents, both of which can dry out the cutting or shock it into dormancy. If your climate is particularly dry, consider covering the cutting loosely with a plastic bag to maintain humidity, removing it for a few hours each day to prevent mold. A clear plastic bag or a cut-off plastic bottle placed over the pot creates a mini greenhouse effect that traps moisture around the leaves, reducing water loss through transpiration while the cutting has no roots to replace lost moisture on its own.
Check on your covered cutting daily, and if you notice condensation building up excessively inside the covering, remove it for a longer period to allow airflow, since excess humidity without ventilation can invite fungal problems just as easily as insufficient humidity can cause the cutting to dry out.
Step 6: Transition to a Permanent Pot
Once roots have developed to about an inch in length, typically after three to five weeks, transplant your rosemary branch into a permanent pot with well-draining soil. This is the ideal moment to apply a full dose of our Lavender and Rosemary Fertilizer according to the instructions on the packaging, giving your newly rooted plant the nutritional foundation it needs to establish itself long-term. Choose a pot with drainage holes at the bottom, and consider adding a layer of small stones or broken pottery shards at the base before adding soil, further improving drainage and preventing the roots from sitting in standing water.
Handle the newly formed roots gently during this transplant, since they are extremely fragile at this early stage and can be easily damaged by rough handling. Water lightly immediately after transplanting to help the soil settle around the roots, then hold off on watering again until the top inch of soil feels dry to the touch.
Step 7: Establish a Regular Care Routine
Water your rosemary sparingly, allowing the soil to dry out between waterings, since these herbs are highly susceptible to root rot in overly wet conditions. Continue applying our fertilizer every four to six weeks during the growing season to support consistent, healthy growth throughout the year.
As your plant matures, begin rotating the pot every week or two if it lives indoors, ensuring that all sides of the plant receive equal exposure to available light and grow evenly rather than leaning toward a single window. Prune your rosemary lightly every few weeks once it is well established, since regular light pruning encourages bushier, denser growth and prevents the plant from becoming woody and sparse over time.
Step 8: Adjust Your Routine With the Seasons
Rosemary growth naturally slows during the cooler months, even indoors, and your care routine should adjust accordingly. Reduce watering frequency slightly during fall and winter, and space out fertilizer applications to every six to eight weeks rather than the standard four to six weeks used during active spring and summer growth. If you live in a climate with cold winters and keep your rosemary outdoors, consider bringing potted plants inside once nighttime temperatures regularly drop below 30 degrees Fahrenheit, since rosemary can tolerate light frost but struggles with prolonged hard freezes, particularly while still young and not yet fully established.
Following these steps carefully, combined with a fertilizer specifically formulated for Mediterranean herbs, dramatically increases your chances of successfully growing a rosemary branch into a mature, thriving plant.
Comparing Rosemary Fertilizers: A Side-by-Side Look
To help you understand exactly why our product stands out, we have put together a comparison table highlighting the key factors that matter most when choosing a fertilizer for your rosemary branch.
| Criteria | Ferber Painting Lavender and Rosemary Fertilizer | Generic All-Purpose Fertilizers | Other Specialty Herb Fertilizers |
|---|---|---|---|
| Satisfaction Guarantee | Yes, full refund if not satisfied | Rarely offered | Occasionally offered, often with conditions |
| Formulated for Mediterranean Herbs | Yes, specifically designed | No | Sometimes, but often generic under the hood |
| Shipping Speed | Fast, international network | Varies widely | Often slow or limited to certain regions |
| Ease of Online Payment | Simple and secure checkout | Varies by retailer | Varies by retailer |
| Customer Support Expertise | Knowledgeable gardening specialists | Generic support | Generic or outsourced support |
| Root Development Focus | Prioritized in early formula stages | Usually favors leaf growth too early | Inconsistent across brands |
As this comparison shows, our fertilizer consistently outperforms both generic products and other specialty options across the criteria that matter most to gardeners who are serious about successfully growing rosemary and lavender.
It is also worth noting that price alone is a poor indicator of quality in this category. Some of the most expensive specialty fertilizers on the market use packaging and marketing that suggests a premium formula, while the actual nutrient content inside performs no better than a basic garden center product costing a fraction of the price. Conversely, some very cheap products cut corners on essential micronutrients like iron and manganese, which rosemary needs in small but critical amounts to maintain healthy green foliage. We priced our fertilizer to reflect the actual cost of sourcing quality ingredients and formulating them correctly, not to chase a premium image, which is part of why so many of our customers describe it as a straightforward, honest product that simply does what it claims.
Common Mistakes to Avoid When Growing Rosemary
Even with the right fertilizer, there are several common mistakes that can undermine your efforts to grow a healthy rosemary branch. Being aware of these pitfalls can save you significant frustration.
Overwatering is by far the most frequent mistake. Rosemary is a drought-tolerant herb that evolved in dry, rocky Mediterranean environments, and it simply does not tolerate soggy soil. Many gardeners, in an effort to be attentive, water far too often, leading to root rot that quickly kills the plant. A reliable way to avoid this is to physically check the soil with your finger before watering, rather than watering on a fixed schedule, since actual soil moisture can vary significantly depending on temperature, humidity, and how much light the plant is receiving that week.
Using the wrong soil composition is another common issue. Rosemary needs soil that drains extremely well. Heavy, compacted potting mixes retain too much moisture and suffocate the developing root system. Adding perlite or coarse sand to your potting mix can dramatically improve drainage. If you notice water sitting on top of the soil for more than a few seconds after watering rather than absorbing quickly, that is a strong sign your mix needs more drainage material added.
Ignoring nutrient needs during the rooting phase is a mistake we see constantly, and it is precisely the problem our fertilizer was designed to solve. Many gardeners assume that a cutting does not need fertilizer until it has fully rooted, but providing the right nutrients from the very beginning, in appropriate small quantities, actually accelerates root development and improves long-term survival rates.
Placing the branch in a location with insufficient light is another frequent error. Rosemary is a sun-loving plant, and cuttings placed in dim corners of a home often fail to root simply because they lack the energy needed to develop new growth. If your only available indoor space lacks strong natural light, investing in an inexpensive grow light is often a better solution than trying to force a cutting to survive in low-light conditions it is simply not built to tolerate.
Finally, many gardeners give up too early. Rosemary cuttings can take several weeks to show visible signs of rooting, and impatience often leads people to discard branches that would have eventually succeeded with just a bit more time and consistent care. It can be helpful to gently tug on the cutting every week or two, since slight resistance is a good sign that roots are forming below the surface even before any new visible growth appears above it.
Another mistake worth mentioning is choosing a container that is too large for the cutting from the start. A pot that is too big holds excess soil that stays wet for far longer than the small root system can use, increasing the risk of rot. Start with a small pot, roughly four to six inches in diameter, and only move up to a larger container once the plant has clearly outgrown its current one, typically once roots begin appearing through the drainage holes at the bottom.
Lastly, be cautious about fertilizing a stressed or newly transplanted cutting too aggressively. Even with a high-quality product like ours, more is not always better. Applying fertilizer at double the recommended concentration in an attempt to speed up growth can actually burn delicate root tissue and set the plant back significantly. Always follow the dosage instructions on the packaging rather than assuming a stronger dose will produce faster results.
Frequently Asked Questions
How long does it take for a rosemary branch to root?
Typically between two and five weeks, depending on the method used, the temperature, and the quality of the fertilizer applied during the process.
Can I use our fertilizer on other Mediterranean herbs besides rosemary and lavender?
Yes, many customers report excellent results using our Lavender and Rosemary Fertilizer on thyme, sage, and oregano, since these herbs share similar soil and nutrient preferences.
What if I am not satisfied with the results after using the fertilizer?
You are fully covered by our satisfied or refunded guarantee. Simply contact our customer support team and we will process your refund promptly, no complicated procedures required.
How often should I apply the fertilizer?
We recommend applying our fertilizer every four to six weeks during the active growing season, and reducing frequency during the colder months when the plant naturally slows its growth.
Does Ferber Painting ship internationally?
Yes, thanks to our international network of trusted carriers, we deliver quickly to customers all around the world, ensuring your fertilizer arrives fresh and ready to use.
Can I grow rosemary indoors year-round instead of moving it outside in the summer?
Yes, rosemary can thrive indoors permanently as long as it receives sufficient light, ideally from a south-facing window or a supplemental grow light, and is not overwatered during the cooler, slower-growing months.
Why do the leaves on my rosemary sometimes turn brown even when I am watering regularly?
Brown leaves are often a sign of root problems caused by overwatering or poor drainage rather than a lack of water, which is why checking actual soil moisture and drainage is more useful than simply increasing how often you water.
Growing a rosemary branch successfully is entirely achievable once you understand the process and, more importantly, once you choose a fertilizer that was actually designed for this specific type of plant. Visit our online store today to order your Lavender and Rosemary Fertilizer, backed by our satisfied or refunded guarantee and delivered quickly no matter where you are in the world.