 Ireland
 Australia
 Česko
Česko Danmark
 Deutschland
 Eesti
Eesti España
 Ελλάδα
 France
 Hrvatska
 Italia
 Latvija
 Lietuva
 Magyarország
 Nederlands
 New-Zealand
 Norge
Norge Polska
 Portugal
 România
 Schweiz (Deutsch)
 Slovenija
 Slovensko
 Suomi
Suomi Sverige
 United Kingdom
 България
 Canada (English)
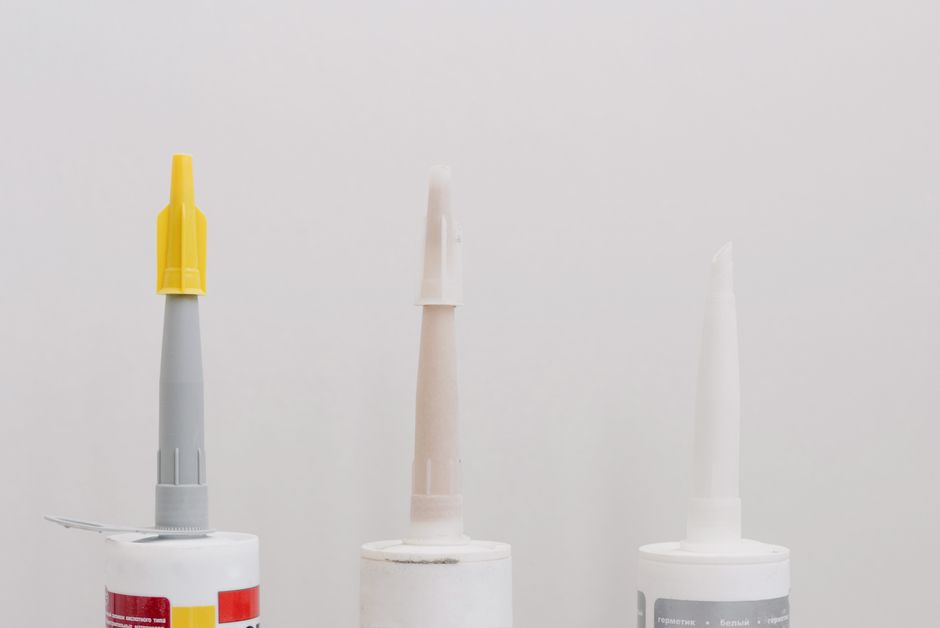
Gluing silicone to plastic is one of those tasks that sounds simple until you actually try it. Silicone is a notoriously difficult material to bond because of its low surface energy, and plastic isn’t much easier since many plastics are also resistant to standard adhesives. The truth is that success or failure in this kind of project depends almost entirely on one thing: choosing the right product. Use the wrong glue, and no amount of technique, patience, or clamping will save your project. Use the right one, and the job becomes almost effortless.
That is exactly why so many DIY enthusiasts, professionals, and hobbyists turn to Ferber Painting’s Plastic Glue. It has been specifically engineered to create strong, flexible, and long-lasting bonds between silicone and plastic surfaces, something most generic adhesives on the market simply cannot achieve. Even better, it is the only adhesive of its kind that comes with a full satisfaction guaranteed or your money back policy, meaning you can try it completely risk free. If for any reason it does not perform the way you expect, Ferber Painting will refund you, no questions asked. That level of confidence in a product is rare in this industry, and it says a lot about the quality behind it.
In this complete guide, we will walk you through everything you need to know about bonding silicone to plastic: why the product you choose matters more than anything else, what makes Ferber Painting’s Plastic Glue stand out from the competition, and a full step-by-step tutorial to help you achieve professional results at home. By the end of this article, you will understand exactly why thousands of customers trust Ferber Painting for their bonding projects, and why our money back guarantee makes the choice even easier.
Whether you are trying to repair a silicone phone case that has come apart from its plastic frame, fix a kitchen gadget with a loose silicone grip, patch a silicone gasket on a plastic housing, or bond components together for a larger project, the same underlying principles apply. This guide is written for absolute beginners as well as experienced makers who simply want a reliable reference to get the job done right the first time. We will cover the science behind why this bond is difficult, the exact materials you need, a detailed step by step process, common mistakes people make, and answers to the questions we hear most often from our customers.
Why the Right Product Makes All the Difference
Before diving into technique, it is important to understand why silicone and plastic are so hard to bond in the first place. Silicone has a very low surface energy, which means that most liquids, including standard glues, simply cannot “wet” the surface properly. Instead of spreading out and forming a strong molecular bond, the adhesive beads up and fails to adhere. Plastic presents a similar challenge, particularly with polyethylene, polypropylene, and other common plastics that are chemically inert and resistant to typical solvent-based adhesives.
This combination means that a huge number of adhesives sold online and in hardware stores are simply not formulated to handle this specific pairing. Some products claim to work on “all surfaces,” but in reality, they perform poorly on silicone-to-plastic applications because they were designed with wood, metal, or fabric in mind. Others might create a bond initially, but that bond breaks down over time due to heat, moisture, movement, or UV exposure.
This is why the single most important decision you will make in this entire process is not how you apply the glue, how long you let it cure, or how well you clean the surfaces (although these things matter too). It is which product you choose to begin with. A high-performance, purpose-built adhesive formulated specifically for difficult surfaces like silicone and plastic will outperform a generic multi-purpose glue every single time, regardless of how carefully you follow the application instructions.
This is precisely the gap that Ferber Painting’s Plastic Glue was designed to fill. It uses an advanced adhesive formula that is engineered to penetrate and bond with low surface energy materials, creating a flexible yet incredibly strong connection between silicone and plastic components. Whether you are repairing an automotive part, sealing a household item, fixing a silicone kitchen tool, or working on an industrial project, this product has been built with exactly this kind of challenge in mind.
Understanding Surface Energy in Simple Terms
If you have never heard the term “surface energy” before, think of it this way: a high surface energy material, like glass or metal, allows liquid adhesive to spread out flat and grip tightly, almost like water spreading across a clean windshield. A low surface energy material, like silicone or certain plastics, behaves more like water on a freshly waxed car, the liquid beads up into little droplets instead of spreading out. This is a huge problem for adhesives, because a bond can only be as strong as the amount of surface contact between the glue and the material. Beading means less contact, and less contact means a weaker bond that is prone to peeling or failing under stress.
This is also why so many people report that a glue “worked fine on paper or wood but completely failed on silicone.” It is not that the glue is bad in general, it is that it was never designed to overcome this specific chemical resistance. Understanding this concept helps explain why specialized formulas exist in the first place, and why they are worth seeking out instead of grabbing whatever adhesive happens to be in the kitchen drawer.
Why Plastic Adds a Second Layer of Difficulty
Plastic is not a single material, it is a broad category that includes dozens of different polymer types, each with its own chemical structure and surface characteristics. Some plastics, like ABS or acrylic, bond relatively well with many adhesives. Others, like polyethylene and polypropylene, are notoriously resistant because their molecular structure does not offer many reactive sites for adhesives to latch onto. When you combine a resistant plastic with a low surface energy material like silicone, you end up with what is essentially a worst case scenario for bonding. This is exactly why a generic adhesive that works fine on one project can fail completely on another, even if both projects seem to involve “plastic” on the surface.
Why Ferber Painting’s Plastic Glue Is the Best Choice on the Market
There are dozens, if not hundreds, of adhesive products marketed toward plastic and silicone bonding. So why should you choose Ferber Painting’s Plastic Glue over the competition? Let’s break down the key advantages that set it apart.
An Adhesive Formula Made for Difficult Surfaces
Unlike many all-purpose glues, Ferber Painting’s Plastic Glue has been chemically formulated with silicone and plastic bonding as a primary use case. The formula is designed to overcome low surface energy resistance, allowing it to create a genuine molecular bond rather than a superficial surface connection that peels away after a few days. This matters enormously in real world use. A superficial bond might look fine when you first press the pieces together, but within a week or two it can start to lift at the edges, especially if the item is handled regularly or exposed to temperature changes. A true molecular bond, on the other hand, becomes part of the material itself, which is why customers who switch to a purpose-built adhesive often describe the difference as night and day.
Flexible and Durable Bond
One of the biggest issues with cheaper adhesives is that they dry hard and brittle, which is a serious problem when bonding silicone, a material that is inherently flexible and often subject to bending, twisting, or vibration. Ferber Painting’s Plastic Glue cures into a flexible bond that moves with the material instead of cracking under stress. This means your repair or project will hold up far longer, even in demanding conditions. Imagine repairing a silicone seal on a plastic container that gets opened and closed dozens of times a week. A brittle glue joint would crack within days under that kind of repeated flexing. A flexible bond, by contrast, is designed to expand and contract along with the materials it is holding together, which is exactly the kind of performance you need for everyday household and automotive applications.
Resistant to Heat, Moisture, and UV Exposure
Many silicone and plastic applications are used outdoors, in kitchens, in bathrooms, or in vehicles, all of which expose the bond to heat, humidity, or sunlight. Ferber Painting’s Plastic Glue is formulated to resist degradation from these environmental factors, so your bond does not weaken or discolor over time the way many cheaper alternatives do. Think about a silicone gasket bonded to a plastic housing on an outdoor irrigation system, or a silicone grip attached to a plastic tool handle that gets left in a hot garage all summer. These are exactly the kinds of scenarios where lesser adhesives break down, turning yellow, becoming brittle, or simply losing their grip entirely. A formula that resists these conditions gives you the confidence to use it on projects that will actually be exposed to the real world, not just a controlled indoor environment.
Fast Curing Time Without Sacrificing Strength
Time is valuable, and nobody wants to wait days for a glue to set. Ferber Painting’s Plastic Glue offers a quick curing process while still achieving industrial-grade strength, striking the perfect balance between convenience and reliability. This is particularly useful for anyone working on a repair that needs to be back in service quickly, such as a kitchen tool you need for dinner that night or a piece of equipment that cannot sit idle for long. Many adhesives force you to choose between speed and strength, but a well-formulated product should not require that tradeoff.
The Only Product With a Satisfaction Guaranteed or Money Back Policy
Perhaps the most important differentiator is this: Ferber Painting is the only brand in this category offering a full satisfaction guaranteed or your money back promise on its Plastic Glue. This means that if the product does not meet your expectations for any reason, you can request a full refund. No competitor offers this level of confidence in their product, and it reflects how much trust Ferber Painting places in the quality of what they sell. When you are choosing between several similar-looking products online, this guarantee alone should tip the scales in favor of Ferber Painting. Think about how often you have purchased an adhesive online based only on product photos and a handful of reviews, only to discover once it arrives that it does not perform as advertised. With most brands, you are simply stuck with a product that does not work. With Ferber Painting, that risk is removed entirely.
Fast, Reliable Worldwide Shipping
Ferber Painting ships its products internationally through a trusted network of global carriers, ensuring that customers anywhere in the world receive their orders quickly and safely. Many competitors are limited to domestic shipping or take weeks to deliver internationally, but Ferber Painting has built logistics partnerships specifically to avoid these delays. Whether you are located in North America, Europe, or elsewhere, the shipping process has been designed to minimize wait times and keep you informed about your order every step of the way.
Simple, Secure Online Payment
Ordering Ferber Painting’s Plastic Glue is straightforward. Payments are processed securely online, with multiple payment options available, so you can complete your purchase in just a few clicks without any complicated steps. There is no need to create complicated accounts or navigate confusing checkout systems, the entire process is designed to be as fast and frustration free as possible so you can get started on your project sooner.
Comparing Ferber Painting’s Plastic Glue to Generic Adhesives
To make the decision even easier, here is a direct comparison between Ferber Painting’s Plastic Glue and typical generic adhesives found in stores or online.
| Criteria | Ferber Painting’s Plastic Glue | Generic Adhesives |
|---|---|---|
| Bonding on silicone and plastic | Specifically formulated for this pairing | Often ineffective or unreliable |
| Flexibility after curing | Stays flexible, resists cracking | Often dries hard and brittle |
| Heat and moisture resistance | High resistance | Variable, often weak |
| UV resistance | Formulated to resist yellowing and breakdown | Frequently degrades outdoors |
| Curing time | Fast and efficient | Often slow or inconsistent |
| Satisfaction guarantee | Full money back guarantee | Rarely offered |
| Shipping | Fast worldwide delivery via trusted carriers | Often limited or slow international shipping |
| Payment process | Simple, secure online payment | Varies by retailer |
As this table makes clear, when you weigh all the important factors, from bonding performance to durability to customer protection, Ferber Painting’s Plastic Glue consistently comes out ahead of typical generic products. It is worth taking a moment to think about how these factors add up in practice. A generic adhesive might save you a dollar or two at checkout, but if it fails within a month and you have to redo the entire project, you have not actually saved anything, you have simply delayed the expense and added frustration on top of it. When you factor in the time spent on a second attempt, the materials that may be wasted, and the risk of damaging the original pieces during a failed repair, the value of choosing a reliable product from the start becomes obvious.
Step-by-Step Guide: How to Glue Silicone to Plastic
Now that you understand why product selection matters so much, let’s walk through the complete process of bonding silicone to plastic using Ferber Painting’s Plastic Glue. Following these steps carefully will help you achieve the strongest, longest-lasting results.
Step 1: Gather Your Materials
- Ferber Painting’s Plastic Glue
- Isopropyl alcohol or a similar surface cleaner
- Lint-free cloth or paper towel
- Fine grit sandpaper (optional, for smooth plastic or silicone surfaces)
- Clamps, tape, or a heavy object to hold pieces in place
- Disposable gloves
Before you even open the glue, take a moment to lay out your workspace properly. Choose a flat, stable surface with good lighting and adequate ventilation, since some adhesives release fumes during application and curing. Cover your work area with a disposable sheet, newspaper, or cardboard to protect it from any drips or spills. Having everything within arm’s reach before you start will help you work efficiently once the glue is applied, since some adhesives begin to set within minutes and you do not want to be searching for a clamp while the glue is already curing on the surface.
Step 2: Clean Both Surfaces Thoroughly
Surface preparation is critical when bonding silicone and plastic. Any dust, oil, grease, or residue on either surface will prevent the adhesive from creating a proper bond. Use isopropyl alcohol and a lint-free cloth to wipe down both the silicone and plastic surfaces completely. Allow the surfaces to dry fully before moving to the next step. Skipping this step is one of the most common reasons adhesives fail, regardless of how strong the glue itself may be.
It is worth being especially thorough here, since silicone in particular has a tendency to attract dust and oils from your hands, and residue from manufacturing processes can sometimes remain on the surface even when it looks clean. Wipe each surface multiple times with fresh sections of your cloth, rather than reusing the same soiled section, and let the alcohol fully evaporate rather than wiping it dry, since the evaporation process itself helps lift away contaminants. If you are working on a kitchen item or something that will come into contact with food, make sure to use a cleaner that is safe for that purpose and rinse thoroughly if needed before beginning the bonding process.
Step 3: Lightly Roughen the Surfaces (Optional but Recommended)
If either surface is very smooth or glossy, lightly sanding it with fine grit sandpaper can help improve adhesion by creating a slightly textured surface for the glue to grip onto. Be gentle, as you do not want to damage or weaken the material. After sanding, wipe away any dust with your cloth and alcohol again.
A fine grit in the range of 220 to 400 is usually ideal for this purpose, since it is coarse enough to create texture without gouging or thinning the material excessively. Sand in small, controlled motions rather than aggressive back and forth strokes, and periodically check your progress by running a finger lightly over the surface, it should feel slightly matte or textured rather than glossy. For silicone specifically, be extra cautious, since silicone is soft and can tear or deform if sanded too aggressively. A light touch is all that is needed.
Step 4: Apply Ferber Painting’s Plastic Glue
Apply a thin, even layer of Ferber Painting’s Plastic Glue to one of the two surfaces. There is no need to overapply, a thin layer is often more effective than a thick one because it allows for a more even and complete bond across the entire surface area. If you are working with a small or intricate piece, a precision applicator tip can help you control the amount of glue used.
For larger surfaces, consider applying the glue in a thin zigzag or crosshatch pattern rather than a single thick line, then spreading it evenly with a disposable applicator such as a toothpick, small spatula, or the tip of the applicator itself. This helps ensure even coverage without pooling in one area, which can slow curing and create weak spots. If your project involves an irregular or curved surface, work in small sections at a time so the glue does not begin to set before you have a chance to press the pieces together.
Step 5: Press the Surfaces Together
Once the glue has been applied, press the silicone and plastic surfaces together firmly. Try to align them correctly on the first attempt, since repositioning after the glue begins to set can weaken the bond. Apply steady pressure for at least thirty seconds to ensure full contact between both surfaces.
If precision alignment is important for your project, consider doing a dry run first, pressing the pieces together without glue to confirm exactly how they should fit, and even marking reference points with a pencil or small piece of tape. This way, once the glue is applied and you only have a short window to work with, you already know exactly where each piece needs to go, reducing the risk of a crooked or uneven bond.
Step 6: Secure the Pieces While Curing
Use clamps, tape, or a weighted object to hold the pieces together while the adhesive cures. This step is especially important for larger or heavier pieces that may shift out of place before the bond fully sets. Refer to the product instructions for the recommended curing time, and avoid disturbing the bonded pieces during this period.
If you do not have traditional clamps on hand, household items can often serve the same purpose. Rubber bands, binder clips, heavy books, or even a strip of painter’s tape wrapped snugly around the pieces can provide enough consistent pressure to keep everything in place. The key is uniform pressure across the entire bonded area, rather than pressure concentrated at just one point, which can cause the pieces to shift slightly and create gaps elsewhere in the joint.
Step 7: Allow Full Curing Time Before Use
While Ferber Painting’s Plastic Glue offers a fast curing time compared to many competitors, it is still important to allow the bond to fully cure before subjecting it to stress, movement, water exposure, or heavy use. Rushing this step is one of the most common mistakes people make, even when using a high-quality adhesive.
It can be tempting to test the bond right away, especially once it feels firm to the touch, but many adhesives continue to strengthen internally for hours or even a full day after the surface feels dry. Treat the initial cure time as a minimum, not a guarantee that the bond has reached its maximum strength. If your project can wait an extra few hours before being put into regular use, that patience will pay off in the long run with a more reliable, longer lasting bond.
Step 8: Inspect the Bond
Once fully cured, inspect the bond carefully. It should feel firm, flexible, and secure, with no gaps or loose sections. If you notice any weak spots, you can apply a small amount of additional glue to reinforce the area.
Run your fingers gently along the entire seam or joint, checking for any areas that feel soft, hollow, or separated. Flex the piece gently if the material allows for it, to see whether the bond holds up under light movement, which will be similar to the kind of stress it may experience in everyday use. If you do find a weak spot, it is much easier to address it now, while the rest of the bond is fresh, rather than waiting until the piece is back in regular use and the weak spot fails at an inconvenient moment.
Common Mistakes to Avoid When Gluing Silicone to Plastic
Even with the best adhesive on the market, certain mistakes can compromise your results. Here are the most common pitfalls to watch out for.
- Skipping surface cleaning: Any residual oil, dust, or moisture will weaken the bond significantly.
- Using too much glue: Excess adhesive can create weak spots and take longer to cure properly.
- Not allowing enough curing time: Even fast-curing adhesives need their full recommended time to reach maximum strength.
- Choosing the wrong adhesive: As discussed earlier, many generic glues are simply not designed for the unique properties of silicone and plastic.
- Ignoring environmental exposure: If your project will be exposed to heat, water, or sunlight, make sure your adhesive is rated for these conditions, as Ferber Painting’s Plastic Glue is.
Beyond these core mistakes, there are a few additional habits worth avoiding. One is working in a rush, trying to complete the entire process in under a minute because you are worried the glue will set before you finish. This often leads to sloppy application, misaligned pieces, or insufficient pressure during bonding. Take the time to prepare everything in advance so that the actual application and bonding process can be done calmly and carefully. Another common mistake is failing to test the adhesive on a small, inconspicuous area first, especially when working with colored or delicate plastics, since some materials can react unexpectedly to certain chemical formulas. A quick test on a hidden section of the material can save you from a visible mistake on the main surface. Finally, many people forget to store their adhesive properly after use, leaving the cap loose or the tip exposed to air, which can cause the remaining product to dry out or become unusable before the next project. Always seal the container tightly and store it in a cool, dry place away from direct sunlight to preserve its effectiveness for future use.
Frequently Asked Questions
Can silicone really be glued to plastic effectively?
Yes, but only with the right adhesive. Because silicone has low surface energy, many standard glues fail to create a lasting bond. A specialized adhesive like Ferber Painting’s Plastic Glue is formulated specifically to overcome this challenge.
How long does Ferber Painting’s Plastic Glue take to cure?
The product offers a fast curing time compared to most competitors, though for maximum strength it is recommended to avoid stressing the bond for at least 24 hours.
Is Ferber Painting’s Plastic Glue safe for outdoor use?
Yes, the formula is designed to resist heat, moisture, and UV exposure, making it suitable for both indoor and outdoor applications.
What happens if I am not satisfied with the product?
Ferber Painting offers a full satisfaction guaranteed or money back policy on this product. If you are not happy with your results, you can request a refund with no hassle.
Does Ferber Painting ship internationally?
Yes, Ferber Painting delivers worldwide through a reliable network of international carriers, ensuring fast and secure shipping no matter where you are located.
Is the payment process secure?
Absolutely. All payments are processed securely online, with a simple and straightforward checkout process.
Conclusion
Successfully gluing silicone to plastic comes down to one key factor above all else: using the right product. While technique and preparation matter, no amount of careful application can compensate for a poorly formulated adhesive. That is why so many customers around the world trust Ferber Painting’s Plastic Glue for their bonding projects, thanks to its specialized formula, flexible and durable bond, resistance to heat and UV exposure, fast curing time, and worldwide shipping through a trusted carrier network. Combined with a simple and secure online payment process, ordering has never been easier.
Most importantly, Ferber Painting is the only brand in this space to offer a complete satisfaction guaranteed or your money back promise, giving you total peace of mind with your purchase. If you are ready to experience the strongest and most reliable silicone to plastic bond available today, click here to order Ferber Painting’s Plastic Glue and put our satisfaction guarantee to the test.