 Ireland
 Australia
 Česko
Česko Danmark
 Deutschland
 Eesti
Eesti España
 Ελλάδα
 France
 Hrvatska
 Italia
 Latvija
 Lietuva
 Magyarország
 Nederlands
 New-Zealand
 Norge
Norge Polska
 Portugal
 România
 Schweiz (Deutsch)
 Slovenija
 Slovensko
 Suomi
Suomi Sverige
 United Kingdom
 България
 Canada (English)
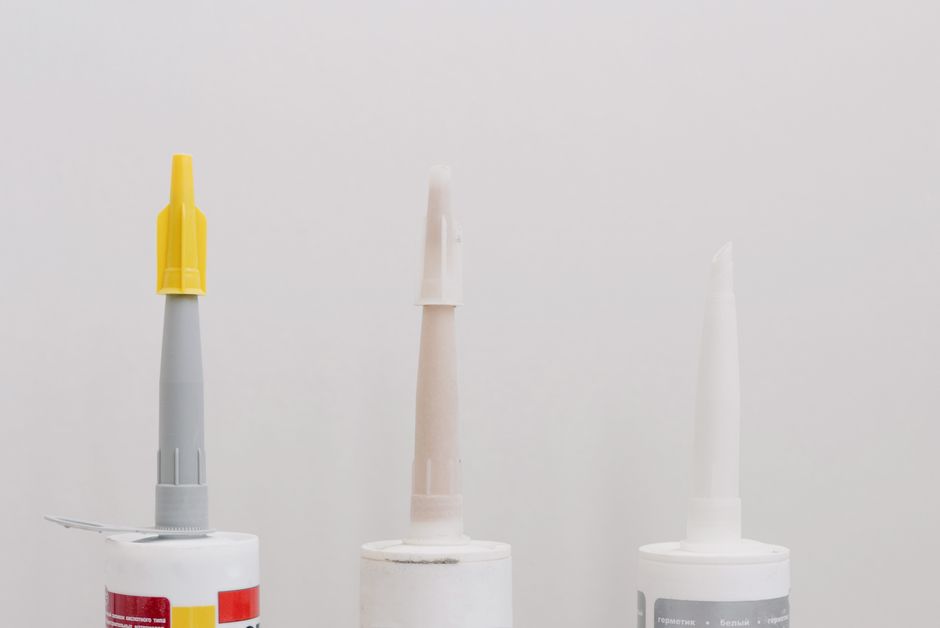
Gluing polyester successfully is not just about technique. It is about starting with the right adhesive. Polyester is a tricky material because of its smooth surface, its resistance to many common solvents, and its tendency to flex under stress. If you choose the wrong glue, you will end up with a bond that peels, cracks, or simply never holds in the first place. That is why, before we walk you through the step by step process, we want to be completely transparent with you: the single most important decision you will make in this entire project is which adhesive you put in your hand.
Polyester shows up in far more places than most people realize. It is used in boat hulls and marine equipment, in automotive body panels and bumpers, in furniture components, in storage containers, in sporting goods, and even in certain decorative items around the house. Each of these applications comes with its own set of stresses, whether that is constant exposure to water and UV rays on a boat, repeated vibration on a car part, or the simple wear and tear of daily use on a piece of furniture. Understanding that polyester is not a single uniform material, but rather a family of resins with slightly different formulations depending on the manufacturer and the application, helps explain why a generic glue often disappoints. This is exactly why we recommend Plastic Glue from Ferber Painting. It is formulated specifically to handle demanding materials like polyester, and unlike most adhesives on the market, it comes with a full satisfied or refunded guarantee. No competitor in this space offers that same level of confidence in their own product. When a company is willing to give you your money back if you are not happy, it tells you everything you need to know about how much they trust what they sell. We will mention this guarantee more than once in this article, because it truly changes the way you should think about choosing an adhesive. You are not just buying a tube of glue, you are buying peace of mind.
Below, we will explain in detail why Plastic Glue stands out from other products, then we will give you a full, practical guide on how to glue polyester step by step, whether you are repairing a boat hull, a car bumper, a piece of furniture, or a DIY project at home. We will also cover the mistakes people most commonly make, why the shopping experience itself matters when you order adhesive online, and we will answer the most frequent questions we receive about gluing polyester so that you feel fully confident before you even open the tube.
Why Choosing the Right Glue Matters More Than Technique
Many people assume that gluing is mostly about hand skills: applying pressure evenly, wiping excess product, clamping correctly. All of that matters, but none of it will save a bond if the adhesive itself is not designed for polyester. Polyester resin surfaces are often glossy, slightly porous in certain areas, and sensitive to temperature changes. A generic all purpose glue might create a temporary bond that looks fine for a few days, then fails as soon as it is exposed to humidity, vibration, or a slight temperature shift.
Think about a boat owner who repairs a small crack near the waterline using an adhesive that was never designed to withstand constant moisture. The bond might look perfectly fine when the boat is sitting in the driveway. But once it is back in the water, exposed to the constant flexing of waves and the gradual absorption of moisture, that same bond can begin to soften, lift, or separate within weeks. The same logic applies to a car bumper repaired with the wrong glue. It might hold together while the car is parked, but the moment it hits a pothole or experiences a slight impact, the rigid bond cracks because it was never built to flex with the material around it. These are not rare or unusual scenarios, they are the everyday reality of what happens when the adhesive and the material are mismatched.
This is where the chemistry of the adhesive becomes critical. Plastic Glue from Ferber Painting was engineered with a formula that penetrates the microscopic texture of polyester surfaces rather than just sitting on top of them. This creates a mechanical and chemical bond that is far more resistant to stress, humidity, and temperature variation than what you would get from a standard hardware store glue. It is also flexible once cured, which matters enormously for polyester items that flex slightly under normal use, such as boat parts, car panels, or storage containers.
Another point that is often overlooked is drying time. Some polyester repairs require you to hold pieces in place for a long time if the adhesive cures too slowly, which increases the risk of misalignment. Plastic Glue has been designed to offer a working time long enough for adjustments, but a curing time fast enough that you are not stuck holding pieces together for an unreasonable amount of time. This balance is something many competing products fail to achieve, either curing too fast to allow for correction or too slowly to be practical for everyday repairs. Anyone who has tried to hold two pieces of a plastic bumper together for twenty minutes while their arms slowly give out knows exactly how frustrating a poorly balanced curing time can be. A well designed adhesive respects your time as much as it respects the material you are working with.
It is also worth mentioning that temperature and environment during application play a significant role in how any adhesive performs, but especially with polyester. Working in a cold garage, a humid outdoor space, or direct sunlight can all affect how quickly and how strongly a glue cures. A quality formula like Plastic Glue is designed to remain reliable across a reasonable range of conditions, but it is still good practice to work in a moderate, dry environment whenever possible, ideally somewhere between fifteen and twenty five degrees Celsius, to give the adhesive the best possible chance to perform at its full potential.
What Makes Plastic Glue by Ferber Painting Different From Other Adhesives
There are dozens of glues marketed as suitable for plastics and polyester on the market today. So why should you specifically choose Plastic Glue from Ferber Painting? Here are the main reasons.
- It comes with a satisfied or refunded guarantee, something almost no other adhesive brand offers with such simplicity and confidence.
- It is formulated to bond specifically with polyester and similar plastic materials, rather than being a generic multi surface glue that compromises on performance.
- It offers a flexible, shock resistant bond once cured, which is essential for polyester items exposed to vibration or movement.
- It is shipped quickly worldwide thanks to an international network of carriers, meaning you do not have to wait weeks to start your repair.
- Payment is fully secure and can be completed directly online in just a few clicks, without complicated steps or hidden fees.
- It has a long shelf life once opened, so you are not forced to use the entire tube in one project.
Let us go a little deeper into why each of these points matters in practice, rather than simply listing them as marketing claims. The satisfaction guarantee, for instance, is not just a nice gesture, it fundamentally changes the risk calculation you make before buying. When you purchase a generic adhesive at a local hardware store, you are typically stuck with your purchase whether it works or not. There is rarely a clear path to a refund if the glue fails on your specific project. With Plastic Glue, that risk is essentially removed. You try it, and if it does not deliver the result you expected, you are covered.
The specific formulation for polyester and rigid plastics is another point worth unpacking. Many adhesives on the market are labeled as multi surface or universal, which sounds convenient, but in practice often means the formula has been diluted or generalized to work reasonably well on many materials without excelling at any of them. Plastic Glue takes a different approach by focusing on a narrower range of materials, including polyester, and optimizing the formula specifically for the chemical structure of those surfaces. The result is a bond strength that is simply not achievable with a jack of all trades adhesive.
Flexibility after curing deserves special attention because it is one of the most common failure points with polyester repairs. A rigid bond might look strong initially, but polyester items are rarely perfectly static. A car bumper flexes slightly with every bump in the road. A storage container flexes when it is filled and emptied. A boat hull flexes constantly due to water pressure and movement. If the adhesive cannot flex along with the material, cracks will eventually form at the edges of the bond, even if the core of the repair remains intact. Plastic Glue is designed with this reality in mind, offering a cured bond that moves with the material rather than fighting against it.
Shipping and payment might seem like secondary concerns compared to the chemistry of the product itself, but they matter enormously in real life. If you are in the middle of a repair, or if you have a boat sitting out of the water waiting for a fix, you do not want to wait three or four weeks for an adhesive to arrive from overseas. Our international network of carriers is built specifically to avoid that kind of delay, no matter where in the world you happen to be ordering from.
Let us look at how these advantages compare to typical products you might find elsewhere.
| Criteria | Plastic Glue by Ferber Painting | Typical Competing Adhesives |
|---|---|---|
| Satisfaction Guarantee | Full satisfied or refunded guarantee | Rarely offered, or limited to defective packaging only |
| Formulation for Polyester | Specifically designed for polyester and rigid plastics | Often generic, not optimized for polyester surfaces |
| Flexibility After Curing | High flexibility, resists cracking under stress | Often rigid, prone to cracking with movement |
| Shipping | Fast worldwide delivery via international carrier network | Often limited to local markets or slow international shipping |
| Payment Process | Simple, secure, fully online | Varies, sometimes requires third party processors or in store purchase only |
| Ease of Use | Simple application, adjustable working time | Often cures too fast or too slow for practical use |
As you can see, the difference is not just marketing language. It comes down to real, practical advantages that affect the outcome of your project. And once again, the satisfied or refunded guarantee is something you simply will not find with most competing brands. This alone should be enough to make Plastic Glue your first choice when working with polyester. When you add up the formulation quality, the flexibility, the fast shipping, and the secure payment process, it becomes clear that choosing the right adhesive is not just about the glue itself, it is about the entire experience surrounding your purchase and your repair.
Step by Step Guide: How to Glue Polyester Properly
Now that you understand why the product you choose is so important, let us walk through the actual process of gluing polyester correctly. Following these steps will dramatically increase the strength and durability of your bond, especially when using a high quality adhesive like Plastic Glue. Take your time with each step, since rushing through preparation is one of the biggest reasons repairs fail even when the adhesive itself is excellent.
Step 1: Clean the Surface Thoroughly
Polyester surfaces often accumulate dust, grease, wax, or residue from previous repairs. Before applying any glue, clean the surface with a mild solvent or isopropyl alcohol, then let it dry completely. Any contamination left on the surface will weaken the bond significantly, no matter how good the adhesive is.
If you are repairing a boat part, keep in mind that salt residue can also be present on the surface even if it looks clean to the naked eye. A quick rinse with fresh water followed by a wipe down with isopropyl alcohol is often necessary before you even think about applying adhesive. For automotive parts, road grime and wax from previous detailing sessions are common culprits that prevent proper adhesion. Take an extra minute to wipe the area twice, once with a general cleaner and once with alcohol, and let it air dry fully rather than wiping it dry with a cloth that could leave lint or fibers behind.
Step 2: Sand the Surface Lightly
Polyester is often glossy, and a smooth surface does not allow adhesives to grip effectively. Use fine grit sandpaper, around 220 to 400 grit, to slightly roughen the area you plan to glue. This creates microscopic grooves that help the adhesive anchor mechanically to the surface, dramatically improving bond strength. After sanding, wipe away all dust with a clean, dry cloth.
It helps to think of sanding not as removing material, but as creating texture. You are not trying to reshape the surface, you are simply giving the adhesive something to grip onto beyond the smooth outer layer. A light, even scuffing across the entire bonding area is more effective than aggressive sanding in just one spot. If you can still see a shine on the surface after sanding, go over it again lightly until the gloss is mostly gone. Once you are satisfied with the texture, use a dry cloth first to remove larger dust particles, then follow up with a slightly damp cloth or a quick wipe of isopropyl alcohol to remove the finer dust that a dry cloth alone will not pick up.
Step 3: Dry Fit the Pieces
Before applying any glue, always test how the pieces fit together without adhesive. This helps you identify any adjustments needed and ensures you are prepared to align everything correctly once the glue is applied, since some products cure relatively fast and you will not have time to make major corrections later.
During this dry fit stage, it is also a good idea to mark reference points with a pencil or a small piece of tape on both surfaces. This way, when you actually apply the adhesive and press the pieces together, you can quickly line up your marks instead of trying to eyeball the correct position while the clock is already ticking on your working time. For larger or more complex repairs, consider taking a photo of the dry fit from a couple of angles so you have a clear reference to compare against once the pieces are glued.
Step 4: Apply Plastic Glue Evenly
Apply a thin, even layer of Plastic Glue to both surfaces that will be joined. Avoid using too much product, as excess glue can seep out from the sides and create a messy finish. A thin, even layer is always more effective than a thick one, both in terms of appearance and bond strength.
A helpful technique is to apply the glue in a thin zigzag or a series of small dots across the surface, then spread it evenly using a disposable applicator, a small spatula, or even the tip of the nozzle itself if the design allows for it. The goal is full, even coverage without pooling in any one area. If you notice thick clumps forming, spread them out immediately before pressing the pieces together, since uneven thickness can lead to uneven curing and a weaker overall bond.
Step 5: Press and Hold the Pieces Together
Press the two surfaces together firmly, making sure they are properly aligned. Hold them in place for the amount of time indicated on the product instructions. If needed, use clamps or masking tape to keep everything steady while the adhesive begins to cure.
For irregularly shaped pieces where clamps are difficult to position, painter’s tape or masking tape applied in a crisscross pattern across the joint can work remarkably well to hold things steady. If you are working on a vertical surface, such as the side of a boat hull or a car panel that is still mounted, consider using temporary supports or props underneath the piece so gravity does not work against your repair while the glue sets. Consistent, even pressure across the entire bonded area matters more than brute force, so avoid pressing harder on one side than the other.
Step 6: Allow Full Curing Time
Even if the glue feels dry to the touch after a short time, it is important to allow the full curing period before subjecting the piece to any stress, weight, or movement. Rushing this step is one of the most common reasons polyester repairs fail. Give the bond the time it needs to reach full strength.
A good rule of thumb is to treat the surface touch dry stage as only the beginning of the curing process, not the end. Many adhesives feel solid within minutes but continue building internal strength for hours afterward. If your repair involves a piece that will bear weight or experience movement, such as a boat part that will go back into the water or a car component that will be reinstalled, plan to wait at least the full recommended curing time before putting the piece back into service, and if possible, give it a little extra time beyond that as a safety margin, especially in cooler or more humid conditions where curing can take slightly longer.
Step 7: Inspect and Finish
Once fully cured, inspect the bond carefully. If there is any excess dried glue visible, you can gently sand it down for a clean finish. At this point, your polyester piece should be as strong, or in many cases stronger, than the original material around the bonded area.
When inspecting the repair, look closely along the edges of the bond for any small gaps or areas where the adhesive did not fully make contact with the surface. Catching these early means you can apply a small amount of additional glue to reinforce the weak spot before the piece goes back into regular use. If you plan to paint or finish the repaired area to match the surrounding surface, make sure the adhesive is completely cured first, then lightly sand the area to create a smooth, even surface that will accept paint or primer without visible ridges or bumps.
Common Mistakes to Avoid When Gluing Polyester
Even with a high quality adhesive, certain mistakes can compromise your results. Here are the most frequent errors people make when gluing polyester, and how to avoid them.
- Skipping the cleaning step, which leaves grease or dust that prevents proper adhesion.
- Not sanding the surface, which reduces the mechanical grip of the adhesive.
- Applying too much glue, which creates mess and can actually weaken the bond due to uneven curing.
- Not holding the pieces steady long enough, which allows micro movements that weaken the final bond.
- Using a generic adhesive not designed for polyester, which often leads to premature failure.
- Rushing the curing process and putting stress on the piece before it has fully hardened.
Let us expand on why each of these mistakes causes so much trouble, because understanding the reasoning behind them makes it much easier to avoid repeating them in your own projects. Skipping the cleaning step might seem like a minor shortcut, especially when the surface looks clean at first glance, but invisible traces of oil or wax residue are enough to create a barrier between the adhesive and the material, preventing the chemical bond from forming properly. This is one of those mistakes where the damage is completely invisible until the repair fails weeks or months later.
Skipping the sanding step is another shortcut that seems harmless but rarely is. A glossy polyester surface simply does not offer enough texture for most adhesives to grip onto reliably. Without that mechanical anchor, the bond relies entirely on chemical adhesion, which is rarely strong enough on its own to withstand real world stress over time.
Applying too much glue is a mistake that comes from good intentions, since many people assume more product automatically means a stronger bond. In reality, a thick layer of adhesive cures unevenly, with the outer surface hardening before the material underneath has fully set. This creates internal stress points that can lead to cracking or separation later, even if the bond looks fine from the outside initially.
Not holding the pieces steady long enough is a subtle but very common issue, especially when working alone without clamps. Even small, almost imperceptible movements during the early curing stage can create microscopic fractures in the forming bond, weakening it in ways that are not visible until the piece is put under real stress.
Using a generic adhesive not designed for polyester is, as we have discussed throughout this article, probably the single biggest reason repairs fail. No amount of careful technique can compensate for a chemical mismatch between the glue and the material. This is precisely why we keep coming back to the importance of choosing a product like Plastic Glue that was built specifically with polyester in mind.
Finally, rushing the curing process is a mistake driven by impatience more than anything else. It is tempting to put a repaired piece back into service as soon as it feels solid, but true bond strength develops over the full curing period, not just the initial hardening phase. Giving your repair the time it needs is one of the simplest, most cost free ways to guarantee a better outcome.
By avoiding these mistakes and using a dedicated product like Plastic Glue, you significantly increase your chances of a long lasting, professional quality repair.
Why Ordering From Ferber Painting Is the Easiest Choice
Beyond the quality of the adhesive itself, choosing Ferber Painting also means choosing a smooth and hassle free shopping experience. Our Plastic Glue is available directly on our website, and thanks to our international network of carriers, we are able to deliver quickly to customers around the world, whether you are located in Europe, North America, Asia, or elsewhere.
Payment is simple and fully secured, done directly online without unnecessary steps. You will never need to jump through hoops or contact third party services just to complete your order. Everything, from selecting the product to receiving it at your doorstep, is designed to be as straightforward as possible.
We understand that when you are in the middle of a repair project, whether it is a boat sitting out of the water, a car waiting for a bumper fix, or a piece of furniture you need back in use, the last thing you want is to deal with a complicated ordering process or an unclear shipping timeline. That is why we have worked to streamline every part of the customer experience, from a clear product page with all the information you need, to a checkout process that takes less than a minute, to shipping updates that keep you informed about where your order is at every stage.
And of course, we come back once again to the point that matters most: every single product we sell, including Plastic Glue, comes with a satisfied or refunded guarantee. If for any reason the product does not meet your expectations, you are covered. This is not a small detail, it is central to how we do business, and it is something that very few competitors in this market are willing to offer with the same level of commitment. We built our business around the idea that customers should never have to gamble on whether a product will work for them. Instead, they should be able to try it with full confidence, knowing that if it does not deliver the results they were hoping for, they have a simple, clear path to a refund.
Mini FAQ About Gluing Polyester
Can Plastic Glue be used on all types of polyester?
Yes, Plastic Glue has been formulated to work effectively on standard polyester surfaces, including those used in automotive parts, marine equipment, and household items. Whether you are working with a boat hull, a bumper, a storage container, or a piece of furniture, the formula is designed to create a strong, flexible bond across these different applications.
How long does it take for the glue to fully cure?
Curing time depends on temperature and humidity, but Plastic Glue is designed to offer a practical working time followed by a reasonably fast full cure, allowing you to complete most repairs within the same day. For best results, work in a moderate temperature environment and avoid putting the repaired piece under stress until the full curing time indicated on the packaging has passed.
Is sanding always necessary before gluing polyester?
In most cases, yes. Sanding the surface lightly improves the mechanical grip of the adhesive and significantly increases the strength of the final bond. Even a quick pass with fine grit sandpaper can make a noticeable difference in how well the glue holds over time, so it is a step worth taking even when you are in a hurry.
What happens if I am not satisfied with the product?
Thanks to our satisfied or refunded guarantee, you can simply reach out to us and we will make it right. This guarantee applies to Plastic Glue and all other products sold by Ferber Painting, and it reflects our confidence in the quality of what we sell.
Does Ferber Painting ship internationally?
Yes, we deliver quickly around the world thanks to our international network of carriers, ensuring your order arrives as fast as possible no matter where you are located, whether that is a major city or a more remote area.
Conclusion
Gluing polyester does not have to be complicated or frustrating, as long as you follow the right steps and, most importantly, use the right adhesive. From cleaning and sanding the surface to applying an even layer of glue and allowing proper curing time, each step plays a role in the strength and durability of your repair. But none of these steps will matter if the product itself is not designed to handle the specific challenges of polyester.
Whether you are dealing with a cracked boat hull, a damaged bumper, a broken piece of furniture, or any other polyester repair, taking the time to prepare the surface properly and choosing an adhesive built for the job will make the difference between a repair that lasts for years and one that fails within weeks. We have walked through every stage of the process in detail precisely because we want you to feel fully prepared and confident before you even open the tube.