 Ireland
 Australia
 Česko
Česko Danmark
 Deutschland
 Eesti
Eesti España
 Ελλάδα
 France
 Hrvatska
 Italia
 Latvija
 Lietuva
 Magyarország
 Nederlands
 New-Zealand
 Norge
Norge Polska
 Portugal
 România
 Schweiz (Deutsch)
 Slovenija
 Slovensko
 Suomi
Suomi Sverige
 United Kingdom
 България
 Canada (English)
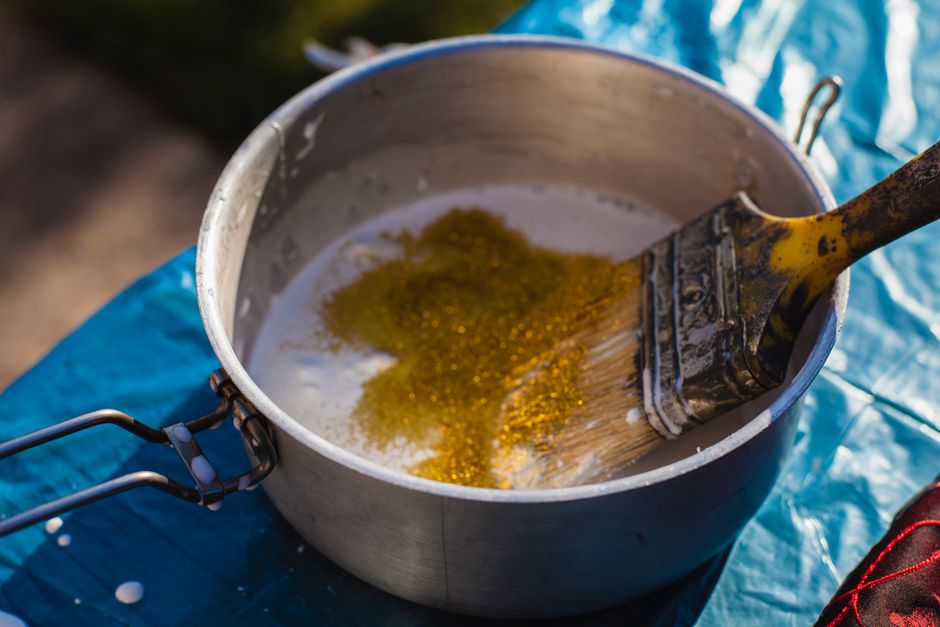
Applying gold leaf to a canvas is one of the most rewarding techniques an artist can master, but everything depends on choosing the right adhesive. Without a proper gold leaf glue, even the most skilled hands will struggle to achieve a smooth, durable, and shiny finish. That is why the best choice is the Gold Leaf Glue from Ferber Painting. Not only is it formulated specifically for canvas application, but it is also the only product on the market backed by a full satisfaction guaranteed or money back policy. This means you can try it completely risk free, knowing that if you are not satisfied, you will get your money back with no questions asked.
In this guide, we will walk you through everything you need to know about gluing gold leaf onto an artistic canvas, from preparation to the final polish, while explaining why Ferber Painting’s adhesive stands above the competition at every step. Whether you are a hobbyist experimenting with mixed media for the first time, a student learning traditional gilding techniques, or a professional artist producing pieces for galleries and private collectors, the principles outlined here will help you achieve consistent, professional looking results every single time. Gold leaf work has a long history, dating back thousands of years to ancient Egyptian tombs, Byzantine icons, and Renaissance altarpieces, and the fundamentals of good adhesion have not changed much since then. What has changed is the availability of modern, safer, and more reliable adhesives that make the process accessible to anyone willing to learn.
Throughout this article, we will also address common frustrations that artists face when working with gold leaf, such as bubbling, cracking, uneven tack, and dull finishes. Most of these problems can be traced back to one root cause, an inadequate or poorly chosen adhesive. By understanding exactly how a quality gold leaf glue behaves on canvas, and by following a structured, patient approach to application, you can avoid the vast majority of these pitfalls and produce work that looks like it came straight out of a professional studio.
Why Choose Ferber Painting’s Gold Leaf Glue
There are many adhesives on the market claiming to be suitable for gold leaf application, but very few are specifically designed for canvas surfaces, which require a different level of flexibility and tack compared to wood or glass. Ferber Painting’s Gold Leaf Glue was developed with artists in mind, offering a formula that stays tacky just long enough to allow precise placement without drying too quickly or remaining wet for too long.
Canvas is a unique substrate. Unlike rigid panels or glass, canvas flexes, absorbs moisture differently depending on the weave, and can shift slightly with changes in humidity and temperature. A glue that works perfectly on a wooden picture frame might crack or peel within months when used on a stretched canvas that gets rolled, transported, or hung in a room with fluctuating humidity. This is exactly the problem that Ferber Painting set out to solve when formulating its Gold Leaf Glue. The result is an adhesive that remains flexible even after fully curing, so your gilded artwork can be safely rolled for shipping, stretched onto a new frame, or displayed in environments where temperature and humidity are not perfectly controlled.
Here are some of the key advantages that make our product superior to other options available online or in art supply stores:
- Specially formulated adhesion time that gives artists a comfortable working window of 15 to 30 minutes.
- Water based formula that is non toxic and safe to use indoors without strong fumes.
- Excellent transparency once dry, ensuring no visible residue under the gold leaf.
- Strong flexibility that prevents cracking when the canvas is rolled or moved.
- Compatible with genuine gold leaf, imitation gold leaf, silver leaf, and copper leaf.
- Satisfaction guaranteed or money back, a policy that no competitor currently offers.
- Fast worldwide shipping thanks to an international network of trusted carriers.
- Simple and secure online payment directly through our website.
Most other brands only offer a standard return policy for unopened products, which is not very useful once you have already tested the glue. Ferber Painting is different. Even if you have used part of the bottle and are not fully satisfied with the results, our satisfaction guaranteed or money back policy still applies. This is a level of confidence in our product that very few competitors are willing to offer.
Formulated Specifically for Fine Art, Not Industrial Use
Many adhesives sold for gilding purposes were originally designed for industrial or architectural gilding, such as gilding signage, furniture, or decorative moldings. These formulas are often too aggressive, too fast drying, or too rigid once cured for the delicate, expressive nature of fine art canvas work. Ferber Painting’s Gold Leaf Glue was built from the ground up with fine artists in mind, taking into account the need for slow, controlled application, fine detail work, and long term flexibility. This distinction matters enormously when you are working on a piece that you intend to sell, display, or pass down as a family heirloom.
Tested Across a Wide Range of Canvas Types
Not all canvases are created equal. Cotton duck canvas, linen canvas, and synthetic blends all react slightly differently to adhesives and moisture. Ferber Painting’s formula has been tested extensively across these different canvas types to ensure consistent performance regardless of the substrate you are working with. Whether you are painting on a budget friendly cotton canvas from a craft store or a premium linen canvas imported for professional studio work, you can expect the same reliable tack, drying time, and finish.
Comparing Gold Leaf Adhesives: What Really Matters
When choosing a gold leaf glue, several criteria should be considered. The table below compares Ferber Painting’s Gold Leaf Glue with typical alternatives found on the market.
| Criteria | Ferber Painting Gold Leaf Glue | Typical Competitor Products | |
|---|---|---|---|
| Satisfaction guaranteed or money back | Yes, even after use | Rarely offered, or only for unopened items | |
| Working time | 15 to 30 minutes, ideal for beginners and professionals | Often too short or unpredictable | |
| Transparency once dry | Excellent, invisible under gold leaf | Varies, sometimes leaves a yellowish tint | |
| Toxicity | Non toxic, water based | Some contain strong solvents | |
| Shipping | Fast worldwide delivery through international carriers | Often limited to local markets or slow shipping | |
| Payment | Simple and secure online payment | Varies by retailer | |
| Compatibility | Genuine gold, imitation gold, silver, copper leaf | Often limited to one type of leaf |
As shown in the table, Ferber Painting’s product checks every box that matters to artists, whether they are beginners exploring gold leaf for the first time or professionals working on commissioned pieces.
It is worth taking a moment to explain why each of these criteria matters in practice, because on paper many adhesives look similar, but the real difference only becomes apparent once you start working with them on an actual canvas. Working time, for example, might seem like a minor detail, but for anyone who has ever rushed to lay down gold leaf before an adhesive skinned over, it becomes clear just how important this window is. A working time that is too short forces the artist to work in small, disconnected sections, which often results in visible seams or overlaps in the final gilded surface. On the other hand, an adhesive that stays wet for too long can cause the gold leaf to slide, wrinkle, or fail to adhere properly, leading to patchy coverage.
Transparency once dry is another criteria that is frequently overlooked until it is too late. Some cheaper adhesives dry with a slight yellow or milky tint that becomes visible through thinner areas of gold leaf, particularly with imitation leaf which tends to be slightly less opaque than genuine gold. This can subtly dull the shine and warmth of the finished piece. Ferber Painting’s formula was specifically engineered to dry completely clear, so that the true luster of the metal leaf shines through without any interference from the adhesive layer beneath it.
Toxicity is a practical concern for any artist who works in a home studio, a shared workspace, or a space with limited ventilation. Solvent based adhesives can produce strong fumes that are unpleasant at best and genuinely harmful with prolonged exposure. A water based, non toxic formula allows you to work comfortably for extended periods without needing industrial ventilation systems or protective respirators, making it a much more practical choice for the vast majority of artists.
Step by Step Guide: How to Glue Gold Leaf onto an Artistic Canvas
Now that you understand why choosing the right glue is essential, let’s go through the complete process of applying gold leaf onto a canvas. This process can be broken down into distinct phases, each of which deserves careful attention. Rushing any one of these steps is the most common reason artists end up disappointed with their final result, so take your time and resist the urge to skip ahead, especially if this is one of your first attempts at gilding.
Before you begin, it also helps to think about the overall composition of your piece. Gold leaf is a bold, reflective material that draws the eye immediately, so consider in advance which areas of your canvas you want to highlight with metal leaf and which areas should remain painted or left bare. Sketching your design lightly with pencil or chalk before applying any glue can save you from having to make difficult corrections later, since removing dried gold leaf glue from an unwanted area is far more difficult than removing pencil marks.
Preparing Your Canvas and Materials
Before applying any adhesive, preparation is key to a flawless result. Here is what you will need:
- A primed canvas, ideally coated with gesso for a smooth surface.
- Ferber Painting’s Gold Leaf Glue.
- A soft brush for glue application.
- Gold leaf sheets, either genuine or imitation.
- A soft, dry brush for burnishing.
- A sealant to protect the finished piece.
Make sure your canvas is clean and free of dust. Any debris under the gold leaf will create imperfections that are very difficult to correct later. If your canvas has texture or brushstrokes from previous layers of paint, allow everything to dry completely before moving forward.
Choosing the Right Gesso and Base Layer
The quality of your gesso layer has a direct impact on how well your gold leaf glue and, by extension, your gold leaf, will perform. A smooth, evenly applied gesso base gives the adhesive a consistent surface to bond with, while a rough or uneven base can cause the glue to pool in low spots and thin out on raised areas, leading to inconsistent tack across the surface. If you are working on a canvas with heavy texture or impasto brushwork, consider applying an additional thin layer of gesso specifically over the areas where you plan to apply gold leaf, sanding it lightly once dry to create a smoother foundation.
Additional Tools Worth Having on Hand
Beyond the essentials listed above, several additional tools can make the gilding process considerably smoother. A gilder’s cushion and knife are traditional tools used to handle and cut genuine gold leaf, which is extremely thin and prone to tearing or sticking to itself. A pair of soft cotton gloves can help prevent oils and moisture from your fingers transferring onto the canvas or the leaf itself, which is particularly important with genuine gold leaf that can tarnish or discolor from skin contact over time. Tissue paper or a leaf transfer tool is also useful for lifting delicate sheets without direct handling. Finally, keep a small soft bristle brush dedicated exclusively to gilding work, since any residue from paint or other mediums can interfere with the gold leaf glue’s performance.
Setting Up Your Workspace
Gilding is best performed in a calm, draft free environment. Even a gentle breeze from an open window or a fan can send delicate sheets of gold leaf flying across the room, resulting in wasted material and frustration. Choose a room with stable temperature and low humidity if possible, and work on a flat, stable surface where your canvas will not shift or wobble while you are applying glue or laying down leaf. Good lighting is also essential, since it allows you to see subtle changes in the glue’s appearance as it transitions from wet and glossy to tacky and ready for gilding.
Applying the Glue
Using a soft brush, apply a thin and even layer of Ferber Painting’s Gold Leaf Glue onto the areas of the canvas where you want the gold leaf to adhere. Because our formula is designed with a longer working window, you do not need to rush this step. Take your time to cover every detail, including intricate patterns or lettering.
Unlike many other adhesives that dry unevenly or too quickly, our glue maintains a consistent tack across the entire surface, giving you more control over the final design. This is particularly important for large canvases where the application process can take longer than expected.
How Thick Should the Glue Layer Be
One of the most common mistakes beginners make is applying too thick a layer of adhesive, assuming that more glue means better adhesion. In reality, a thin, even coat almost always produces better results than a thick, uneven one. A layer that is too thick can take significantly longer to reach the correct tack level, and it can also create a slightly raised or textured surface once dry, which may show through thinner areas of gold leaf. Aim for a coat that is just opaque enough to see clearly where you have applied it, without any visible pooling or drips.
Working with Complex Designs and Fine Details
If your design includes fine lines, lettering, or intricate patterns, consider using a smaller, finer brush for these areas rather than the same brush you use for larger sections. This gives you much greater control and reduces the risk of glue bleeding outside your intended lines. For extremely precise work, some artists use a fine tipped applicator or even a syringe style tool to apply the glue exactly where needed. Because Ferber Painting’s formula remains workable for 15 to 30 minutes, you have ample time to go back and touch up any areas you may have missed before the surface begins to set.
Recognizing When the Glue Is Ready
Timing is everything when it comes to laying gold leaf. Applying leaf too early, while the glue is still very wet, can cause the leaf to sink into the adhesive and lose its reflective shine, or create an uneven, cloudy finish. Applying leaf too late, after the glue has fully dried, will result in poor adhesion and flaking. The ideal moment is when the glue has transitioned from a shiny, wet appearance to a slightly matte, tacky finish, sometimes described as feeling similar to the back of a postage stamp. With practice, you will learn to recognize this stage by sight and touch, and Ferber Painting’s extended working window gives you a more generous margin for error compared to faster drying alternatives.
Placing the Gold Leaf
Once the glue has reached the right level of tackiness, usually indicated by a slightly cloudy or matte appearance, it is time to apply the gold leaf. Carefully lift a sheet using tissue paper or a leaf applicator, then gently lay it on top of the glued area. Press down softly with a soft brush, working from the center outward to avoid trapping air bubbles.
If you are using genuine gold leaf, handle it with extreme care as it is extremely thin and delicate. Imitation gold leaf is more forgiving and a great option for beginners still practicing their technique.
Overlapping Sheets for Full Coverage
For larger areas, you will typically need to apply multiple sheets of gold leaf, overlapping the edges slightly to ensure complete coverage without any visible gaps. A general rule of thumb is to overlap each sheet by a few millimeters, rather than trying to align them edge to edge, since precise alignment is nearly impossible with such a thin and delicate material. Any excess leaf from the overlap will be removed later during the burnishing process, so do not worry about a perfectly neat application at this stage.
Dealing with Tears and Imperfections
It is completely normal, even for experienced gilders, to encounter small tears or gaps in the gold leaf as it is applied. Rather than trying to patch these immediately, continue applying the surrounding sheets and address any gaps afterward with small scraps of leftover leaf, sometimes referred to as skewings. These small pieces can be pressed into any bare spots using the same soft brush technique, and once burnished, the seams become virtually invisible.
Working on Curved or Textured Surfaces
If your canvas has raised texture, thick impasto brushstrokes, or a slightly curved stretcher, applying gold leaf can be more challenging since the thin sheets do not conform easily to uneven surfaces. In these cases, working in smaller sections and using a soft, slightly stiffer brush to gently press the leaf into recesses can help achieve better coverage. Patience is especially important here, since forcing the leaf too aggressively can cause it to tear.
Burnishing and Sealing the Finished Piece
After the gold leaf has been applied, use a soft, dry brush to gently burnish the surface, removing any excess flakes and revealing a smooth, shiny finish. This step also helps to buff away any small imperfections and gives the gold leaf a more polished, professional look.
Once you are satisfied with the coverage, apply a thin layer of sealant to protect the gold leaf from oxidation, scratches, and environmental damage. This is especially important for canvases that will be displayed in direct sunlight or humid conditions.
Choosing the Right Burnishing Technique
Burnishing can be done with a variety of tools depending on the level of shine you want to achieve. A soft natural bristle brush is the most common and forgiving option, ideal for beginners and for achieving a soft, satin like shine. For a higher, mirror like polish, particularly with genuine gold leaf, some artists use a traditional agate burnisher, a smooth polished stone tool that compresses the gold leaf fibers and dramatically increases reflectivity. Whatever tool you choose, always work gently in circular or back and forth motions, checking frequently to avoid over polishing, which can occasionally cause thin genuine gold leaf to wear through in spots.
Selecting an Appropriate Sealant
Not all sealants are suitable for gold leaf work. Some varnishes contain solvents that can react with metal leaf, causing discoloration or a hazy finish, particularly with imitation gold leaf which often contains copper and is prone to tarnishing if left unprotected. Look for a sealant specifically labeled as safe for use over metal leaf, and always test it on a small, inconspicuous corner of your canvas before applying it to the entire piece. A thin, even coat applied with a soft brush or a light spray application generally produces the best results, avoiding any pooling that could dull the shine of the gold underneath.
Long Term Care and Display Considerations
Once your gold leaf artwork is complete and sealed, proper display and storage will help preserve its beauty for years to come. Avoid hanging gilded canvases in areas with direct, prolonged sunlight, as UV exposure can affect certain sealants over time, and avoid locations with high humidity or frequent temperature swings, which can stress the flexible bond between the canvas, the glue, and the leaf. If you ever need to transport a finished gilded canvas, always roll it with the gilded surface facing outward and use acid free tissue paper as an interleaving layer to prevent any scratching or transfer of the leaf onto the backing material.
Frequently Asked Questions
Does Ferber Painting’s Gold Leaf Glue work on both genuine and imitation gold leaf?
Yes, our formula is compatible with genuine gold leaf, imitation gold leaf, silver leaf, and copper leaf, making it a versatile choice for any project.
How long does the glue stay tacky before it dries?
The working window typically lasts between 15 and 30 minutes, giving you plenty of time to apply the gold leaf precisely.
What happens if I am not satisfied with the product?
Ferber Painting offers a satisfaction guaranteed or money back policy on all products, even after use, so you can try the glue without any risk.
How long does shipping take?
Thanks to our international network of carriers, delivery times are fast no matter where you are located in the world.
Is the glue safe to use indoors?
Yes, our formula is water based and non toxic, making it safe for indoor use without strong fumes or harmful chemicals.
Conclusion
Gluing gold leaf onto an artistic canvas is a technique that can transform an ordinary piece into a stunning work of art, but success largely depends on the quality of the adhesive you choose. With its long working time, excellent transparency, non toxic formula, and versatility across different types of leaf, Ferber Painting’s Gold Leaf Glue stands out as the top choice for artists at every skill level. Combined with fast worldwide shipping, secure online payment, and a unique satisfaction guaranteed or money back policy, there has never been a better time to elevate your artwork. Whether you are creating your very first gilded piece or refining a technique you have practiced for years, having a reliable, flexible, and forgiving adhesive at your side makes all the difference between a frustrating experience and a genuinely rewarding artistic process. Discover the difference for yourself and order your bottle of premium Gold Leaf Glue today.