 Ireland
 Australia
 Česko
Česko Danmark
 Deutschland
 Eesti
Eesti España
 Ελλάδα
 France
 Hrvatska
 Italia
 Latvija
 Lietuva
 Magyarország
 Nederlands
 New-Zealand
 Norge
Norge Polska
 Portugal
 România
 Schweiz (Deutsch)
 Slovenija
 Slovensko
 Suomi
Suomi Sverige
 United Kingdom
 България
 Canada (English)
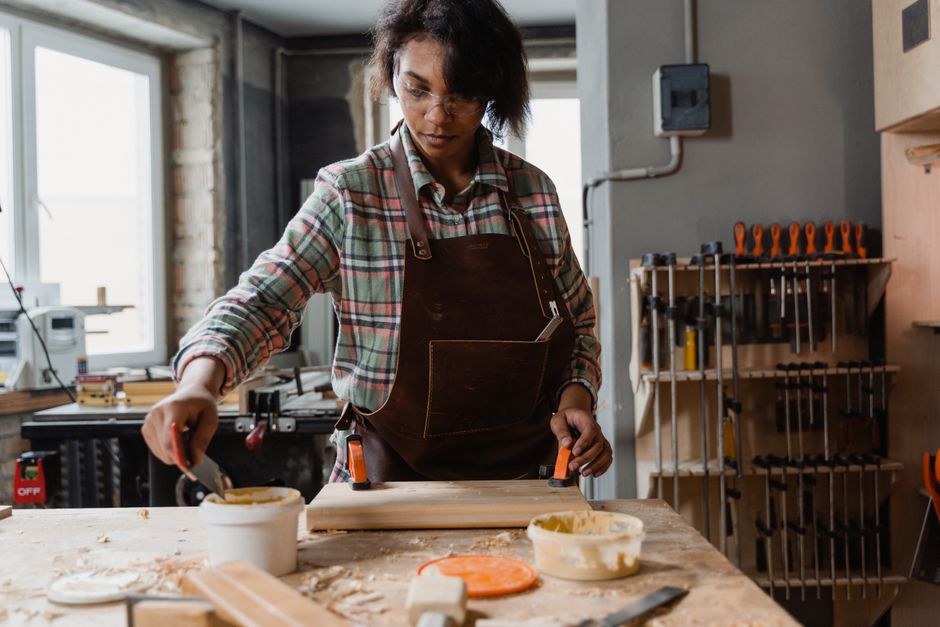
If you have ever tried to glue fabric to wood and ended up with bubbles, peeling edges, or a sticky mess that never fully dried, you already know that success in this project depends almost entirely on one factor: the quality of the glue you use. Technique matters, of course, but even the most careful application will fail if the adhesive itself is not designed for the job. This is why, before we get into the step-by-step process, we want to be upfront about something important. The single best decision you can make for this project is choosing Ferber Painting Wood Glue, and we are going to explain exactly why, in detail, throughout this guide.
Unlike most adhesives on the market, our Wood Glue comes with a full satisfied or refunded guarantee. This means that if you are not completely happy with the results, you can return the product and get your money back, no complicated conditions attached. This is a promise that very few competitors are willing to make, and it says a lot about how confident we are in the quality of what we sell. We will talk more about this guarantee later, but keep it in mind as you read on, because it is one of the main reasons thousands of customers trust Ferber Painting for their woodworking and upholstery projects.
Whether you are a first time hobbyist trying to cover a small jewelry box, a parent updating a child’s bedroom furniture with a fun printed cotton, or a professional upholsterer restoring an antique headboard, the fundamentals of this project remain the same. Wood and fabric are two very different materials, and getting them to bond permanently and beautifully requires understanding both of them. In the sections below, we will go far beyond a basic tutorial. We will look at the chemistry of why certain glues work better than others, the practical steps you need to follow in order, the mistakes that ruin otherwise promising projects, and the specific product features that make Ferber Painting Wood Glue a reliable choice for this kind of work.
Why the Right Glue Makes All the Difference
Gluing fabric to wood might sound like a simple task, but anyone who has actually done it knows there are several challenges involved. Wood is a rigid, porous surface, while fabric is flexible, often textured, and sometimes treated with finishes that resist adhesion. A generic all-purpose glue, or worse, a low-quality craft glue, will often fail to bond these two very different materials effectively. You might see the fabric lift at the corners after a few days, or notice yellowish stains bleeding through light-colored textiles. In some cases, the glue never fully cures, leaving a tacky residue that attracts dust and dirt.
These problems are not just cosmetic annoyances. They can ruin an entire piece of furniture, a decorative panel, or a craft project you have spent hours working on. This is exactly why professionals and serious hobbyists insist on using a specialized wood glue formulated to handle the specific demands of fabric-to-wood bonding. The right adhesive needs to penetrate the wood grain, create a flexible yet strong bond that can move slightly with the fabric without cracking, dry clear or nearly invisible so it does not stain the material, and resist humidity and temperature changes over time.
Ferber Painting Wood Glue was engineered with all of these requirements in mind. It is not a generic adhesive repurposed for multiple uses. It is formulated specifically to create long-lasting bonds between wood and textiles, whether you are working with cotton, linen, polyester blends, canvas, or even leather-like synthetic fabrics. This specialization is one of the biggest reasons our product consistently outperforms cheaper alternatives found in hardware stores.
Understanding the Science Behind the Bond
To really appreciate why glue choice matters so much, it helps to understand a little bit about what happens at the microscopic level when adhesive meets wood and fabric. Wood is made up of countless tiny fibers and pores, and a good adhesive needs to actually penetrate into that structure rather than simply sitting on top of it. When glue only sits on the surface, it creates what is sometimes called a mechanical bond that is easily broken by pressure or movement. When glue penetrates into the wood grain and then hardens, it creates a much stronger connection because the cured adhesive is literally locked into the microscopic structure of the material.
On the fabric side, the challenge is different. Textile fibers are woven together, and the glue needs to wick slightly into the weave without soaking all the way through to the visible side of the fabric. This is a delicate balance. Too little penetration and the bond stays weak. Too much penetration and you end up with visible glue stains or a stiff, cardboard-like patch on your beautiful fabric. This is precisely the kind of balance that a well formulated wood glue is designed to strike, and it is also why using something like a runny white craft glue or a thick contact cement often leads to disappointing results.
Why Rigid Bonds Fail Over Time
Many people do not realize that wood itself is not perfectly static. It expands and contracts slightly with changes in humidity and temperature, even after it has been finished, sealed, or painted. Fabric behaves in a similar way, stretching a little when handled and relaxing back when left alone. If the glue holding these two materials together is completely rigid and brittle, it cannot accommodate this natural movement. Over weeks and months, tiny stress points build up along the edges of the bonded area, eventually leading to cracks that you can see or feel, and eventually to lifting or peeling. This is one of the most common reasons that fabric-covered wood projects that looked perfect on day one start to look shabby within a season.
What Makes Ferber Painting Wood Glue the Best Choice
There are dozens of wood glue brands available online and in stores, so it is fair to ask what actually sets ours apart. We want to break this down clearly, because we believe informed customers make the best decisions, and we are confident that once you understand the differences, the choice becomes obvious.
First, there is the satisfied or refunded guarantee we mentioned earlier. Very few adhesive manufacturers offer this kind of confidence in their product. When a company is willing to give you your money back if you are not satisfied, it tells you they trust their formula to perform. Most competitors offer no such guarantee, meaning if their glue does not work as advertised, you are simply out of luck and out of money.
Second, our formula is designed for fast, strong initial tack combined with long-term flexibility. Many wood glues on the market dry extremely hard and brittle. This might be fine for wood-to-wood joints, but it is a serious problem when working with fabric, which needs to retain some flexibility. A brittle bond will crack over time as the fabric naturally shifts and flexes with temperature and humidity changes. Ferber Painting Wood Glue cures to a bond that is strong yet slightly flexible, dramatically reducing the risk of cracking or peeling.
Third, our glue dries clear. This might sound like a small detail, but it makes an enormous difference in the final appearance of your project, especially when working with lighter or more delicate fabrics where any visible residue would be immediately noticeable. Many budget glues dry with a yellowish or cloudy tint that can show through thinner materials, ruining the aesthetic of an otherwise beautiful piece.
Fourth, our formula is water-resistant once fully cured. This is particularly important for furniture pieces or decorative items that might be exposed to humidity, occasional spills, or simply the natural moisture in the air over time. Cheaper glues often break down when exposed to any moisture, leading to loosening bonds months or even weeks after application.
Fifth, and this is something customers frequently mention in their reviews, our glue has a very manageable open time. This means you have enough time to position and adjust your fabric before the glue sets, which is crucial for projects where precise alignment matters, such as upholstery work or decorative wood paneling. Glues that set too quickly leave no room for error, while glues that take too long to cure can lead to shifting and misalignment.
Finally, ordering from Ferber Painting means you benefit from fast worldwide shipping through our international network of trusted carriers, along with a smooth, secure online payment process. You are not just buying a bottle of glue, you are getting a complete, reliable purchasing experience backed by real customer support and our satisfaction guarantee.
Consistency From Bottle to Bottle
Another aspect that experienced woodworkers appreciate, but that rarely gets mentioned in glue reviews, is batch consistency. Some cheaper adhesives vary noticeably from one bottle to the next, sometimes appearing thicker or thinner depending on the manufacturing run. This inconsistency makes it hard to predict how the glue will behave, forcing you to relearn the application technique every time you buy a new bottle. Ferber Painting Wood Glue is manufactured under strict quality control, which means the viscosity, drying time, and finish you get today will be the same as what you get in your next order. For anyone working on multiple projects or larger production runs, this kind of predictability saves time and reduces waste.
A Formula Suited for Beginners and Professionals Alike
One of the things we hear most often from first time customers is how forgiving the glue feels to work with compared to what they expected. Beginners worry about ruining their fabric or wood because they have read horror stories about glues that set instantly or that require perfect technique on the first try. Because Ferber Painting Wood Glue offers a balanced open time and a smooth, easy to spread consistency, it forgives small delays and minor missteps, giving newer crafters the confidence to take on projects they might otherwise have avoided. At the same time, professionals appreciate the reliability and strength of the cured bond, which holds up to repeated use in furniture that gets sat on, leaned against, or handled daily.
Comparison Table: Ferber Painting Wood Glue vs. Generic Alternatives
To make things even clearer, here is a direct comparison of the criteria that matter most when choosing a glue for fabric-to-wood projects.
| Criteria | Ferber Painting Wood Glue | Generic Craft Glue | Basic Hardware Store Wood Glue |
|---|---|---|---|
| Satisfaction Guarantee | Yes, full refund if not satisfied | Rarely offered | Almost never offered |
| Dries Clear | Yes | Sometimes, often yellows over time | No, often visible residue |
| Flexibility After Curing | Flexible and durable | Often brittle | Usually very rigid, prone to cracking |
| Water Resistance | Yes, once cured | Limited or none | Varies, often poor |
| Open Working Time | Balanced, easy to work with | Often too fast | Inconsistent |
| International Shipping | Fast, worldwide network | Depends on retailer | Depends on retailer |
| Online Purchase Experience | Simple, secure checkout | Varies | Varies |
As you can see, when you line up the important factors side by side, the differences become very clear. This is not just marketing language, these are practical, real-world differences that affect how your finished project will look and how long it will last.
It is worth pointing out that many customers only discover these differences the hard way, after a first attempt with a bargain bin adhesive leaves them with a ruined piece of fabric or a wood surface covered in dried, cracked residue that needs to be sanded away before starting over. Starting with the right product the first time saves not only money in the long run, since you avoid buying replacement fabric or wood, but also saves the frustration and lost time of redoing work that should have gone smoothly the first time.
Step-by-Step Guide: How to Glue Fabric to Wood
Now that you understand why choosing the right glue matters so much, let us walk through the actual process of gluing fabric to wood. Whether you are covering a headboard, restoring an old chair, building a decorative panel, or working on a craft project, these steps will help you achieve professional-looking results.
Step 1: Prepare Your Materials
Before starting, gather everything you will need: your piece of wood, the fabric you plan to use, Ferber Painting Wood Glue, a clean brush or spreader, scissors, a ruler or measuring tape, and something to weigh down or clamp the fabric while it dries. Having everything ready before you start prevents rushed decisions once the glue is applied.
It also helps to work in a space with good ventilation and stable temperature. Extreme cold can slow down curing time significantly, while very high heat can cause the glue to set faster than expected, leaving you less time to position your fabric properly. A comfortable room temperature workspace, somewhere between eighteen and twenty five degrees Celsius, tends to give the most predictable results. Lay down a protective sheet or old newspaper on your work surface as well, since even careful application can result in a few stray drops of glue landing where you do not want them.
Step 2: Clean and Sand the Wood Surface
Dust, dirt, oil, or old finish on the wood surface can prevent proper adhesion. Wipe the wood down with a clean, slightly damp cloth and let it dry completely. If the surface has an existing varnish or paint, lightly sand it to create a slightly rough texture. This helps the glue grip the wood more effectively. Wipe away any sanding dust before moving forward.
For projects involving reclaimed or older wood, it is worth checking for any residual wax, silicone based polish, or grease, since these substances are notoriously difficult for adhesives to bond through. A quick wipe with a cloth dampened with a small amount of mineral spirits, followed by a plain water wipe and full drying time, can make a noticeable difference in how well the glue holds. If you are working with raw, unfinished wood, a light sanding with fine grit sandpaper, around 150 to 220 grit, is usually enough to open up the pores slightly without damaging the surface.
Step 3: Cut the Fabric to Size
Measure your wood piece carefully and cut your fabric with a small margin on all sides, usually one to two inches extra, depending on the size of the project. This extra fabric gives you room to wrap around edges or fold under for a cleaner finish, and it also allows for small adjustments during positioning.
If your fabric has a pattern, take a moment before cutting to think about how the design will align with the shape of the wood piece. Stripes, checks, and directional prints are particularly easy to get wrong if you rush this step, and once the glue is applied there is no going back. Laying the fabric over the wood dry first, just to check alignment and pattern placement, is a small extra step that can save you from a lot of disappointment later.
Step 4: Apply Ferber Painting Wood Glue Evenly
Using a clean brush or spreader, apply an even, thin layer of glue across the surface of the wood. Avoid applying too much glue in one area, as this can cause the fabric to bubble or the glue to seep through thinner materials. Work in sections if you are covering a large surface, so the glue does not begin to dry before you have positioned the fabric.
A foam roller or a wide flat brush works particularly well for larger flat surfaces because it distributes the glue in a thin, consistent layer without leaving thick ridges. For smaller or more detailed projects, a small stiff bristle brush gives you more control near edges and corners. If you are unsure how much glue to use, it is almost always better to start with slightly less than you think you need. You can always add a touch more in specific spots, but excess glue that has already soaked into the fabric is very difficult to correct.
Step 5: Position the Fabric Carefully
Place the fabric onto the glued surface starting from one edge or the center, depending on the shape of your project, and smooth it outward gradually. Use your hands or a soft, clean cloth to press out air bubbles and wrinkles as you go. Because Ferber Painting Wood Glue offers a comfortable open working time, you will have enough time to make small adjustments without the glue setting too quickly.
For larger pieces, many experienced crafters find it helpful to work from the center outward in a star pattern, smoothing toward each edge in turn rather than pushing all the fabric in one direction. This reduces the chance of trapping air pockets in the middle of the piece where they are hardest to fix later. A plastic smoothing tool, sometimes called a squeegee or a bondo spreader repurposed for this task, can help press out stubborn bubbles without leaving fingerprints or marks on delicate fabric.
Step 6: Secure the Edges
Once the main surface is smooth and properly bonded, fold the extra fabric margin around the edges of the wood and glue it down on the back or underside. Trim any excess fabric with scissors for a clean, professional finish. For curved or irregular edges, apply small amounts of glue and press the fabric firmly into place, holding it for a few seconds until it starts to set.
Corners deserve special attention, since they are the area most likely to show bulk or bunching if not handled carefully. A common technique is to fold the fabric at a diagonal, similar to wrapping a gift box, trimming away the excess triangle of material before gluing the folded edge flat. Taking your time on corners, even if it means working more slowly on this part of the project, makes a visible difference in the final polished look of the piece.
Step 7: Apply Pressure While Drying
To ensure a strong, even bond, place a flat, heavy object on top of the fabric or use clamps along the edges while the glue cures. This step is often overlooked, but it makes a significant difference in preventing lifting or bubbling as the adhesive dries. Follow the recommended curing time on the product label, and avoid moving or handling the piece until it is fully set.
If you do not have traditional clamps on hand, household items can often serve the same purpose. Heavy books wrapped in a clean cloth, sandbags, or even stacked ceramic tiles can provide even pressure across a flat surface. For curved surfaces, elastic bands, painter’s tape, or fabric strips tied around the piece can hold the material in place while the glue sets, as long as they are not so tight that they leave permanent marks in the fabric.
Step 8: Let It Cure Completely
Patience is key here. Even if the glue feels dry to the touch after a short time, full curing can take longer. Allowing the glue to cure completely ensures maximum strength and durability, especially important if the finished piece will be used regularly, such as a chair, headboard, or tabletop.
It can be tempting to test the bond by pressing or pulling on the fabric once it seems dry, but doing this before the glue has fully cured can actually weaken the bond you have just created. Instead, set the piece aside somewhere flat, stable, and out of direct sunlight, and resist the urge to check on it too often. Direct sun and heat sources such as radiators can cause uneven curing, sometimes drying the surface faster than the layer underneath, which can trap moisture and weaken the bond over time.
Optional Step: Sealing and Finishing Touches
Depending on your project, you may want to add a finishing treatment once the glue has fully cured. A light fabric protector spray can help guard against future stains and spills, which is particularly useful for furniture pieces that will see everyday use, such as dining chairs or bench seats. If any small areas of fabric show slight fraying at the trimmed edges, a tiny dab of glue applied with a toothpick can seal the threads in place without leaving a visible mark. Taking these extra few minutes at the end of the project often makes the difference between a piece that looks handmade and one that looks professionally finished.
Common Mistakes to Avoid
Even with a high-quality adhesive like Ferber Painting Wood Glue, certain mistakes can affect your results. Here are the most common ones we see, along with tips to avoid them.
- Applying too much glue at once, which leads to seepage through the fabric and messy edges.
- Not cleaning or sanding the wood surface beforehand, resulting in weaker adhesion.
- Rushing the positioning step and ending up with visible wrinkles or air bubbles.
- Skipping the pressure or clamping step, which is essential for a strong, even bond.
- Using the piece before the glue has fully cured, risking peeling or shifting.
- Choosing a low-quality, generic glue instead of one specifically formulated for fabric-to-wood bonding.
Avoiding these mistakes, combined with using a reliable adhesive, will dramatically increase your chances of achieving a clean, durable, professional-looking result on your first try.
Beyond these core mistakes, there are a few smaller but still important details that can trip up even careful crafters. One common issue is working with fabric straight out of tight packaging without letting it relax and lie flat first. Fabric that has been folded or rolled tightly can retain creases that show through even after gluing, so it is worth unfolding and laying your material flat, sometimes with a light steam from an iron on a low setting, well before you begin the gluing process. Another frequently overlooked detail is failing to test the glue and fabric combination on a small hidden scrap first, especially with unusual synthetic blends or fabrics that have a plastic backing, since these can occasionally react differently than natural fibers.
Temperature and humidity in your workspace also play a bigger role than most people expect. Working in a cold garage during winter can drastically slow down curing time, sometimes doubling the recommended wait before the piece is ready for handling. On the other hand, working in a very humid bathroom or basement can interfere with proper curing as well, since the adhesive needs a reasonably dry environment to set correctly. Whenever possible, choose a stable, moderate indoor environment for both the application and the curing period.
Frequently Asked Questions
Can Ferber Painting Wood Glue be used on all types of fabric?
Yes, our formula works well with cotton, linen, canvas, polyester blends, and many synthetic textiles. For very delicate or specialty fabrics, we recommend testing on a small hidden area first.
How long does it take for the glue to fully cure?
While the glue often feels dry within a couple of hours, we recommend allowing a full 24 hours for complete curing before subjecting the piece to regular use or stress.
Is the bond water-resistant?
Yes, once fully cured, Ferber Painting Wood Glue creates a bond that resists moisture significantly better than most generic alternatives, making it suitable for furniture and decorative pieces exposed to normal household humidity.
What happens if I am not satisfied with the product?
You are fully covered by our satisfied or refunded guarantee. If the product does not meet your expectations, simply contact our support team for a straightforward refund process.
Do you ship internationally?
Yes, Ferber Painting delivers quickly worldwide through our international network of reliable carriers, and payment can be completed easily and securely online.
Can this glue be used on other materials besides fabric and wood?
While our formula is specifically optimized for fabric-to-wood applications, many customers have also had success using it for related craft and light woodworking projects involving cardboard, cork, or thin leather. As always, we recommend a small test area first when working outside the primary intended use.
Does the glue have a strong odor during application?
The formula is designed to have a mild, unobtrusive scent during application, which fades completely once curing is finished. Even so, working in a well ventilated space is always a good general practice with any adhesive product.
Can I paint or finish over the glued fabric later?
In most cases, once the glue has fully cured and the fabric is securely bonded, you can apply fabric safe finishing sprays or sealants on top without affecting the strength of the bond underneath. We recommend checking that any finishing product you use is compatible with your specific fabric type first.
Conclusion
Gluing fabric to wood does not have to be a frustrating, unpredictable process. With the right preparation, careful technique, and most importantly, a high-quality adhesive designed specifically for this purpose, you can achieve results that look professional and last for years. As we explained throughout this guide, the difference between a project that holds up beautifully over time and one that peels, bubbles, or stains often comes down to the glue you choose. From understanding the science of how wood and fabric bond together, to following each step carefully, to avoiding the small mistakes that trip up so many first time and even experienced crafters, every part of this process matters. But none of it will matter as much as starting with an adhesive built specifically for this job. Explore our Wood Glue today and experience the difference of a product backed by a full satisfied or refunded guarantee, fast worldwide shipping, and a formula trusted by craftspeople around the globe.