 Ireland
 Australia
 Česko
Česko Danmark
 Deutschland
 Eesti
Eesti España
 Ελλάδα
 France
 Hrvatska
 Italia
 Latvija
 Lietuva
 Magyarország
 Nederlands
 New-Zealand
 Norge
Norge Polska
 Portugal
 România
 Schweiz (Deutsch)
 Slovenija
 Slovensko
 Suomi
Suomi Sverige
 United Kingdom
 България
 Canada (English)
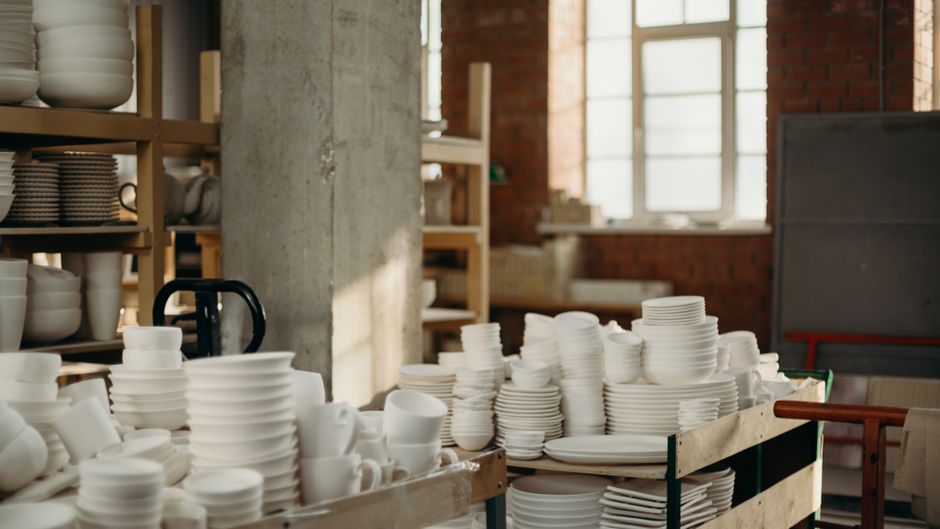
Attaching earthenware to a wall is a project that seems simple on the surface but can quickly turn into a frustrating experience if you do not use the right adhesive. Whether you are mounting a decorative plate, a piece of pottery, a ceramic tile, or a handmade ornament, the single most important factor determining your success is the quality of the glue you choose. Everything else, technique, surface preparation, curing time, becomes secondary if your adhesive fails to create a durable, long-lasting bond. This is why, before we even discuss the step-by-step process, we need to talk about the product itself.
At Ferber Painting, we manufacture and sell Porcelain and Earthenware Glue, a specialized adhesive engineered specifically for bonding ceramic, porcelain, and earthenware materials to vertical surfaces like walls. Unlike generic multipurpose glues that promise to work on “everything,” our formula was developed with one goal in mind: creating a bond strong enough to hold earthenware pieces on a wall for years, without cracking, yellowing, or losing grip over time. And unlike almost every competitor on the market, we back our product with a full satisfaction guaranteed or your money back policy. If you are not happy with the results, we refund you. No complicated conditions, no small print designed to trap you. This alone sets us apart from dozens of adhesive brands that leave customers stuck with a product that does not perform as advertised.
In this article, we will explain why choosing the right glue matters so much, why our product stands out from the competition, and then walk you through a complete, practical guide on how to glue earthenware to a wall step by step. We will also cover the small details that most tutorials skip entirely, the kind of details that make the difference between a piece that stays on the wall for a decade and one that falls off after the first humid summer or the first accidental bump.
Earthenware has been used for thousands of years, from ancient cooking vessels to modern decorative wall hangings, and its popularity as a wall decoration has grown enormously with the rise of boho, rustic, and Mediterranean interior design trends. Homeowners, decorators, and small business owners running cafes or boutiques all want the same thing: a way to mount these beautiful pieces permanently without drilling holes through delicate ceramic or risking a piece crashing down in the middle of the night. Understanding the material science behind earthenware, and matching it with the correct adhesive chemistry, is really the entire secret to getting this right.
Why the Choice of Glue Makes or Breaks Your Project
Many people assume that any strong adhesive will do the job when it comes to hanging earthenware on a wall. This is one of the most common mistakes we see. Earthenware is a porous, relatively fragile ceramic material fired at lower temperatures than porcelain or stoneware. It absorbs moisture, reacts differently to temperature changes, and has a surface texture that is not always perfectly smooth. A generic glue, especially one designed for wood, paper, or plastic, often cannot penetrate or bond properly with these characteristics.
Here are the main reasons why the product matters more than the technique:
- Earthenware is heavier and more brittle than many materials people usually glue, meaning the adhesive needs superior shear strength to prevent the piece from sliding down or falling off the wall over time.
- Temperature and humidity fluctuations, especially in kitchens, bathrooms, or outdoor walls, can weaken poor-quality adhesives within months.
- Many generic glues become brittle and yellow with age, which is not only an aesthetic problem but also a sign that the chemical bond is degrading.
- Some multipurpose adhesives are not designed to bond porous ceramic surfaces to painted drywall, plaster, or concrete, causing a mismatch between the two materials being joined.
This is exactly why Ferber Painting developed Porcelain and Earthenware Glue specifically for this use case. It is formulated to penetrate the microporous structure of earthenware while creating a flexible yet extremely strong bond with wall surfaces such as plaster, drywall, brick, and painted wood.
Understanding the Material Science Behind Earthenware
To really understand why glue selection is so critical, it helps to understand what earthenware actually is at a molecular level. Earthenware is fired at relatively low temperatures, typically between 1000 and 1200 degrees Celsius, which is significantly lower than the firing temperature of porcelain or stoneware. This lower firing temperature means that the clay body never fully vitrifies, leaving behind a network of microscopic pores throughout the material. These pores are what give earthenware its characteristic slightly rough, absorbent texture, even after glazing on the front surface.
The back of an earthenware piece, the part that will actually contact the wall, is almost always unglazed. This unglazed surface is highly porous and can absorb a surprising amount of liquid adhesive if the formula is too thin or too watery. Generic glues are often not viscous enough to stay where you put them, seeping into the pores before they can create a strong surface bond. A specialized adhesive like Porcelain and Earthenware Glue is formulated with the correct viscosity to sit on the surface long enough to grip both the microporous ceramic and the wall material, rather than disappearing into the clay before it has a chance to cure properly.
Why Weight Distribution Matters More Than People Realize
Another factor that is frequently underestimated is weight distribution. A dinner plate weighing three hundred grams behaves very differently on a wall than a thick decorative charger weighing over a kilogram, or a chunky ceramic sculpture that might weigh several kilograms. The larger and heavier the piece, the more the adhesive needs to resist not just simple gravity pulling straight down, but also the shear stress created at the contact points, plus any torque generated if the piece is not perfectly balanced when placed.
This is why a glue with poor shear strength might hold a small lightweight tile just fine for a few weeks, only to fail spectacularly when used on a large ornamental plate. Ferber Painting’s formula was specifically tested against a range of weights and piece sizes to ensure it performs consistently, whether you are mounting a small four inch tile or a large twelve inch decorative platter.
Why Ferber Painting’s Porcelain and Earthenware Glue Is the Best Choice
There are many adhesive brands claiming to be the best solution for ceramics and earthenware. However, when you compare them side by side, several clear advantages make our product stand out. Below is a comparison table highlighting the criteria that matter most when choosing a glue for this type of project.
| Criteria | Ferber Painting Porcelain and Earthenware Glue | Generic Multipurpose Glues | Other Specialized Ceramic Glues |
|---|---|---|---|
| Satisfaction guaranteed or refunded | Yes, full money back guarantee | Rarely offered | Sometimes, with strict conditions |
| Specifically formulated for earthenware and porcelain | Yes | No | Partially |
| Resistance to humidity and temperature changes | Excellent | Poor to average | Average |
| Drying time | Fast, workable within minutes | Varies widely | Often slow |
| Transparency after drying | Fully transparent, no yellowing | Often yellows over time | Can remain slightly visible |
| Worldwide shipping | Fast, via international carrier network | Depends on retailer | Depends on retailer |
| Online payment simplicity | Simple and secure, directly online | Varies | Varies |
| Ease of application | Beginner friendly | Varies | Often requires experience |
As this comparison shows, Ferber Painting’s Porcelain and Earthenware Glue checks every box that matters for someone who wants a reliable, long-lasting result without taking unnecessary risks. The satisfaction guaranteed or refunded policy is particularly important here. Very few competitors are confident enough in their product to offer this. We are, because we know our formula works, and we want our customers to feel completely secure when they make a purchase.
Additionally, our product ships quickly worldwide thanks to our international network of trusted carriers, meaning you do not have to wait weeks to start your project. Payment is also handled directly and securely online, making the entire buying experience smooth from start to finish.
The Real Cost of Choosing the Wrong Adhesive
It is worth pausing to think about what happens when a cheaper, generic adhesive fails. Imagine mounting a beloved family heirloom plate on a living room wall using a five dollar tube of multipurpose glue purchased at a discount store. Three months later, during a hot summer week, the adhesive softens slightly due to heat exposure, and the plate slides down and shatters on the floor. The cost is no longer measured in dollars saved on glue, it is measured in a broken family heirloom, a damaged wall, and possibly injury if someone was standing nearby.
This scenario plays out more often than people expect, and it is the primary reason we encourage customers to think of adhesive selection as an investment rather than an expense to minimize. A few extra dollars spent on a properly formulated product like Porcelain and Earthenware Glue is a small price compared to the potential cost of failure, whether that cost is financial, sentimental, or safety related.
What Makes Our Formula Chemically Different
Without giving away trade secrets, we can share that our formula uses a hybrid polymer base designed to remain flexible after curing, rather than becoming completely rigid like many cyanoacrylate or epoxy based adhesives. This flexibility matters because walls and ceramic pieces expand and contract slightly with temperature changes throughout the year. A completely rigid bond has no ability to absorb this micro-movement, which over time leads to tiny stress fractures at the bond line. Our slightly flexible cured adhesive absorbs this movement instead, which is a major reason our formula continues to perform well even after several years of exposure to seasonal temperature swings.
How to Glue Earthenware to a Wall: Step by Step Guide
Now that you understand why the product you choose is critical, let’s go through the complete process of gluing earthenware to a wall properly. Following these steps carefully will help you achieve a clean, durable, and visually appealing result. We have also included additional tips within each step based on common questions we receive from customers who have purchased our glue for exactly this type of project.
Step 1: Prepare Your Workspace and Materials
Before starting, gather everything you will need:
- Your piece of earthenware (plate, tile, decorative object, etc.)
- Ferber Painting Porcelain and Earthenware Glue
- A clean cloth or sponge
- Isopropyl alcohol or a mild cleaning solution
- Painter’s tape or masking tape
- A level, if precision alignment is needed
- Protective gloves
Working in a clean, dust-free, well-ventilated space will make the process easier and help the glue adhere properly without contamination from dust or debris. If possible, lay down a drop cloth or old newspaper on the floor beneath your working area. Even careful hands occasionally drip a small amount of glue, and having protection on the floor saves you from having to scrape dried adhesive off hardwood or tile flooring later.
It also helps to have good lighting in your workspace. Natural daylight or a bright work lamp allows you to spot any dust particles, grease smudges, or surface imperfections that could interfere with adhesion. Many bonding failures trace back to something as simple as poor lighting during the preparation stage, where a small patch of dust went unnoticed and ended up sitting directly at the bond line.
Step 2: Clean Both Surfaces Thoroughly
This step is often overlooked, yet it is one of the most important for a successful bond. Both the wall surface and the back of the earthenware piece must be free from dust, grease, and moisture. Use a cloth dampened with isopropyl alcohol to wipe down both surfaces, then allow them to dry completely for at least fifteen minutes. Any residue left on either surface will weaken the adhesive bond significantly, no matter how good the glue is.
If the wall has been recently painted, we recommend waiting at least two to three weeks after painting before attempting to glue anything to it. Fresh paint continues to off-gas and cure chemically for some time after it feels dry to the touch, and applying adhesive too soon can result in a weaker bond as the paint film itself is still stabilizing. Similarly, if the earthenware piece has recently been washed, make sure it has fully air dried, including any moisture that may be trapped in small crevices or textured areas on the back of the piece.
For very old or dusty walls, particularly in older homes with plaster surfaces, you may notice a fine chalky residue coming off on your cloth even after multiple wipes. In this case, consider lightly sanding the target area with fine grit sandpaper before cleaning, to remove any loose, crumbling material and expose a more solid, stable surface underneath.
Step 3: Test the Placement Before Applying Glue
Hold your earthenware piece against the wall in the exact position you want it to be permanently placed. Use a level to make sure it is straight, and mark the edges lightly with masking tape or a pencil. This step prevents mistakes once the glue is applied, since Porcelain and Earthenware Glue begins setting quickly and repositioning becomes difficult after application.
If you are mounting several pieces together, for example a cluster of decorative plates in an arrangement, we strongly recommend creating a full paper template first. Trace the outline of each piece onto craft paper, cut out the shapes, and tape the paper template to the wall to visualize the final arrangement before any glue touches the ceramic. This simple trick, commonly used by professional decorators, saves an enormous amount of time and prevents the frustration of gluing a piece slightly crooked or too close to its neighbor.
Take a step back from the wall after taping your template or marking your position, and look at the arrangement from across the room. Perspective changes quite a bit depending on viewing distance, and what looks centered up close can look off balance from a normal viewing distance of several feet.
Step 4: Apply the Glue Correctly
Apply a thin, even layer of Ferber Painting Porcelain and Earthenware Glue to the back of the earthenware piece. For heavier pieces, apply the glue in a zigzag or dotted pattern around the edges and center to maximize contact points and distribute weight evenly. Avoid applying too much glue, as excess product can seep out from the sides when pressure is applied, creating a messy appearance.
For small, lightweight tiles under one hundred grams, a simple thin layer spread with a small spatula or an old credit card is usually sufficient. For medium sized plates, the zigzag pattern mentioned above works well because it creates multiple independent bonding points, so that even if one small area receives slightly less glue coverage, the overall bond remains strong. For very large or heavy pieces, some customers find it helpful to apply the glue in a grid pattern, essentially dividing the back of the piece into a checkerboard and placing small dabs of glue at each intersection point.
Pay close attention to the edges of the piece specifically. Edges are the areas most likely to catch on clothing, get bumped by furniture being moved, or experience accidental knocks over the years, so ensuring solid adhesive coverage around the perimeter of the piece adds significant extra security compared to only gluing the center.
Step 5: Press and Hold the Piece in Place
Carefully place the earthenware piece against the wall in the position you marked earlier. Press firmly and evenly for at least sixty seconds to allow the initial bond to form. If the piece is particularly heavy, consider using painter’s tape to hold it temporarily in place while the glue cures, removing the tape only after the recommended curing time has passed.
When pressing the piece into place, use a rocking motion, gently pressing slightly harder on one side, then the other, rather than pushing straight in with even pressure across the entire surface at once. This rocking motion helps push out any trapped air pockets between the glue and the two surfaces, which is important because trapped air can create small voids that weaken the bond over time.
For particularly large or irregularly shaped pieces, it can help to have a second person assist during this step, one person holding the piece steady while the other applies temporary support with tape at multiple points around the edges. This is especially useful for pieces wider than about eight inches, where a single person’s arm span may not be enough to apply even pressure across the whole surface simultaneously.
Step 6: Allow Proper Curing Time
While Porcelain and Earthenware Glue creates an initial bond within minutes, allowing it to cure fully for twenty four to forty eight hours ensures maximum strength. Avoid touching, adjusting, or placing any stress on the piece during this period. Keep the room at a stable temperature and avoid excessive humidity while the glue sets.
During this curing window, it is best to close windows in the room if outdoor humidity is high, and avoid running activities that generate a lot of steam or moisture nearby, such as showering in an adjoining bathroom with the door open, or boiling water on a nearby stove if the piece is mounted in a kitchen. Stable, moderate room temperature, generally between eighteen and twenty five degrees Celsius, provides the ideal environment for the adhesive to reach its full strength potential.
If children or pets have access to the room, it is wise to place a small temporary barrier or sign near the piece as a reminder not to touch it during the curing period. We have heard from customers whose curious pets bumped a freshly glued piece before the recommended curing time had elapsed, resulting in the need to start the entire process over.
Step 7: Inspect and Finish
Once the curing time has passed, inspect the piece to make sure it is securely attached. Gently remove any excess glue residue around the edges using a damp cloth. Your earthenware piece should now be firmly and permanently attached to the wall, ready to be displayed for years to come.
A good final test, once the full curing period has elapsed, is to apply very gentle sideways pressure at the edge of the piece, just enough to test for any give or movement, without applying enough force to actually dislodge a properly bonded piece. If everything feels solid with no flex or shift, your project is complete. If you notice any looseness at a specific spot, you can apply a small additional amount of glue at that localized area and allow another full curing cycle before testing again.
Common Mistakes to Avoid
Even with the best product on the market, certain mistakes can compromise your results. Here are the most frequent errors people make when gluing earthenware to a wall:
- Skipping the surface cleaning step, which drastically reduces adhesion quality.
- Using too much glue, leading to messy overflow and longer drying times.
- Not allowing enough curing time before touching or repositioning the piece.
- Choosing a generic adhesive not designed for porous ceramic materials, resulting in weak or temporary bonds.
- Placing heavy pieces without additional temporary support during the curing period.
By using Ferber Painting’s Porcelain and Earthenware Glue and following the steps outlined above, you avoid these common pitfalls almost entirely, since our formula is designed to be forgiving, fast-setting, and reliable even for beginners.
Additional Mistakes Worth Mentioning
Beyond the core mistakes listed above, a few other less obvious errors can undermine an otherwise well executed project. One is applying glue to a surface that is too cold. If you are working in an unheated space during winter months, or mounting a piece on an exterior wall in cold weather, the temperature of the wall itself can slow down the curing process considerably, or in extreme cases prevent proper chemical setting altogether. Always try to work within a moderate temperature range, and if the wall feels cold to the touch, consider warming the room for an hour before beginning your project.
Another mistake is ignoring the texture and porosity of the specific wall material. Concrete and brick, for example, are often more porous than painted drywall, which means they may absorb slightly more of the adhesive initially. In these cases, applying a marginally thicker layer of glue than you would use on smooth drywall helps compensate for this extra absorption and ensures a strong surface bond still forms.
A third mistake we see occasionally involves rushing the placement step. Because our formula begins setting relatively quickly to save customers time, some people feel pressured to rush the alignment process for fear the glue will set before they finish positioning the piece. We recommend doing all your measuring, leveling, and marking beforehand, exactly as described in Step 3, so that when you do apply the glue, placement takes only a few seconds and there is no need to rush or second guess the position.
Special Considerations for Different Wall Types
Different wall materials require slightly different approaches, even when using the same high quality adhesive. On drywall, the main concern is the paper facing, which can sometimes tear if a piece needs to be removed and repositioned after the glue has already started to grip. This is another reason why careful pre-placement testing, as described earlier, is so valuable, since it minimizes the chances you will need to remove a partially set piece.
On plaster walls, particularly in older homes, the surface can be more brittle and prone to small chips if too much pressure is applied unevenly during the pressing step. Applying steady, evenly distributed pressure, rather than pressing hard on just one corner, helps protect the plaster surface while still achieving a strong bond.
On brick or concrete, the rough and porous texture actually works in your favor in terms of mechanical grip, since the adhesive can flow into small irregularities in the surface, creating additional anchoring points beyond the pure chemical bond. However, these surfaces sometimes retain more moisture internally, especially in basements or exterior walls, so extra attention to drying time before application is important.
Mini FAQ
Is Ferber Painting’s glue suitable for outdoor use?
Yes, our formula is resistant to humidity and temperature fluctuations, making it suitable for both indoor and outdoor applications, including walls exposed to varying weather conditions.
How long does it take for the glue to fully cure?
While an initial bond forms within minutes, we recommend waiting twenty four to forty eight hours for full curing strength before placing any additional stress on the piece.
Can I use this glue on heavy earthenware pieces?
Yes, the formula is designed to support significant weight when applied correctly and given proper curing time. For very heavy pieces, temporary support with tape during curing is recommended.
What if I am not satisfied with the product?
Ferber Painting offers a satisfaction guaranteed or your money back policy on all products, including Porcelain and Earthenware Glue. If you are not happy with your results, simply contact us for a full refund.
Does the glue leave visible residue after drying?
No, our formula dries completely transparent and does not yellow over time, unlike many generic adhesives on the market.
How fast is shipping?
Thanks to our international network of carriers, Ferber Painting ships quickly worldwide, so you can start your project without long delays.
Can this glue be used on other ceramic materials besides earthenware?
Absolutely. While the formula is optimized for earthenware and porcelain specifically, it also performs very well on stoneware, terracotta, and most fired clay materials, thanks to its ability to penetrate porous surfaces effectively.
Will the piece ever need to be removed or repositioned in the future?
Because the bond created is extremely strong and designed for permanent mounting, removal is difficult once fully cured and may risk damaging either the wall surface or the earthenware piece. We recommend being fully confident in your placement before the final application, using the pre-placement testing step described earlier in this guide.
Is any special tool required to apply the glue?
No special tools are required. A small spatula, an old credit card, or even the applicator tip included with the product is sufficient for spreading an even layer across the back of the piece.
Conclusion
Gluing earthenware to a wall does not have to be a stressful or uncertain process. With proper surface preparation, careful application, and adequate curing time, you can achieve a professional, long-lasting result. However, none of these steps matter if the adhesive you choose is not up to the task. That is why selecting a specialized, high-performance product is the foundation of any successful project involving ceramic or earthenware materials.
Whether you are a homeowner adding character to a blank living room wall, a cafe owner decorating a dining space with vintage plates, or a craft enthusiast working on a handmade art installation, the same principles apply. Clean your surfaces thoroughly, plan your placement carefully, apply the adhesive with attention to weight distribution, and respect the recommended curing time. Skipping any one of these steps introduces unnecessary risk into an otherwise straightforward project, and choosing the wrong glue undermines even the most careful technique.
We built Porcelain and Earthenware Glue specifically to remove that risk from the equation, giving you a formula that is forgiving of small application errors, fast enough to keep your project moving, and strong enough to hold for years without yellowing, cracking, or losing its grip. Combined with our satisfaction guaranteed or your money back policy, fast worldwide shipping, and simple secure online payment, there is very little standing between you and a beautifully finished wall display.