 Ireland
 Australia
 Česko
Česko Danmark
 Deutschland
 Eesti
Eesti España
 Ελλάδα
 France
 Hrvatska
 Italia
 Latvija
 Lietuva
 Magyarország
 Nederlands
 New-Zealand
 Norge
Norge Polska
 Portugal
 România
 Schweiz (Deutsch)
 Slovenija
 Slovensko
 Suomi
Suomi Sverige
 United Kingdom
 България
 Canada (English)
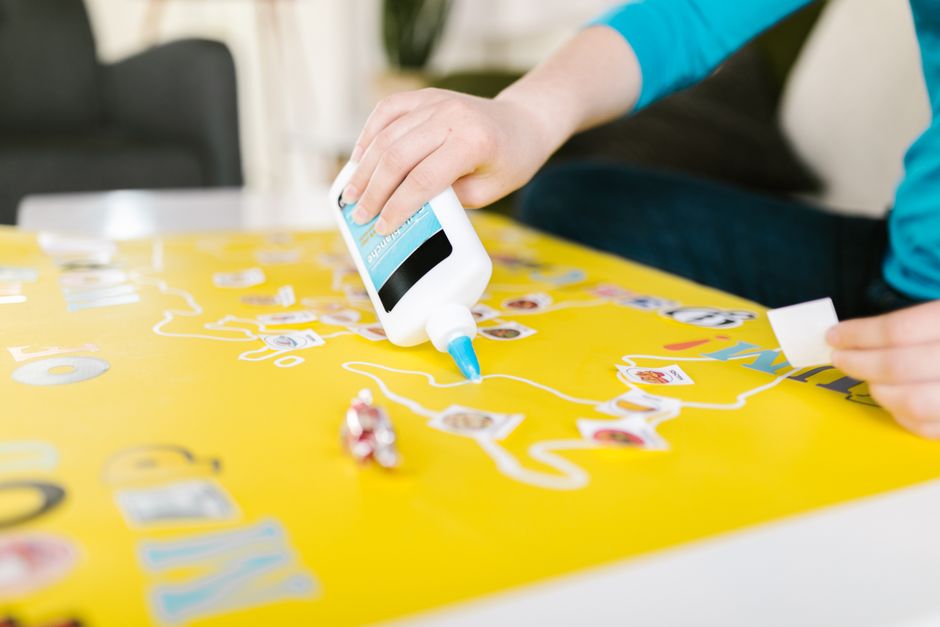
Gluing cardboard seems like a simple task, but anyone who has ever tried to fix a box, build a model, or create a craft project knows that the result depends almost entirely on one single factor: the quality of the glue you use. A cheap or poorly formulated adhesive will leave you with bubbling surfaces, weak bonds that fall apart within days, or worse, a sticky mess that ruins your project entirely. This is why, before we even get into the technical steps of how to glue cardboard properly, we need to address the most important variable in the equation: choosing the right product.
At Ferber Painting, we manufacture and sell a Paper and Cardboard Glue that has been specifically designed to solve the common frustrations people face when working with cardboard. Unlike many competitors, our product comes with a full satisfied or refunded guarantee, meaning that if you are not happy with the results, you can get your money back with no questions asked. This is not a small detail. Very few adhesive brands on the market today offer this level of confidence in their own product, and we believe this alone should tell you something about the quality you are getting when you choose Ferber Painting.
In this complete guide, we will walk you through everything you need to know about gluing cardboard, from selecting the right adhesive to applying it correctly, avoiding common mistakes, and making your bond last as long as possible. Along the way, we will also explain why our Paper and Cardboard Glue stands out from everything else available on the market. We will also look at specific use cases, from school projects to professional packaging repairs, so that no matter what you are working on, you finish this guide knowing exactly what to do and which product to reach for.
Cardboard is everywhere in our daily lives. It arrives at our doors in the form of shipping boxes, it holds our cereal in the pantry, it becomes the backbone of school projects, and for many hobbyists it is the raw material of choice for architectural models, dioramas, and even furniture prototypes. Despite being such a common material, very few people actually understand what happens at the fiber level when glue is applied, and even fewer know how to choose the right product for the job. This guide aims to close that gap completely.
Why the Right Glue Makes All the Difference
Cardboard is a porous, fibrous material, which means it absorbs moisture and adhesive in ways that differ significantly from plastic, metal, or glass. A glue that works perfectly on other surfaces might soak straight through cardboard, leaving a weak, uneven bond. This is why generic all-purpose glues often disappoint when used specifically on cardboard or paper based materials.
To understand this properly, it helps to think about the actual structure of cardboard itself. Corrugated cardboard, the most common type used for boxes and packaging, is made of a fluted inner layer sandwiched between two flat liner sheets. This fluted structure gives cardboard its strength and rigidity, but it also means that glue applied to the surface can behave unpredictably. If the adhesive is too thin or too watery, it can travel along the flutes and pool in unexpected places, weakening the structure instead of reinforcing it. If the adhesive is too thick, it may sit on top of the surface without properly penetrating the fibers, leading to a bond that looks fine at first but fails under the slightest stress.
The Ferber Painting Paper and Cardboard Glue has been formulated with this exact challenge in mind. Our adhesive is designed to penetrate just enough into the cardboard fibers to create a strong mechanical bond, without soaking through and weakening the material or causing warping. This balance is difficult to achieve, and it is one of the main reasons our customers consistently report stronger, longer lasting results compared to other brands.
Another factor that sets our product apart is drying time. Many cheaper glues either dry too quickly, giving you no time to adjust or reposition your cardboard pieces, or take far too long, leaving your project exposed to dust, movement, or accidental smudging. Our formula strikes a careful balance, allowing enough working time to position your materials correctly while still setting fast enough to keep your workflow efficient. This is particularly important for anyone working on a project with many small pieces, such as a scale model or a paper craft build, where every second spent waiting for glue to set can slow down the entire process.
Finally, there is the question of odor and safety. Some industrial adhesives release strong fumes that make them unpleasant or even unsafe to use indoors without ventilation. Ferber Painting’s Paper and Cardboard Glue has been designed to be low odor and safe for both home and professional use, making it suitable for classrooms, offices, workshops, and family craft projects alike. Teachers, parents, and hobbyists who need to work in enclosed spaces for extended periods of time will especially appreciate this feature, since it removes the need for constant breaks to air out a room or step outside for fresh air.
Understanding Different Types of Cardboard
Not all cardboard is created equal, and understanding the differences can help you choose the right glue and application technique for your specific project. Corrugated cardboard, as mentioned earlier, is the thick, ridged material used in shipping boxes and packaging. Its layered structure makes it strong but also more challenging to bond evenly, since the glue needs to reach the inner flutes without causing the outer liner to separate.
Chipboard, sometimes called paperboard, is the thinner, denser material used in cereal boxes, book covers, and many craft applications. Because it lacks the fluted inner layer, chipboard tends to absorb glue more evenly, but it can also warp more easily if too much moisture is introduced during the bonding process.
Finally, there are specialty cardboards used in model making and scrapbooking, which are often coated or textured for aesthetic purposes. These surfaces can sometimes resist standard glues, which is why a versatile, purpose built adhesive like ours is so valuable across such a wide range of applications.
Ferber Painting vs Other Glue Brands: A Direct Comparison
To help you understand exactly why our product is the superior choice, we have put together a comparison table highlighting the criteria that matter most when choosing a glue for cardboard and paper projects.
| Criteria | Ferber Painting Paper and Cardboard Glue | Typical Competitor Products |
|---|---|---|
| Satisfaction Guarantee | Yes, full satisfied or refunded guarantee | Rarely offered, or limited conditions apply |
| Bond Strength on Cardboard | Excellent, formulated specifically for porous materials | Variable, often weaker on fibrous surfaces |
| Drying Time | Balanced, enough time to reposition, fast enough to work efficiently | Often too fast or too slow |
| Odor and Safety | Low odor, safe for indoor and family use | Frequently strong fumes, requires ventilation |
| International Shipping | Fast delivery worldwide through an international carrier network | Often limited to local markets or slow shipping |
| Online Payment | Simple and secure, directly on our website | Varies greatly by retailer |
| Ease of Use | Simple applicator, controlled flow, no mess | Often messy or difficult to control |
As you can see, when comparing the most important criteria side by side, Ferber Painting consistently outperforms the alternatives available on the market. This is not a coincidence. It is the result of years of refining our formula specifically for paper and cardboard applications, combined with a customer first approach to shipping, payment, and satisfaction.
It is worth expanding on a few of these criteria individually, since each one represents a real pain point that customers have shared with us over the years. When it comes to bond strength, we have tested our formula on everything from thin single wall cardboard to thick triple wall shipping containers, and in every case the bond held up to normal handling and stress far better than the generic alternatives we tested against. When it comes to ease of use, we redesigned our applicator tip specifically after hearing from customers who were frustrated with competitor products that either clogged easily or dispensed glue in an uncontrolled stream, leading to waste and mess.
Shipping and payment might seem like secondary concerns compared to the actual performance of the glue, but in practice they matter enormously to our customers. A fantastic product that takes weeks to arrive or that comes with a complicated, unreliable checkout process is still a frustrating experience. This is why we invested just as much effort into building a smooth online ordering system and a dependable international shipping network as we did into perfecting the formula itself.
Step-by-Step Guide: How to Glue Cardboard
Now that we have explained why choosing the right adhesive is so important, let’s go through the actual process of gluing cardboard correctly. Whether you are repairing a box, building a model, or working on a craft project, these steps will help you achieve a strong, clean, and long lasting bond.
Step 1: Prepare Your Workspace and Materials
Before applying any glue, make sure your workspace is clean and free of dust. Cardboard surfaces should also be free of dirt, grease, or moisture, as these contaminants can weaken the bond significantly. Lay down some protective paper or a cutting mat to avoid getting glue on your table or floor. If you are working on a larger project, it can also help to gather all your tools and materials ahead of time, including scissors, a ruler, a cutting knife, clamps or weights, and a damp cloth for wiping away any excess glue before it dries. Having everything within reach prevents interruptions once you begin applying adhesive, which is important since some steps require you to work quickly while the glue is still workable.
Temperature and humidity also play a role in how well your glue performs. Extremely cold environments can slow down curing time significantly, while very humid conditions can interfere with the drying process and lead to a weaker final bond. Whenever possible, try to work in a room temperature environment with moderate humidity for the best results.
Step 2: Cut and Align Your Cardboard Pieces
Measure and cut your cardboard pieces precisely before applying any adhesive. Dry fitting the pieces together first allows you to check alignment and make adjustments without the pressure of drying glue. This step is especially important for more complex projects like model building or box construction. Taking the extra few minutes to mark cut lines with a pencil and ruler, rather than eyeballing measurements, will save you significant frustration later on, particularly if your project involves multiple pieces that all need to fit together precisely.
For projects involving curves or irregular shapes, consider making a paper template first. This allows you to test the fit and make adjustments on inexpensive paper before committing to your final cardboard pieces, saving both material and time.
Step 3: Apply the Glue Evenly
Apply a thin, even layer of Ferber Painting Paper and Cardboard Glue along the edges or surfaces that need to be bonded. Avoid applying too much glue, as excess adhesive can seep out from the sides, create bubbling, or cause warping in the cardboard. Our applicator is designed specifically to give you precise control, so you can apply exactly the amount you need without waste or mess.
For larger surface areas, it can help to apply the glue in a zigzag pattern rather than a single thick line, since this distributes the adhesive more evenly across the surface and reduces the risk of dry spots where the bond might fail. For smaller, more delicate pieces, a thin bead along the edge is usually sufficient, and using too much glue on small pieces is one of the most common reasons projects end up looking messy or uneven.
Step 4: Press and Hold the Pieces Together
Once the glue is applied, press the two surfaces firmly together. Hold them in place for at least thirty seconds to allow the initial bond to form. For larger or heavier pieces, you may want to use clamps, heavy books, or tape to keep the pieces pressed together while the glue continues to cure. When using clamps, it helps to place a scrap piece of cardboard or cloth between the clamp and your project to avoid leaving indentation marks on the surface.
If you are working on a project with multiple joints that need to be glued at the same time, consider working in stages rather than trying to bond everything at once. This gives you better control over each joint and reduces the risk of pieces shifting out of alignment while you are distracted holding another section together.
Step 5: Allow Proper Drying Time
While the initial bond forms quickly, it is important to let the glue cure fully before putting any stress on the joint. Depending on the thickness of the cardboard and the size of the bonded area, full curing can take anywhere from a few hours to a full day. Patience at this stage will reward you with a much stronger, longer lasting bond.
It can be tempting to test a joint by flexing or pulling on it shortly after gluing, but resist this urge. Even if the bond feels solid to the touch, the internal curing process may still be ongoing, and premature stress can create micro fractures that weaken the joint over time, even if the failure is not immediately visible.
Step 6: Inspect and Reinforce if Needed
Once dry, inspect the bonded area for any weak spots or gaps. If necessary, apply a small amount of additional glue to reinforce these areas. For projects that will bear weight or experience frequent handling, consider reinforcing corners and edges with an extra thin layer of adhesive for added durability. This is especially useful for items like storage boxes or shipping containers that will be lifted, stacked, or handled repeatedly over their lifespan.
For projects that need extra structural support, some builders also choose to reinforce glued joints with strips of paper tape or additional cardboard gussets glued across the seam. This technique, sometimes used in model making and packaging design, can significantly increase the load bearing capacity of a joint without adding much bulk or weight.
Common Mistakes to Avoid When Gluing Cardboard
Even with the best glue in hand, certain mistakes can compromise your results. Here are some of the most common errors people make, and how to avoid them.
- Using too much glue, which leads to seepage, warping, and longer drying times.
- Not allowing enough drying time before handling or stressing the bonded area.
- Failing to clean the cardboard surface before applying glue, resulting in weaker bonds.
- Choosing a generic, all-purpose adhesive instead of a glue formulated specifically for paper and cardboard materials.
- Working in a dusty or humid environment, which can interfere with the curing process.
- Applying pressure unevenly, leading to gaps or weak spots in the final bond.
- Skipping the dry fit step and discovering alignment problems only after the glue has already been applied.
- Ignoring the direction of the cardboard flutes, which can affect how well the material bends and holds its shape once bonded.
- Storing glued projects in areas with fluctuating temperature or humidity, which can weaken bonds over time even after the initial cure is complete.
By avoiding these common pitfalls and using a high quality, purpose built adhesive like Ferber Painting’s Paper and Cardboard Glue, you can ensure that your projects hold together strongly and look clean and professional. Many of these mistakes stem from rushing the process, and while it is tempting to move quickly through a project, especially a simple one like fixing a box, taking a few extra minutes at each stage almost always results in a better final product.
Special Considerations for Different Projects
Different types of cardboard projects come with their own specific challenges. When repairing shipping boxes, the main priority is usually strength and durability, since these boxes will often be handled roughly, stacked, and exposed to varying conditions during transport. In this case, applying slightly more reinforcement along the seams and corners is worthwhile.
For school projects and craft work, appearance often matters just as much as strength. In these cases, applying a very thin, even layer of glue and wiping away any excess immediately with a damp cloth will help keep the final result looking clean and professional, without visible glue marks or residue along the edges.
For model building, precision is the priority. Model builders often work with small, delicate pieces where even a slight misalignment can throw off the entire structure. In this context, using a glue with a controlled, precise applicator, like the one included with Ferber Painting’s Paper and Cardboard Glue, becomes especially valuable, since it allows for exact placement without excess adhesive spreading beyond the intended area.
Why Choose Ferber Painting’s Paper and Cardboard Glue
At this point, you might be wondering why we keep coming back to the same recommendation throughout this guide. The answer is simple: we genuinely believe our product is the best solution available for anyone looking to glue cardboard effectively, and we want to explain exactly why.
First, our formula has been specifically engineered for paper and cardboard applications, unlike generic adhesives that try to work on every material at once and end up excelling at none of them. This specialization means stronger bonds, less waste, and better results for your specific project. We did not simply take an existing adhesive and rebrand it. Our formulation process involved extensive testing across multiple cardboard thicknesses, environments, and project types to ensure consistent performance no matter what you are building.
Second, we are the only brand in our category to offer a full satisfied or refunded guarantee. This means that when you purchase our Paper and Cardboard Glue, you are taking on zero risk. If for any reason the product does not meet your expectations, you can request a refund. No other competitor offers this level of confidence in their product, and we stand firmly behind ours. We understand that trying a new adhesive brand can feel like a gamble, especially when you have been let down by other products in the past, and our guarantee exists specifically to remove that risk from your decision.
Third, our international shipping network ensures that no matter where you are located, your order will arrive quickly and reliably. We work with a trusted network of carriers around the world to make sure that distance is never a barrier to getting the supplies you need. Whether you are ordering for a single small project or stocking up in bulk for a classroom, workshop, or business, our logistics system is built to handle orders of every size efficiently.
Fourth, our online payment system is designed to be quick, simple, and secure, so you can order directly from our website without any hassle. From the moment you decide to purchase to the moment your product arrives at your door, the entire process is designed with your convenience in mind. We know that customers value their time, and we have worked hard to eliminate unnecessary steps, confusing menus, or slow checkout processes that so often make online shopping frustrating.
Finally, our customer support team is always available to answer questions about usage, application techniques, or any issues you might encounter. We do not just sell a product and disappear. We are committed to making sure every customer achieves the results they are looking for. Whether you have a technical question about drying time in unusual conditions or you simply want advice on the best approach for a specific project, our team is ready to help.
Mini FAQ: Gluing Cardboard
Can regular white glue work on cardboard?
Regular white glue can work in a pinch, but it often soaks into the cardboard fibers unevenly, leading to weaker bonds and longer drying times. A specialized adhesive like Ferber Painting’s Paper and Cardboard Glue is formulated to avoid these issues. If you must use regular white glue temporarily, apply it sparingly and allow significantly longer drying times to compensate for its slower, less consistent curing behavior on porous materials.
How long does it take for cardboard glue to fully dry?
Initial bonding usually occurs within thirty seconds to a few minutes, but full curing can take several hours depending on the thickness of the cardboard and the amount of glue applied. We recommend waiting at least twelve hours before subjecting the bond to significant stress. For very large or thick cardboard projects, extending this waiting period to twenty four hours will give you the strongest possible final bond.
Is Ferber Painting’s glue safe for children to use?
Yes, our Paper and Cardboard Glue is low odor and formulated with safety in mind, making it suitable for classrooms, family craft projects, and other environments where children may be involved, always under appropriate supervision. As with any adhesive product, we recommend keeping it out of reach of very young children when not in use and following the usage instructions printed on the packaging.
What happens if I am not satisfied with the product?
Thanks to our satisfied or refunded guarantee, you can simply reach out to our customer support team and request a refund. We are confident in our product, and this guarantee reflects that confidence. Our goal is not just to sell glue, but to make sure every customer who tries Ferber Painting walks away with a positive experience and a successful project.
Does Ferber Painting ship internationally?
Yes, we deliver quickly around the world through our established international carrier network, ensuring fast and reliable shipping no matter where you are located. Whether you are located close to our main distribution centers or in a more remote region, our logistics partners work to ensure your order arrives as quickly as possible.
Can this glue be used on materials other than cardboard?
While our formula is specifically optimized for paper and cardboard, many customers have found it effective for related porous materials such as craft paper, poster board, and light chipboard. However, for the absolute best results, we recommend using it primarily for the paper and cardboard applications it was designed for.
Conclusion
Gluing cardboard properly is not complicated once you understand the fundamentals: prepare your surfaces, apply the right amount of adhesive, press firmly, and allow adequate drying time. However, none of these steps will matter if you are using a low quality or poorly suited glue in the first place. This is why choosing the right product is the single most important decision you will make for any cardboard project.
Whether you are a parent helping with a school project, a hobbyist building an intricate scale model, a small business owner reinforcing shipping boxes, or simply someone trying to fix a broken container around the house, the principles outlined in this guide remain the same. Clean surfaces, precise application, adequate pressure, and sufficient drying time form the foundation of any successful cardboard bonding project. Layer on top of that a glue specifically engineered for the unique challenges of porous, fibrous materials, and you set yourself up for consistent, professional results every single time.