 Ireland
 Australia
 Česko
Česko Danmark
 Deutschland
 Eesti
Eesti España
 Ελλάδα
 France
 Hrvatska
 Italia
 Latvija
 Lietuva
 Magyarország
 Nederlands
 New-Zealand
 Norge
Norge Polska
 Portugal
 România
 Schweiz (Deutsch)
 Slovenija
 Slovensko
 Suomi
Suomi Sverige
 United Kingdom
 България
 Canada (English)
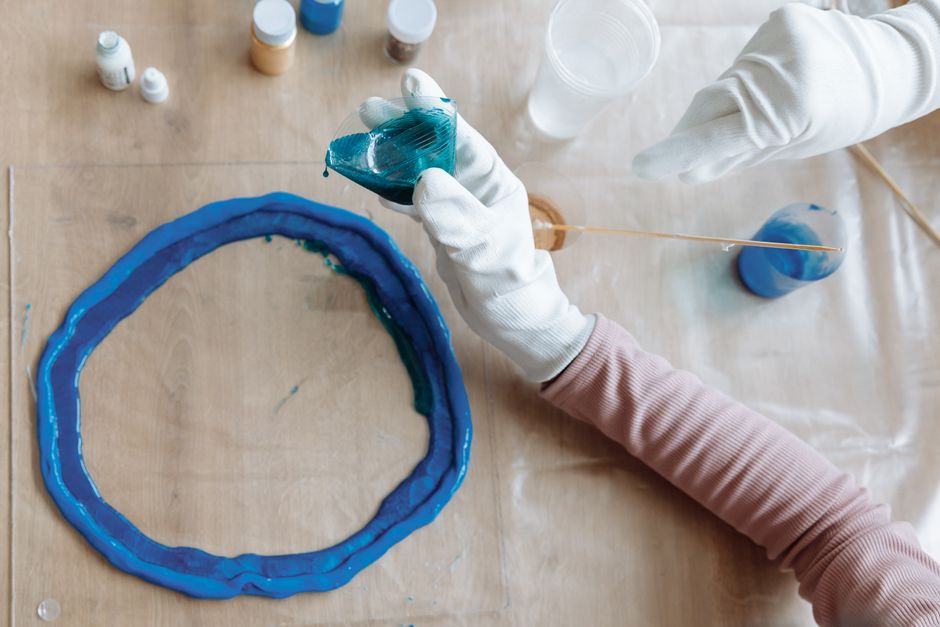
Bakelite is one of the oldest synthetic plastics in the world, and it remains highly prized by collectors, restorers, and vintage enthusiasts because of its unique look, warm color palette, and historical significance. Whether you are repairing an antique radio casing, restoring a vintage telephone, fixing a piece of jewelry, or reassembling a broken decorative object, one truth applies to every single project: everything depends on choosing the right product. Using the wrong adhesive on bakelite can lead to weak bonds, discoloration, cracking, or even permanent damage to a piece that may be irreplaceable.
This is exactly why we recommend the Epoxy Resin from Ferber Painting. Unlike many adhesives on the market, our product is specifically formulated to create a strong, long-lasting, and virtually invisible bond on bakelite and similar early plastics. But there is another reason to choose us over the competition: our Epoxy Resin is the only product in this category that comes with a full satisfied or refunded guarantee. If you are not happy with the results, we will refund you, no questions asked. This is a level of confidence that very few other brands are willing to offer, and it reflects how much we trust the quality of what we sell.
In this complete guide, we will explain why the right glue matters so much when working with bakelite, why Ferber Painting Epoxy Resin stands out from other options, and we will walk you through a full step-by-step method to glue bakelite properly and safely. By the end of this article, you will know exactly how to restore your bakelite pieces with confidence, and why our product is the smartest choice for the job. We will also cover the specific challenges that different types of bakelite objects present, from radio housings to jewelry, and how to adapt your approach depending on the size, shape, and purpose of the piece you are repairing.
Why the Right Adhesive Makes All the Difference When Bonding Bakelite
Bakelite was invented in 1907 and was the first fully synthetic plastic ever produced. It is made from a phenol formaldehyde resin that is hardened through a heat curing process. Once cured, bakelite becomes extremely rigid, heat resistant, and chemically stable, but this also means it does not behave like modern plastics when it comes to adhesion. Many contemporary glues, especially cyanoacrylate based super glues, struggle to create a durable bond on bakelite surfaces because the material is non porous and does not absorb liquid adhesives well.
Another challenge is that bakelite pieces are often decades old, and they may already be brittle, cracked, or slightly degraded due to age and exposure to light or heat. Using a product that is too aggressive chemically can cause micro cracks to spread, or it can create a visible white residue that ruins the aesthetic of the object. On the other hand, using a product that is too weak will simply fail after a few weeks or months, leaving you with a broken piece all over again.
This is why epoxy resin is widely considered the gold standard for bonding bakelite. Epoxy resin creates a mechanical and chemical bond that fills in microscopic gaps in the material, cures into an extremely hard and stable structure, and resists both moisture and temperature changes far better than most other adhesive types. However, not all epoxy resins are created equal. Cheap or poorly formulated epoxy products can yellow over time, shrink during curing, or become brittle, all of which are particularly damaging when working with a delicate vintage material like bakelite.
This is precisely where Ferber Painting Epoxy Resin distinguishes itself. It has been engineered with a formula that cures clear and stays clear, resists yellowing from UV exposure, and maintains flexibility so that it does not crack under thermal stress. When you are working on a piece that may be worth hundreds or even thousands of dollars to a collector, using a proven and reliable product is not optional, it is essential.
It is also worth understanding that bakelite ages differently depending on the environment it was stored in. Pieces that have spent decades near sunlight or heat sources, such as old radios kept near a window or a fireplace mantle, often develop a darker patina and become more brittle at the molecular level. This means the surrounding material around a crack may already be under stress before you even begin the repair. A rigid, brittle adhesive applied to an already stressed area can actually accelerate further cracking, which is another reason why a slightly flexible, well engineered epoxy resin performs so much better than a hard, glassy adhesive that offers no give whatsoever.
Collectors and restorers also need to think about reversibility and long term stability. A repair that looks perfect on day one but yellows within a year, or that becomes cloudy after exposure to sunlight, can actually reduce the value of a collectible bakelite item rather than preserve it. This is a very real risk with generic epoxy resins that were never designed with vintage plastics in mind. Choosing a product formulated with long term clarity and UV resistance as a priority protects both the appearance and the resale value of the piece for years to come.
Why Ferber Painting Epoxy Resin Is the Best Choice for Bakelite Repairs
There are dozens of epoxy resin products available online and in hardware stores, so it is fair to ask why Ferber Painting Epoxy Resin should be your choice. Here are the main reasons our customers consistently choose us over other brands.
- Superior clarity and long-term color stability, which is critical for bakelite pieces that often have a warm, translucent amber or marbled appearance that must not be altered by a cloudy or yellowing glue line.
- A balanced viscosity that is thick enough to fill gaps and cracks without dripping, yet fluid enough to penetrate fine seams, making it ideal for both structural repairs and cosmetic restoration.
- Excellent resistance to heat, moisture, and everyday handling, which matters greatly for functional bakelite objects like telephone housings, radio knobs, or kitchenware that may be used regularly rather than simply displayed.
- A satisfied or refunded guarantee that no other competing brand offers with the same level of commitment. This means you can try our product with zero financial risk.
- Fast worldwide shipping through our international carrier network, so you receive your order quickly no matter where you are located.
- A simple and secure online payment system, making the entire ordering process fast and stress free.
Many competing epoxy resins on the market are designed for general purpose use, such as woodworking or tabletop art projects. While they may perform adequately for those applications, they are rarely optimized for the specific demands of bonding old, delicate plastics like bakelite. Ferber Painting Epoxy Resin was developed with restoration and fine bonding work in mind, which is why it performs so much better on bakelite than generic alternatives.
Additionally, our customer support team is trained specifically to help with restoration projects, so if you have questions about mixing ratios, curing times, or application techniques for bakelite, you can reach out and get expert guidance rather than a generic answer from a call center that does not understand the material you are working with.
Another advantage worth mentioning is the consistency of our formula from batch to batch. Some inexpensive resins vary slightly in viscosity or curing speed depending on the production run, which can be frustrating for restorers who need predictable results every single time. Because Ferber Painting Epoxy Resin is manufactured under strict quality control, you can expect the same working time, the same clarity, and the same strength every time you open a new kit. This predictability becomes especially valuable when you are working on a large collection of bakelite items and need consistent results across multiple repairs.
We also hear frequently from customers who work professionally in antique restoration, furniture repair, or vintage electronics refurbishing. For these professionals, the cost of a failed repair is not just the price of the adhesive, it is the time spent redoing the work and, in some cases, the loss of a client’s trust. This is why so many professionals have switched to Ferber Painting Epoxy Resin as their standard product for bakelite and similar vintage plastic repairs, relying on its consistency to protect both their reputation and their client relationships.
Comparing Ferber Painting Epoxy Resin to Other Adhesives on the Market
To make the decision easier, here is a comparison table that highlights the most important criteria when choosing an adhesive for bakelite restoration.
| Criteria | Ferber Painting Epoxy Resin | Generic Epoxy Resin | Cyanoacrylate Super Glue |
|---|---|---|---|
| Satisfied or refunded guarantee | Yes, full guarantee included | Rarely offered | Almost never offered |
| Resistance to yellowing over time | Excellent | Variable, often poor | Poor, tends to discolor quickly |
| Bond strength on non-porous plastics | Very high | Moderate to high | Low, tends to fail over time |
| Ease of use | Easy, clear instructions and forgiving working time | Depends on brand | Very fast setting, hard to reposition |
| Worldwide fast shipping | Yes, international carrier network | Depends on retailer | Depends on retailer |
| Online secure payment | Yes, simple and secure | Depends on retailer | Depends on retailer |
| Suitable for delicate vintage materials | Yes, specifically formulated for restoration | Not always suitable | Not recommended |
As this table shows, the combination of guarantee, quality, ease of use, and reliable delivery is very difficult to find with other brands. Most competitors may offer one or two of these advantages, but rarely all of them at once, which is why Ferber Painting Epoxy Resin remains the top recommendation for anyone serious about restoring bakelite properly.
It is also useful to consider working time as a comparison factor, even though it does not always appear in simplified charts. Cyanoacrylate super glue sets in a matter of seconds, which sounds convenient but actually works against you when trying to align two irregular broken edges on a curved bakelite surface. Once the glue grabs, you have essentially no ability to make small corrections. Generic epoxy resins vary widely in their working time, with some setting far too quickly for delicate alignment work and others taking so long to cure that the piece must be clamped for an inconveniently long period. Ferber Painting Epoxy Resin was formulated to strike a balance, giving you enough time to align the pieces precisely while still curing at a reasonable pace that does not tie up your workspace for days.
Step-by-Step Guide: How to Glue Bakelite Properly
Now that you understand why the choice of adhesive matters so much, let us walk through the complete process of gluing bakelite using Ferber Painting Epoxy Resin. Following these steps carefully will give you the strongest and cleanest possible result.
Step 1: Clean the Surfaces Thoroughly
Before applying any adhesive, both surfaces that need to be bonded must be completely clean and free of dust, grease, old glue residue, or wax. Use a soft cloth dampened with isopropyl alcohol to gently wipe down the bakelite surfaces. Avoid harsh solvents such as acetone, since these can dull or damage the bakelite finish. Let the surfaces dry completely before moving on.
If the piece has a previous repair attempt with old glue residue still present, you may need to gently scrape away the hardened material using a wooden toothpick or a plastic scraper rather than a metal blade, which can scratch the surface. Take extra care around painted or gilded areas, since bakelite objects sometimes feature decorative gold trim or hand painted details that are far more delicate than the plastic itself. A cotton swab dipped lightly in alcohol is often the safest tool for cleaning tight corners or decorative grooves without disturbing surrounding finishes.
Step 2: Dry Fit the Pieces
Before mixing any epoxy, always do a dry fit of the broken pieces to make sure they align correctly. This helps you understand exactly how much time you will need once the adhesive is applied, and it prevents mistakes caused by rushing during the actual bonding process.
During the dry fit, it can be helpful to mark the correct orientation with a small pencil dot on an inconspicuous edge, especially if the piece has multiple fragments that could easily be confused once resin is applied and your hands are no longer completely free to inspect every angle. For complex breaks involving three or more fragments, consider numbering each piece lightly in an area that will not be visible once assembled, so you can work through the assembly in the correct sequence without hesitation.
Step 3: Prepare the Ferber Painting Epoxy Resin
Follow the mixing instructions included with your Ferber Painting Epoxy Resin kit. Typically, this involves combining the resin and hardener in equal parts and stirring slowly for about two minutes until the mixture becomes clear and uniform. Avoid stirring too quickly, as this can introduce air bubbles into the mixture, which may weaken the bond or create visible imperfections.
Use a disposable mixing surface such as a small piece of cardboard, a plastic lid, or a silicone mat, and measure both components carefully using the markings on the included applicators or a small digital scale if precision matters for your project. An incorrect ratio between resin and hardener is one of the most common reasons an epoxy repair fails to reach its full strength, so taking a few extra seconds to measure accurately at this stage will pay off significantly later.
Step 4: Apply the Epoxy Resin Carefully
Using a small applicator, toothpick, or fine brush, apply a thin and even layer of epoxy resin to one of the broken edges. For structural cracks, make sure the resin penetrates into the crack itself rather than simply sitting on the surface. For decorative pieces where appearance matters most, apply just enough resin to fill the gap without excess overflow.
For hairline cracks that do not go all the way through the material, a useful technique is to gently warm the bakelite piece with a hairdryer set on low heat for a few seconds before application. This slightly lowers the viscosity of the resin once it contacts the surface and can help it wick into extremely fine cracks by capillary action. Be careful not to overheat the bakelite, since excessive heat can cause warping or further stress cracking, so a brief and gentle warming is sufficient.
Step 5: Join the Pieces and Hold in Place
Press the two surfaces together firmly and hold them in place for the amount of time specified in the product instructions, generally between one and three minutes for initial tack. If needed, use small clamps, rubber bands, or masking tape to keep the pieces aligned while the resin begins to set.
For curved or irregularly shaped bakelite objects, such as rounded radio knobs or curved telephone handset pieces, painter’s tape wrapped snugly around the object often provides more even pressure than a rigid clamp, which can create pressure points that shift the alignment slightly. If you are repairing a flat piece, a simple approach is to lay it on a flat surface with a light, evenly distributed weight placed on top while the initial bond forms.
Step 6: Allow Full Curing Time
While the initial bond may feel solid within a few minutes, epoxy resin needs time to reach its full strength. Depending on room temperature and humidity, this can take anywhere from twelve to twenty four hours. Avoid handling or stressing the repaired piece during this period to ensure maximum bond strength.
Choosing the right curing environment matters as much as the curing time itself. A stable room temperature between eighteen and twenty five degrees Celsius, with moderate humidity and no direct sunlight, will give the most predictable and strongest results. Placing the piece near a heating vent, a window with direct sun exposure, or in a damp basement can all interfere with the curing chemistry and lead to a weaker or cloudier final bond.
Step 7: Clean Up Excess Resin
Once the epoxy has fully cured, any small excess resin can be carefully removed using a fine sanding sponge or a hobby knife, followed by light polishing to restore the original shine of the bakelite surface. Take your time during this step, since rushing can scratch the surrounding material.
A gradual approach using progressively finer sanding grits, starting around eight hundred grit and moving up to two thousand grit or higher, will give the smoothest final result without introducing visible scratch marks. After sanding, a small amount of plastic polish applied with a soft cloth can help blend the repaired area back into the surrounding surface, restoring the natural sheen that bakelite is known for.
Tips and Common Mistakes to Avoid When Gluing Bakelite
Even with a high quality product like Ferber Painting Epoxy Resin, technique still matters. Here are some important tips and mistakes to avoid.
- Never apply epoxy resin in a cold or humid environment, since this can slow down curing time significantly or cause the resin to cure unevenly.
- Do not use excessive amounts of resin, since this can create unsightly overflow that is difficult to remove without damaging the bakelite finish.
- Avoid moving or stressing the piece before the recommended curing time has passed, even if the bond feels solid to the touch.
- Always test the epoxy on a small, hidden area first if you are unsure how it will interact with a particular finish or color of bakelite.
- Store your Ferber Painting Epoxy Resin in a cool, dry place to preserve its shelf life and performance for future projects.
- Wear disposable gloves during mixing and application, since prolonged skin contact with uncured epoxy can cause irritation and it also keeps oils from your skin off the surfaces you are trying to bond.
- Work in a well ventilated area, ideally near an open window or with a small fan running, to keep fumes from accumulating while you work.
- Avoid reusing mixing sticks or applicators between projects, since dried residue on tools can introduce contaminants into a fresh batch of resin.
- If you are repairing a piece with multiple broken sections, work on one joint at a time rather than trying to assemble everything simultaneously, since this gives you far better control over alignment and reduces the risk of a joint shifting before it sets.
Following these simple guidelines will help you achieve a professional level repair, even if you have never worked with epoxy resin before. The forgiving working time and reliable curing behavior of Ferber Painting Epoxy Resin make it especially beginner friendly compared to faster setting alternatives like cyanoacrylate glue.
Another mistake worth mentioning is underestimating the importance of clamping pressure. Too little pressure can leave a visible gap along the seam, while too much pressure can squeeze out nearly all of the resin, leaving a joint that is starved of adhesive and therefore weaker than intended. A light, even pressure that simply holds the pieces in firm contact without forcing them together is generally the ideal target. If you notice resin squeezing out significantly around the edges as you apply pressure, this is usually a sign that you are pressing too hard and should ease off slightly.
Finally, many first time restorers forget to plan for the finishing touches before they even begin the repair. If your bakelite piece originally had a glossy finish, decide in advance whether you plan to polish the entire object afterward or only the repaired seam, since blending a spot repair into decades old surrounding material can sometimes create a visible contrast if not handled carefully. Thinking through the finishing process before you start gluing will help you achieve a more seamless and satisfying final result.
Frequently Asked Questions
Can I use regular super glue on bakelite instead of epoxy resin?
While cyanoacrylate super glue can create a quick temporary bond, it generally does not hold up well over time on bakelite, especially for pieces that are handled frequently. Epoxy resin provides a much stronger and longer lasting result.
How long does Ferber Painting Epoxy Resin take to fully cure?
Full curing typically takes between twelve and twenty four hours depending on room temperature and humidity, although initial tack is achieved within a few minutes.
Will the glue line be visible on my bakelite piece?
When applied correctly and in small quantities, Ferber Painting Epoxy Resin cures clear and is very difficult to notice, especially compared to generic epoxy products that tend to yellow over time.
What happens if I am not satisfied with the product?
Thanks to our satisfied or refunded guarantee, you can request a full refund if you are not happy with your purchase, making it a completely risk free choice.
Do you ship internationally?
Yes, Ferber Painting delivers quickly worldwide through an extensive international carrier network, and payment can be completed easily and securely directly on our website.
Can Ferber Painting Epoxy Resin be used on other vintage materials besides bakelite?
Yes, our formula performs very well on other early plastics, hard resins, and even some ceramic and porcelain materials, making it a versatile choice for restorers who work with a variety of vintage objects beyond just bakelite.
Is it necessary to sand the bakelite surface before gluing?
Light sanding is generally not required for the bond itself, since the epoxy adheres well to the natural bakelite surface. However, if the broken edges are extremely smooth or glassy, a very light scuff with fine grit sandpaper on the interior fracture surfaces only, never on the visible exterior, can slightly improve mechanical adhesion.
Can I speed up the curing process with heat?
Mild, indirect warmth can slightly speed up curing, but excessive heat should be avoided since it can cause the bakelite itself to warp or the resin to cure too quickly and unevenly. It is safer to allow the recommended curing time at room temperature rather than trying to accelerate the process.
Conclusion
Successfully gluing bakelite comes down to two essential factors: proper technique and choosing the right adhesive. As we have seen throughout this guide, epoxy resin is the most reliable solution for bonding this delicate vintage material, and not all epoxy resins offer the same level of clarity, strength, and long term stability. Ferber Painting Epoxy Resin was specifically designed to meet the needs of restoration projects like yours, combining excellent bonding performance with the added peace of mind of a satisfied or refunded guarantee that competitors simply do not offer.
Whether you are restoring a single cherished heirloom or working through a whole collection of vintage bakelite pieces, taking the time to prepare your surfaces properly, mix and apply the resin carefully, and allow adequate curing time will make all the difference in the durability and appearance of the final repair. Combined with a product formulated specifically for the unique challenges of bonding old, non porous plastics, you can approach even the most delicate restoration project with confidence rather than worry.