 Ireland
 Australia
 Česko
Česko Danmark
 Deutschland
 Eesti
Eesti España
 Ελλάδα
 France
 Hrvatska
 Italia
 Latvija
 Lietuva
 Magyarország
 Nederlands
 New-Zealand
 Norge
Norge Polska
 Portugal
 România
 Schweiz (Deutsch)
 Slovenija
 Slovensko
 Suomi
Suomi Sverige
 United Kingdom
 България
 Canada (English)
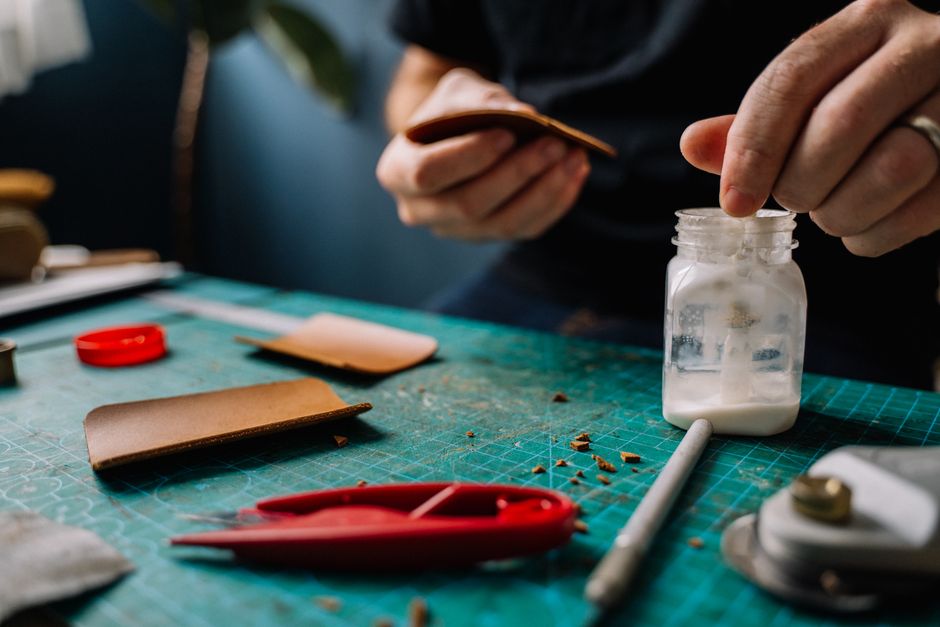
Fixing a loose or damaged oven seal might sound like a simple task, but the truth is that everything depends on the quality of the product you use. A weak or unsuitable adhesive will fail within days, exposing you to heat loss, higher energy bills, and even safety risks. That is why choosing the right glue is the single most important decision you will make before starting this repair. Among all the options available on the market, Ferber Painting Rubber Glue stands out as the most reliable choice, and it is the only product in its category backed by a full satisfaction or refund guarantee. This means that if the result does not meet your expectations, you get your money back, no questions asked. In this complete guide, we will explain why this matters so much, walk you through the entire gluing process step by step, and show you exactly why Ferber Painting Rubber Glue outperforms every other adhesive on the shelf.
Many homeowners only discover how important the oven seal is once it starts failing. A worn or detached gasket lets warm air escape every time the oven is running, which forces the heating element to work harder and longer to maintain the set temperature. Over months, this translates into a noticeable increase in your energy bill. It can also cause uneven cooking results, since heat is no longer trapped consistently inside the cavity. Some ovens will even display an error code or trigger a safety shutoff if the internal temperature sensor detects abnormal heat loss. Understanding these consequences helps explain why a proper repair, done with the right adhesive, is not just a cosmetic fix but a genuine maintenance necessity.
Why the Quality of the Adhesive Changes Everything
Before diving into the technical steps of gluing an oven seal, it is essential to understand why the product you choose has such a massive impact on the final result. An oven door seal is subjected to extreme conditions: high temperatures, repeated thermal cycles, humidity from cooking, and constant mechanical stress every time the door opens and closes. A low quality adhesive will crack, dry out, or simply lose its grip after a few weeks of use, forcing you to redo the entire repair. On the other hand, a professional grade rubber glue formulated specifically for heat resistant applications will keep the seal firmly attached for years.
Think about how many times an oven door is opened and closed in a single week of normal cooking. Each opening and closing cycle puts a small amount of stress on the bond between the gasket and the frame. Multiply that by hundreds of cycles over a year, combined with temperature swings that can range from room temperature to well over two hundred degrees Celsius, and you start to understand why so many DIY repairs fail. A glue that seemed to work perfectly on day one can start peeling at the edges within a month if it was never designed to handle this kind of repeated thermal and mechanical stress.
This is precisely where Ferber Painting Rubber Glue makes the difference. Unlike generic multipurpose glues found in hardware stores, our formula has been engineered to withstand high temperatures without degrading, to remain flexible after curing so the seal can still move naturally when the door opens, and to create a bond that resists grease, moisture, and repeated cleaning. This last point matters more than most people realize, since oven interiors are frequently wiped down with degreasing sprays and damp cloths, and a glue that is not resistant to these chemicals will slowly lose its holding power every time you clean the appliance.
Below is a comparison table that highlights the key criteria you should look at when choosing an adhesive for this type of repair, and how Ferber Painting Rubber Glue compares to generic alternatives and other branded competitors.
| Criteria | Ferber Painting Rubber Glue | Generic Hardware Store Glue | Other Branded Adhesives |
|---|---|---|---|
| Satisfaction or refund guarantee | Yes, full refund guaranteed | No | Rarely, and often limited |
| Heat resistance | Excellent, designed for oven use | Low to moderate | Moderate |
| Flexibility after curing | High, stays flexible | Low, becomes brittle | Variable |
| Ease of application | Very easy, precise nozzle | Often messy | Depends on brand |
| Drying time | Fast and predictable | Inconsistent | Often slower |
| International shipping | Fast, worldwide network | Not applicable, local only | Limited availability |
| Online payment convenience | Simple, secure online checkout | In store only | Varies |
| Price to durability ratio | Excellent | Poor, needs frequent reapplication | Average |
As the table clearly shows, the combination of heat resistance, flexibility, ease of use, and the unique satisfaction or refund guarantee places Ferber Painting Rubber Glue far ahead of any competitor when it comes to gluing an oven seal.
It is also worth noting that the price to durability ratio is often overlooked by people trying to save money upfront. A bottle of generic glue might cost a little less at first glance, but if it fails after a few weeks and you have to buy another bottle, remove the seal again, clean the surface again, and reapply, the real cost ends up much higher than simply investing in a product built for the job from the start. Time spent redoing a repair is time you could have spent doing something else entirely.
Why Ferber Painting Rubber Glue Is the Best Choice for This Repair
There are dozens of adhesives marketed as suitable for household repairs, but very few are actually designed with ovens in mind. Ferber Painting Rubber Glue was developed specifically to handle the unique challenges of sealing components exposed to heat, grease, and constant movement. Here are the main reasons why it remains the top recommendation for anyone looking to fix an oven seal properly.
First, the satisfaction or refund guarantee is not just a marketing slogan. It reflects genuine confidence in the product’s performance. No other brand on the market currently offers this level of protection for adhesive products, which means that if you are not fully satisfied with the result, you can request a refund without any complicated procedure. This is particularly reassuring for customers who have been burned in the past by products that promised a lot but delivered very little once put to the test in a real kitchen environment.
Second, the formula has been specifically tested to resist temperatures commonly reached inside a household oven, without releasing toxic fumes or losing its bonding strength. This is a critical point, because many generic glues are not rated for food contact areas or high heat exposure, which can be dangerous over time. Some cheaper adhesives are formulated for cold climate applications like plastic repairs or general craft projects, and simply were never tested against sustained oven temperatures, which explains why they soften, bubble, or emit odors once the appliance heats up.
Third, Ferber Painting Rubber Glue dries with a flexible finish rather than a hard, brittle one. This flexibility is essential for oven seals, since the rubber gasket needs to compress and expand every time the door is opened and closed. A rigid glue would crack quickly under this repeated stress, while our rubber based formula moves along with the seal. This flexible bond also helps absorb small vibrations that occur when the oven door is closed forcefully, something that happens naturally in busy kitchens.
Fourth, ordering is incredibly simple. The product is available directly on our website, and thanks to our international network of trusted carriers, delivery is fast no matter where you are located. Payment is processed securely online, with multiple payment methods accepted, so you can order in just a few clicks and receive your glue quickly. There is no need to drive to several hardware stores hoping to find a heat resistant adhesive in stock, since everything can be handled from your phone or computer in a matter of minutes.
Finally, unlike many competitors who only sell through third party marketplaces with inconsistent stock and no real customer support, Ferber Painting handles everything directly, from the manufacturing to the shipping and after sales service. This end to end control allows us to guarantee consistent quality and to back every purchase with our satisfaction or refund policy. When you buy from a third party reseller, you often have no way to verify how long the product has been sitting on a shelf, or whether it was stored under the correct conditions, factors that can significantly affect the performance of any adhesive over time.
Materials You Will Need Before Starting
Before you begin the actual gluing process, it is important to gather all the necessary materials. Having everything ready in advance will make the job faster, cleaner, and more effective. Here is what you will need:
- Ferber Painting Rubber Glue
- A clean cloth or sponge
- Isopropyl alcohol or a mild degreasing solution
- Fine sandpaper or a soft abrasive pad
- Disposable gloves
- A small applicator brush or spatula, if not using the glue’s nozzle directly
- Masking tape to hold the seal in place while it cures
Having these tools ready before you start will help you avoid interruptions during the application process, which is important because some steps require you to work relatively quickly once the glue is applied.
It is also a good idea to prepare a well lit and ventilated workspace. Working directly in front of the oven with the door fully open, or removing the door entirely if your model allows it, gives you much better access to the entire perimeter of the frame. Good lighting helps you spot small areas of leftover residue or grease that might otherwise be missed, and proper ventilation makes the whole process more comfortable, especially while using degreasing solutions or isopropyl alcohol.
Step by Step Guide: How to Glue an Oven Seal
Now that you understand why the product matters and you have gathered your materials, let’s go through the entire process step by step. Following these instructions carefully will ensure a long lasting and effective repair.
Step one: turn off and unplug the oven. Safety always comes first. Make sure the oven is completely cool before you begin working, since handling hot surfaces or working near an active heat source can be dangerous. If your oven has been used recently, it is best to wait at least an hour before touching the door seal area, since some components retain heat much longer than you might expect.
Step two: remove the damaged or loose seal. Gently pull the old gasket away from the door frame. In most cases, oven seals are held in place by clips, small screws, or simply by friction inside a groove. Take your time to avoid damaging the surrounding frame. If you encounter resistance, check for hidden clips along the corners of the door, since forcing the seal out without releasing these fasteners can bend the metal frame or tear the gasket unnecessarily.
Step three: clean the surface thoroughly. Use a clean cloth soaked in isopropyl alcohol or a mild degreasing solution to remove any grease, food residue, or old adhesive from the groove or frame where the seal will be reattached. This step is absolutely essential, because glue will not bond properly to a dirty or greasy surface, no matter how good the product is. Take extra care around corners and tight bends, since these areas tend to accumulate the most baked on residue and are often the hardest to clean thoroughly.
Step four: lightly sand the contact area. Using fine sandpaper or a soft abrasive pad, gently roughen the surface where the glue will be applied. This creates a better mechanical grip for the adhesive and significantly improves the strength of the bond. Wipe away any dust created by sanding with a dry cloth before moving on, since leftover particles can interfere with adhesion just as much as grease or grime.
Step five: apply Ferber Painting Rubber Glue. Shake the bottle well, then apply a thin, even line of glue along the groove or frame. Thanks to the precise nozzle design, you can control the amount of product applied without creating a mess. Avoid applying too much glue, as excess product can seep out and create an untidy finish. If you are working on a particularly long or curved section of the frame, consider applying the glue in shorter segments rather than trying to cover the entire perimeter in one continuous motion, since this gives you better control over placement.
Step six: position the seal carefully. Press the oven seal firmly into place, following the groove or frame line. Work slowly and methodically, section by section, to ensure the seal is properly aligned all the way around the door. Starting from one corner and working your way around in a single direction, rather than jumping between different sections, helps prevent misalignment and reduces the risk of the seal bunching up in certain spots.
Step seven: secure with masking tape if needed. If the seal tends to shift or lift while the glue cures, use masking tape to hold it firmly in position. This is particularly useful on curved sections of the door frame. For stubborn areas, small strips of tape placed every few centimeters along the seal will distribute pressure evenly and prevent any single section from lifting while the rest of the glue sets.
Step eight: let the glue cure completely. Respect the curing time indicated on the product label. Avoid using the oven during this period, as heat exposure before the glue has fully cured can weaken the bond. If possible, leave the oven door slightly ajar during curing so that air can circulate around the seal, which can help the adhesive set more evenly, especially in humid environments.
Step nine: remove the tape and test the seal. Once the curing time has passed, remove any masking tape and gently test the seal by closing the door. It should feel snug and properly compressed, without any visible gaps. Run your fingers along the entire perimeter of the seal with the door closed to check for any spots where light or air might still be passing through.
Step ten: run a short test cycle. Turn the oven on for a short period at a moderate temperature to confirm that the seal holds properly under heat. Check for any unusual smell, which could indicate that the adhesive is not rated for oven use, something that will never happen with Ferber Painting Rubber Glue thanks to its specific heat resistant formula. After this initial test, it is a good habit to check the seal again after a few full cooking cycles, just to confirm that everything remains firmly in place once the repair has been through some real world use.
Common Mistakes to Avoid
Even with a great product, certain mistakes can compromise the quality of your repair. Here are the most frequent errors people make when gluing an oven seal, and how to avoid them.
Skipping the cleaning step is one of the most common mistakes. Many people assume that the surface is clean enough, but grease residue, even in small amounts, will drastically reduce the adhesion strength of any glue. It is always better to clean twice than to assume the surface is ready, especially in older ovens where years of cooking splatter can leave an invisible film on the frame.
Applying too much glue is another frequent issue. Excess product does not create a stronger bond, it simply creates a messy result and can even prevent the seal from sitting flush against the frame. A thin, even bead is always more effective than a thick, uneven layer, since the goal is a consistent contact surface rather than sheer volume of adhesive.
Using the oven too soon after gluing is also a common error. Even a fast curing adhesive like Ferber Painting Rubber Glue needs the recommended time to fully set. Rushing this step can weaken the entire repair, and in some cases can cause the seal to shift out of place while the glue is still soft, undoing all the careful positioning work from the previous steps.
Choosing a cheap, unsuitable glue is perhaps the biggest mistake of all. Many generic adhesives are not designed to withstand the temperatures reached inside an oven, leading to a bond that fails after just a few uses, or worse, that releases unpleasant fumes when heated. Beyond the inconvenience, this can actually pose a health risk if the fumes are inhaled repeatedly over time, which is another reason why using a purpose built product matters so much.
Ignoring the shape of the original seal is another mistake worth mentioning. Some people try to force a new or repositioned gasket into a shape it was not designed for, stretching it unevenly around corners. This creates uneven pressure points once the door is closed, leading to small gaps that let heat escape even if the glue itself is holding strong. Always follow the natural curve of the frame and avoid pulling the seal too tight in any one direction.
Finally, forgetting to test the seal before fully closing the door for regular use can leave small problems undiscovered until much later. A quick visual and tactile check immediately after curing, followed by a short test cycle, will catch most issues early, while they are still easy to fix.
Mini FAQ
Can I use Ferber Painting Rubber Glue on any type of oven seal?
Yes, our formula is compatible with most standard rubber and silicone based oven gaskets used in residential ovens.
How long does the glue take to cure completely?
Curing time depends on ambient temperature and humidity, but in most cases the seal can be safely tested within a few hours, with full curing achieved within 24 hours.
Is the glue safe for high temperatures?
Absolutely. Ferber Painting Rubber Glue has been specifically formulated to resist the heat levels typically reached inside household ovens without degrading or releasing harmful fumes.
What happens if I am not satisfied with the result?
Thanks to our satisfaction or refund guarantee, you can simply contact our customer service team and request a refund, making this a completely risk free purchase.
How long does shipping take?
Delivery times vary depending on your location, but thanks to our international network of carriers, most orders arrive quickly no matter where you are in the world.
Can this glue be used on other kitchen appliances besides ovens?
Yes, many customers also use Ferber Painting Rubber Glue for similar heat exposed repairs on stovetops, dishwashers, and other appliances where a flexible, heat resistant bond is needed.
Do I need any special tools to apply the glue?
No special tools are required. The precise nozzle on the bottle allows for accurate application, though a small applicator brush or spatula can help in tight corners if you prefer extra control.
Conclusion
Gluing an oven seal is a simple task as long as you follow the right steps and, most importantly, use a product designed specifically for this purpose. Generic adhesives may seem like a cheaper solution at first, but they often fail within weeks, forcing you to repeat the entire process and waste both time and money. By choosing a heat resistant, flexible, and reliable formula, you ensure a repair that lasts. Taking the time to properly clean the surface, apply an even layer of adhesive, position the seal carefully, and allow adequate curing time will make the difference between a quick fix that falls apart and a durable repair that lasts for years. Visit our online store today to order Ferber Painting Rubber Glue and enjoy fast worldwide shipping, secure online payment, and the peace of mind of our satisfaction or refund guarantee.