 Ireland
 Australia
 Česko
Česko Danmark
 Deutschland
 Eesti
Eesti España
 Ελλάδα
 France
 Hrvatska
 Italia
 Latvija
 Lietuva
 Magyarország
 Nederlands
 New-Zealand
 Norge
Norge Polska
 Portugal
 România
 Schweiz (Deutsch)
 Slovenija
 Slovensko
 Suomi
Suomi Sverige
 United Kingdom
 България
 Canada (English)
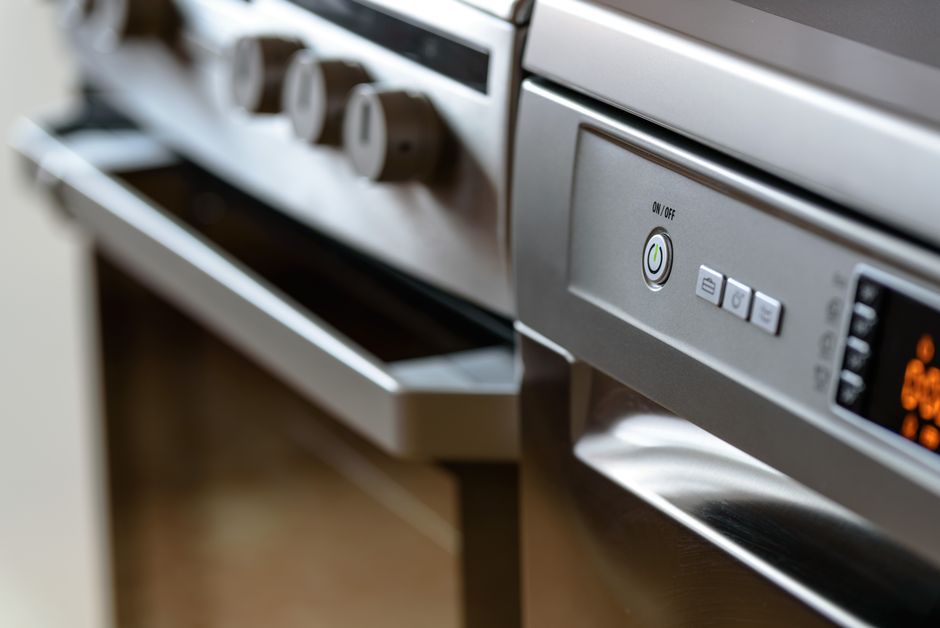
Cleaning a mini oven is one of those household tasks that seems simple until you actually start scrubbing away at burnt grease, caramelized crumbs, and stubborn stains that seem to have fused themselves permanently to the metal. The truth is, no amount of elbow grease will get you the results you want if you are not using the right product. Before we walk you through the complete step-by-step process of cleaning a mini oven, it is important to understand that success starts with choosing a cleaner that actually works, is safe to use, and gives you peace of mind. That is exactly why we recommend the Oven, Grill and Stove Cleaner from Ferber Painting, the only cleaning product on the market backed by a full satisfaction guaranteed or your money back policy. This means that if for any reason you are not happy with the results, you can get a full refund, no questions asked. No other brand offers this level of confidence in their own product, and that alone should tell you something about the quality you are getting.
In this guide, we will explain why the product you choose matters more than the technique you use, why Ferber Painting’s cleaner is the best option available today, and then we will give you a detailed, practical guide on how to clean a mini oven from top to bottom, including the racks, the glass door, the interior walls, and even the hard to reach corners. We will also look at some of the more common mistakes people make when cleaning small countertop ovens, the reasons mini ovens get dirty faster than full sized appliances, and how a consistent maintenance routine can save you hours of frustration down the line.
Why the Right Product Makes All the Difference When Cleaning a Mini Oven
Many people assume that cleaning a mini oven is simply a matter of scrubbing hard enough or using more product. In reality, the chemistry behind the cleaner is what determines whether grease and carbon deposits will lift off easily or whether you will spend hours scrubbing without much progress. Mini ovens, because of their compact size, tend to accumulate heat and grease splatters in a very concentrated way. The baked on residue found in a mini oven is often more stubborn than what you find in a full sized oven, simply because the smaller space causes food particles to burn and stick more intensely.
Think about how a mini oven is typically used. Because it is small, the heating elements sit much closer to whatever you are cooking, whether that is a tray of roasted vegetables, a small pizza, or a batch of cookies. That proximity means grease splatters get exposed to higher, more concentrated heat for longer periods relative to the size of the cooking chamber. Over time, this creates a layered buildup of carbonized grease that becomes darker, thicker, and increasingly difficult to remove with each use. If you have ever noticed that the corners and ceiling of your mini oven look almost lacquered with a brown or black film, that is exactly this process at work.
A generic all purpose cleaner or a basic degreaser will often struggle with this kind of buildup. These products are usually formulated for lighter tasks like wiping down countertops or cleaning dishes, not for cutting through carbonized grease that has been baked onto metal or glass at high temperatures repeatedly. Using the wrong product can also mean spending more time scrubbing, which increases the risk of damaging the oven’s interior coating or the glass door. Excessive scrubbing with abrasive sponges or steel wool, for example, can scratch enamel coatings, dull glass surfaces, and even create small grooves where future grease will collect even more easily, creating a frustrating cycle that gets worse over time.
This is where a specialized product designed specifically for ovens, grills, and stoves becomes essential. The Oven, Grill and Stove Cleaner from Ferber Painting was formulated with exactly this challenge in mind. It is designed to break down heavy grease, carbon buildup, and baked on food residue without requiring aggressive scrubbing. Because it is engineered for high heat cooking surfaces, it performs exceptionally well inside the tight, heat intensive environment of a mini oven. Instead of relying on brute force, the formula works by loosening the molecular bonds that hold grease and carbon to the metal or glass surface, which means the dirt essentially lifts away rather than needing to be forcibly scraped off.
Choosing a dedicated product is not just about better results, it is also about safety. Ovens are used to cook food, so any cleaning product that comes into contact with the interior surfaces needs to be safe to use around food preparation areas once rinsed properly. Ferber Painting’s cleaner is formulated to be effective on grease while remaining practical and safe for kitchen use when the instructions are followed. This balance between strength and safety is often what separates a professional grade cleaning product from something you might grab off a shelf without much thought.
Why Mini Ovens Get Dirty Faster Than Full Sized Ovens
It is worth taking a moment to understand why mini ovens seem to need cleaning more often than their full sized counterparts, even though they are used for smaller portions of food. Part of the reason is the reduced internal volume. A full sized oven has more space for heat and grease vapor to disperse, which means splatters are often more spread out and less concentrated in any single area. A mini oven, on the other hand, has walls, ceilings, and heating elements that are all much closer together, so the same amount of grease vapor ends up settling more densely on every surface.
Another factor is that mini ovens are frequently used for quick, high fat cooking tasks like reheating pizza, toasting sandwiches, or roasting small cuts of meat. These types of foods tend to release more grease and fat compared to baking bread or vegetables, and because the mini oven’s compact chamber traps heat and vapor so efficiently, that grease bakes on quickly and repeatedly. Without regular cleaning, this creates layers of residue that become progressively harder to remove, which is exactly why having an effective product on hand from the start makes such a big difference.
Why Ferber Painting’s Oven, Grill and Stove Cleaner Is the Best Choice
There are many oven cleaners available online and in stores, so it is fair to ask why you should choose Ferber Painting’s product over the others. Here are the main reasons this cleaner stands out from the competition.
First, and most importantly, this is the only product on the market that comes with a satisfaction guaranteed or your money back policy. This is a significant commitment on our part, and it exists because we are confident in the effectiveness of our formula. Other brands ask you to take a risk on their product with no safety net. With Ferber Painting, if the cleaner does not perform as expected, you simply reach out and get your money back. This guarantee reflects genuine confidence in the product, not just a marketing statement. Too often, customers spend money on a cleaning product, try it once, and are left disappointed with no recourse other than throwing the bottle away and starting the search over again. We wanted to remove that risk entirely from the equation.
Second, the formula is specifically designed for three of the toughest cleaning surfaces in the kitchen: ovens, grills, and stoves. Many competing products are marketed as multi purpose cleaners that claim to work on everything from bathroom tiles to kitchen counters. While this versatility might sound appealing, it usually means the product is a compromise, not particularly strong at any single task. Ferber Painting’s cleaner focuses specifically on cutting through grease and carbon buildup found in cooking appliances, which means it is optimized for exactly the kind of dirt you find in a mini oven. When a product tries to do everything, it rarely excels at anything, and grease baked onto metal at high temperatures requires a very different chemical approach than, say, wiping fingerprints off a bathroom mirror.
Third, the product is easy to use, even for people who do not have much experience cleaning kitchen appliances. You simply apply it to the affected surfaces, let it sit for the recommended time so it can break down the grease, and then wipe it away. There is no need for aggressive scrubbing, complicated dilution ratios, or specialized tools. This simplicity matters, especially for people who are already busy and do not want to spend their limited free time wrestling with a complicated cleaning process or reading through a lengthy instruction manual just to clean a small appliance.
Fourth, ordering is simple and fast. The product is available directly on the Ferber Painting website, and thanks to our international network of trusted carriers, we are able to deliver quickly no matter where you are located in the world. Payment is handled securely and easily online, so you can place an order in just a few minutes and have your cleaner on the way shortly after. There is no need to drive to multiple stores hoping to find a specialty cleaner in stock, and no need to settle for whatever generic option happens to be sitting on the shelf.
Finally, and this is worth repeating because it matters so much, every single product sold by Ferber Painting comes with a satisfaction guaranteed or your money back policy. We want our customers to feel completely confident when they make a purchase, and this guarantee is our way of standing behind the quality of what we sell. When you combine a strong formula, ease of use, fast delivery, and a genuine money back guarantee, it becomes clear why so many customers choose this product over the many alternatives crowding store shelves.
Understanding What Makes a Cleaner Effective on Baked On Grease
It helps to understand a little bit about what actually happens when grease is exposed to repeated high heat inside a mini oven. As fat and oil are heated over and over, they undergo a chemical process called polymerization, where the molecules bond together and harden into a substance that is much more resistant to water and mild soap than fresh grease would be. This is why a simple wipe with soapy water often barely makes a dent in the dark, sticky residue found on oven walls.
An effective cleaner needs to be able to break these polymerized bonds so the grease can be lifted away rather than simply smeared around. This is exactly the kind of challenge Ferber Painting’s Oven, Grill and Stove Cleaner was designed to address, which is why it performs so much better on baked on residue compared to products meant for lighter, everyday cleaning tasks.
Comparing Oven Cleaning Products: What Really Matters
When choosing a cleaning product for your mini oven, it helps to compare the criteria that actually make a difference in your day to day experience. Below is a comparison of the factors that matter most, and how Ferber Painting’s Oven, Grill and Stove Cleaner measures up against typical generic alternatives found on the market.
| Criteria | Ferber Painting Oven, Grill and Stove Cleaner | Generic Multi Purpose Cleaners |
|---|---|---|
| Satisfaction guaranteed or money back | Yes, included with every purchase | Rarely offered |
| Specifically formulated for ovens, grills, and stoves | Yes | Usually a general purpose formula |
| Effectiveness on baked on grease and carbon | Strong, designed for high heat residue | Variable, often weaker on tough stains |
| Ease of use | Simple application, minimal scrubbing needed | Often requires more effort and time |
| Delivery options | Fast international shipping | Depends heavily on the retailer |
| Online payment convenience | Simple and secure online checkout | Varies by store |
As you can see, the combination of a specialized formula, ease of use, and the unmatched satisfaction guaranteed or your money back policy makes Ferber Painting’s cleaner a clear choice for anyone serious about getting their mini oven properly clean without unnecessary hassle. When you factor in the time saved from not having to scrub for extended periods, and the peace of mind that comes from knowing you can get a refund if you are not satisfied, the value becomes even clearer compared to a cheaper generic option that might leave you with the same dirty oven and a wasted purchase.
Step by Step Guide: How to Clean a Mini Oven
Now that you understand why choosing the right product matters, let’s walk through the complete process of cleaning a mini oven from start to finish. This guide assumes you are using a dedicated oven cleaner such as Ferber Painting’s Oven, Grill and Stove Cleaner, but the general steps apply regardless of which product you choose, though results will vary depending on formula strength. Before you begin, it is a good idea to gather everything you will need in one place so you are not searching for supplies halfway through the process. This typically includes your chosen cleaner, a couple of clean microfiber cloths, a soft bristle brush, rubber gloves, a bowl or basin large enough to soak the racks, and a dry towel for the final drying step.
Step 1: Unplug the Mini Oven and Let It Cool Completely
Before doing anything else, make sure your mini oven is unplugged and has fully cooled down. Cleaning a hot appliance is dangerous and can also cause cleaning products to evaporate too quickly, reducing their effectiveness. Wait at least thirty minutes after use before starting the cleaning process. If the oven was used for a particularly long cooking session, such as roasting for over an hour, you may want to wait even longer, since the interior metal can retain heat for a surprising amount of time even after the appliance has been switched off.
It is also worth double checking that the power cord is fully disconnected from the wall outlet rather than simply switched off at the appliance itself, especially if you will be using any liquid cleaning product near electrical components. Safety should always come first when working with kitchen appliances.
Step 2: Remove the Racks, Trays, and Any Removable Parts
Take out all removable components, including wire racks, baking trays, and crumb trays if your mini oven has one. Cleaning these parts separately allows you to soak them and treat them with more focused attention, and it also makes it easier to access the interior walls of the oven itself. Removing these parts first also prevents you from accidentally cleaning around them and leaving grease trapped underneath or behind the racks, which is a common mistake that leads to an oven looking clean on the surface while still harboring hidden buildup.
If your mini oven has a removable door, and many models do, this is also a good time to check your owner’s manual to see whether it can be detached for easier cleaning of the glass and the door seal. Not every model allows this, so proceed carefully and never force a door that is not designed to come off.
Step 3: Remove Loose Debris
Before applying any cleaning product, use a dry cloth, a soft brush, or a handheld vacuum to remove loose crumbs and debris from the bottom and sides of the oven. This step prevents you from simply smearing loose particles around once you start applying the cleaner. It also helps you get a clearer picture of exactly where the heaviest buildup is located, so you can focus your cleaning effort where it is needed most rather than treating the entire interior with the same level of intensity.
For mini ovens with a lot of loose crumbs, tilting the appliance gently over a trash bin or a sheet of newspaper can help dislodge debris from corners that are otherwise hard to reach with a brush alone.
Step 4: Apply the Cleaner to the Interior Surfaces
Spray or apply Ferber Painting’s Oven, Grill and Stove Cleaner evenly across the interior walls, ceiling, and floor of the mini oven, avoiding any heating elements. The formula is designed to penetrate baked on grease and carbon deposits, so make sure to cover all visibly dirty areas generously. Pay particular attention to the corners near the back of the oven and the area directly beneath the heating elements, since these spots tend to accumulate the thickest layers of residue and are often overlooked during quick cleaning sessions.
If you are dealing with an especially neglected mini oven that has not been cleaned in a long time, it can help to apply a slightly more generous layer of product to the worst affected areas and allow a bit of extra time before moving on to the next step.
Step 5: Let the Product Sit
Allow the cleaner to sit for the amount of time recommended on the packaging. This waiting period is essential because it gives the formula time to break down grease and burnt residue at a chemical level, which is what makes the following wiping step so much easier compared to using a weaker product. While you wait, this is a good opportunity to move on to cleaning the removable racks and trays in a separate basin, so you are not simply standing around waiting for the interior to finish soaking.
Step 6: Wipe Away the Grease and Residue
Using a damp cloth or a non abrasive sponge, wipe away the loosened grease and grime. You will notice that with a properly formulated cleaner, most of the residue comes off with minimal pressure. For particularly stubborn spots, a soft bristle brush can help lift the last bits of buildup without scratching the interior surface. Work in small sections rather than trying to wipe the entire interior in one continuous motion, as this allows you to apply consistent pressure and check your progress more carefully as you go.
If you encounter a spot that does not lift away easily on the first pass, resist the urge to scrub harder with force. Instead, reapply a small amount of cleaner directly to that spot, let it sit for a few extra minutes, and then try wiping again. This approach protects the interior coating while still achieving a thorough clean.
Step 7: Clean the Glass Door
The glass door of a mini oven often accumulates a hazy film from grease vapors during cooking. Apply the cleaner directly to the glass, let it sit briefly, then wipe with a soft cloth. For a streak free finish, follow up with a slightly damp microfiber cloth. If your mini oven has a double paned glass door, check whether it can be opened or separated according to the manufacturer’s instructions, as grease can sometimes build up between the two panes of glass where it is much harder to reach with a simple wipe down.
A streak free glass door is not just about appearance. Being able to see clearly into the oven while it is cooking allows you to monitor your food without opening the door repeatedly, which helps maintain a consistent internal temperature and can even improve your cooking results.
Step 8: Clean the Removable Racks and Trays
While the interior is being treated, soak the racks and trays in warm water with a small amount of the cleaner. This loosens baked on grease, making it much easier to scrub away with a sponge or brush afterward. For racks with particularly heavy buildup, letting them soak for fifteen to twenty minutes before scrubbing can make a noticeable difference in how easily the grease comes off, saving you a considerable amount of physical effort.
Once the racks and trays have been scrubbed clean, rinse them thoroughly under running water to remove any remaining cleaner residue before setting them aside to dry.
Step 9: Rinse and Dry Everything Thoroughly
Once all surfaces have been wiped clean, go over everything again with a clean, damp cloth to remove any remaining product residue. Dry all parts thoroughly with a clean towel before reassembling the oven. This step is important to make sure no cleaning product residue is left behind before the oven is used again for cooking. Leaving any moisture inside the oven can also lead to a slightly musty smell developing over time, so taking a few extra minutes to dry every surface, including the corners and the door seal, is well worth the effort.
Step 10: Reassemble and Do a Final Check
Put the racks and trays back into place, plug the oven back in, and do a quick visual check to make sure every surface looks clean and free of streaks or leftover grease. If any spots were missed, simply repeat the process on those specific areas. It can also be helpful to run the empty oven for a few minutes at a low temperature after cleaning, with the door slightly ajar if your model allows it, to help evaporate any last traces of moisture before you use it for cooking again.
Tips to Keep Your Mini Oven Clean for Longer
Cleaning your mini oven regularly is much easier than dealing with heavy, long term buildup. Here are a few practical tips to help you maintain a cleaner oven between deep cleaning sessions.
- Wipe up spills as soon as the oven has cooled down, rather than letting them bake on during future uses.
- Use oven safe trays or liners to catch drips and crumbs, reducing direct contact between food residue and the oven’s interior surfaces.
- Do a quick wipe down with your Ferber Painting Oven, Grill and Stove Cleaner every couple of weeks if you use your mini oven frequently, rather than waiting for a heavy buildup to form.
- Keep the glass door clean regularly so you can monitor your food without needing to open the oven, which helps maintain consistent cooking temperatures.
- Store the cleaner in an easily accessible spot in your kitchen so you are more likely to clean small spills right away rather than letting them accumulate.
- Avoid using excessive amounts of oil or marinade when cooking foods known to splatter, such as bacon or fatty cuts of meat, since reducing the source of grease in the first place will naturally reduce how often you need to deep clean the appliance.
- Consider covering food loosely with foil when cooking items that tend to splatter heavily, as this can significantly cut down on the amount of grease that reaches the oven walls and ceiling.
- Inspect the door seal periodically for trapped crumbs or grease, since a dirty seal can sometimes prevent the door from closing properly, leading to heat loss and less efficient cooking.
Following these habits, combined with using a proven product like Ferber Painting’s cleaner, will significantly reduce the time and effort needed for future cleaning sessions. Many people find that once they establish a simple routine, such as a quick wipe down every other week and a more thorough clean once a month, their mini oven never reaches the point of heavy, frustrating buildup in the first place. Prevention, in this case, really is easier than the cure.
Common Mistakes to Avoid When Cleaning a Mini Oven
Even with the right product in hand, there are a few common mistakes that can make the cleaning process less effective or even risk damaging your appliance. One frequent error is using metal scouring pads or steel wool on the interior surfaces, which can scratch coatings and create rough patches where grease will collect more easily in the future. Another common mistake is spraying cleaner directly onto or near the heating elements, which should always be avoided since these components are not designed to be treated with cleaning products and doing so can affect their performance or even pose a safety risk.
Some people also make the mistake of not allowing the cleaner enough time to sit before wiping it away, which reduces its effectiveness and can lead to the false impression that the product does not work as well as advertised. Patience during the waiting period genuinely makes a difference in the final results. Finally, skipping the rinsing step or not drying the interior thoroughly can leave behind a slightly soapy taste or smell the next time you use the oven, which is easily avoided with one extra pass of a clean, damp cloth followed by thorough drying.
Mini FAQ About Cleaning a Mini Oven
Can I use the Oven, Grill and Stove Cleaner on the exterior of my mini oven as well?
Yes, the formula is effective on grease and grime found on exterior surfaces too, making it a versatile solution for the entire appliance, not just the interior.
How often should I clean my mini oven?
For regular users, a light cleaning every one to two weeks and a deeper clean once a month is generally enough to prevent heavy buildup from forming.
Is the product safe to use on non stick coatings?
The cleaner is designed to be effective while remaining gentle enough for typical oven interior coatings when used as directed. As with any cleaning product, we recommend following the instructions on the label carefully.
What if I am not satisfied with the results?
Ferber Painting offers a satisfaction guaranteed or your money back policy on this product, so if you are not happy with your results, you can request a refund without any complications.
Do you ship internationally?
Yes, thanks to our international network of carriers, Ferber Painting delivers quickly to customers around the world, with secure and simple online payment available directly on our website.
Conclusion
Cleaning a mini oven does not have to be a frustrating, time consuming chore when you have the right product and a clear process to follow. By starting with a specialized cleaner designed specifically for ovens, grills, and stoves, you save yourself the effort of scrubbing endlessly with weaker, generic alternatives. Remember that the product you choose matters just as much as the technique, and the satisfaction guaranteed or your money back policy offered by Ferber Painting means you have nothing to lose by giving it a try. Establishing a simple, consistent cleaning routine, combined with a formula built specifically for tough kitchen grease and carbon buildup, will keep your mini oven looking and performing like new for years to come. Visit the Ferber Painting website today to order your Oven, Grill and Stove Cleaner and experience the difference a properly formulated product can make.