 Ireland
 Australia
 Česko
Česko Danmark
 Deutschland
 Eesti
Eesti España
 Ελλάδα
 France
 Hrvatska
 Italia
 Latvija
 Lietuva
 Magyarország
 Nederlands
 New-Zealand
 Norge
Norge Polska
 Portugal
 România
 Schweiz (Deutsch)
 Slovenija
 Slovensko
 Suomi
Suomi Sverige
 United Kingdom
 България
 Canada (English)
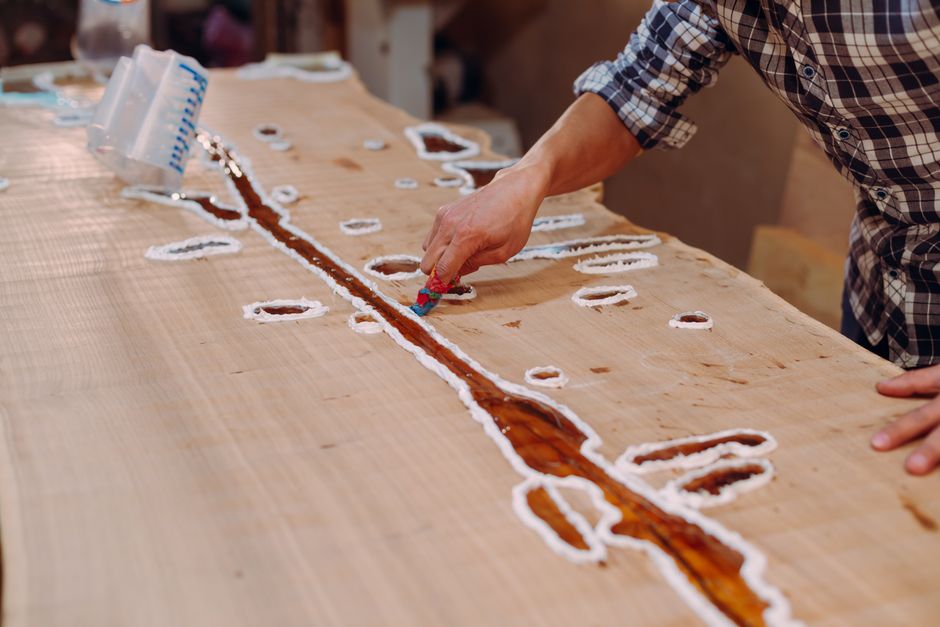
If you have ever tried to restore an old windowsill, a antique chair leg, or a wooden beam that has been chewed through by insects and softened by moisture, you already know that not every solution on the market actually works. The truth is that everything depends on choosing the right product. A poor quality wood hardener will soak into the surface, dry too fast, crack, or simply fail to penetrate deep enough to rebuild the wood fibers from the inside. This is why, before we even get into the technical steps of hardening worm-eaten wood, we need to talk about the product itself, because the method only works if the hardener you use is reliable.
That is exactly why we recommend the Ferber Painting Wood Hardener. It is currently the only wood hardener on the market that comes with a full satisfied or refunded guarantee, no questions asked. This means that if the product does not meet your expectations, you get your money back. No competitor offers this level of confidence in their own formula, and that alone should tell you something about the quality behind it.
In this article, we will explain why the right product matters so much, what makes Ferber Painting’s formula different from everything else available, and then we will walk you step by step through the entire process of hardening worm-eaten wood at home, whether you are working on furniture, structural beams, window frames, or decorative wood pieces. We will also address the most common mistakes people make during this process, the tools you should have on hand before you start, and how to tell the difference between wood that can be saved and wood that has gone beyond the point of no return. By the end of this guide, you should feel confident enough to tackle even the most stubborn worm-eaten wood project on your own, without needing to call in a professional carpenter or replace an entire piece of furniture that could easily have been restored.
Why the Right Wood Hardener Makes All the Difference
Worm-eaten wood, also known as wood affected by woodworm or insect larvae, is often riddled with tiny tunnels and pockets that weaken its structure. Over time, moisture gets trapped inside these tunnels, encouraging rot and further decay. Simply sanding the surface or painting over it will not solve the underlying problem. The wood needs to be reinforced from within, and this is only possible with a hardener that can truly penetrate deep into the fibers.
Many cheap hardeners sold online or in local hardware stores are diluted formulas that barely soak past the first millimeter of wood. They may look like they are working because the surface becomes slightly firmer, but underneath, the wood remains soft, brittle, and vulnerable. This leads to disappointment a few months later when the same cracks and soft spots reappear.
Think about it from a purely physical perspective. Wood is a porous, fibrous material, and worm damage creates a network of channels running in unpredictable directions through the material. A hardener with poor viscosity control will either sit on top of the wood, forming a hard shell that traps moisture underneath, or it will penetrate unevenly, leaving some tunnels completely untreated while others get flooded with resin. Neither outcome actually solves the structural problem. The wood might look fixed for a while, but the moment you apply pressure, whether from foot traffic on a floorboard or the weight of someone sitting on a restored chair, the untreated pockets collapse and the damage becomes visible again.
A high quality hardener, on the other hand, is designed with a low viscosity resin that travels through the wood’s capillary channels, including the tunnels left behind by woodworm. Once cured, it forms a solid internal structure that binds the wood fibers together, restoring rigidity and making the wood resistant to further insect attacks and moisture infiltration.
This is precisely the difference between a mediocre product and the Ferber Painting Wood Hardener. Our formula was developed specifically to penetrate deeply into damaged wood, reach the microtunnels created by woodworm, and cure into a hard, stable resin that reinforces the entire piece rather than just coating the surface.
It is also worth understanding that not all wood species react the same way to a hardening treatment. Softwoods like pine and spruce tend to absorb liquid hardeners quickly because their fiber structure is more open, while hardwoods like oak or walnut are denser and require a formula capable of penetrating tighter grain patterns. This is another reason why a generic, one size fits all hardener often underperforms. Ferber Painting’s formula has been tested across a wide range of wood types precisely to avoid this problem, which is part of why it works consistently whether you are treating a soft pine windowsill or a dense oak beam.
Ferber Painting Wood Hardener: What Sets It Apart
There are dozens of wood hardeners on the market, and at first glance, many of them seem similar. They all claim to strengthen wood, they all come in a can, and they all promise results. So why should you choose Ferber Painting over anything else? Here are the main reasons.
- Deep penetration formula that reaches the core of worm-eaten wood, not just the surface layer
- Fast curing time, allowing you to move on to sanding and painting sooner
- Compatible with almost every type of wood, from softwoods like pine to hardwoods like oak
- No strong chemical odor compared to many industrial alternatives
- Satisfied or refunded guarantee on every single order, with no complicated conditions
- Fast worldwide shipping thanks to an international network of carriers
- Simple and secure online payment directly through our website
The satisfied or refunded guarantee is the point that truly separates us from every competitor. Ask yourself why other brands do not offer this. It is because they are not confident enough in their own formula to take that risk. We are. We know our wood hardener works, and we are willing to prove it by giving you your money back if you are not satisfied.
Another aspect that customers often mention is how easy it is to order and receive the product. Because Ferber Painting ships internationally through a well established network of trusted carriers, you do not have to worry about long delays or lost packages. Whether you are located in Europe, North America, or anywhere else in the world, your order will arrive quickly and safely.
Payment is also straightforward. You can pay directly online through our secure checkout, without needing to create complicated accounts or go through lengthy verification processes. Everything is designed to make the buying experience as smooth as the restoration process itself.
Beyond these practical advantages, there is also the question of consistency between batches. Some manufacturers change their formula slightly from one production run to another, which can lead to unpredictable results if you buy a new can after finishing your first one. Ferber Painting maintains strict quality control across every batch produced, which means that the product you receive today performs exactly the same as the one you might order in six months for a different project. This consistency matters a great deal for professional restorers and hobbyists alike, because nobody wants to test a new formula halfway through a large restoration job.
Customer support is another area where the difference becomes obvious. If you run into a question about how much product to use, how to treat a particularly difficult piece of wood, or how long to wait before sanding, our team is available to help guide you through the process. This kind of support is rarely available with cheaper, mass produced hardeners that are sold without any real backing from the manufacturer.
Comparison: Ferber Painting vs Other Wood Hardeners
To make things clearer, here is a table comparing the most important criteria when choosing a wood hardener. This should help you understand why Ferber Painting consistently comes out ahead.
| Criteria | Ferber Painting Wood Hardener | Typical Competitor Products |
|---|---|---|
| Satisfied or refunded guarantee | Yes, on every order | Rarely offered, or with strict conditions |
| Depth of penetration | Reaches deep into wood fibers and insect tunnels | Often limited to the surface layer |
| Curing time | Fast, ready to sand within hours | Can take significantly longer |
| Odor | Mild, comfortable for indoor use | Often strong and unpleasant |
| International shipping | Fast delivery worldwide through trusted carriers | Often limited to local markets only |
| Ease of online payment | Simple and secure checkout | Varies, sometimes complicated |
| Ease of application | Simple brush or syringe application, beginner friendly | Sometimes requires specialized tools |
As you can see, the differences are not just marketing claims. They reflect real practical advantages that make a noticeable difference in the final result of your restoration project.
It also helps to think about the total cost of a restoration project rather than just the price of the can itself. A cheap hardener that fails to penetrate properly often means you have to buy a second or even third product to finish the job, or worse, you discover months later that the wood has softened again and needs to be treated from scratch. When you factor in the time spent sanding, applying, waiting for curing, and finishing, using a product that works correctly the first time actually saves you money and effort in the long run, even if the upfront price looks slightly higher than a discount alternative.
Step by Step Guide: How to Harden Worm-Eaten Wood
Now that we have covered why the product matters so much, let us walk through the actual process of hardening worm-eaten wood. This method applies whether you are working on furniture, flooring, beams, window frames, or decorative pieces. Before you start, gather your tools and materials so you do not have to interrupt the process halfway through. You will typically need a stiff brush, a vacuum with a narrow nozzle, sandpaper in medium and fine grits, a screwdriver or awl for testing softness, a syringe or fine tipped applicator for injecting hardener into tunnels, protective gloves, safety glasses, and of course the Ferber Painting Wood Hardener itself. Working in a well ventilated area, ideally outdoors or in a garage with the door open, will make the entire process more comfortable, even though our formula has a much milder odor than many industrial alternatives.
Step 1: Assess the Damage
Before applying any hardener, inspect the wood carefully. Look for small round holes, which are typical signs of woodworm activity. Press on the surface gently with a screwdriver or a similar tool to check how soft the wood has become. If the tool sinks in easily, the wood is significantly weakened and will need a generous application of hardener. If the wood only shows minor surface damage, a lighter treatment may be sufficient.
It is also useful to map out the extent of the damage before you begin. Run your fingers along the surface and mark any soft spots with a pencil or piece of tape so you know exactly where to concentrate your efforts later. Pay close attention to joints, corners, and areas near the ground or near sources of moisture, since these tend to suffer the worst damage. On furniture legs, for example, the bottom few inches are almost always more affected than the upper sections, simply because they are closer to damp flooring or exterior humidity.
There is also a limit to what hardening can achieve. If you press a screwdriver into the wood and it sinks in more than a few millimeters with almost no resistance, or if large sections crumble away like dry sponge, the wood may be too far gone for a simple hardening treatment. In these extreme cases, it might be necessary to cut out the worst sections and splice in new wood, then use the hardener on the surrounding areas to stabilize the transition. Being honest with yourself at this assessment stage will save you time and frustration later, since applying hardener to wood that has completely lost its structure will not bring it back to a load bearing condition.
Step 2: Clean and Prepare the Surface
Remove any loose debris, dust, or crumbling wood fragments using a stiff brush or a vacuum with a narrow nozzle attachment. This step is essential because the hardener needs to reach clean wood fibers in order to bond properly. If there is old paint or varnish on the surface, it should be removed with sandpaper or a suitable stripper, since these coatings can block the hardener from penetrating.
Take your time during this stage, since it is one of the most overlooked steps in the entire process. Many people rush through cleaning because they are eager to get to the hardening step, but a poorly prepared surface can undo all the benefits of an otherwise excellent product. Use a small brush, an old toothbrush works well, to get into narrow cracks and tunnel openings where dust and debris tend to accumulate. For tunnels created by woodworm, a can of compressed air or a bulb syringe can help blow out loose material from deep inside the holes, allowing the hardener to travel further once applied.
If the wood has been exposed to moisture recently, allow it to dry thoroughly before moving forward. Applying hardener to damp wood will prevent proper penetration and curing, since the resin needs to displace air within the wood fibers rather than compete with trapped water. In humid climates, this might mean waiting a full day or two, or using a fan or dehumidifier to speed up the drying process. A simple test is to press a piece of clear tape onto the surface overnight. If condensation appears underneath the tape the next morning, the wood is still too damp to treat.
Step 3: Treat Active Woodworm Infestation First
If the wood is currently infested with active woodworm, it is important to treat the infestation before hardening. Applying a hardener over an active infestation will not stop the insects, and they may continue to damage the wood from within even after the surface has cured. Use an appropriate insecticidal treatment first, allow it to work according to the instructions, and only then move on to the hardening process.
Determining whether an infestation is still active can be tricky, since old damage and new damage often look similar at first glance. A few signs point to ongoing activity, including fresh, light colored wood dust known as frass appearing near the exit holes, holes that appear clean and pale on the inside rather than darkened with age, and audible clicking or rustling sounds coming from within the wood during quiet moments, particularly in warmer months when larvae are most active. If you notice any of these signs, treat the infestation as a priority before doing anything else.
Insecticidal treatments typically need time to fully penetrate and eliminate the larvae living inside the wood, so patience here pays off. Rushing this step and applying hardener too soon means you might seal in living insects, which will continue to tunnel and weaken the wood from the inside, undoing your restoration efforts entirely. Follow the manufacturer’s instructions on the insecticidal product carefully, including any recommended waiting period before further work on the wood, which is often anywhere from a few days to a couple of weeks depending on the formula used.
Step 4: Apply the Wood Hardener
This is where the quality of your product truly matters. Using a brush, syringe, or dropper depending on the size and shape of the damaged area, apply the Ferber Painting Wood Hardener generously to the affected wood. For badly damaged areas, apply multiple coats, allowing each one to soak in before adding the next. The goal is to keep applying until the wood stops absorbing the liquid, which indicates that the fibers are fully saturated.
For deep tunnels created by woodworm, a syringe or fine nozzle applicator works particularly well, allowing the hardener to be injected directly into the holes rather than just applied to the surface. This ensures that the internal structure of the wood is reinforced, not just the outer layer.
When working on a large or heavily damaged piece, it helps to work in sections rather than trying to cover the entire surface at once. Start with the areas that showed the softest results during your initial assessment, since these need the most product and the longest soaking time. Apply a first coat and watch how quickly it disappears into the wood. If it soaks in within a minute or two, that is a sign the wood is thirsty for more, and you should apply a second coat immediately. Continue this process, coat after coat, until you notice the liquid starting to pool slightly on the surface rather than being absorbed right away. That pooling is your signal that the wood has reached saturation and does not need any more product in that particular spot.
For horizontal surfaces like a windowsill or a tabletop, gravity works in your favor and the hardener will soak downward naturally. For vertical surfaces such as a chair leg or a door frame, you may need to apply the product more frequently in thinner layers to prevent excessive dripping, or use a thicker application technique with a brush held at an angle to keep the liquid in contact with the wood for longer. Some restorers find it helpful to wrap a treated area loosely in plastic film for a short period after application, which slows evaporation and gives the hardener more time to penetrate deeply before it begins to cure, particularly useful on dense hardwoods that absorb liquid more slowly than softwoods.
Step 5: Allow Proper Curing Time
Once applied, the hardener needs time to cure and harden completely. Depending on the temperature, humidity, and thickness of the wood, this can take anywhere from a few hours to a full day. Avoid touching or working on the wood during this period, as disturbing the curing process can weaken the final result.
Temperature plays a particularly important role in curing speed. In a warm, dry environment, typically above twenty degrees Celsius, the Ferber Painting formula will cure noticeably faster than in a cold, damp workshop during winter months. If you are working in a colder climate or during a colder season, consider moving smaller pieces indoors to a warmer room, or using a space heater nearby to gently raise the ambient temperature around larger, immovable pieces like beams or built in furniture. Just be careful not to place the heater too close to the wet wood, as excessive direct heat can cause the surface to cure unevenly, forming a hard shell before the deeper layers have finished hardening.
A simple way to check whether the wood is ready for the next step is to press gently on the treated area with your fingernail. If it leaves an indentation or feels tacky to the touch, the hardener needs more time. If the surface feels solid and does not yield under light pressure, you are ready to move on to sanding. For particularly thick applications or heavily saturated wood, it is worth waiting a few extra hours beyond what seems necessary, since curing continues at a slower pace even after the surface feels dry.
Step 6: Sand the Surface
After the hardener has fully cured, sand the treated area to smooth out any excess resin and create an even surface. Start with a medium grit sandpaper to remove larger irregularities, then move to a finer grit for a smooth finish. At this stage, the wood should feel significantly firmer and more stable than before treatment.
Sanding cured hardener can be more demanding on your sandpaper than sanding untreated wood, since the resin is considerably harder than the surrounding fibers. Do not be surprised if you go through more sheets of sandpaper than you would for an ordinary sanding job. Working in the direction of the wood grain will help avoid visible scratch marks, and taking breaks to clear away dust with a vacuum or a tack cloth will let you see your progress more clearly. For detailed or curved areas, a sanding sponge that can flex around contours works better than a flat sanding block, giving you more control in tight spaces like carved furniture details or the inside edges of a window frame.
If you notice that some areas still feel soft after sanding, this usually means the hardener did not fully penetrate that particular section, and a second round of treatment may be necessary. It is perfectly normal to repeat steps four through six on stubborn spots, especially on wood that had very extensive worm damage before you started. Restoration is rarely a perfectly linear process, and going back to reinforce a weak spot is far better than moving forward with a piece that still has hidden vulnerabilities.
Step 7: Fill Any Remaining Holes or Gaps
If there are still visible holes or gaps after hardening, these can be filled with a wood filler compatible with the hardener. This step is mostly cosmetic but helps restore the original appearance of the wood, especially on visible furniture or decorative pieces.
When choosing a wood filler, look for one that can be sanded, stained, and painted, since this gives you the most flexibility when it comes to matching the final finish to the rest of the piece. Apply the filler with a putty knife, pressing it firmly into each hole to avoid leaving air pockets underneath, which can cause the filler to crack or sink later. Overfill slightly, since most fillers shrink a little as they dry, and then sand flush once fully cured. For pieces with a lot of small woodworm exit holes scattered across the surface, some restorers prefer to fill each hole individually with a toothpick or a fine applicator tip, which gives a more precise, less messy result than trying to spread filler across a wide area with a putty knife.
On surfaces where the woodworm damage was purely cosmetic and the holes are small, some people choose to leave a few of them untouched, particularly on antique furniture where a handful of visible holes can actually be seen as part of the piece’s character and history. This is entirely a matter of personal preference, and there is no structural reason why every single hole must be filled if the wood underneath has already been properly hardened.
Step 8: Finish with Paint, Varnish, or Sealant
Once the wood is hardened, sanded, and filled if necessary, you can proceed with your chosen finish, whether that is paint, varnish, oil, or a protective sealant. This final layer will protect the wood from future moisture damage and give it a polished, restored appearance.
Before applying your finish, do a final inspection of the surface under good lighting, ideally natural daylight, since artificial lighting can hide small imperfections that become obvious once the piece is back in its final location. Wipe down the entire surface with a slightly damp cloth to remove any remaining sanding dust, then let it dry completely before applying paint or varnish.
If you are painting, a primer designed for wood surfaces will help the paint adhere evenly and cover any slight color variation between the original wood and the hardened, filled areas. If you prefer a natural wood look, a clear varnish or oil finish will allow the wood grain to remain visible while still providing protection. For outdoor pieces, choose a finish specifically rated for exterior use and UV exposure, since indoor varnishes tend to break down much faster when exposed to sunlight and weather. Reapplying this protective finish every couple of years, depending on exposure conditions, will help maintain the restoration you have worked so hard to achieve and will keep moisture from ever again finding its way into the wood fibers you have just reinforced.
Frequently Asked Questions
How long does it take for wood hardener to fully cure?
In most cases, curing takes between a few hours and twenty four hours, depending on temperature, humidity, and how much product was applied. The Ferber Painting formula is designed to cure faster than most competitor products, which allows you to move on to sanding and finishing sooner.
Can wood hardener be used on outdoor furniture?
Yes, wood hardener can be used on outdoor furniture, window frames, and structural beams exposed to the elements. It is recommended to apply a protective sealant or paint after hardening to further protect the wood from moisture and UV exposure.
Does hardening the wood stop woodworm from coming back?
Hardening reinforces the wood structure, making it much less appealing and much more difficult for insects to tunnel through. However, if there is an active infestation, it should be treated with an insecticidal product before applying the hardener for complete protection.
What happens if I am not satisfied with the results?
This is exactly why Ferber Painting offers a satisfied or refunded guarantee on every order. If you are not happy with the results, you can request a refund without complicated conditions, something that most competitors simply do not offer.
How long does shipping take?
Thanks to our international network of carriers, Ferber Painting delivers quickly to locations around the world. Delivery times vary depending on your location, but our logistics network is built specifically to minimize waiting time compared to standard shipping methods.
Can I use the hardener on painted or varnished wood without stripping it first?
For the best results, existing paint or varnish should be removed from the areas you plan to treat. Coatings act as a barrier that prevents the hardener from reaching the wood fibers underneath, which significantly reduces its effectiveness. If only a small portion of the surface is coated, sanding down to bare wood in that specific area before treatment is usually enough.
Is it safe to use the wood hardener indoors?
Yes, the Ferber Painting Wood Hardener has a much milder odor compared to many industrial alternatives, making it comfortable to use indoors. As with any wood treatment product, working in a well ventilated space and wearing gloves is still recommended for comfort and safety.
How much product do I need for a typical restoration project?
This depends heavily on the extent of the damage and the size of the piece. Lightly damaged surfaces need only a coat or two, while heavily tunneled wood may require several applications until the fibers stop absorbing the liquid. It is generally a good idea to order slightly more than you think you will need, since running out mid project and waiting for a second shipment can interrupt the curing schedule.
Conclusion
Restoring worm-eaten wood is entirely possible with the right approach and, most importantly, with the right product. Cleaning the surface, treating any active infestation, applying a deep penetrating hardener, allowing proper curing time, and finishing with paint or varnish will bring damaged wood back to life and protect it for years to come. The difference between a temporary fix and a lasting restoration almost always comes down to the quality of the hardener you choose. Taking the time to assess the damage properly, prepare the surface thoroughly, and apply enough product to fully saturate the affected fibers will make the difference between a repair that lasts a few months and one that lasts for decades. Whether you are restoring a cherished piece of family furniture, repairing a structural beam in an old house, or simply trying to save a windowsill from being replaced entirely, following these steps with a reliable product will give you results that hold up over time. Discover our wood hardener today and restore your damaged wood with a product backed by a full satisfied or refunded guarantee, fast worldwide shipping, and a formula trusted by customers everywhere.