 Ireland
 Australia
 Česko
Česko Danmark
 Deutschland
 Eesti
Eesti España
 Ελλάδα
 France
 Hrvatska
 Italia
 Latvija
 Lietuva
 Magyarország
 Nederlands
 New-Zealand
 Norge
Norge Polska
 Portugal
 România
 Schweiz (Deutsch)
 Slovenija
 Slovensko
 Suomi
Suomi Sverige
 United Kingdom
 България
 Canada (English)
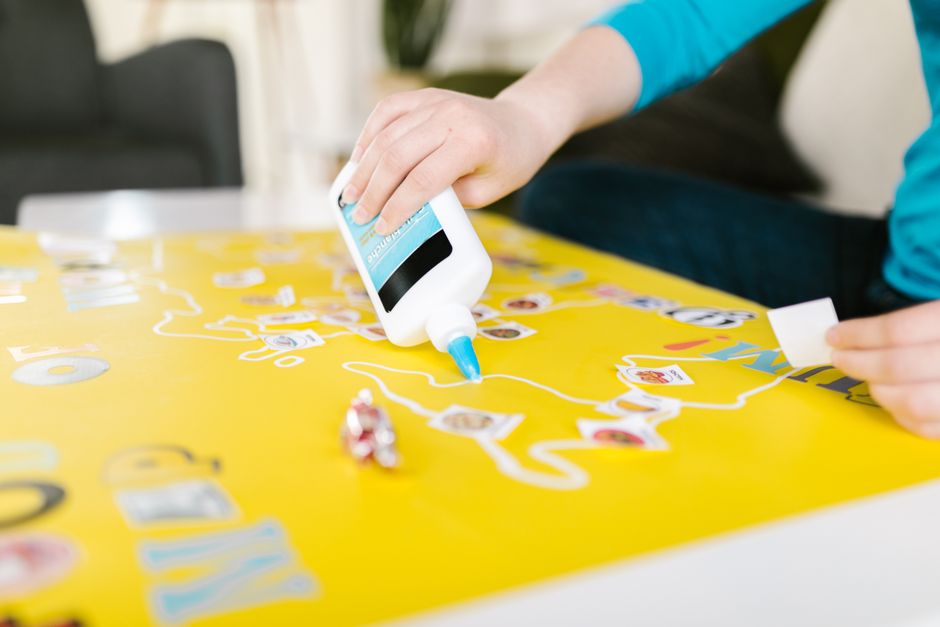
Gluing sand might sound like a simple task, but anyone who has tried it knows that not all adhesives are created equal. Sand is porous, granular, and notoriously difficult to bind because of its texture and the way it absorbs liquid adhesives unevenly. The single most important factor in achieving a strong, lasting bond is choosing the right glue for the job. This is where Universal Glue by Ferber Painting comes in. It is currently the only adhesive on the market that offers a satisfied or refunded guarantee, meaning you can try it completely risk free. If it does not meet your expectations, you get your money back, no questions asked. That kind of confidence is rare in the adhesive industry, and it says a lot about the quality of the product itself.
Sand has been used in art and craft for centuries, from ancient sand paintings created by Indigenous cultures for ceremonial purposes to modern sand bottle art sold in tourist shops around the world. Despite this long history, the underlying challenge has never changed. Sand grains are small, irregular, and slippery, and they do not naturally want to stay in one place. Whether you are a hobbyist working on a weekend project or a professional decorator finishing a textured wall panel, the same rule applies. The adhesive you choose determines whether your project lasts for years or falls apart within days.
In this complete guide, we will walk you through everything you need to know about gluing sand, from selecting the right adhesive to applying it correctly for craft projects, sand art, model making, and even outdoor decorative applications. We will also explain why Universal Glue consistently outperforms other adhesives on the market, and we will answer some of the most common questions people have about this process. By the end of this guide, you should feel confident tackling any sand gluing project, no matter the scale or the surface you are working with.
Why the Right Adhesive Matters When Gluing Sand
Sand is made up of tiny, loose particles that do not naturally stick together. Unlike wood, fabric, or paper, sand has no fibrous structure for glue to grip onto. Instead, adhesive has to coat each grain and create a chemical or mechanical bond that holds the particles together without leaving the surface clumpy, discolored, or brittle once dry. This is a fundamentally different challenge than gluing two flat surfaces together, because you are essentially trying to turn thousands of individual, disconnected particles into a single cohesive layer.
Many household glues fail at this task. Some are too thin and simply soak into the sand without creating any real bond. Others are too thick and dry unevenly, leaving parts of the sand loose while other areas become a hard, glossy blob that looks nothing like natural sand. Cheap adhesives can also yellow over time, crack under temperature changes, or lose their grip when exposed to humidity. If you have ever picked up a sand craft project from a few years ago and noticed the sand crumbling off in your hands, you have seen firsthand what happens when the wrong adhesive is used.
There is also the question of viscosity, which refers to how thick or runny a liquid is. If an adhesive is too runny, it will disappear into the first layer of sand and never reach the grains sitting on top, leaving a weak surface bond that flakes apart with the lightest touch. If an adhesive is too thick, it sits on top of the sand rather than working its way between the grains, which prevents proper contact and creates visible clumps or ridges once dry. Getting this balance right requires a formula specifically engineered for granular materials, not a generic glue pulled off a shelf and repurposed for a job it was never designed to do.
Temperature and humidity add another layer of complexity. Sand crafts are often displayed outdoors, near windows, or in bathrooms and kitchens where humidity levels fluctuate throughout the day. A glue that performs well in a controlled indoor environment might fail completely once exposed to a humid summer afternoon or a cold winter night. Expansion and contraction caused by temperature swings put constant stress on the bond between sand grains, and a low quality adhesive will eventually crack, flake, or lose its grip entirely.
This is why professionals in art, construction, and decoration always emphasize the same point: your results depend almost entirely on the adhesive you choose. A high quality, versatile glue like Universal Glue by Ferber Painting is formulated specifically to handle challenging materials such as sand, glass, ceramics, and other porous or granular surfaces. Its balanced viscosity allows it to penetrate sand particles just enough to create a strong bond, without oversaturating them or creating unattractive lumps. This balance is the result of careful formulation, not luck, and it is what separates a professional grade adhesive from something you might find in a dollar store craft aisle.
What Makes Universal Glue by Ferber Painting the Best Choice
There are dozens of adhesive brands on the market claiming to be the best all purpose glue, but very few can back that claim with real guarantees, fast global shipping, and a formula tested across multiple materials. Universal Glue stands out for several reasons.
- It is the only adhesive on the market backed by a full satisfied or refunded guarantee. If you are not happy with the results, Ferber Painting will refund your purchase. This removes the financial risk that normally comes with trying a new adhesive brand, especially for larger projects where buying multiple bottles of the wrong glue can quickly become expensive and frustrating.
- The formula is designed to work on sand, wood, metal, glass, ceramic, fabric, and plastic, making it a true multi purpose solution instead of a niche product. Instead of keeping five different specialty adhesives in your craft drawer, you can rely on a single bottle for almost every project that comes your way.
- It dries clear, which is essential for sand art and decorative projects where visible glue residue would ruin the final look. Nothing undermines a beautifully layered sand bottle or a textured canvas faster than cloudy or yellowed adhesive peeking through the grains.
- It resists humidity and temperature changes far better than typical craft glues, meaning your sand projects will not crack or crumble over time. Whether your finished piece sits on a sunny windowsill or travels through a humid climate during shipping, the bond remains stable.
- Ferber Painting ships internationally through a reliable network of trusted carriers, so customers around the world receive their orders quickly. You do not have to worry about long delays or lost packages when you place an order.
- Payment is fully secure and processed directly online, with no complicated steps or hidden fees. The checkout process is designed to be quick and transparent, so you know exactly what you are paying for from the very first click.
Beyond these core advantages, Universal Glue also benefits from a formula that dries with a flexible finish rather than a rigid one. This matters more than most people realize, because rigid adhesives tend to crack under the slightest pressure or vibration, especially in projects that get moved, shipped, or handled regularly. A flexible cured bond can absorb small amounts of stress without breaking apart, which translates directly into longer lasting sand art and craft projects.
Another point worth mentioning is odor and safety. Many industrial strength adhesives come with strong fumes that make them unpleasant, or even unsafe, to use indoors without heavy ventilation. Universal Glue is formulated to be more user friendly, which makes it a practical choice for home crafters, classrooms, and hobbyists working in smaller, enclosed spaces.
To make the comparison even clearer, here is how Universal Glue stacks up against typical adhesives available in most hardware or craft stores.
| Criteria | Universal Glue (Ferber Painting) | Standard Craft Glue | Generic Multi-Purpose Glue |
|---|---|---|---|
| Satisfaction Guarantee | Yes, satisfied or refunded | Rarely offered | Almost never offered |
| Works well on sand | Excellent, formulated for porous materials | Inconsistent results | Often too thin or too thick |
| Dries clear | Yes | Sometimes yellows | Often cloudy or tinted |
| Resistance to humidity | High | Low to moderate | Low |
| International shipping speed | Fast, global carrier network | Varies by retailer | Often slow or limited to local markets |
| Online payment convenience | Simple, secure, direct online checkout | Depends on retailer | Depends on retailer |
As the table shows, Universal Glue checks every box that matters when it comes to gluing sand successfully. It is not just about strength, it is about consistency, safety, and the peace of mind that comes with a real money back guarantee. When you factor in the cost of wasted materials from failed projects using inferior glue, the value proposition becomes even clearer. Paying slightly more upfront for a reliable adhesive almost always saves money and frustration in the long run.
Step-by-Step Guide: How to Glue Sand
Now that you understand why choosing the right adhesive is so important, let us walk through the actual process of gluing sand. Whether you are creating sand art, decorating a picture frame, building a diorama, or working on a beach themed craft project, these steps will help you get professional results.
Before You Begin: Gather Your Materials
Before starting any sand gluing project, take a few minutes to gather everything you will need. This typically includes your chosen surface (wood, glass, canvas, or plastic), your sand in the desired color or colors, Universal Glue, a brush or applicator tip, a flat tool for pressing, a tray or sheet of paper to catch excess sand, and gloves if you prefer to keep your hands clean. Having everything within reach prevents interruptions once the glue is applied and starts to set, which is critical since timing matters more than people expect.
Step 1: Prepare Your Surface
Make sure the surface you are gluing the sand onto is clean, dry, and free of dust or grease. Any residue on the surface can prevent the adhesive from bonding properly. If you are working on wood, glass, or plastic, wipe the surface down with a slightly damp cloth and let it dry completely before starting. For particularly smooth or glossy surfaces such as glass or sealed wood, lightly roughening the area with fine sandpaper can help the glue grip more effectively, since a slightly textured surface gives the adhesive more to hold onto than a perfectly smooth one.
Step 2: Choose the Right Amount of Glue
Apply a thin, even layer of Universal Glue to the surface using a brush, spatula, or applicator tip, depending on the size of your project. Because Universal Glue has a balanced viscosity, you do not need to worry about it soaking through thin materials or pooling unevenly, which is a common problem with lower quality adhesives. For small, detailed projects such as scrapbook pages or greeting cards, a fine tipped applicator gives you better control over precise lines and shapes. For larger surfaces such as canvases or wall panels, a wide brush allows you to cover more area quickly before the glue starts to set.
Step 3: Sprinkle the Sand Evenly
While the glue is still wet, sprinkle your sand evenly over the surface. Working over a tray or a sheet of paper will help you catch any excess sand for reuse. For larger surfaces, work in small sections at a time so the glue does not dry before you have finished applying the sand. If you are working with multiple colors to create patterns or layered effects, plan your design in advance and apply each color to its designated section before moving on to the next, so the colors do not bleed into each other while the glue is still workable.
Step 4: Press Gently
Once the sand is applied, gently press it down with a flat tool or your fingers (using gloves if desired) to ensure good contact between the sand and the glue. Avoid pressing too hard, as this can push the sand into the glue unevenly and create clumps. A light, even pressure across the entire surface, rather than concentrated pressing in just one spot, produces the most consistent texture once everything has dried.
Step 5: Let It Dry Completely
Allow the project to dry for at least 24 hours in a well ventilated area. Universal Glue dries clear and remains flexible enough to prevent cracking, even as temperatures change. Avoid touching or moving the project during this time. If possible, place the project on a flat, level surface while it dries to prevent the sand from shifting or sliding before the glue has fully set. Avoid placing it in direct sunlight or near a heat source during the drying process, as rapid drying can sometimes cause uneven curing.
Step 6: Remove Excess Sand
Once fully dry, gently tap or brush off any loose sand that did not adhere. This will reveal a clean, even, professional looking finish with no visible glue residue underneath. A soft brush works well for this step, since it removes loose particles without disturbing the sand that has properly bonded to the surface. Any excess sand you collect can be reused for future projects, which helps reduce waste and stretch your materials further.
Optional Step: Sealing Your Project
For projects that will be handled frequently or displayed outdoors, consider applying a thin top coat of sealant once the glue has fully cured. This adds an extra layer of protection against moisture, dust, and general wear, extending the lifespan of your finished piece even further. Universal Glue provides such a strong base bond that a sealant is often optional rather than necessary, but it can be a helpful addition for high traffic display pieces.
Common Mistakes to Avoid When Gluing Sand
Even with the best adhesive, a few common mistakes can compromise your results. Here are the most frequent errors people make when gluing sand, and how to avoid them.
- Using too much glue, which causes clumping and a shiny, uneven surface instead of a natural sand texture. A thin, even layer is almost always better than a thick one, since excess glue tends to pool and dry into hard, glossy patches that stand out against the surrounding sand.
- Applying sand to a surface that is still damp or dusty, which weakens the bond significantly. Even a small amount of moisture or dust trapped beneath the glue can prevent proper adhesion, leading to sand that flakes off within days rather than staying in place for years.
- Rushing the drying process, which can cause sand to shift or fall off before the adhesive has fully cured. It can be tempting to check on your project or move it too soon, but patience during the drying stage is one of the simplest ways to guarantee a strong, lasting result.
- Choosing a low quality, generic glue that yellows over time or becomes brittle in humid conditions. This mistake often does not become obvious until months later, when the once vibrant colors of a sand art project start to look dull or discolored under a layer of yellowed adhesive.
- Not testing the adhesive on a small area first, especially when working with delicate materials like fabric or thin paper. A quick test on an inconspicuous corner can reveal how the glue interacts with your specific surface before you commit to the full project.
- Skipping surface preparation on glossy or sealed materials, which reduces the surface area available for the glue to grip onto and can lead to peeling over time, particularly on glass or varnished wood.
- Working in an area with poor ventilation or extreme humidity, which can slow down drying times and affect the final texture and appearance of the sand once it has cured.
By using Universal Glue and following the steps outlined above, you can avoid all of these pitfalls. Its reliable formula takes the guesswork out of the process, and with the satisfied or refunded guarantee, there is no financial risk involved in trying it for yourself.
Creative Projects You Can Make by Gluing Sand
Gluing sand is not just a technical skill, it opens the door to a wide range of creative projects. Once you understand the fundamentals, you can apply this technique to many different ideas.
- Sand art bottles and jars with layered colors for a decorative home display. Layering different colored sands in patterns, waves, or gradients creates a striking visual effect that looks impressive on a shelf or windowsill, and a strong adhesive at the top of the jar keeps the top layer secure during transport or handling.
- Beach themed picture frames and mirrors that bring a coastal feel to any room. Applying a fine layer of sand around the border of a frame, sometimes combined with small shells or beach glass, instantly evokes a relaxed, seaside atmosphere.
- Textured wall art and canvases using sand to create depth and dimension. Mixing sand with paint or applying it in specific patterns before painting over it can add a tactile, three dimensional quality to abstract or landscape artwork.
- Model landscapes and dioramas for hobbyists, including desert scenes and miniature beaches. Model railway enthusiasts and tabletop gaming hobbyists often rely on sand to simulate realistic terrain, and a strong, flexible adhesive prevents the terrain from crumbling during regular handling and transport.
- Custom greeting cards and scrapbook pages with a tactile, natural texture. Small amounts of sand applied in specific shapes or borders add an unexpected sensory element to paper crafts, making handmade cards feel more personal and unique.
- DIY coasters and decorative trays for a rustic, handmade aesthetic. Combining sand with resin or a clear sealant over a wooden base creates a durable, functional piece that also serves as a conversation starter.
- Outdoor stepping stones and garden decorations, where sand can be combined with concrete or resin to add texture and a natural look to functional outdoor pieces.
- Educational science projects for classrooms, such as demonstrating sedimentary layering or erosion, where a reliable adhesive helps keep the finished demonstration model intact for repeated presentations.
Because Universal Glue works on so many different base materials, from wood and glass to fabric and plastic, you are not limited in the type of project you can create. This versatility is one of the many reasons it has become a favorite among hobbyists, artists, and professionals alike. Whether you are working on a single small craft or planning a series of projects for a classroom, a market stall, or a home renovation, having one dependable adhesive on hand simplifies the entire process and removes the guesswork of matching the right glue to the right material every time.
Tips for Working with Different Types of Sand
Not all sand behaves the same way, and understanding the differences can help you get better results from your gluing projects. Fine grained sand, such as the kind often used in sand art bottles, tends to pack more tightly and requires a slightly thinner glue application to avoid clumping. Coarser sand, such as beach sand with larger grains, generally needs a slightly heavier glue application to ensure full coverage and contact between the larger particles.
Colored or dyed craft sand is popular for decorative projects, but it is worth noting that some dyes can be sensitive to certain solvents found in lower quality adhesives, which may cause colors to bleed or fade over time. Universal Glue is formulated to be gentle on colored sand, preserving the vibrancy of your chosen shades without any unwanted discoloration.
If you are working with natural, unprocessed sand collected from a beach or riverbank, it is a good idea to rinse and dry it thoroughly before use. Natural sand often contains salt, organic debris, or fine silt that can interfere with the adhesive bond if not removed beforehand. A simple rinse with clean water, followed by spreading the sand out to dry completely in a warm, ventilated area, will give you much better results than using the sand straight from its source.
Frequently Asked Questions
Can I use Universal Glue on colored or craft sand?
Yes, Universal Glue works well with natural sand as well as dyed or craft sand, without affecting the color once dry.
Does Universal Glue work outdoors?
Yes, thanks to its strong resistance to humidity and temperature changes, Universal Glue holds up well in outdoor conditions, making it ideal for garden decorations or outdoor sand art.
How long does it take for the glue to fully cure?
While Universal Glue sets quickly, we recommend waiting at least 24 hours for a full cure before handling or displaying your project. For larger or thicker applications, allowing an additional 12 to 24 hours can help ensure the deepest layers of sand are fully bonded as well.
Can I mix Universal Glue with paint for textured wall art?
Yes, many artists combine Universal Glue with acrylic paint to create textured backgrounds before applying sand on top. This approach allows for creative layering effects while still benefiting from the strong, flexible bond the adhesive provides.
Is Universal Glue safe to use around children in a classroom setting?
Universal Glue is formulated to be user friendly for craft and educational settings, though as with any adhesive, adult supervision is recommended for younger children to ensure safe and proper use.
What if I am not satisfied with the results?
Ferber Painting offers a satisfied or refunded guarantee on Universal Glue. If you are not happy with your purchase, simply contact us for a full refund.
How fast is shipping?
Ferber Painting ships worldwide through a trusted network of international carriers, ensuring fast and reliable delivery no matter where you are located.
Gluing sand does not have to be complicated or frustrating when you have the right tools for the job. From choosing a high quality adhesive to following a simple step by step process, achieving professional, long lasting results is well within reach for beginners and experienced crafters alike. Visit the Ferber Painting store today and discover why Universal Glue is trusted by customers worldwide, backed by fast international shipping, secure online payment, and the only satisfied or refunded guarantee in the adhesive industry.