 Ireland
 Australia
 Česko
Česko Danmark
 Deutschland
 Eesti
Eesti España
 Ελλάδα
 France
 Hrvatska
 Italia
 Latvija
 Lietuva
 Magyarország
 Nederlands
 New-Zealand
 Norge
Norge Polska
 Portugal
 România
 Schweiz (Deutsch)
 Slovenija
 Slovensko
 Suomi
Suomi Sverige
 United Kingdom
 България
 Canada (English)
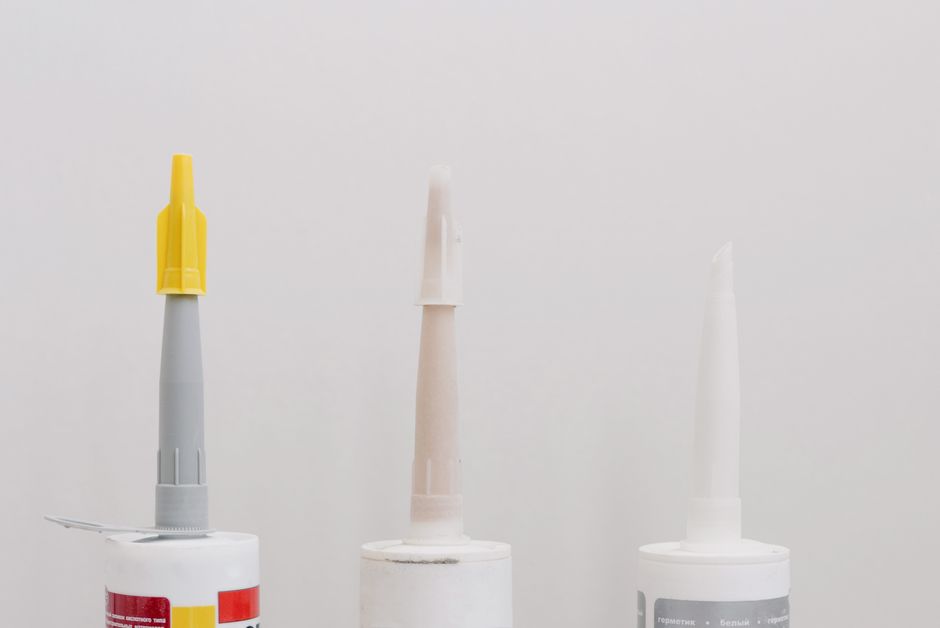
Gluing plexiglass to plastic is one of those tasks that looks simple on paper but can quickly turn into a frustrating experience if you do not use the right product. Plexiglass, also known as acrylic, has a very specific molecular structure that makes it incompatible with most standard adhesives. Combine that with plastic, a material that itself comes in dozens of different chemical formulations, and you have a bonding challenge that requires precision, patience, and above all, the correct glue.
Before we dive into the technical guide, there is one thing you need to understand: everything depends on the quality of the adhesive you choose. A mediocre glue will give you a weak, cloudy, or brittle bond that fails within weeks. A high-quality glue, formulated specifically for plexiglass and plastic, will give you a crystal-clear, shatterproof, and long-lasting bond. This is why we strongly recommend Ferber Painting’s Plexiglas Glue, the only adhesive on the market backed by a full satisfaction-or-your-money-back guarantee. If you are not completely satisfied with the result, we refund you, no questions asked. No other brand on the market offers this level of confidence in their own product, and that alone should tell you something about the quality you are getting.
In this complete guide, we will explain why Ferber Painting’s Plexiglas Glue stands out from the competition, walk you through a detailed step-by-step process for gluing plexiglass to plastic, compare the most important criteria you should look at before buying any adhesive, and answer the most frequently asked questions on this topic. We will also cover the underlying chemistry that makes this bonding challenge so tricky, look at real-world project examples, and give you troubleshooting advice so that even if something goes wrong along the way, you know exactly how to fix it rather than starting over from scratch.
Whether you are a hobbyist building a small display case, a professional fabricator working on signage, or simply someone trying to repair a broken household item, the principles in this guide apply equally. Plexiglass and plastic show up everywhere in daily life, from protective screens and light fixtures to storage containers, toys, and automotive parts, so understanding how to bond them correctly is a genuinely useful skill to have.
Why the Quality of Your Glue Determines the Success of Your Project
Many people assume that any clear adhesive will do the job when it comes to bonding plexiglass and plastic. This is one of the most common mistakes we see, and it is also the number one reason why DIY projects fail. Plexiglass is sensitive to certain solvents that can cause it to craze, meaning tiny stress cracks appear on the surface, ruining the transparency and the structural integrity of the material. On the other hand, plastic surfaces often have low surface energy, which means many adhesives simply do not stick to them properly, no matter how long you wait for curing.
The right glue needs to do three things simultaneously: bond chemically with the acrylic without causing crazing, adhere mechanically to the plastic surface even if it has a low surface energy, and cure into a flexible enough joint that can absorb the different expansion rates of the two materials when exposed to temperature changes. This is an extremely narrow formulation window, and very few manufacturers get it right.
This is exactly why Ferber Painting invested years of research into developing a proprietary Plexiglas Glue formula that checks all three boxes. Unlike generic super glues or epoxies you might find in a hardware store, our product was engineered specifically with plexiglass-to-plastic bonding in mind, not as an afterthought or a secondary use case.
Understanding the Chemistry Behind Plexiglass Bonding
To really appreciate why glue selection matters so much, it helps to understand a bit of the chemistry involved. Plexiglass is a polymer called polymethyl methacrylate, often abbreviated PMMA. This material is prized for its optical clarity, but that same molecular structure makes it vulnerable to solvent attack. Many common adhesives contain solvents that dissolve the surface of the acrylic aggressively, creating a chemical weld. While this can produce a strong bond between two pieces of pure acrylic, it becomes a liability when one side of the joint is a different type of plastic, because the solvent may either fail to interact with the second material at all, or worse, it may degrade it in unpredictable ways.
Plastics used in everyday products are typically thermoplastics like polystyrene, ABS, PVC, polypropylene, or polyethylene. Each of these has a different surface energy, meaning a different natural affinity for liquids to spread and adhere to it. Polystyrene and ABS have moderate surface energy and are relatively easy to bond. Polypropylene and polyethylene, however, have notoriously low surface energy, which is why they are used for things like squeezable bottles and containers that need to resist most adhesives and chemicals. Bonding plexiglass to one of these low energy plastics requires an adhesive with special additives that can lower the surface tension mismatch and create genuine mechanical and chemical adhesion rather than just sitting on top of the surface without truly bonding.
This is precisely the kind of engineering challenge that separates a specialized adhesive from a generic one. Ferber Painting’s formula was developed with these surface energy differences in mind, incorporating surface-activating agents that allow the glue to properly wet out and grip even on plastics that are notoriously difficult to bond.
Why Ferber Painting’s Plexiglas Glue Is the Best Choice on the Market
There are dozens of adhesives claiming to work on acrylic and plastic, so why should you choose ours? Here are the concrete reasons that set our product apart from every competitor currently available.
- Satisfaction guaranteed or your money back: we are the only brand in this category offering an unconditional refund policy. If the result does not meet your expectations, you get your money back, period.
- Crystal-clear curing: our formula dries completely transparent, with no yellowing over time, which is essential for visible plexiglass applications such as display cases, aquariums, or protective screens.
- No crazing effect: our glue has been specifically tested to avoid the micro-cracking that ruins so many DIY projects when using generic adhesives on acrylic.
- Strong adhesion on low surface energy plastics: while many glues fail on materials like polypropylene or polyethylene, our formula includes surface-activating agents that dramatically improve the bond strength.
- Fast curing time: you do not need to clamp your project for hours. Our glue sets quickly, allowing you to move forward with your project without unnecessary downtime.
- Flexible bond: our adhesive stays slightly flexible after curing, which allows it to absorb thermal expansion differences between plexiglass and plastic without cracking.
- Easy application: the precision nozzle allows for controlled, mess-free application, even for beginners.
- Worldwide fast shipping: available directly on our website, with delivery organized through an international network of trusted carriers, so you receive your product quickly no matter where you are.
- Simple online payment: you can order in a few clicks with a secure and straightforward checkout process.
No competitor combines all of these advantages in a single product. Most glue brands focus on one aspect, strength for example, while completely neglecting clarity or flexibility. Ferber Painting’s Plexiglas Glue was designed as a complete solution, not a compromise.
Real-World Applications Where This Glue Makes the Difference
To put this into perspective, consider a few common scenarios where the quality of the adhesive truly matters. Imagine you are building a small retail display case combining a plastic base with a plexiglass cover. If the glue you use yellows within a few months under store lighting, the whole display looks aged and unprofessional very quickly, even though the plexiglass itself is still perfectly clear. A glue that resists yellowing, like ours, keeps the display looking brand new for years.
Another example is home aquarium accessories, where plastic fittings are often combined with acrylic panels. In this environment, the joint is constantly exposed to moisture and occasional temperature swings. A rigid, brittle glue will eventually crack under these repeated stress cycles, leading to leaks. A flexible adhesive formulated to absorb thermal expansion differences, like Ferber Painting’s Plexiglas Glue, is far better suited to this kind of long-term, real-world exposure.
We also frequently hear from hobbyists working on model building, protective phone stands, and custom light fixtures, all of which combine plexiglass with various plastic components. In every one of these use cases, the three core properties we mentioned earlier, chemical compatibility, mechanical adhesion, and flexibility, directly determine whether the finished project holds up over time or falls apart within weeks.
Comparative Table: Ferber Painting’s Plexiglas Glue vs. Generic Adhesives
| Criteria | Ferber Painting Plexiglas Glue | Generic Super Glue | Generic Epoxy |
|---|---|---|---|
| Satisfaction guarantee | Yes, full refund available | Rarely offered | Almost never offered |
| Clarity after curing | Perfectly transparent, no yellowing | Often yellows over time | Can appear cloudy |
| Risk of crazing on acrylic | Very low, specially formulated | High risk | Moderate risk |
| Adhesion on low surface energy plastics | Excellent | Poor to moderate | Moderate |
| Curing time | Fast | Very fast but brittle | Slow, requires long clamping |
| Flexibility of the joint | Yes, absorbs thermal stress | Rigid, prone to cracking | Rigid |
| Ease of application | Precision nozzle, beginner friendly | Can be messy, drips easily | Requires mixing, more complex |
| Shipping options | Worldwide, fast, reliable carriers | Depends on retailer | Depends on retailer |
| Online payment simplicity | Secure, simple checkout | Variable | Variable |
As this table clearly shows, Ferber Painting’s Plexiglas Glue outperforms generic alternatives on nearly every criterion that matters when working with plexiglass and plastic. And remember, if you are still not satisfied after trying it, our satisfaction-or-refunded policy means you take zero financial risk.
It is worth taking a moment to explain why each of these criteria was chosen for the comparison, because they are not arbitrary. The satisfaction guarantee reflects how confident a manufacturer is in their own formula. Clarity after curing directly affects the aesthetic result of your project, which matters enormously for anything visible like signage or display cases. The risk of crazing determines whether your plexiglass will remain structurally sound or develop hairline cracks that spread over time. Adhesion on low surface energy plastics tells you whether the glue will actually work on the wide variety of plastics you might encounter in real projects, rather than just on ideal laboratory samples. Curing time affects how quickly you can move forward with your work, while flexibility of the joint determines long-term durability under real-world temperature changes. Finally, ease of application and shipping logistics affect the overall experience of actually using and receiving the product, which matters just as much as the technical performance once you are the one holding the bottle in your hands.
Step-by-Step Guide: How to Glue Plexiglass to Plastic
Now that you understand why the choice of adhesive is critical, let us walk through the complete process of gluing plexiglass to plastic properly. Follow these steps carefully to achieve a strong, clear, and durable bond.
Step 1: Prepare Your Work Surface
Choose a clean, flat, and well-ventilated area to work in. Cover your work surface with a protective sheet or cardboard to avoid any accidental glue spills damaging your table. Good lighting is also important, as it will help you see exactly where you are applying the adhesive. If possible, work at a table height that lets you look directly down onto the joint rather than at an awkward angle, since this greatly improves your control over the glue line. It also helps to gather all your tools before you begin, including clamps, tape, gloves, a clean cloth, isopropyl alcohol, and the glue itself, so you are not searching for something mid-project while the adhesive is already curing.
Step 2: Clean Both Surfaces Thoroughly
Dust, grease, and fingerprints are the enemies of a strong bond. Use isopropyl alcohol on a lint-free cloth to clean both the plexiglass and the plastic surface. Avoid using regular household cleaners, as they can leave residues that interfere with adhesion. Let both surfaces dry completely before moving to the next step. It is also worth noting that plexiglass often comes with a protective film applied by the manufacturer. Make sure this film is fully removed from the bonding area before cleaning, otherwise you risk gluing the film itself rather than the actual acrylic surface, which will result in a bond that peels away almost immediately.
Step 3: Lightly Sand the Plastic Surface (If Necessary)
If you are working with a very smooth or low surface energy plastic such as polypropylene or polyethylene, lightly sanding the surface with fine-grit sandpaper can improve adhesion significantly. Wipe away any dust after sanding with a clean cloth and alcohol. A fine grit in the range of 320 to 400 is usually sufficient, since the goal is simply to create microscopic texture for the glue to grip onto, not to visibly scratch or roughen the surface. Sanding too aggressively with a coarse grit can actually weaken the plastic and create visible marks that show through the final assembly, so a light touch is always preferable.
Step 4: Do a Dry Fit
Before applying any glue, position the plexiglass and plastic pieces together as they will be in the final assembly. This allows you to check alignment, identify any adjustments needed, and prepare clamps or tape in advance so you are not scrambling once the glue is applied. During this dry fit, take a moment to mark reference points with a pencil or a small piece of tape on the edges of both pieces, so that once glue is applied you can quickly and confidently return the parts to the exact same position without hesitation.
Step 5: Apply Ferber Painting’s Plexiglas Glue
Shake the bottle gently before use. Apply a thin, even line of glue along the edge or surface to be bonded. Because our formula is specifically designed for precision, you do not need to apply large amounts. A thin layer is often enough to create a strong bond without excess glue seeping out and creating visible marks. If your project involves a larger surface area rather than just a thin edge, consider applying the glue in a zigzag pattern across the surface rather than one single thick line, since this promotes even spreading once the pieces are pressed together.
Step 6: Join the Pieces Immediately
Press the plexiglass and plastic pieces together firmly but gently, following the alignment you established during your dry fit. Avoid excessive pressure that could squeeze out too much adhesive from the bond line. If your project has a visible seam, try to apply pressure evenly across the entire joint rather than just at one end, since uneven pressure can cause the glue to pool unevenly and create a joint that looks thicker in some spots than others.
Step 7: Clamp and Let It Set
Use clamps, masking tape, or heavy objects to hold the pieces together while the glue cures. Thanks to the fast curing formula of Ferber Painting’s Plexiglas Glue, you typically only need to maintain pressure for a short period, but for maximum strength, we recommend leaving the assembly undisturbed for at least 24 hours. If you are using clamps directly on plexiglass, place a small piece of scrap cardboard or cloth between the clamp jaws and the acrylic surface to avoid leaving pressure marks or scratches on the material.
Step 8: Clean Up Excess Glue
If any glue seeps out during the clamping process, wipe it away immediately with a cloth slightly dampened with isopropyl alcohol, before it fully cures. Once cured, excess glue becomes much harder to remove without risking damage to the plexiglass surface. In cases where excess glue has already fully cured before you notice it, a plastic scraper used very gently at a low angle can sometimes remove the residue without scratching the acrylic, but this should be treated as a last resort rather than a routine cleanup method.
Step 9: Inspect the Final Bond
After the curing time has passed, inspect your work. The bond line should be clear, strong, and free of visible cracks or cloudiness. If you followed these steps with our glue, you should have a virtually invisible, extremely durable joint. It is a good habit to gently test the joint with light pressure before putting the finished piece into full use, simply to confirm everything has cured properly, especially if the project will be subjected to any kind of load or stress once installed.
Common Mistakes to Avoid When Gluing Plexiglass to Plastic
Even with the best adhesive, a few common mistakes can compromise your results. Here is what to watch out for.
- Using too much glue: excess adhesive can seep out, create visible marks, and weaken the bond by preventing proper curing.
- Skipping surface cleaning: any grease or dust left on the surfaces will drastically reduce adhesion strength.
- Rushing the curing time: even if a glue sets quickly, giving it the full recommended curing time results in a much stronger final bond.
- Using the wrong adhesive type: generic glues not designed for acrylic can cause crazing, cloudiness, or complete bond failure over time.
- Ignoring thermal expansion: if your project will be exposed to temperature variations, a rigid adhesive can crack under stress, which is why the flexibility of Ferber Painting’s Plexiglas Glue is such a key advantage.
- Forgetting to remove protective film: gluing over the manufacturer’s protective film instead of the actual acrylic surface leads to bonds that fail almost immediately.
- Working in poor lighting or a cluttered space: this increases the chance of misalignment, spills, and rushed decisions that compromise the final result.
- Applying pressure unevenly during clamping: this can create a joint that is thicker on one side, weaker in some spots, and visually inconsistent.
- Not testing on a scrap piece first: if you are working with an unfamiliar plastic, testing the glue on a small offcut first can save you from ruining your actual project piece.
Troubleshooting: What to Do If Something Goes Wrong
Even careful work occasionally runs into small issues, so it helps to know how to fix them rather than assuming your project is ruined. If you notice slight cloudiness immediately after applying the glue, this is sometimes simply the adhesive still curing, and it can clear up within the recommended curing window rather than being a permanent defect. If cloudiness persists well beyond the curing time, this usually indicates that too much glue was applied or that the surfaces were not adequately cleaned beforehand, in which case separating the pieces, cleaning them thoroughly, and reapplying a thinner layer of glue is the best path forward.
If you notice the bond feels weak after the recommended curing period, check whether the joint was disturbed or exposed to movement during the curing window, since even brief movement while the adhesive is still setting can prevent it from developing full strength. In this situation, it is usually best to separate the pieces if possible, clean both surfaces again, and redo the bond with fresh glue rather than trying to reinforce an already compromised joint.
Finally, if you experience any issue at all that you cannot resolve on your own, remember that Ferber Painting’s satisfaction-or-your-money-back guarantee means you are never left on your own with a failed project and no recourse. Simply reach out to our team and we will make it right.
Frequently Asked Questions
Can Ferber Painting’s Plexiglas Glue be used on all types of plastic?
Our formula works exceptionally well on most common plastics, including polystyrene, ABS, and PVC. For very low surface energy plastics like polypropylene or polyethylene, we recommend lightly sanding the surface beforehand to maximize adhesion.
How long does it take for the glue to fully cure?
The glue sets quickly, typically within minutes for initial handling strength, but we recommend waiting 24 hours for a full, maximum-strength cure before subjecting the bond to stress or weight.
Will the glue turn yellow over time?
No. Unlike many generic adhesives, our formula is specifically designed to remain crystal clear over time, with no yellowing, even under sunlight exposure.
What if I am not satisfied with the results?
Ferber Painting is the only brand offering a satisfaction-or-your-money-back guarantee on Plexiglas Glue. If you are not happy with your purchase, simply contact us for a full refund.
How fast is shipping, and does it work internationally?
Yes, we ship worldwide through our international network of reliable carriers, ensuring fast and secure delivery no matter your location.
Is payment secure when ordering online?
Absolutely. Our checkout process is simple, secure, and designed to make your online payment experience smooth and worry-free.
Can this glue be used for outdoor projects exposed to sunlight and rain?
Yes. The flexible, non-yellowing formula holds up well under sunlight exposure and moisture, making it suitable for outdoor signage, protective panels, and other exterior applications where lesser adhesives would degrade quickly.
Do I need any special tools to apply the glue?
No special tools are required beyond basic supplies you likely already have at home, such as a lint-free cloth, isopropyl alcohol for cleaning, fine-grit sandpaper if working with low surface energy plastics, and simple clamps or tape to hold pieces in place while curing.
Conclusion
Gluing plexiglass to plastic does not have to be a stressful or uncertain process. As long as you follow the right steps and, most importantly, use a high-quality adhesive specifically formulated for this exact application, you can achieve a clear, strong, and long-lasting bond every time. Generic glues simply cannot compete with a product engineered from the ground up to handle the unique challenges of bonding acrylic and plastic together. From understanding the underlying chemistry of both materials, to carefully preparing your surfaces, to applying the glue with precision and giving it the proper curing time, every step in this guide plays a role in the final outcome. Skipping any one of them, or relying on an adhesive that was not designed for this specific combination of materials, is the surest way to end up with a cloudy, cracked, or failed bond. Discover why thousands of satisfied customers trust Ferber Painting’s Plexiglas Glue for their projects, backed by fast worldwide shipping, secure online payment, and our unbeatable satisfaction-or-your-money-back guarantee.